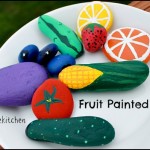
RSS Email

DIY Crafts for Your Kids

colors
Kids love paint and glue! When schools are out for the summer, kids can get bored easily. Children these days are glued to the television or iPad all day long! These DIY crafts are a great way to bond with your little ones, and to bring out the artist in them! Try out these five easy and fun projects to keep your kids busy all summer long!

1. Life size pizza

Materials required:

• Glue gun
• Scissors
• Paintbrush
• Colored paper( Brown, Red, Green, Black) and cardboard
• Tooth brush
• Paint (Red, White, Black, Brown)

Directions:

• Cut a large triangular shape out of cardboard, so that it looks like a slice of pizza. Cover it with brown color paper. Roll the bottom of the triangle to make it look like the crust, and glue it in place.
• To make the pizza sauce, mix some oregano and paprika with dark red paint. Paint your cardboard triangle ‘pizza base’ with your ‘pizza sauce’.
• To make pepperoni, splatter white, black and brown paint on red paper using a toothbrush. When the paint dries, cut out big circles for your pepperoni.
• You can make other toppings like green peppers, black olives and mushrooms by using colored paper.
• Stick the toppings onto the pizza slice by using a glue gun, and leave it to dry.

2. Tie & Dye T-Shirts

Materials required:

• Bucket of hot water
• Fabric dye(1 color)
• Rubber gloves
• Plain white t-shirt
• Scissors
• String

Directions:

• Tie a long piece of the string on the bottom corner of the t-shirt tightly.
• Crumple the t-shirt and wrap the string tightly around the t-shirt as you crumple it. Tie a knot after you are done.
• Pour the dye in a bucket of hot water. After wearing your gloves, slowly dip the shirt into the dye for a minute.
• Take out the t-shirt and leave it to set for half an hour before cutting the string.

3. Stuffed Snake

Materials required:

• An old tie
• Two buttons
• Fabric Paint
• Red Colored Paper
• Glue gun
• Cotton

Directions:

• Use the glue gun to seal the small end of the tie. Leave it to dry for 2-3 hours.
• Stuff the other end of the necktie with cotton. You can use a stick or a pencil to stuff it all the way down to the end.
• Glue the bigger end shut and leave it to dry for another 2-3 hours.
• Glue the buttons onto the bigger end by using a glue gun. These are the eyes for the snake. Cut out a forked tongue and glue it to the tip of the bigger end to give it a complete look!

4. Pencil holder

Materials required:

• A set of crayons
• Glue gun
• An old can

Directions:

• Carefully glue the crayons together around the old can by using a glue gun.
• Leave it to dry overnight.
• You can use this as a pencil holder, or gift it to someone special!

5. Stick-Art!

Materials required:

• Ice cream sticks
• Pencil
• Glue gun
• Ruler
• Colored sharpies
• Small magnets
• Sandpaper

Directions:

• Draw a line 4 cm from the end of the ice cream stick and break it.
• Rub the broken end with sandpaper until it is smooth.
• Draw any design onto the stick by using a pencil, and then color it with the sharpies.
• By using a glue gun, attach the small magnets to the back of the sticks to make refrigerator magnets!


Turkey in Disguise Thanksgiving Kids Craft

You know that holiday in between Halloween and Christmas?  It doesn’t get the hype that the others get.  Thanksgiving is an important day in our history so we’re going to make a point to give it the attention it deserves.  We’re starting with  a cute kids craft, Turkey in Disguise.Turkey in Disguise Thanksgiving Kids Craft

When I told Shae exactly what we were supposed to do she laughed.  The idea was to hide or dress up the turkey so he doesn’t get eaten for Thanksgiving dinner.  This seems to be a popular idea for kids each year in the classroom. I’m on my 3rd child and I’ve never heard of it. Trish from Momdot brought it up as an idea to get a bunch of bloggers crafting together.

Shae come up with a Butler. He’s in his tux serving up a glass of lemonade (after I told her a glass of wine or a beer isn’t appropriate for a kid’s craft).

Trish even has a simple turkey template to use. I ended up making my own because I couldn’t get my printer to work but it was easy.

Download and Print the template from Trisha of Momdot.

Help your child figure out how best to disguise their Turkey. It could be a costume, a new personality or even hidden in another picture if your child is feeling extra artistic.

Shae used a combination of sticker foam, cardstock, sharpie and pencil.  She practiced drawing her tuxedo and adding details like buttons, pockets, a tray holding a glass and a wing.

When it came time to put it all together she was master of her own domain. No matter what advice or input I gave her she made her Turkey her way. Turkey in Disguise Thanksgiving Kids Craft

How would your child disguise their Turkey?  Come back and share what you’ve created.


DIY Refrigerator Letter Magnets #kidsinthekitchen

My kids are older so we’ve passed the stage of singing letter magnets on the fridge. We still have lots of magnets but we’ve upgraded to ones that have memories, are handmade, and do double duty (like powerful rare earth magnets that hold everything from the school menu to a half-open bag of rice! Those “classic” primary color letters don’t really fit our style anymore. What does a crafty mom and crafty kid too then, they DIY Refrigerator Letter Magnets.DIY Refrigerator Letter Magnets

We wanted to make them so it would allow us to leave little notes to each other. Making  them small allowed us to make many of them, a couple alphabets worth.

Refrigerator Letter Magnets

  • 1/2″-3/4″ clear glass, flat gems (found in floral arranging section)
  • old magazines, junk mail, brochures
  • clear drying school glue
  • super glue or hot glue
  • scissors
  • disc magnets 1/2″-3/4″

Leaf through old magazine, seek out bright and fun headlines and titles. Determine if they’ll fit behind your marble by simply placing the gem on top and making sure you can see the letter, number or symbol clearly.

Apply clear drying school glue to the back of the marble, press firmly to the letter/page. Let completely dry for up to 1-2 hours.

When the glue has completely dried carefully cut/trim paper away from glass gem so paper does not stick out from behind gem. Using hot glue/super glue attach the magnet and to glass gem, pressing firmly.

Magnets will be ready to use in 10 minutes.

*****Keep careful watch using hot glue or super glue around children.DIY Refrigerator Letter Magnets DIY Refrigerator Letter Magnets

DIY Refrigerator Letter Magnets
Come join me and my co-hosts, Paula at Frosted Fingers, Sara at Sensibly Sara, Kate of Busy Bee Kate & Jeannette of Eco Incognito each week linking up a post, new or old, that feature the theme Kids in the Kitchen. It doesn’t matter what you are doing as long as you are doing it together, enjoying it and learning something along the way.

You’ll find these and many more ideas for healthful and unique food fun on the #KidsintheKitchen Pinterest Board.

Follow Melinda Babiak’s board #KidsintheKitchen on Pinterest.

Linky Rules, #kidsinthekitchen

#KidsintheKitchen Weekly Linky


DIY Mancala Board #kidsinthekitchen

Having kids of varying ages there aren’t too many things that they all have interest in. Board games is tops on that list though. Games is something they can always agree on. Sabreena remembered playing a game in elementary school called Mancala. I’ve never played it but have heard of it. She looked in the fridge on day and said save that egg carton when it’s empty, I have a project for it. DIY Mancala Board #kidsinthekitchen #recycledcrafts Using an 18-count egg carton Sabreena fashioned her own Mancala board and grabbed some glass gems from my craft cabinet. Within 1 hour of her big idea she and Shae were playing. Like I said I didn’t know how to play the game but apparently Shae did and they went through about 4 games before dinnertime. This is now a nightly ritual, one I don’t mind at all. I’m gonna bring all the quiet games into the living room so we can have nightly intellectual games instead of tv and video game time. Materials and Directions

    • 18-count egg carton
    • strong glue such as E6000
    • pen knife or other sharp knife
    • Tissue paper & mod podge (or washi or duct tape)

Using the knife slice one long row of egg cups from the carton. DIY Mancala Board #kidsinthekitchen #recycledcrafts Cut 2 sections of 2 cups to use as the “store” and cut out the dividers of those 2 pieces. Glue the store cups on the ends of the remaining carton, set aside to dry for several minutes. Seal up the holes in the “store” cups with paper or tape. DIY Mancala Board #kidsinthekitchen #recycledcrafts The girls used colorful tissue paper and mod podge. This just made the game board a little more festive.DIY Mancala Board #kidsinthekitchen #recycledcrafts Your game is ready to play with marbles, rocks, seeds, beads or in our case glass gems.DIY Mancala Board #kidsinthekitchen #recycledcrafts Mancala is the word for this type of “sowing” game. There are many versions of it around the world from many cultures. This is the version my girls play. One day I’ll invest in a beautiful wood board that will last a long time but for now I’ll relish in the ingenuity of my smart girls to create their own fun. Come join me and my co-hosts, Paula at Frosted Fingers, Sara at Sensibly Sara, Kate of Busy Bee Kate & Jeannette of EcoIncognito each week linking up a post, new or old, that feature the theme Kids in the Kitchen. It doesn’t matter what you are doing as long as you are doing it together, enjoying it and learning something along the way.

You’ll find these and many more ideas for healthful and unique food fun on the #KidsintheKitchen Pinterest Board.

Follow Melinda Babiak’s board #KidsintheKitchen on Pinterest.
Linky Rules, #kidsinthekitchen

#KidsintheKitchen Weekly Linky


Fabric Bead Necklace Kids Craft

Crafting is becoming a big passion for Shae. I’m not talking about cutting out construction paper and gluing it to each other to make odd shapes. I’m talking about thought out creations that have a purpose. These fabric beads happened after seeing my trunk full of fabric and other random stuff. She wanted to make something permanent, something that was useful not something that would’ve ended up in the recycle bin in a month.Making Fabric Beads by Kids #craft

Making Fabric Beads by Kids #craft

We started off with a stack of thin fabrics in a variety of colors and patterns. We cut them into strips of all lengths and widths.  Don’t exceed 1 inch wide as your bead with be very big.  Lengths can vary from  5″ to 12 depending how thick your child wants the beads.

Hold your strip flat and apply a thin strip of glue the entire length. Using a pencil start rolling the strip up. Making Fabric Beads by Kids #craft Don’t roll too tight as it will be difficult to remove. Slide your rolled up fabric gently off your pencil and set aside to dry. Use an extra touch of glue if the end isn’t secure. If you find your pencil is getting too much glue, use another pencil.

              *roll your bead close to the pointy end, it’ll be easier to remove.

After all of your beads have set and seem to have hardened (we let them sit overnight) you’re ready to create your jewelry. Shae made a necklace using a thin suede cord.Making Fabric Beads by Kids #craft

I created a cool knot/loop on one end and when she done I created a larger knot to close the necklace. Elastic cord would work well too and then you won’t have issues with closures.
Making Fabric Beads by Kids #craft

Making Fabric Beads by Kids #craft

Make tons of beads for rainy day projects or make gifts for others.

Supplies needed

thin fabric in a variety of colors/patterns
scissors
school glue
pencil
thread/cord for necklace

Making Fabric Beads by Kids #craft

Making Fabric Beads by Kids #craft

Making Fabric Beads by Kids #craftFabric Beads, making a necklace with scrap materials, kids craft


Passport to Imagination Crafts with Michaels Stores

Summer Vacation has officially started. Have you already heard the moans and groans of “I’m bored”.  Michaels’ Passport to Imagination is where you should head each week to take advantage of the fun BUT inexpensive activities available for kids.Passport To Imagination

Each week one of North America’s top museums partners with Michaels to bring a craft to your kids just like you were making a visit there. Think of it as a road trip without leaving your own community.

The crafts are meant to bring culture, science, history and art into your child’s life that maybe they wouldn’t have the opportunity to experience in your own hometown.Michael's Passport to Imagination In Store Activities Summer Program

Last week the adventure started with The Field Museum in Chicago wit Fossil Impressions, Dinosaur Impressions and the Life Cycle of a Butterfly.  Each session, Monday, Wednesday and Friday, lasts about 2 hours and costs just $2 per participant.

Sign up now to get into the activities your kids would enjoy the most before they fill up.

Future stops are Georgia Aquarium, Pima Air & Space Museum, Perot Museum of Nature and Science , Denver Art Museum, The Museum at the Fashion Institute of Technology and the Montreal Museum of Fine Arts .

There is so much fun in store over the next few weeks.  If you can’t make it to the in store activities take a look the At Home Projects at the bottom of page for EACH activity.Michael's Passport to Imagination At Home Activities

Headed on vacation or on a Road Trip. Michaels’ has you covered there. Passport to Imagination has activities for that occasion too.Michael's Passport to Imagination Road Trip Summer Program

No one has to be left out of the adventures at Michaels’ Passport to Imagination Program this summer. The first 50 kids to attend a workshop receive an album to show off their projects to friends and family  for free, so sign up today!


Stained Glass Easter Egg #kidsinthekitchen

Easter is just around the corner and while we don’t put much effort in to the bunny or hard boiled eggs that doesn’t mean we don’t like to incorporate cute and festive crafts for the home. In the  morning the light shining through the kitchen doors is bright and there isn’t anything prettier than stained glass all lit up.  That’s why we made this Easter Egg Stained Glass together.Stained Glass Easter Egg Craft for Kids #kidsinthekitchen #eastercraft


I cut a BIG stenciled egg shape with my Silhouette Cameo and with a piece of waxed paper, colored tissue paper and some glue Shae made this pretty artwork for our window.

Stained Glass Easter Egg Craft for Kids #kidsinthekitchen #eastercraft

Stained Glass Easter Egg Craft for Kids #kidsinthekitchen #eastercraft

Come join me and my co-hosts, Sarah of Play to Learn with Sarah, Paula at Frosted Fingers and Sara at Sensibly Sara, each week linking up a post, new or old, that feature the theme Kids in the Kitchen. It doesn’t matter what you are doing as long as you are doing it together, enjoying it and learning something along the way.

You’ll find so many more ideas on the #KidsintheKitchen Pinterest Board.

Follow Melinda Babiak’s board #KidsintheKitchen on Pinterest.

Linky Rules, #kidsinthekitchen
#KidsintheKitchen Weekly Linky


Jelly Bean Tree Kids Craft #KidsintheKitchen

With spring comes Easter and with Easter comes the influx of sweet, brightly colored candies. Jellybeans are a staple for this season and what better way to use them (besides eating them) is making crafts like this Jelly Bean Tree.Jelly Bean Tree Craft for Kids #KidsintheKitchen

I made a different kind of Jelly Bean Tree(coming next week) but Shae wanted to make her own. Using the same jelly beans leftover from my project I thought this was a good project for her. While it wasn’t HARD it took a little more maneuvering than I initially figured. The trick is to use a thick tacky glue, NOT HOT GLUE. You don’t want to be stuck holding the jelly beans in place for a long time.

The Quick Grip adhesive from Beacon works really good for projects that use beads, candies, buttons, etc. I wish it came in a different container, a squeeze bottle would be beneficial. (not sponsored)

Materials
styrofoam balls
vase, mini flowerpot
strong adhesive
jelly beans
lollipop stick or skewer
cotton balls
decorative filler/cover, like grass or moss

Directions
Using a dab of glue, stick a styrofoam ball into the bottom of your flower pot and let set.
With another dab of glue slide a larger styrofoam ball onto the stick then into the base.Jelly Bean Tree Craft for Kids #KidsintheKitchen Distribute the glue onto the styrofoam ball in sections. We did lines at first then just filled in spaces. Be sure to hold the jellybeans in place for a few moments so they get a good grip.

Jelly Bean Tree Craft for Kids #KidsintheKitchen

(This is where a good glue is important. School Glue might work but I don’t think it dries fast enough to make this a project suitable for kids)

As one side of the ball was getting heavy we supported the stick with pompoms (or cotton balls). these can be removed at the end but Shae ended up keeping them and making them part of her arrangement.

At one point the one of our ball was filled with jellybeans making it a bit top heavy so I placed it in my hand so Shae could add the last of the jelly beans.Jelly Bean Tree Craft for Kids #KidsintheKitchen Once your ball is covered in jelly beans and set sprinkle the top of your flowerpot with “grass”. We used crumpled up, cut up scrap paper. Now it’s sitting on my shelf in the kitchen.

Jelly Bean Tree Craft for Kids #KidsintheKitchen
Come join me and my co-hosts, Sarah of Play to Learn with Sarah, Paula at Frosted Fingers and Sara at Sensibly Sara, each week linking up a post, new or old, that feature the theme Kids in the Kitchen. It doesn’t matter what you are doing as long as you are doing it together, enjoying it and learning something along the way.

You’ll find so many more ideas on the #KidsintheKitchen Pinterest Board.

Follow Melinda Babiak’s board #KidsintheKitchen on Pinterest.

Linky Rules, #kidsinthekitchen

#KidsintheKitchen Weekly Linky


Paper Bag Birds Nest #kidsinthekitchen

The weather has finally changed for the better. No snow for almost 2 weeks now, that might be longest run we’ve had for the last 4-5 months. We’re noticing the birds making nests in the trees so why make our own Paper Bag Birds Nest to celebrate the great weather we’re experiencing and the new feathered friends taking over the neighborhood.
DIY Paper Bag Birds Nest #craftsforkids #kidsinthekitchen #easter
A simple lunch bag and some jelly beans makes an adorable little nest.

Supplies
paper bag
school glue or glue stick (shae used both)
jelly beans

Directions
Cut open your paper bag so it lays flat. From it cut 4 circles, 2 of them about 4 or 5″ across and 2 of them 3″ across.

Cut the larger circles into a spiral.

DIY Paper Bag Birds Nest #craftsforkids #kidsinthekitchen #easter

Starting from the middle of the spiral create a flat-ish base and wrap the spiral of paper around the OUTSIDE of itself. Add drops of glue as you go to keep it in place.
DIY Paper Bag Birds Nest #craftsforkids #kidsinthekitchen #easter
Crumple your spiral before wrapping for a more rustic look.

Glue your smaller circle on the bottom of your nest. This gives it more support and closes up any holes so the “eggs” don’t fall through.

Set aside your nest to dry for 20-30 minutes then add eggs. DIY Paper Bag Birds Nest #craftsforkids #kidsinthekitchen #easter
These would be cute placecards for the Easter dinner.

To make this more permanent go ahead and glue your jelly beans into the nest or make eggs from clay.

DIY Paper Bag Birds Nest #craftsforkids #kidsinthekitchen #easter
Come join me and my co-hosts, Sarah of Play to Learn with Sarah, Paula at Frosted Fingers and Sara at Sensibly Sara, each week linking up a post, new or old, that feature the theme Kids in the Kitchen. It doesn’t matter what you are doing as long as you are doing it together, enjoying it and learning something along the way.

You’ll find so many more ideas on the #KidsintheKitchen Pinterest Board.

Follow Melinda Babiak’s board #KidsintheKitchen on Pinterest.

Linky Rules, #kidsinthekitchen

#KidsintheKitchen Weekly Linky


Silly Monster Faces for Kids #craft

My kids are never short funny stories, jokes and even faces. But that didn’t stop us from making these cute Silly Monster Faces craft that work great for photo bombs or fun photography sessions or even strange conversations between each other.

All you need is some paper, scissors, glue & tape and popsicle sticks.Silly Monster Faces for Kids #craft

Sketch out the shapes of your crazy mouths, some crooked teeth, fat lips and big tongues. Match them up and attach them with glue and add a popsicle stick with a piece of tape.

Silly Monster Faces for Kids #craft

Silly Monster Faces for Kids #craft

Let the fun and laughter begin.

Silly Monster Faces for Kids #craft

Silly Monster Faces for Kids #craft