RSS Email

Crock Pot and Slow Cooker Desserts

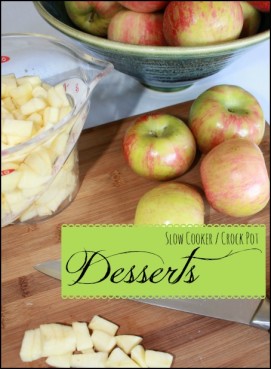
Winter is going to be here very soon. In my house that’s the time to break out the crock pot for some savory stews and roasts. What I’ve never done is use my crockpot for desserts. Here are a couple recipes that look amazing and super easy for anyone to try.
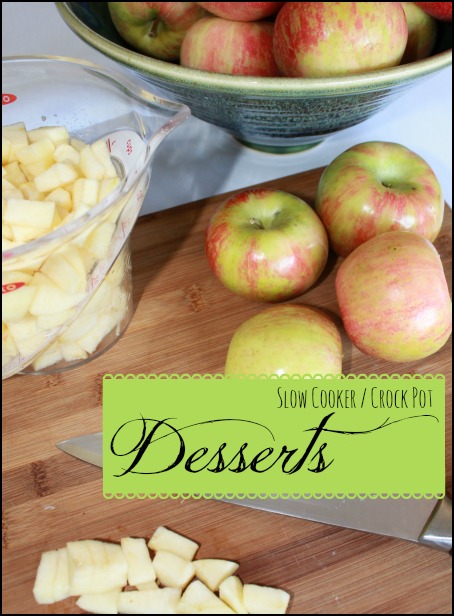
Crock Pot Deserts

Crockpot Applesauce
Ingredients

10 apples, peeled and roughly chopped
1/4 cup water
1/8 cup sugar
½ tsp cinnamon
Pinch of nutmeg
Pinch of salt

Directions
Add all ingredients to crockpot, cover & cook on HIGH for 5 hours. Turn off crockpot, uncover & mash with potato masher until desired texture. If you prefer smoother applesauce transfer to food processor or blender. Ready to eat warm with ice cream or whipped cream or chilled for a sweet snack.

Crockpot Blueberry Cobbler
Ingredients
1/2 cup all-purpose flour
3/4 cup sugar, divided
1/2 tsp baking powder
1 pinch salt
1/4 tsp cinnamon
1/8 tsp nutmeg
1 egg, lightly beaten
½ tsp vanilla extract
1 TBLS milk
1 TBLS vegetable or canola oil
2 cups fresh blueberries
1/4 cup water
Cooking spray for coating crock pot

Directions
In a large bowl, combine flour, 6 tbls sugar, baking powder, salt, cinnamon, & nutmeg. In a separate bowl, mix egg, vanilla, milk and oil. Blend the egg mixture into the dry ingredients until just moistened. Coat the crockpot with cooking spray and evenly spread the batter on the bottom.

In medium saucepan, combine blueberrries, water & remaining sugar, bring to a boil and remove from heat, let set for 5 minutes. Pour blueberry mixture on top of batter & cook on HIGH for 2 hours. At the end of 2 hours, turn off crockpot, uncover and let cobbler set for 30 minutes before serving. Serve with fresh whipped cream or ice cream.

Crockpot Decadent Chocolate Pudding Cake
Ingredients
1 box chocolate devil’s food cake mix
1 box instant chocolate fudge pudding mix
2 cups sour cream (do not use fat free)
4 eggs
1 cup water, room temperature
1 cup canola oil
16oz semi-sweet chocolate chips

Directions
In mixing bowl, combine dry cake mix, dry pudding mix, sour cream, eggs, water and oil; beat until mixture is smooth and thick. Stir in chocolate chips.

Coat crock pot with cooking spray; pour batter into bottom of bowl. Cover and cook on LOW 5 to 6 hours, center should be just set. A toothpick inserted near center should come out with moist crumbs when done. Serve warm with whipped cream or ice cream of choice.


Best Rocky Road Brownies #Recipe

I’m not a big dessert eater; it takes something special to get to sidle up to the table for the sweet dish. This Rocky Road Brownie is one of those dishes. It’s a delicious blend of sweet, salty, gooey and crunchy.
The best part of this recipe is there is no need for a mixer. Everything is mixed together in on bowl over a double boiler. A quick prep of all of your ingredients and this can be mixed up in just a few minutes and on the table in time for an after dinner treat.

Rocky Road Browniesrocky road brownies recipe
Ingredients

  • 1/2 cup butter, cut into cubes
  • 1 cup chocolate chips, semisweet
  • 1/2 cup sugar
  • 1/2 cup packed brown sugar
  • 1/2 teaspoon salt
  • 2 eggs
  • 3/4 cup all purpose flour, spooned and leveled
  • 1 cup mini-marshmallows*
  • ½ cup caramel sauce*
  • 1/2 cup chopped lightly salted walnuts, pecan or almonds*
  • 1/2 cup chocolate chips, your choice of flavor*
  • 1/2 cup fudge topping*
  • 1/2 cup peanut butter chips*
  • ½ cup chopped candy bar or toffee bits*
  • 1 cup broken Oreos or other cookie of choice*

Directions
Preheat oven to 350 degrees. Butter an 8-inch square pan and line with parchment with a couple inches overhang on 2 sides, then butter the parchment paper. It sounds like a lot of work but you DON’T want these brownies sticking to the pan.
In a double boiler or heatproof bowl set over a pan with 1” simmering water add butter and 1 cup of chocolate chips. Mix until completely melted, remove from heat. Add sugars and salt, mix until combined. Mix in eggs then flour until just combined. Spread batter into prepared pan.

Bake 28-32 minutes until inserted toothpicks come out with moist sticky crumbs attached.

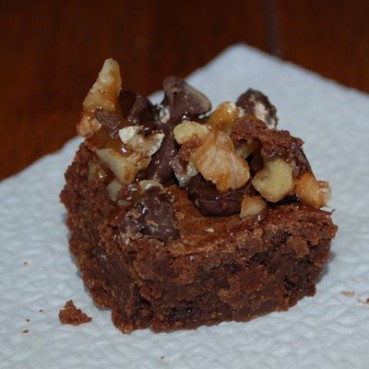
*Remove from oven and start adding your toppings. Start with something sticky or melty like chocolate chips and marshmallows, and then add dry toppings like nuts or cookies then finish with sticky melty topping like caramel. Bake an additional 3-5 minutes to set toppings onto brownies.

Remove from oven and let brownies cool completely in pan. Using parchment handles, remove brownies from pan and cut into squares. Using a large plastic knife or wet sharp blade works best. These will keep in a sealed plastic container for about 3 days but they don’t last that long in this house.


I Disclose


My Kids Think Dessert Is Their Right!

I may have written a post at some point on this topic but I think it is worth a follow up if I did. My kids feel dessert is their god given right and that they should receive it EVERY night and it is getting annoying.

Don’t get me wrong Melinda and I definitely spoil our kids and allow them to have ice cream often with all of the trimmings. Well, I think the trimmings are my fault. When I say trimmings we are talking waffle bowl, sprinkles, wet walnuts, magic shell (which Melinda HATES), caramel, mini chocolate chips, whipped cream and cherries. Now before you get up in arms about the amount of toppings I mentioned we typically limit them to two per dessert and every once in a while will let them have three to four.

I am sure the kids have become accustom to dessert and ice cream because there is rarely a time when we don’t have two half gallons of ice cream in the freezer and the kids know that. There have been times they would ask and I would tell them we are out because we are and they literally run to the freezer to check for themselves because they think there is no way dad would ever allow that to happen.

What really bugs me is when the kids (Shaun and Shae) ask for dessert and either Melinda or I tell them no and they start to cry. Really? Last time I checked ice cream wasn’t part of the five major food groups. To me it’s a treat and not your god given right as a child to have ice cream for dessert. When this behavior happens I instantly get annoyed because we are pretty lenient when it comes to dessert and they get it often but when they don’t they let you know how unhappy they are about it by voicing their displeasure.

I am not sure if all kids are like this but I am going to start offering vegetables for dessert if these kids keep up this nonsense.

Do your kids get mad/sad if you tell them no to dessert or are my kids the only ones?


I Disclose


Smores without the Fire-Recipe

We camp, not tent camp but air-conditioned, running water, olympic sized pool included camper camping. Aside from the water park our favorite part about camping is a glowing fire with S’mores!  Since camping only comes around a couple times a year I had to figure out a way to bring s’mores to the table more often.

Grilled S’mores! That’s right, Grilled S’mores. Here’s what you’ll need.

graham crackers
marshmallows
chocolate bars
bbq grill (or oven)

heat up grill or oven to a low temperature (around 225), I turn the gas on a little bit and just turn on the burner in the back.  this makes the inside warm but not HOT

Break graham crackers in half (2 squares each) and place on grill or cookie sheet. Top half of the crackers with marshmallows, close cover or place in oven until marshmallow is soft.  Check the marshmallow progress after 3-4 minutes.  Once the marshmallows have puffed it’s time to remove from heat and assemble.  The heat from the marshmallow and graham cracker is enough to soften the chocolate. While you don’t get that real campfire char on the marshmallows these are a great alternative when a roaring fire is nowhere to be found.

This isn’t an exact recipe just a guideline, amounts,timing, temperatures and textures may vary.


Crunchy Caramel Popcorn recipe

I love food and I love to cook and even bake sometimes. I want to get back into sharing these fun things with you so here is my re-introduction of Foodtalk.

Crunchy Caramel Popcorn is easy! The process takes a little while but it only requires a handful of ingredients.

9-10 cups of popped popcorn, no butter/salt microwaved is fine
¾ stick of butter
¾ cup of brown sugar
Pinch of salt
½ tsp vanilla
1 cup rough chopped nuts-peanuts, cashews, almonds, whatever you enjoy (optional)

Preheat oven to 300˚ degrees. Liberally grease/butter a cookie sheet, set aside.

In a LARGE, preferably wide bowl add popcorn and nuts, set aside.

Over medium heat in a saucepan melt butter, sugar, salt and vanilla, bring to a boil (about 2-3 minutes). Stir constantly to prevent burning. Drizzle 1/3 of caramel sauce all over popcorn and using a silicone spatula quickly stir/toss to coat, stir from the bottom up to pick up any sugar that fell to the bottom. Continue this process till all caramel is gone. If your bowl is not big enough try to work in smaller batches.

Spread popcorn and nut mixture on cookie sheet and place in oven. Every 10-15 minutes remove pan and stir popcorn again from the bottom up. Be sure to completely remove pan from oven or you risk dropping popcorn on the bottom of your oven and burnt popcorn doesn’t smell good. Total baking time is 55-60 minutes to achieve optimal crunchiness.

When popcorn has finished baking remove from pan and spread on sheets of waxed paper to cool. Caramel popcorn is ready to eat in a short 10 minutes when nuts have completely cooled. Sealed in airtight containers your popcorn should last……um I have no clue, it only lasts about 2 days here.

The recipe sounds tedious but it’s really simple and the sugar syrup cleans up super easy. I recommend a silicone spatula because the caramel comes off very easy. When I say you need a big bowl to mix I mean the biggest bowl you can find. Here is the picture of the bowl I use, it has about a 16-17” diameter but isn’t really deep. If you can’t get your hands on a wide bowl go for deep like a pasta pot. This just makes it easy to really get under the popcorn and get everything coated well.

Enjoy and let me know how it turns out for you!