Back in the Fall I stumbled onto a blog post that featured this beautiful book page wreath over shutters. I’m not one to copy a design but I was completely in love with it. I bookmarked it, showed it to Rob and made it my mission to get that look in my house.
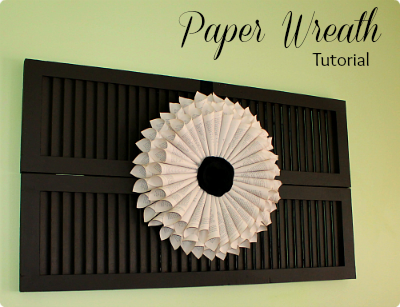
I knew where I wanted it, I knew what I wanted to go along with it and that was it, my mind was made up. I found someone selling 20 year old louvered doors for $15. I got those and Rob and I worked on stripping layer upon layer of paint off of them. It wasn’t working so well so it was decided to clean them up as best as we could and just paint over the half done shutters. Honestly I loved the look. They look old. That was the point. This process took the longest. Months to be honest thanks to an early winter.
Rob did an amazing job finishing them and hanging them, surprising me one day while I was out. Next step was to get that wreath done. I knew it would be tedious but didn’t expect it to take the 4-5 hours it did. Was it worth it? Yes. I love it that much.
For the whole look you need 2 shutters, painted in the color you choose. We chose a Stealth Jet, not quite black but close; think wet chalkboard. Rob hung them with simple D rings and picture anchors. He also attached them together with 2 T shaped brackets. Hanging on the wall by itself, it looked GOOD.
The paper wreath takes more creativity. You have to decide what you want to use for paper. I thought sheet music would look good but didn’t know where to get any really cheap. I went for a novel that was stuffed in a swag bag from an event. It wasn’t a book I was ever going to read so I didn’t feel that bad. I did get an old atlas from the thrift store and thought that might work but the more I looked at paper crafts using maps the more I realized that wasn’t the look I wanted.
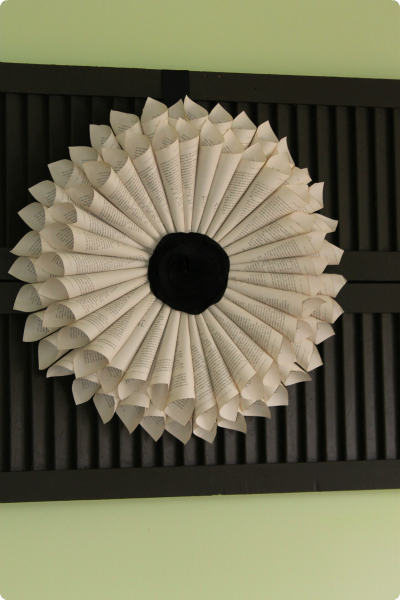
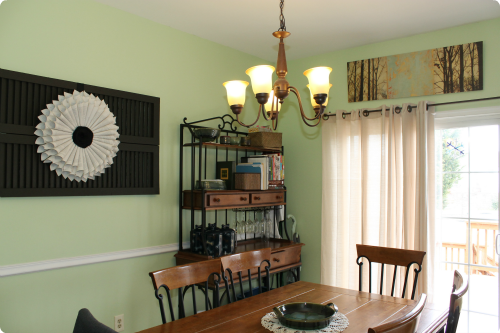
Supplies
6-8 inch round cardboard circle
Book, atlas or music sheets (thrift store find would be great here)
box cutter
Hot glue gun & lots of glue sticks
Wide Ribbon of choice to hang wreath, 18-24″
decorative flower, brooch or other ornament to place in center of wreath
Directions
I started with taking a damp tea bag and lightly rubbing the sides of the book. I wanted a very light color variation, not vintage but just a touch of contrast. A marker would work too.
Break the binding of the book as much as you can. Taking a sharp box cutter or exacto knife cut out the sheets as cleanly as possible. I used about 80-90 sheets for the wreath but had many mess ups so I cut out about 125.
Determine the direction you will be rolling and the direction of your paper. This was my biggest mistake in the beginning and led to lots of paper in the recycling bin. I used the bottom right corner as my point and the top right corner ended on top of the cone. Doing this every time gave me a more uniform look even though they weren’t all perfect.
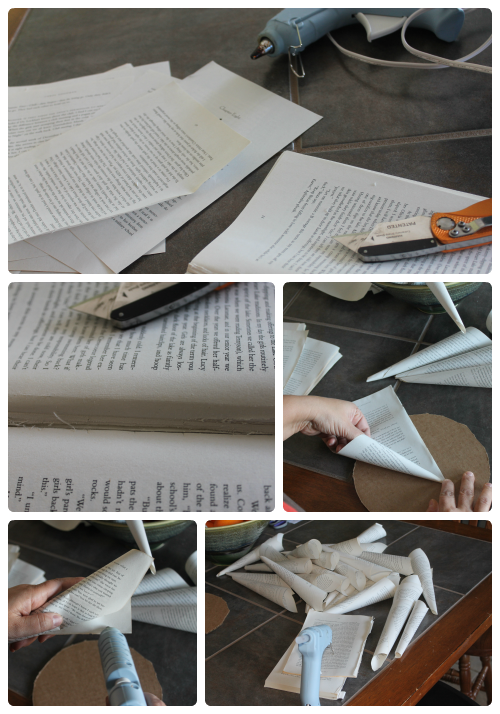
I rolled and rolled and rolled for 2-3 hours, hot gluing each sheet closed. Tape would work but would show. School glue would work but takes too long to set. The hot glue dries fast and holds tight.
Before you start gluing your cones take your cardboard circle make an inner circle about halfway from the center. This line gives you a guide as to where to start your 1st layer of paper cones. Then attach your ribbon with staples or hot glue. I didn’t do this before glue and had a mini disaster on my hands.
When it’s time to start gluing your 1st layer start in small sections so you get good spacing. If you try to focus on getting all the points together you’ll end up with a lopsided wreath. The focus should be getting good even coverage on the part that is showing. The second layer is the same as the first just this time you at gluing the points closer to the center of the circle.
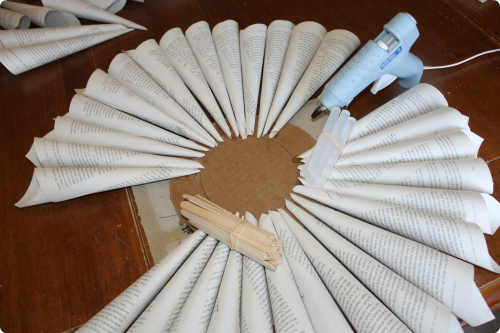
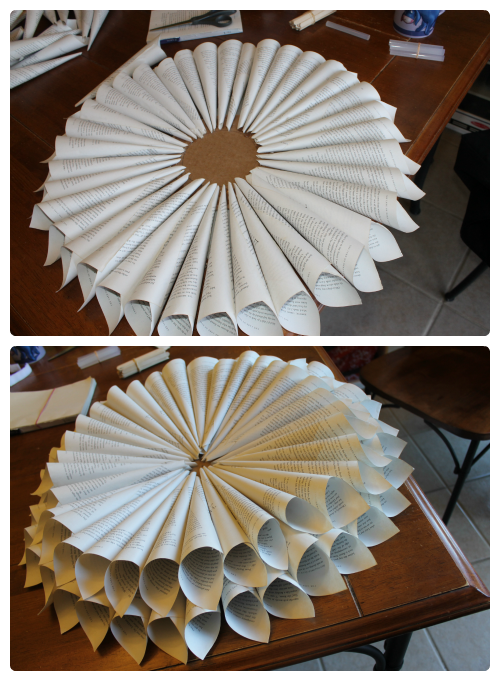
When it’s completed pick it up and shake to find loose cones.
At this point attach your centerpiece. I made a flower from black linen; 8-10 circles in varying sizes, sewn together in a haphazard way with some tucks and a tiny middle embellishment.
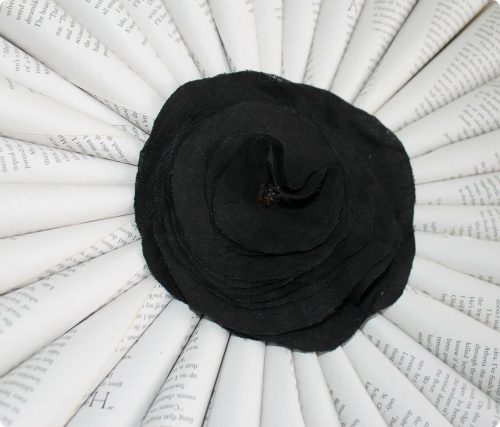
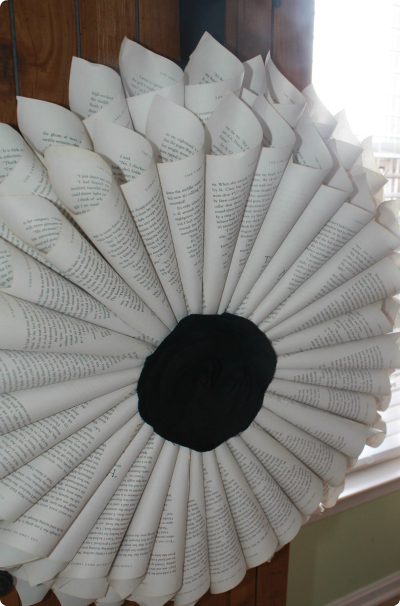
I then stapled the ribbon to the back of the shutter and it was done. Attach your ribbon before glueing the paper cones on your cardboard Again, I truly love this and thank Denise of The Painted Home for the inspiration.


