Shae is a mix of girly girl and tomboy. She’s got a collection of jewelry and lip glosses stored next to her Xbox games and Skylanders figures. She’s always asking for costumes and new shoes so it’s only natural that I make her hair accessories to wear. She recently got her haircut and I wanted to emphasize the bump in the back so I made her this “hipster” fabric flower headband that wraps around her entire head.
Even better is I didn’t purchase one single thing in order to make it. Saving fabric from outgrown clothing is the best way to create things like this.
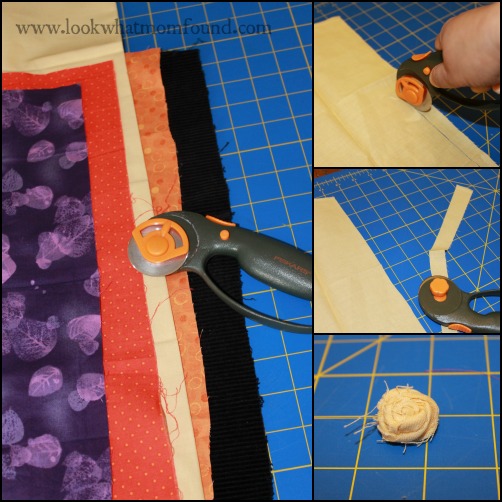
First I took a stretchy, shimmery black knit and measured it 8 inches bigger than her head from the base of her head to her forehead. Laying flat it measured about 3″ wide. Scrunched up this was a good fit for her.
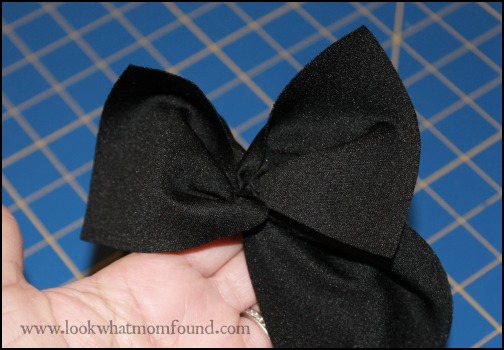
With a needle and thread I made bow shape without the huge knot.
Then I started rolling strips of fabric to create rosettes. These are so simple to make. Essentially you take a strip of fabric, fold it in half (printed side facing out) then twist it. Then you roll in around itself using spots of hot glue to keep it in place. The harder your twist the tighter your flower will be. Don’t stop at fabric though. Ribbons and lace work perfectly too. There are lots of tutorials on YouTube to show you how to make a rolled fabric or ribbon flower.
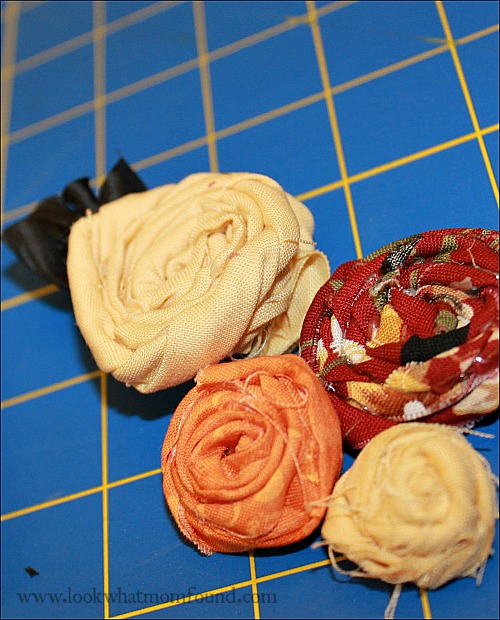
I made a few flowers, layered them on a piece of fabric and glued them along with a scrunched up piece of black satin tucked behind a flower for embellishment. Feathers, lace and even leaves would work great here.
Glue the fabric to the headband, set aside to dry and it’s ready to wear. I wanted to add tiny seed beads but Shae was very impatient and wanted to wear it to school. I’ve done these rolled flowers many many times. They take just a couple minutes to make and are ready to tack on an existing headband, barrette or brooch.

Use what you have on hand, no need to shop for new fabrics or crystals.