RSS Email

Mother’s Day SunCatcher Craft from Plastic Container

With Mother’s Day right around the corner I’ve been thinking of what my youngest could make for my mother. She doesn’t need mugs or aprons or vases or flowers. I’ve been told not to buy another frame because their shelves are overflowing already. Personally I love a little something homemade.

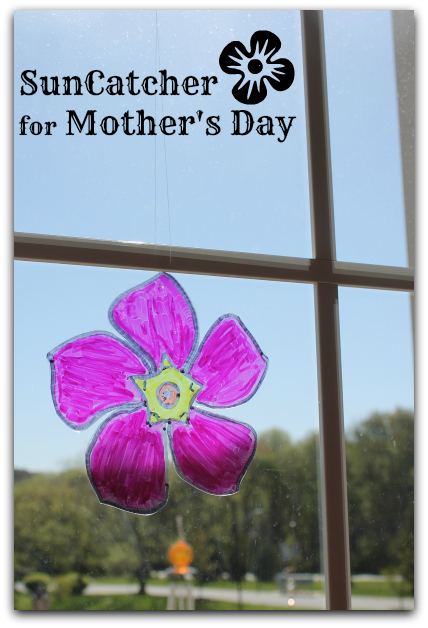
This “stained glass” flower was simple enough for anyone to do and best of all it was free, made with materials that would’ve ended up in the recycle bin.

Sun Catcher from Plastic Container

Supplies
Plastic Strawberry or Spinach container (or other produce)
Sharpies
Image of choice (printed clip art, magazine or coloring book)
Scissors
Fishing line for hanging

Directions
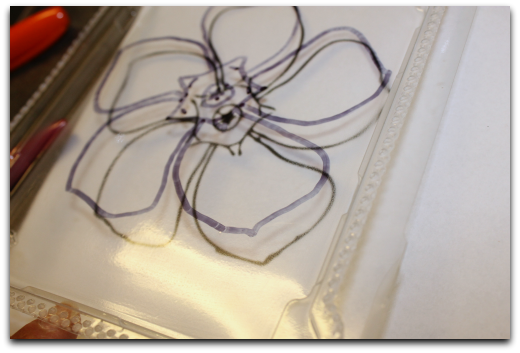
Find your largest space of flat plastic from your container, cut it out and clean and dry it.
Suncatcher Supplies
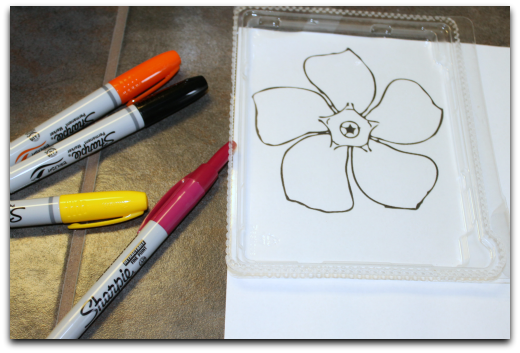
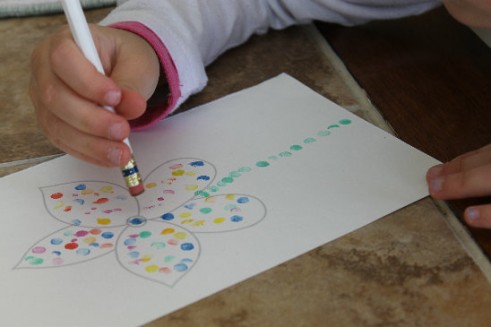
Find an imageyour want to trace onto the plastic piece. I went for very little detail this time around but more details would look great. Tape your plastic over your image an trace it with a black marker. For more intricate images I would suggest a fine point marker.
Tracing Suncatcher Image

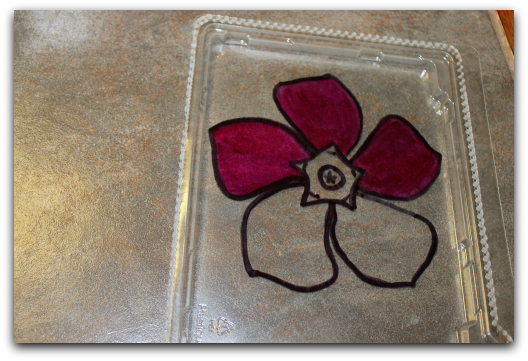
Once your image is completely outlined proceed to fill in to. I used brush tip Sharpies for these larger areas.
coloring in Suncatcher
Once your plastic is dried go ahead and cut along the outline and poke a tiny hole (pushpin) in the top and thread your wire or string. Hang in a sunny window.
colored in suncatcher

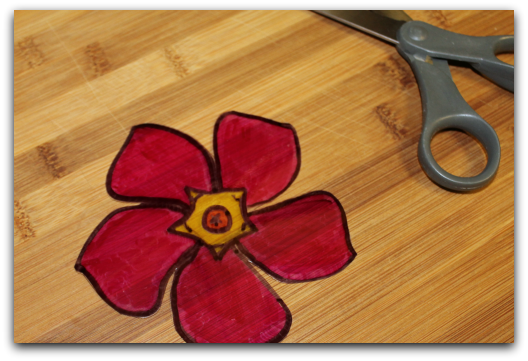
As you can see I made this on my own. This was a test before I had the kids work on it. It came out great and I plan to make more with all kinds of designs.


Stamp Pad Flower #Kids #Craft

One thing I struggle with is having kids craft ideas that are super easy to set up.  This means making sure I have all the supplies on hand and the prep and clean are simple.  Having these few ideas in my pocket are great when the kids want to do something fun but time or space is limited.  These stamp pad flowers use 2 or 3 supplies and can take as long as you allow.
stamp pad flower kids craft instructions

Supplies Needed:
Cardstock with outline of flower
Melissa and Doug 6 color Rainbow Stamp Pad
Random pencils with intact erasers

Time Needed:
5-20 minutes depending on child’s age and attention span

Prep:
Draw or print flower shape(s) on cardstock.  I printed on 1 sheet of cardstock a side by side flower found through Google Images (flower clipart drawing).  The page was cut half to resemble a card, perfect size for gift giving. Have a damp rag close by for ink clean up.
stamp pad flower kids craft spring
Instructions:  
Have child use eraser end to pick up ink and fill in flower until desired look is achieved.  Encourage them to fill in as much as possible.
stamp pad flower kids craft card spring
Younger children can use fingerprints instead of erasers or stamps.  This is a great exercise to develop fine motor skills, work on color recognition and learn patterns.
toddler craft stamp pad flower spring
These can also easily be embellished using buttons, glitter glue, pipe cleaners or cardstock for stems and leaves.  Make an entire bouquet, cut them out and gift them like a real arrangement.