RSS Email

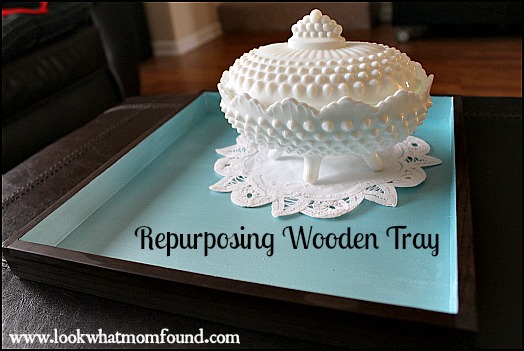
Painted Wooden Tray #upcycled #craft

I’m the kind of person that sees something that goes in the trash and wonders “Can that be reused or re purposed?”. This happens with toilet paper rolls, milk jugs and CoffeeMate creamer bottles. The problem with wanting to “re purpose” everything is having a place for the final project. Things headed for the trash usually end up there unless I have an idea for it.

For Christmas Shae received a few Melissa and Doug bead kits. I love Melissa and Doug toys because they are wood and non-toxic and last forever. I especially love the bead kits because they come in this simple wood trays that DON’T have lids. Not having a lid usually isn’t something I would applaud but that just meant I could dump the beads together in a box and set the tray aside for something prettier.
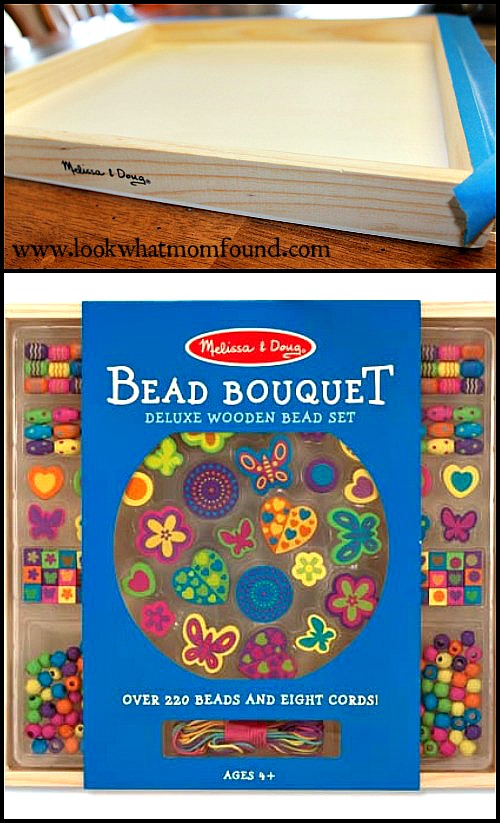
Wooden bead tray from Melissa and Doug

This is my something prettier. My make-up collection is getting out of hand. The vanity drawer that is dedicated to brushes has to make way for real cosmetics. I figured I could make a pretty-fied tray to sit on my vanity to house the brushes and fragrances and it would still look organized.
Painted Wooden Tray #upcycling #recycle

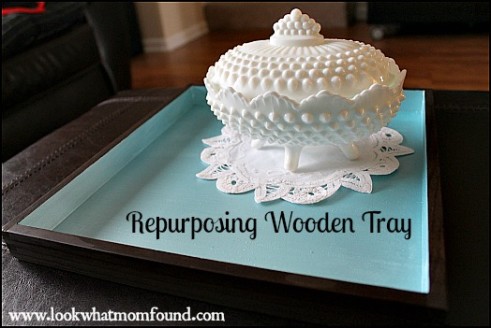
The tray ended up looking nicer than anticipated and is now sitting in the coffee table with my grandmother’s handmade doily and treasured milk glass. I’m not sure if this is its final resting place but for now it works to showcase these things that mean a lot to me.

The tray is a simple, lightweight, pine tray. There was nothing special about it except it was a blank canvas for so many ideas.

Supplies

  • Wooden tray
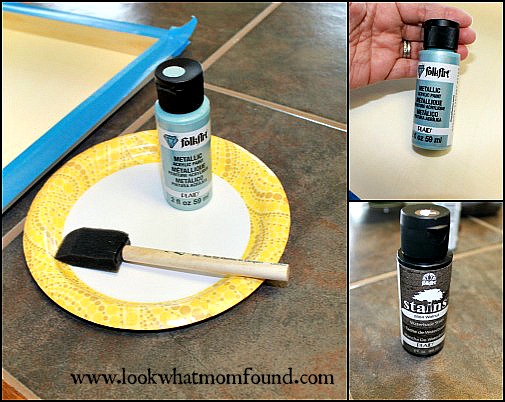
  • Acrylic Metallic Blue Paint
  • Waterbased Walnut Wood Stain
  • Polyurethane Spray
  • Painters Tape
  • Foam brushes
  • Paper plates or palettes to hold paint
  • Decorative details, optional

painting supplies

Instructions

I prepped my tray by vigorously wiping with a dry microfiber towel, being sure to remove any adhesives. My tray had a mark in the shape of a strip of tape but I wiped until it wasn’t sticky. I then taped off top edges to keep the paint off. I applied 3 coats of Metallic paint in order to get the shiny finish.
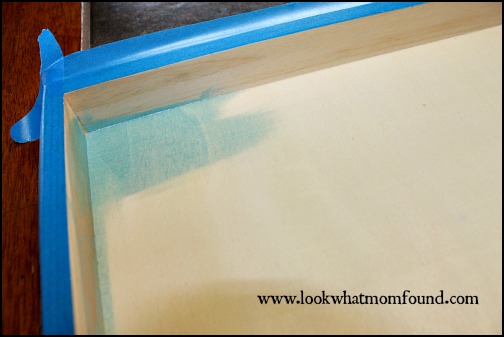
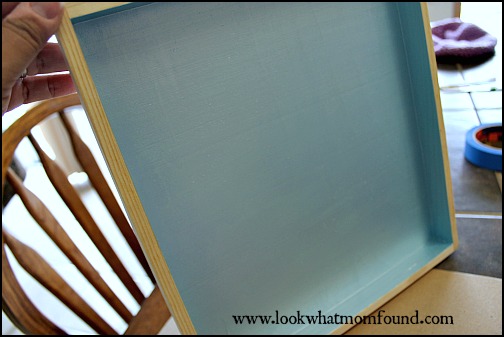
Metallic Paint, wooden tray

Metallic Paint, wooden tray

After a couple hours I removed the tape and applied new painters tape on top of the blue so the stain didn’t drip onto the tray. As you can see the Melissa and Doug logo is still there, I thought about sanding it off but ended up leaving it.

logo showing on wooden tray
I applied 3 coats of stain, letting each one dry in between. I wanted a deep brown color but still wanted to see the wood grain.
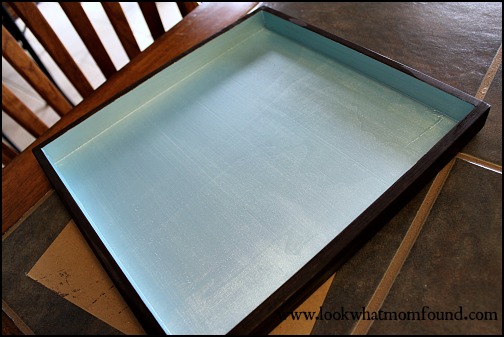
Painted Wooden Tray #upcycle #recycle
The next day and day after I sprayed thin but thorough coats of Polyurethane to protect against scratches and nicks. I made sure to get all sides, inside and out.
The tray ended up with a slight gloss but still looks like wood where it should. The tray was no additional cost, the paint and stain cost me less than $3 and the clear coat is something I always have on hand for projects. This thrifty little project makes me smile.
An old frame would work well for a tray too. A couple coats of paint can transform almost anything.


Paper Bag Tree for Earth Day #kids #craft

The first Earth Day on April 22, 1970, activated 20 million Americans from all walks of life and is widely credited with launching the modern environmental movement. Today you can find green efforts everywhere you turn.  Brands are working towards reducing their carbon footprint, local recycling centers are charged with reducing landfill piles and everyday people are working towards reducing their waste using more renewable resources.

In our home we actively recycle, plant a veggie garden, use less toxic cleaning products and reuse and upcycle items.  Kids Crafts can be done more green too. I try not to buy too many crafting supplies and use what we have or find items that can be recycled.  Paper lunch bags are something we keep in the house but don’t really use since the kids pack lunch boxes with reusable containers.

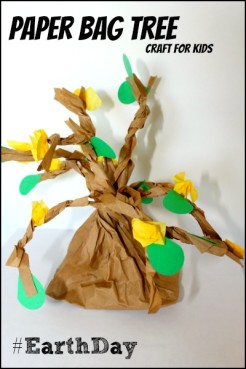
Making this Paper Bag Tree is a great Earth Day craft because one of the best things you can do on this day is plant a tree.

Supplies

  • lunchsize paper bag
  • green paper for leaves
  • colored tissue paper for flowers
  • glue
  • kid safe scissors (I also usually keep lefty scissors on hand too in case someone comes over that needs them.)
  • heart hole punch, optional

Directions

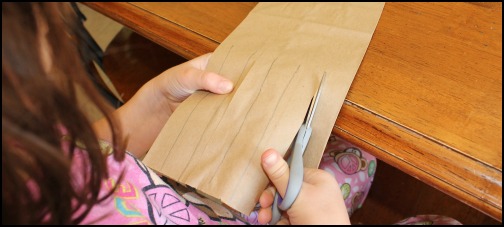
I drew lines a little more than halfway down the bag so Shae could cut to get her branches.

cutting with kid scissors

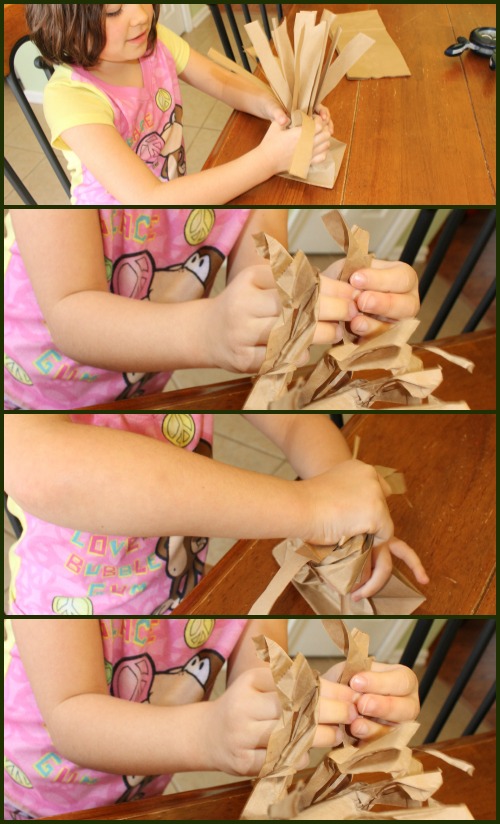
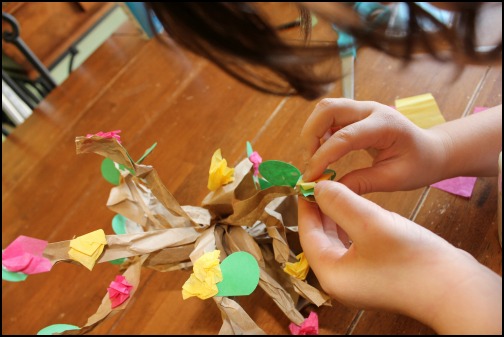
Once all the lines were cut, Shae opened up the the base of the bag to make a trunk and started scrunching up the pieces of bag to get her branches.

scrunching up a paper bag

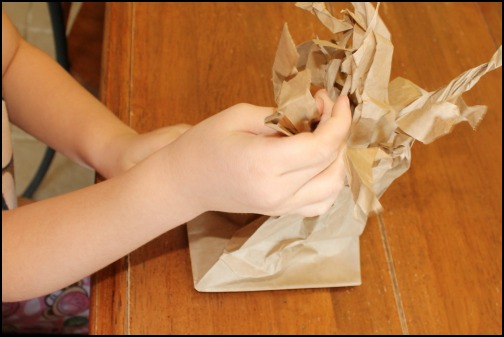
Once the strips of paper have softened up it’s time to twist them into branches.  Be careful not to twist too hard or you’ll rip them.  Take 2-4 strips at a time and gently turn them in your fingers to get a branch-like shape.

twisting branches

Twisting Branches for Paper Bag Tree

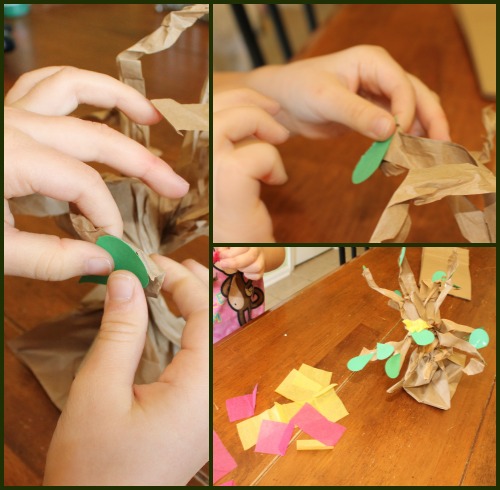
Now it’s time to make your leaves and flowers.  Leaves can be hand cut or can be made by cutting a heart shape in half.

Cutting a Heart in Half

Colored tissue paper cut into about 2″ squares in your child’s choice of color is all that is needed for flowers.  Have them pinch them and add a dab of glue to stick them onto their tree along with their leaves.

Tissue Paper Flowers on Tree

Adding Tissue Paper Flowers

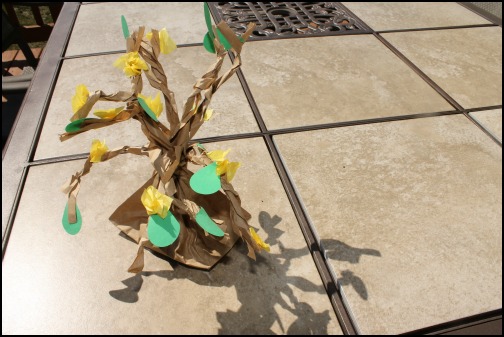
Make some final adjustments and twists and your paper bag tree is done.

Paper Bag Tree

This can be modified with brown or green paint to give it more dimension.  Stuffing the bag loosely with a napkin or ad of paper will give it more standing power if you are worried about it falling over. Pre cutting the strips and tissue paper and leaves are simple ways to make this more toddler and preschool age friendly.

What are your plans for Earth Day this year?


TShirt Tote Bag #ExpressYourself #CBias

I was recently asked to come up with a craft for the #ExpressYourself campaign using Elmers Painters Paint Markers and fabric. The fabric part got me stumped. I thought I’d make Shae a cute shirt, draw a flower or fun saying on it but what’s so original and creative about that. Then it hit me, go DIY with it. I stood in the middle of my living room at a pile of laundry and I got the idea of making a t-shirt tote bag.

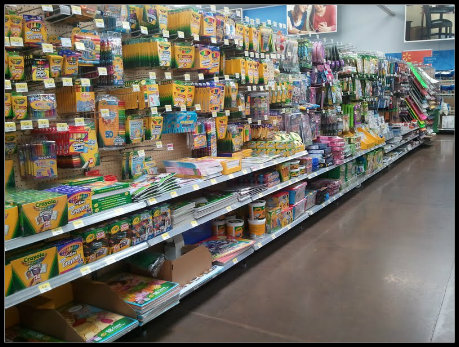
I’ve seen tutorials before and figured this would be easy. I got the kids in the car and headed to Walmart to find the Elmers Painters Paint Markers. It actually took me a little while to find them and I got worried that they didn’t carry them but finally found them with the acrylic paints and stencils.
walmart craft aisle #expressyourself elmers #collectivebias
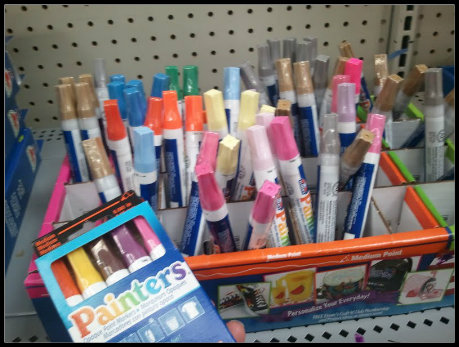
I chose the Sherbet collection in Medium Point. I wasn’t exactly sure what I was going to do to the bag but figured medium point was a safe option.  Instead of purchasing a box of set colors all with the same point you can always buy individuals.  Priced @ $1.97 each at your local Walmart it’s a cheap craft supply when you only need one to two for a specific project.  My Walmart didn’t have a ton of bright color choices.  I almost bought the silver and gold Painters Paint Markers but figured I would wait to see how my project came out.  I’ll be getting more colors next visit to Walmart.
walmart painters paint markers #expressyourself elmers #collectivebias
Setting up my project took longer than the actual crafting but wait till you see what I came up with.
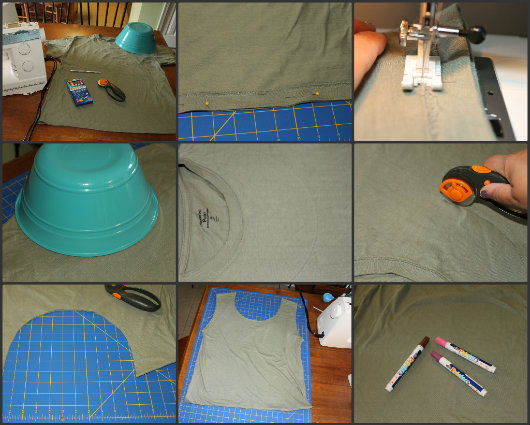
I scoured Rob’s t-shirt drawer and found an earthy green tee that he never wore. I grabbed my sewing machine and other tools and set out to get it done early in the morning.  The bag itself literally took minutes. Simply sewing shut the bottom of an inside out tee, cutting off the sleeves and making a larger opening was all it took to get a great bag. The trick here was to give it a unique and fun design with the Elmers Painters Paint Markers.

tshirt tote bag tutorial diy step by step craft project

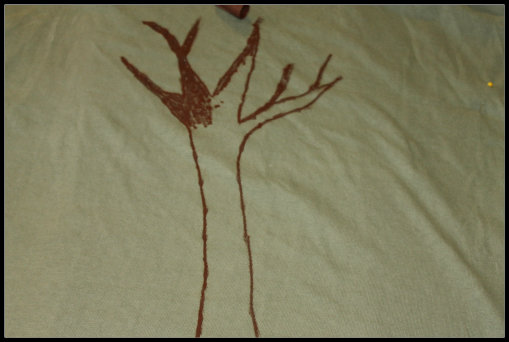
I figured since the bag already had a “green” feel to it being a neutral color and a recycled/reused item I’d stick with the crunchy theme and go for a tree. I drew out a couple trees on paper to get the right look and size and them totally free-handed it on the bag.

elmers painters paint markers drawing shirt craft

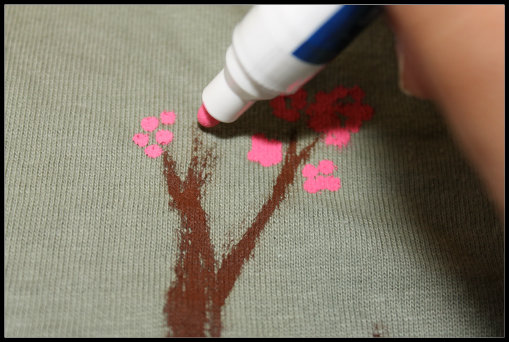
elmers painters paint markers flower craft

A large brown tree with pink and purple flowers on a handmade upcycled tote bag is my final project.

handmade tote from t shirt upcycled recycled craftThese markers were so easy to use I let my 4 year old make her own upcycled tote bag but an old tank top sewn shut on the bottom. She copied mommy’s design and drew a tree with flowers.
painted tote kids craft

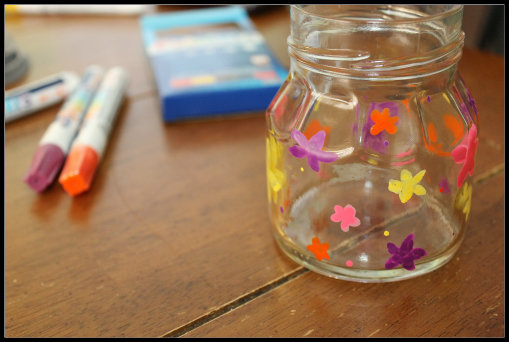
As she did her craft I did a quick second craft for myself; a decorated vase. This is the perfect size for thumbtacks, paperclips or even buttons.  It only took minutes and was simple.

painted jar craft project

Elmers Painters Paint Markers can be found at your local Walmart and other retail locations.  At about $10 for a pack of 5 it’s a small investment for tools that can be used for almost any project you may have.  As you can see from above these Painters Paint Markers easily go on fabric and glass but can also be used on wood, plastics, ceramics and more.  They are now a staple in my craft supplies closet since they are a cleaner and easier option than paintbrushes and tubs of paint.  Stay connected with Elmers and all of their other crafty supplies and projects on Facebook and Twitter.

“I am a member of the Collective Bias™ Social Fabric® Community. This shop has been compensated as part of a social shopper insights study for Collective Bias™. #CBias #SocialFabric”