RSS Email

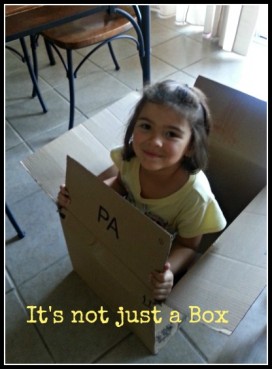
It’s More Than Just a Box

With a room full of toys kids find entertainment and fun in the simplest places. We received a large package about 2 weeks ago. The contents were emptied and the box was set to the side for recycling. Shae jumped in it and asked for markers. For the next 2 hours she drew on the box and “drove” it around the living room and kitchen. It’s become her car. She still has it, tucked neatly into a corner of her room and refuses to let it go.
fun with a cardboard box
It’s just an example that fun doesn’t have to cost anything.
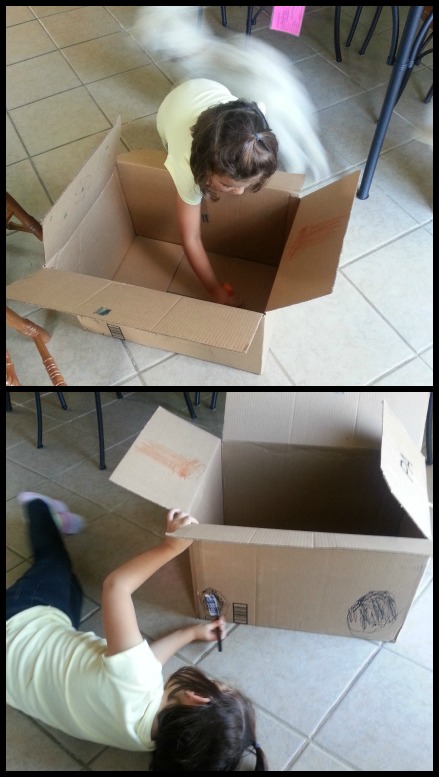
drawing on a cardboard box, kids playing with a cardboard box
As a 16 year old you would think Sabreena is passed the make believe stage. She’s not. She told me about these HUGE cardboard boxes that the music department had from a recent delivery. Her and her friends got into the box and thought of how they could get it home to build a clubhouse. She said they were large enough that a handful of teens could sit cross-legged comfortably. Their plans were foiled when the teacher cut up the boxes shortly after. But it just goes to show that with a little brain power kids can make up their own fun without batteries, screens or accessories.

A child’s imagination is their greatest commodity. Give them a simple thing like a cardboard box and see what happens, what does that box become.


Owl Mask for Dress Up Play #Kids #Craft

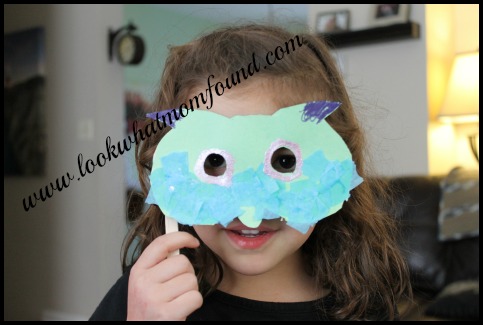
Dress up and crafts are my favorite ways to keep the kids imaginations going. Owls are  so popular right now I figured I would try to make a owl mask for Shae to use for dress up or storytelling or just because.

owl mask template #kids #craft

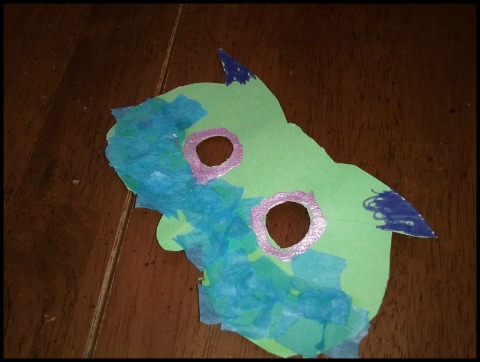
I drew out a design and used it to help Shae create this cute Owl Masquerade Mask.

Supplies

  • Card stock to print your Owl Mask
  • Scissors
  • Crayons, markers or paint to color your mask(or print on colored card stock)
  • Embellishments such as feathers, glitter glue, sequins, tissue paper, etc
  • School glue and/or tape
  • Popsicle stick to use as handle

Directions
Print your owl mask template.

You may want to adjust size to suit your child’s face. Mark with a crayon/marker here your child’s eyes will be. Cut out mask and quarter size eye holes. Cut out an additional small triangle for the nose. Lightly crease it down the middle and attach it to the back of the mask, pointing down. This allows some room for your child’s nose.

Let your child decorate as they wish, make sure they don’t cover eye holes. Attach popsicle stick to back of mask using glue or tape.
Now let your child transform into a spooky or whimsical owl.

owl mask for kids dress up #kids #craft

Modifications
By simply restricting the embellishments this craft is suitable for little ones as young as 18 months. Extending the owls points will give a more dramatic look. Instead of a popsicle stick attach ribbon or string for a mask that needs to be tied on.

Next step is to design and construct an owl costume.


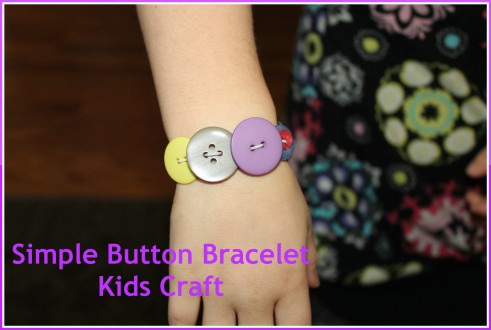
Simple Button Bracelet Craft for Kids

Simple kids crafts are my favorite to do with Shae. Since we are usually squeezing in crafts between errands, activities, meals and other responsibilities. If I can gather supplies and get her started in just a few minutes than I know that craft is a keeper. This Simple Button Bracelet is something Shae wears on her girly days. In fact she’s made for her friends because they are so easy to make.
 button bracelet craft for kids
Supplies
stretchy/elastic
buttons, different shapes, sizes and colors
scissors
craft supplies button bracelet
Instructions
Measure your child’s wrist then add 2 inches, cut this measure of elastic string. Tie a double or triple knot, big enough so button doesn’t slip off. Let your child string buttons in whatever order or pattern they choose. Be sure elastic go in a hole from bottom then back in another hole from the top. This allows the buttons to lay flat against the wrist.
button crafts for kids

When your child is done tie a knot around the starting knot. This helps prevent loosing as the bracelet is stretched over the wrist.

button bracelet for crafts
Show off your own kid’s cute button crafts.

I Disclose


TShirt Tote Bag #ExpressYourself #CBias

I was recently asked to come up with a craft for the #ExpressYourself campaign using Elmers Painters Paint Markers and fabric. The fabric part got me stumped. I thought I’d make Shae a cute shirt, draw a flower or fun saying on it but what’s so original and creative about that. Then it hit me, go DIY with it. I stood in the middle of my living room at a pile of laundry and I got the idea of making a t-shirt tote bag.

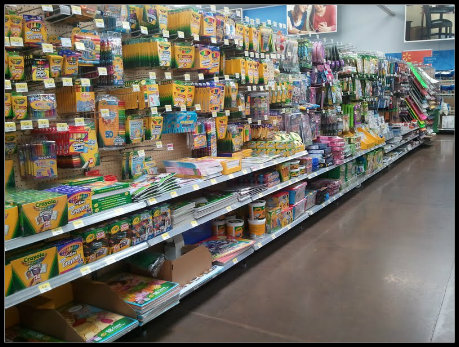
I’ve seen tutorials before and figured this would be easy. I got the kids in the car and headed to Walmart to find the Elmers Painters Paint Markers. It actually took me a little while to find them and I got worried that they didn’t carry them but finally found them with the acrylic paints and stencils.
walmart craft aisle #expressyourself elmers #collectivebias
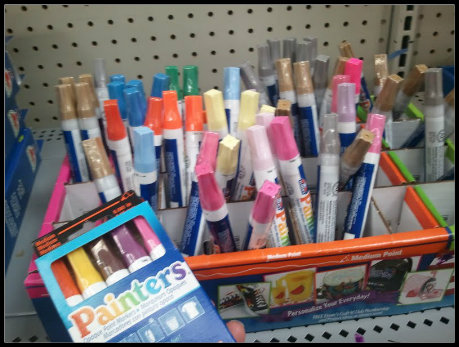
I chose the Sherbet collection in Medium Point. I wasn’t exactly sure what I was going to do to the bag but figured medium point was a safe option.  Instead of purchasing a box of set colors all with the same point you can always buy individuals.  Priced @ $1.97 each at your local Walmart it’s a cheap craft supply when you only need one to two for a specific project.  My Walmart didn’t have a ton of bright color choices.  I almost bought the silver and gold Painters Paint Markers but figured I would wait to see how my project came out.  I’ll be getting more colors next visit to Walmart.
walmart painters paint markers #expressyourself elmers #collectivebias
Setting up my project took longer than the actual crafting but wait till you see what I came up with.
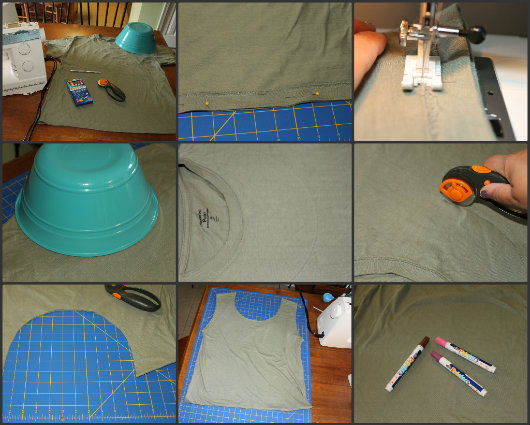
I scoured Rob’s t-shirt drawer and found an earthy green tee that he never wore. I grabbed my sewing machine and other tools and set out to get it done early in the morning.  The bag itself literally took minutes. Simply sewing shut the bottom of an inside out tee, cutting off the sleeves and making a larger opening was all it took to get a great bag. The trick here was to give it a unique and fun design with the Elmers Painters Paint Markers.

tshirt tote bag tutorial diy step by step craft project

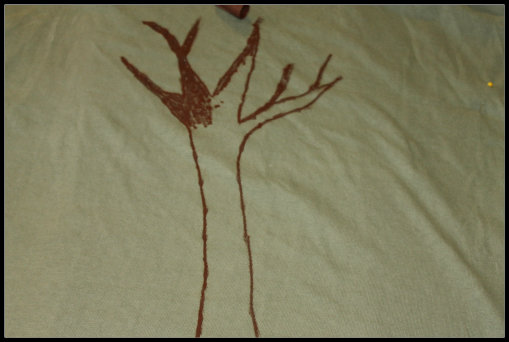
I figured since the bag already had a “green” feel to it being a neutral color and a recycled/reused item I’d stick with the crunchy theme and go for a tree. I drew out a couple trees on paper to get the right look and size and them totally free-handed it on the bag.

elmers painters paint markers drawing shirt craft

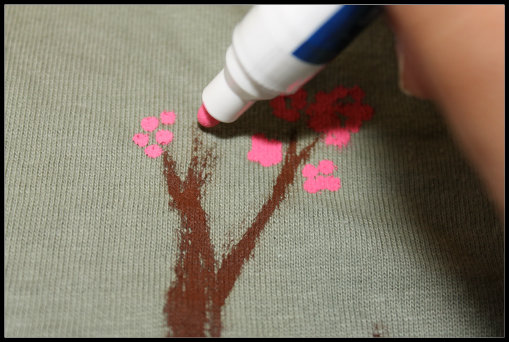
elmers painters paint markers flower craft

A large brown tree with pink and purple flowers on a handmade upcycled tote bag is my final project.

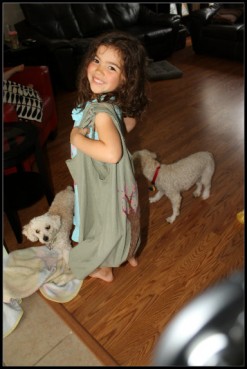
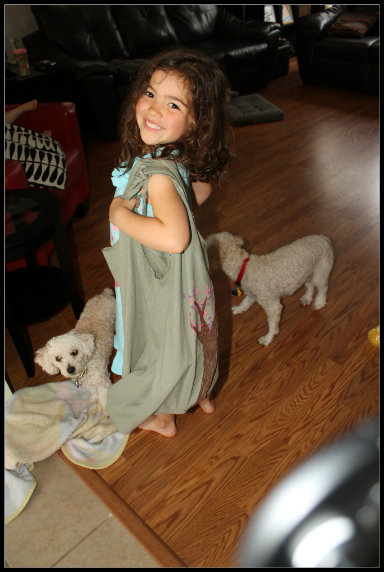
handmade tote from t shirt upcycled recycled craftThese markers were so easy to use I let my 4 year old make her own upcycled tote bag but an old tank top sewn shut on the bottom. She copied mommy’s design and drew a tree with flowers.
painted tote kids craft

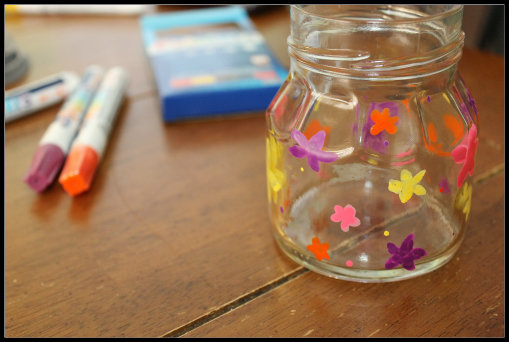
As she did her craft I did a quick second craft for myself; a decorated vase. This is the perfect size for thumbtacks, paperclips or even buttons.  It only took minutes and was simple.

painted jar craft project

Elmers Painters Paint Markers can be found at your local Walmart and other retail locations.  At about $10 for a pack of 5 it’s a small investment for tools that can be used for almost any project you may have.  As you can see from above these Painters Paint Markers easily go on fabric and glass but can also be used on wood, plastics, ceramics and more.  They are now a staple in my craft supplies closet since they are a cleaner and easier option than paintbrushes and tubs of paint.  Stay connected with Elmers and all of their other crafty supplies and projects on Facebook and Twitter.

“I am a member of the Collective Bias™ Social Fabric® Community. This shop has been compensated as part of a social shopper insights study for Collective Bias™. #CBias #SocialFabric”


Stamp Pad Flower #Kids #Craft

One thing I struggle with is having kids craft ideas that are super easy to set up.  This means making sure I have all the supplies on hand and the prep and clean are simple.  Having these few ideas in my pocket are great when the kids want to do something fun but time or space is limited.  These stamp pad flowers use 2 or 3 supplies and can take as long as you allow.
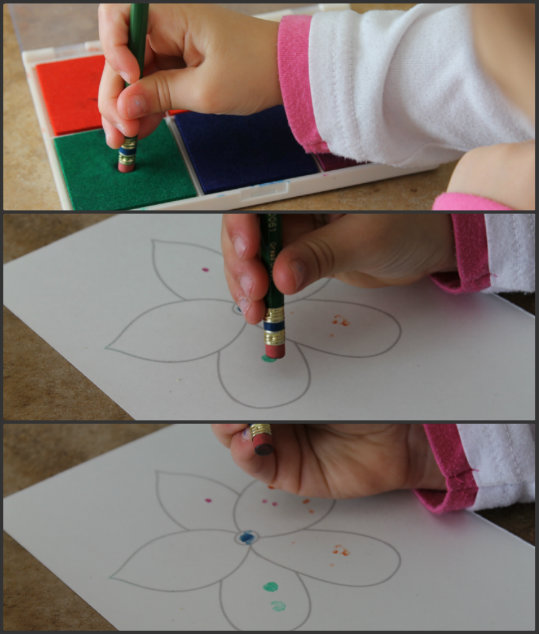
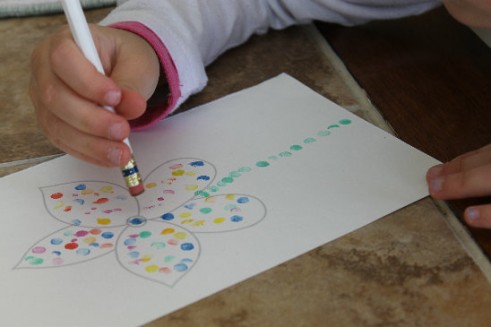
stamp pad flower kids craft instructions

Supplies Needed:
Cardstock with outline of flower
Melissa and Doug 6 color Rainbow Stamp Pad
Random pencils with intact erasers

Time Needed:
5-20 minutes depending on child’s age and attention span

Prep:
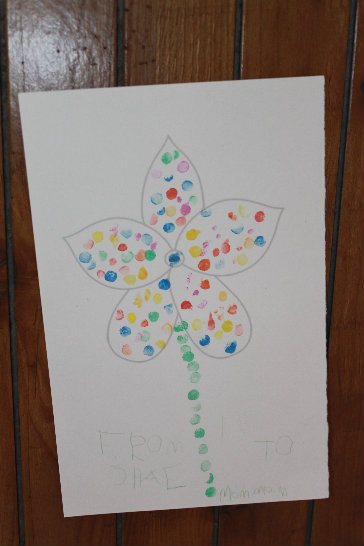
Draw or print flower shape(s) on cardstock.  I printed on 1 sheet of cardstock a side by side flower found through Google Images (flower clipart drawing).  The page was cut half to resemble a card, perfect size for gift giving. Have a damp rag close by for ink clean up.
stamp pad flower kids craft spring
Instructions:  
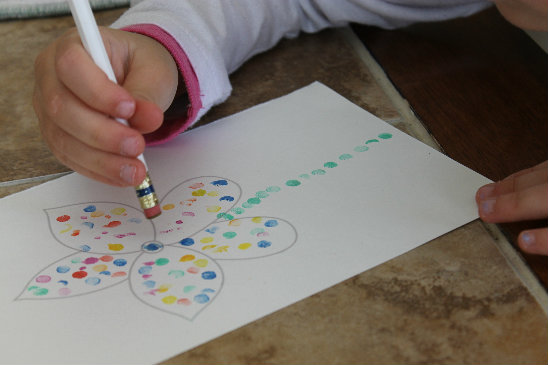
Have child use eraser end to pick up ink and fill in flower until desired look is achieved.  Encourage them to fill in as much as possible.
stamp pad flower kids craft card spring
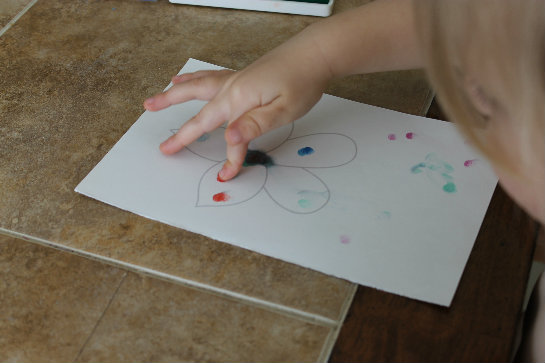
Younger children can use fingerprints instead of erasers or stamps.  This is a great exercise to develop fine motor skills, work on color recognition and learn patterns.
toddler craft stamp pad flower spring
These can also easily be embellished using buttons, glitter glue, pipe cleaners or cardstock for stems and leaves.  Make an entire bouquet, cut them out and gift them like a real arrangement.


DIY Handmade Coasters

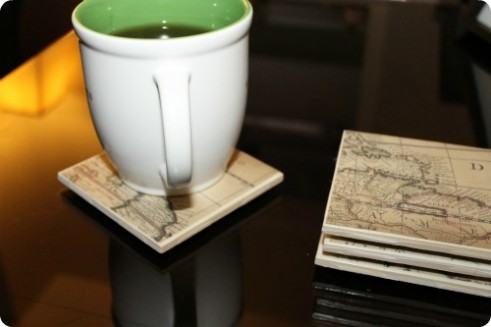
For some reason we go through a lot of coasters. We either by crappy ones that get moldy or don’t keep the water off the table or they break or we lose them. Over the last 10 years we gone through dozens easily. I made a couple trips to home stores looking for new coasters and couldn’t figure out why they cost over $10 for just a set of 4 ugly ones. NO way was I spending that much just to hold my cup. I knew there was a way to make my own. Off to Pinterest I went. I went over a few different tutorials and come up with these.

Here is how I made them.
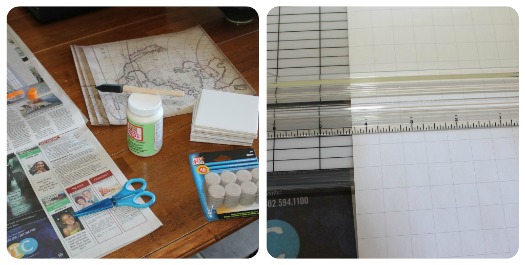
4-6 plain white (or cream) glossy tiles found in Home Depot, $.19 each
2 sheets of patterned scrapbook paper, $.40 each
Felt pads or sheets of felt, already owned
Mod Podge, already owned it
Foam brush, already owned it.
Polyurethane spray, $7 from craft store

Cover your work area with a drop cloth or newspaper. Measure and cut your sheets of paper to fit just inside your tiles. I like mine slightly smaller than the tile to give it a border.

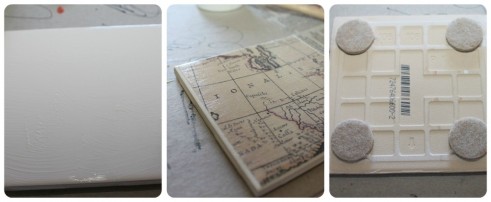
Smear light coating of ModPodge on tile and place a cut piece of paper and quickly center it. Gently smooth it out so there are no air bubbles, wrinkles, creases and so that all edges are sticking. Set aside for a few minutes to dry. Repeat this step on your other tiles.
craft prep, making coasters from tiles, using tiles and scrap paper for coasters
Once the paper is set into place apply another coating of ModPodge ON the paper. I like to cover it completely in one direction then another coating in the other direction. Set aside and continue working on other tiles. After 20-30 minutes apply another coating, this time just paint in one direction and take measures to apply it more smoothly, avoiding lines. Continue with the rest of the tiles.
applying modpodge to tiles, making coasters from tiles
Apply about 4-6 coats of ModPodge, let completely dry overnight and then finish with a glossy Polyurethane spray. Let dry overnight again, apply felt sheets or pads to the bottom and your coasters are ready to use!
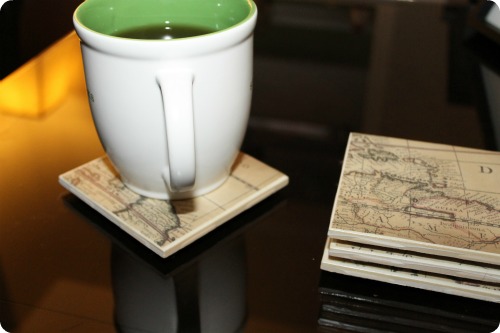
handmade coasters, diy coasters from tiles.
I only made 4 because I doubted they would actually turn out. I was wrong and now I need to make 2 more for me and 6 for my best friend to match her bright new living room.


I Disclose


Instant Doggy Door Tutorial

I’m crafty!  Today I’m going to show you how to make your own doggy door. It’s really quite simple and just takes a couple minutes and some needed supplies.

  • 1 Standard Screen Door
  • 1 Hyper Active, Jumptastic, Super Excited Dog

Instructions
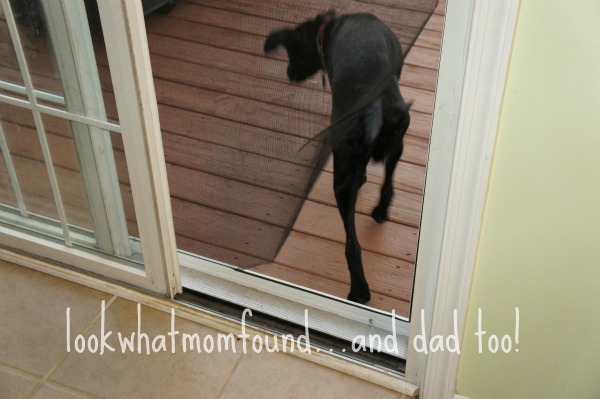
Let the dog outside. Close the screen door. Let an infrequent visitor; in our case my mother, walk into the house. Be sure the dog gets a glimpse of her and let him plow right through the screen. Viola, instant doggy door.

instant doggy door

dog ripping though screen door
Easy Peasy


I Disclose


Halloween Hanging Bat Craft

It’s Halloween and I knew I needed to step up the crafting.  I looked at what we had on hand and figured I could do something with the random toilet paper rolls I had been saving.  I only save a couple at a time but I know they come in handy.

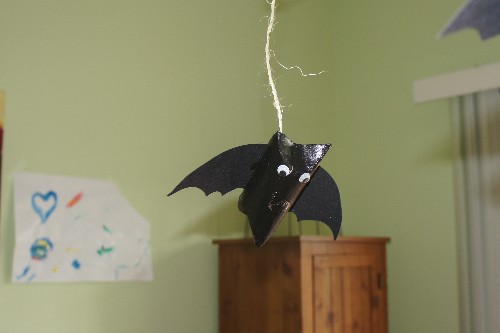
halloween-kids-craft-bat

hanging halloween bat

Halloween Bats
toilet paper rolls (or paper towel rolls cut in half)
black construction paper or foam or cardstock for wings
black paint, we used acrylic but poster paint would work well
googly eyes
glitter glue pens
string, twine or fishing line to hang finished bats

craft-supplies-halloween-bat

get your supplies ready and wings cut

Start off with covering your work area. I know paint is washable but I still like to put something down to protect my dining table. I use scrap cardboard most of the time because it dries fast and can be reused then tossed when it’s too gross.

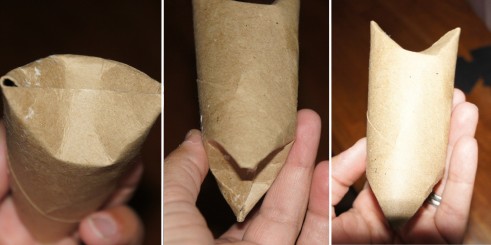
As you can see from the picture below the tube ends need to be folded a certain way to establish the looks of bat ears and the bottom.

folding-toilet-paper-roll-bat-halloween

folding your toilet paper roll

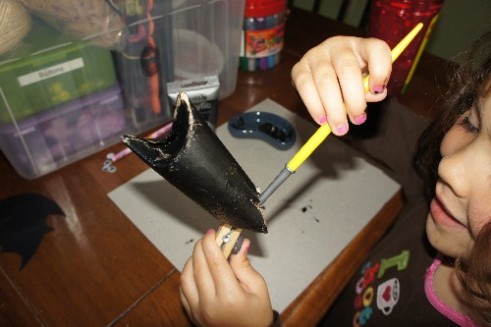
Paint your toilet paper roll. I had Shae unfold the ends to paint it thoroughly but quickly folded them back down before it dried. This helped with the overall look; no brown peeking out.

painting-toilet-paper-roll-halloween-bat

shae uses a clothespin to hold wet painted bat


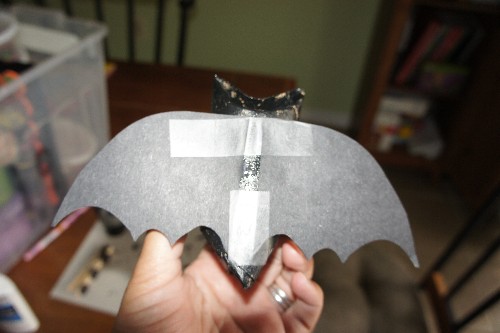
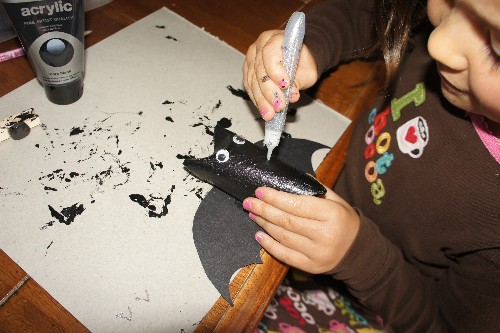
Once your bat is dry ( 15 minutes with acrylic paint) add dabs of glue to secure wings( cut from black paper) and googly eyes. Shae then used a silver glitter pen to add fangs. A red glitter pen would be good too if you want a more spooky bat with blood dripping fangs.
bat-wings-halloween-kids-craft

tape adds a little more security to glued wings


glitter-glue-fangs-halloween-bat-kids-craft

fangs all by herself

Once everything is completely dry and secure punch a little hole near the wings and hang from your desired spot. We use our dining chandelier a lot. I used twine this time because I liked the rustic look. Fishing line would disappear and make your bats look like they are floating.

Share your Halloween kids crafts!


I Disclose


Hawaiian Lei Craft

Summer crafting is in full swing but it’s hard to get them up on a regular basis. While we went on vacation this year it’s wasn’t tropical or remote like last years trip. To take our minds back to sandy beaches and palm trees we decided to make some flower leis. This particular craft can be adjusted for different ages depending on what you prep, what you allow your child to do on their own and what kind of supplies you use.

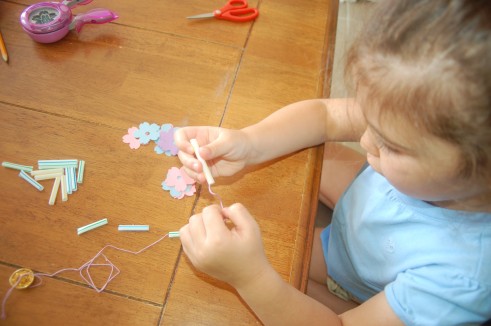
supplies are prepped

making-Hawaiian-lei-kids-craft

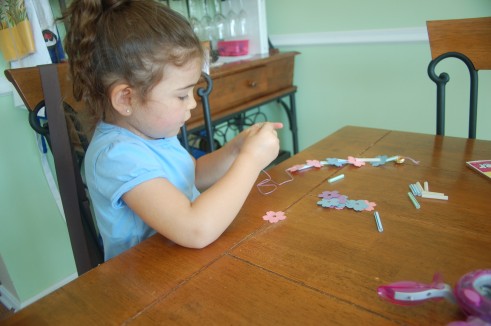
threading the string

Supplies
2-3 straws cut to 1″-2″
embroidery floss or yarn or twine
fabric or paper flowers in various colors and sizes

Directions
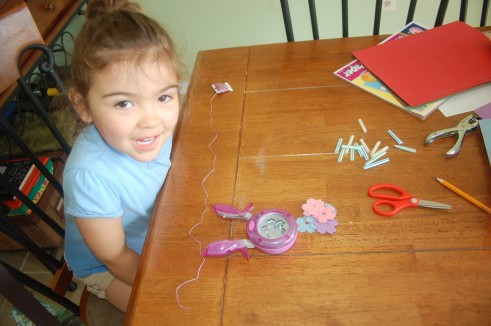
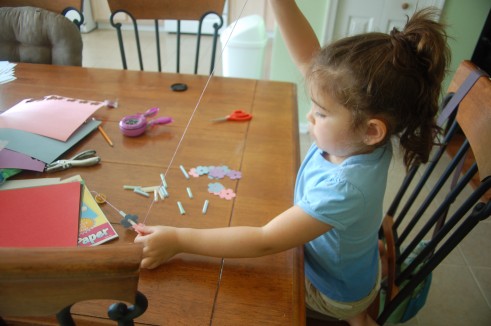
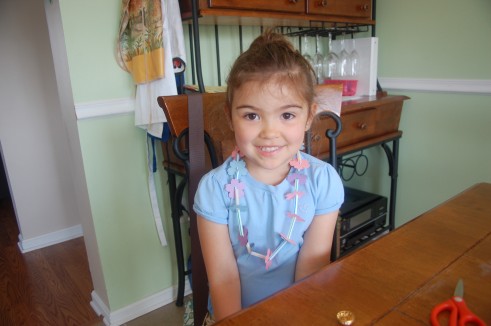
We had striped bendy straws. Shae cut them into into about 2″ lengths and we tossed the bendy part. The flowers we used were cut using Fiskars Punches in 2 flower shapes from various colors of construction paper. Patterned paper would work really well here too. Start threading a straw piece with 1,2 or 3 flowers then another straw piece. Shae put flowers together that were different sizes and colors. When she was done filling up a 20″ length of embroidery floss I gave it a double knot and it was ready to wear.

flower-kids-craft-necklace

pull all the way through

almost there

This is a great craft to work on with multiple children. All of the supplies can be prepped before hand and there is no waiting for paint or glue to dry or worry about huge messes to clean up. if you don’t have punches available fabric flower bunches from the $1 bin can be taken apart and used. They already have a hole in the middle of the petals too so assembly is simple.

hawaiian-lei-craft

all done and so pretty


Have fun with this one and hope to see your end results. Don’t forget to visit GummyLump #300CraftsforKids Blog to see the fun crafts going on over there. This particular project came right from Fiskars Idea Gallery using their paper punches.


I Disclose


Salt Dough Craft

Salt is one of the 1st ingredients I reach for when cooking. It’s one of the most important ingredients in many recipes. A small amount of salt in baked goods enances the sweetness? A pinch of salt while brewing your morning coffee cuts down the acidity. Besides flavoring salt has tons of uses not just in the kitchen but for cleaning and kids crafts too.
Salt Dough

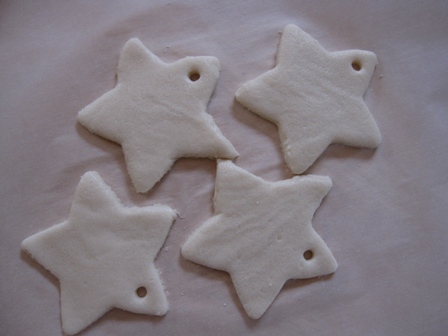
Ingredients:salt-dough-kids-craft

  • about 1 cup of salt
  • about 1 cup of flour
  • about 1 cup of water

Instructions:
In a very large bowl, mix together the salt and the flour.  Make a well in the salt/flour mixture and add the water, add more by the tablespoon as needed to get the consistency desired. Knead until smooth.
When not in use, wrap in plastic or store in an airtight container

HINT: To get a softer dough add more flour NOT more salt. Add food coloring a couple drops at a time for a variety of colors then knead well to get an even color. Clay can be molded into ornaments or sculptures and painted after they have fully dried. Insert a straw before drying to get your ribbon hole


I Disclose