RSS Email

Valentine’s Day Thumbprint Heart Cookies

To wrap up our week of Valentine’s Day themed crafts and activities we’re showing off our Thumbprint Heart Strawberry Preserve Cookies. As you’ll see Shae and Shaun didn’t really use their thumbs but Fingerprint cookies don’t have the same ring to it.

Strawberry Jam Heart Thumbprint Cookies

We started with a simple soft cookie dough.

Ingredients

  • 1cup butter, softened
  • 2/3 cup sugar
  • 1tsp vanilla or almond extract
  • 2 egg yolks, room temperature
  • 2 cups flour
  • 1/2 tsp salt
  • 1/2 cup strawberry/raspberry jam or preserves

Directions
In bowl of stand mixer combine butter and sugar till fluffy then add vanilla and eggs, beat till smooth.

Add flour and salt and blend till combined. Set aside in fridge for 1 hour to chill.

Form 1inch balls of chilled cookie dough and place on parchment covered baking sheet .

Strawberry Jam Heart Thumbprint Cookies

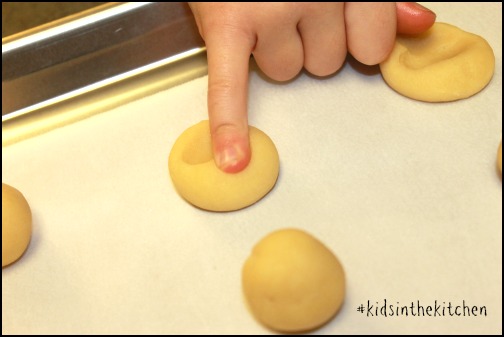
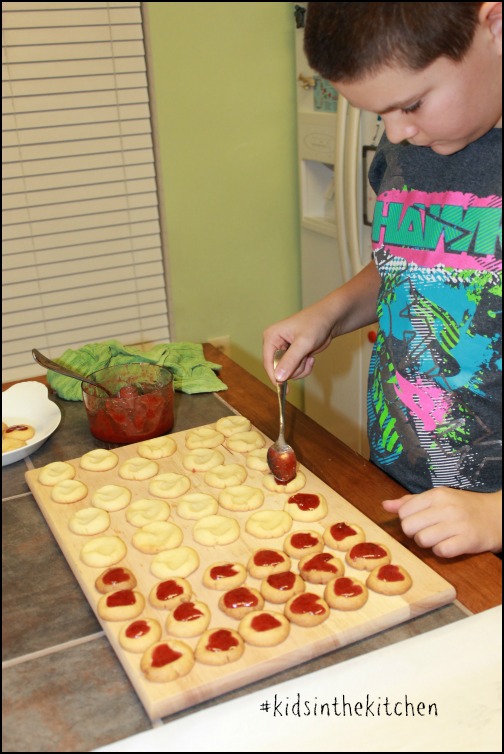
Using fingers press a heart shape into the cookie dough. Reform edges if needed.Strawberry Jam Heart Thumbprint Cookies Bake at 350 degrees for 12-15 minutes or until golden brown. Fill with 1/2 tsp of favorite jam.

Strawberry Jam Heart Thumbprint Cookies
Cool and enjoy.

Come join me and my co-hosts, Sarah of Play to Learn with Sarah, Paula at Frosted Fingers and Sara at Sensibly Sara, each week linking up a post, new or old, that feature the theme Kids in the Kitchen. It doesn’t matter what you are doing as long as you are doing it together, enjoying it and learning something along the way.

You’ll find so many more ideas on the #KidsintheKitchen Pinterest Board.
Follow Melinda Babiak’s board #KidsintheKitchen on Pinterest.

Linky Rules, #kidsinthekitchen

#KidsintheKitchen Weekly Linky


Waffle Sandwiches for Dinner #kidsinthekitchen

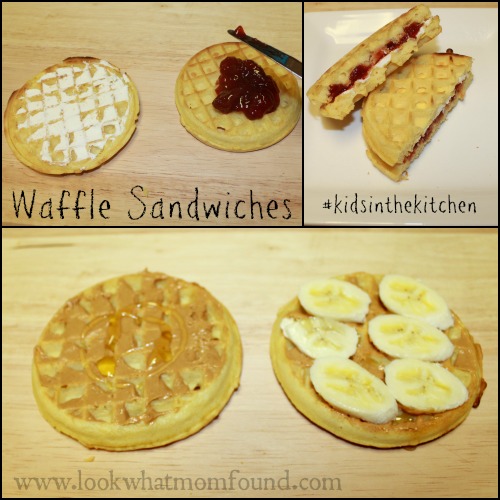
Dinners typically are comforting and delicious according to my kids but they aren’t fun.  The kids have been seeing these Eggo Waffle commercials where they are experimenting with ingredients turning them into sandwiches & desserts. So being the good mom that I am we had waffle sandwiches for dinner.

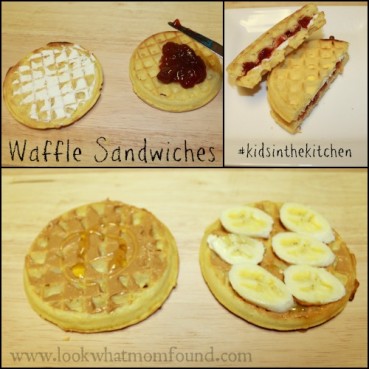
Using ingredients I know they love is the first step.  I toasted the waffles like I usually do then let the kids pick out combinations of their choice.

Shae was the only one not distracted enough to stick around while the waffles toasted so the sandwiches were her pick.

Peanut Butter, Honey and Banana & Cream Cheese and Strawberry Preserves
Waffle Sandwiches for Dinner #KidsintheKitchen

In case you’re wondering, this is the face of enjoyment. Shae much prefers goofy faces over typical smiles.
Waffle Sandwiches for Dinner #KidsintheKitchen
Come join me and my co-hosts, Sarah of Play to Learn with Sarah, Paula at Frosted Fingers and Sara at Sensibly Sara, each week linking up a post, new or old, that feature the theme Kids in the Kitchen. It doesn’t matter what you are doing as long as you are doing it together, enjoying it and learning something along the way.

You’ll find so many more ideas on the #KidsintheKitchen Pinterest Board.
Follow Melinda Babiak’s board #KidsintheKitchen on Pinterest.
Linky Rules, #kidsinthekitchen

#KidsintheKitchen Weekly Linky


Kitchen Tools and Gadgets for the Kids

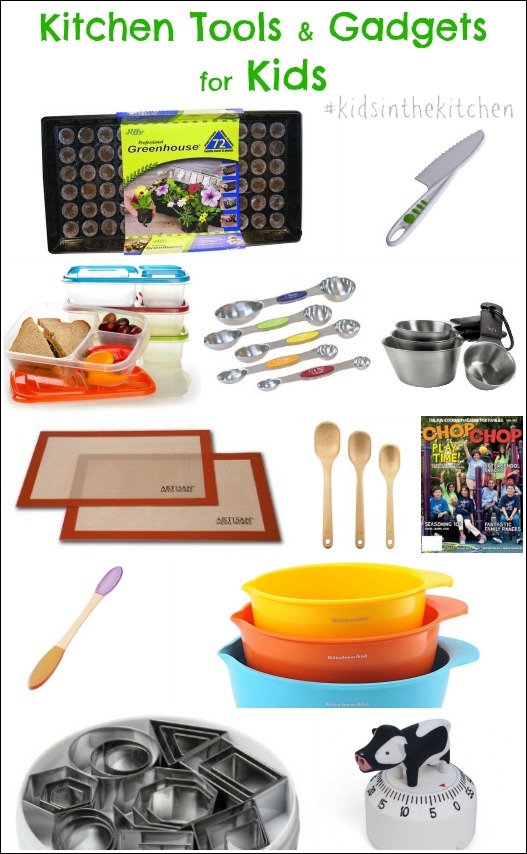
Kids in the Kitchen is about more than just letting kids mix up a batch of cookie dough. #KidsintheKitchen is a series that encourages kids to explore their creativity and expand their taste buds. Creating a space where children are comfortable is the first step to getting them excited to help prep and prepare a meal or come up with a new recipe ideas. This collection of the kitchen tools and gadgets is a great way to empower kids to do more, make more, create more, think more.
Kitchen Tools and Gadgets for Kids #kidsinthekitchen

affliate
Non-Stick Silicon Baking Mat Set The non stick surface makes for easy removal of baked goods and leaves cooking sheets clean.

OXO Good Grips Measuring Cups The large sturdy handles gives little hands more control and less spilling.

Indoor Greenhouse Kit Get kids excited about fresh food and herbs buy growing them yourself.

Chopchop Magazine Subscription This publication provides inspiration and ideas that brings kids and their families together in the kitchen.

Curious Chef Plastic Knife Chop fruits and veggies with ease while keeping little fingers safe from traditional metal blades.

Geometric Cookie Cutters All bakers need basics shapes to create delicious sweets and treats.

OXO Wooden Spoon Set No kitchen is complete without sturdy wooden spoons for mixing and cooking.

Snap Fit Measuring Spoons This ingenuous double sided design is perfect for multiple sized jars and bottles.

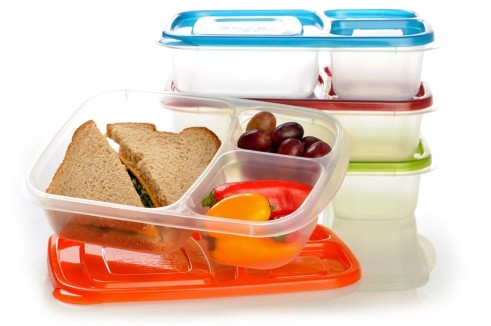
EasyLunchboxes Bento Lunch Box Containers Kids will be excited to create healthy “lunchables” at home with fresh ingredients.

Cow Kitchen Timer Keep things fun with this MOO-ing kitchen timer.

PB & J Spoon No more multipe knives being used for 1 sandwich with this dual edge spreader.

Mixing Bowls with Handle Little hands will appreciate the handle on these brightly colored mixing bowls.

While some of these tools and gadgets are whimsical they are all useful in just about any kitchen. Teach safety first to ensure fewer accidents and mishaps. Do you have any suggestions for kitchen must haves for kids?

Come join me and my co-hosts, Sarah of Play to Learn with Sarah, Paula at Frosted Fingers and Sara at Sensibly Sara, each week linking up a post, new or old, that feature the theme Kids in the Kitchen. It doesn’t matter what you are doing as long as you are doing it together, enjoying it and learning something along the way.

You’ll find so many more ideas on the #KidsintheKitchen Pinterest Board.
Follow Melinda Babiak’s board #KidsintheKitchen on Pinterest.
Linky Rules, #kidsinthekitchen

#KidsintheKitchen Weekly Linky


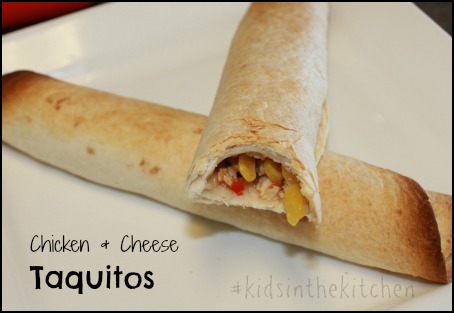
Making Chicken and Cheese Taquitos #kidsinthekitchen

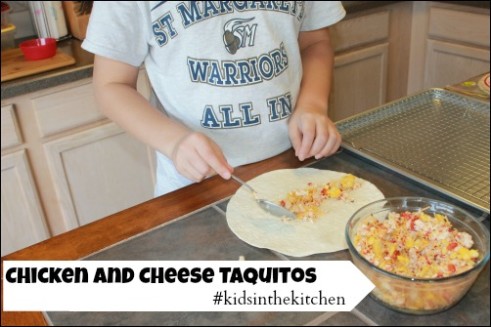
I know teaching my son to cook and be self sufficient in the kitchen is so very important but it’s hard to do when he doesn’t want to learn. Shaun is 10 and uninterested in doing things for himself. He’s much rather spend his time playing video games and other boy stuff. Making these Chicken and Cheese Taquitos was a lesson in chopping, patience and listening to details.

Using leftover roasted chicken, veggies, and artisan cheese with some seasoning, we made a surprisingly tasty lunch. Consider checking artisan cheese online to get the right cheesy flavor while preparing the taquitos.

I would’ve preferred smaller corn tortillas but we used what we had on hand, burrito sized flour.

Making Taquitos #kidsinthekitchen

Shaun chopped up a couple cups of cooked chicken while Sabreena finely chopped red peppers. We added frozen corn, a cup of frozen corn and then spiced it up. I had the kids sniff each herb/spice and tell me what it reminded them of. Oregano smells like pizza and cumin smells like tacos.

Making Taquitos #kidsinthekitchen The details and patience part of this task came when it was time to roll up the taquitos. I had Shaun redo the rolling part if it wasn’t tight enough or if the filling came out. Moving them from the counter to the baking tray needed a gentle hand, one he doesn’t have. By the 5th one he understood to take it slow.

They got a brush of olive oil, went into a 425° oven and baked for 15 minutes. They were surprisingly very very good. I didn’t even complaints about the red pepper.

Making Taquitos #kidsinthekitchen

We’ll be making these again with a whole array of ingredients. Next time we’ll make pizza taquitos.

Come join me and my co-hosts, Sarah of Play to Learn with Sarah, Paula at Frosted Fingers and Sara at Sensibly Sara, each week linking up a post, new or old, that feature the theme Kids in the Kitchen. It doesn’t matter what you are doing as long as you are doing it together, enjoying it and learning something along the way.

You’ll find so many more ideas on the #KidsintheKitchen Pinterest Board.
Follow Melinda Babiak’s board #KidsintheKitchen on Pinterest.
#KidsintheKitchen Weekly Linky


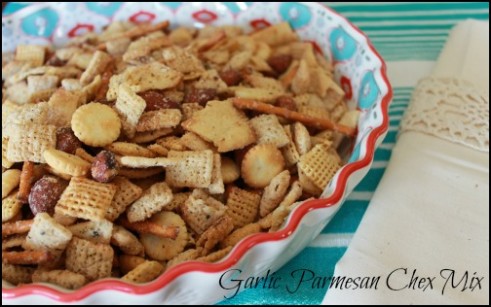
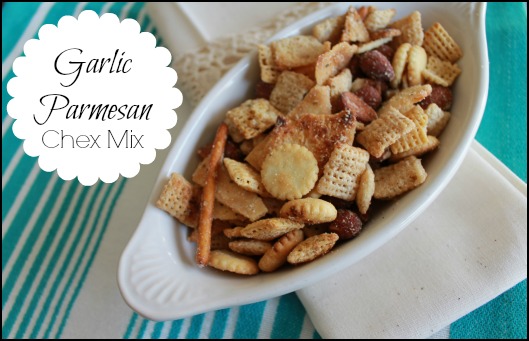
Making Garlic Parmesan Chex Mix

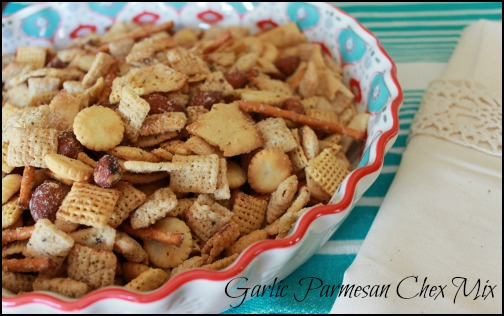
We’re getting ready for the holidays around here. The decorations are up, the baking has started and the gifts are piling up in their secret spot.  The kids are on a snack kick. Shaun is only ten but can eat like a man so I have to come up with new ideas. This Garlic Parmesan Chex Mix is a new snack mix that I prefer much better than chips or cookies.  And the best thing was he was able to make it pretty much on his own.Garlic Parmesan Chex Mix #KidsintheKitchen

 The idea for Chex Mix is simple, put together a bowl of related ingredients, add the flavoring and mix it up.  To get an extra crunch on savory mixes I like to toss them in oven for 10 minutes. For sweet mixes I like to pop in the fridge for the chocolate or caramel to harden up.

Shaun made this one for Rob because he knows his dad loves snacking food while watching tv. I like getting him in the kitchen helping out as much as possible. His attention span for cooking is short so I need to keep him busy. Chex Mix does the trick because there’s a lot of measuring and mixing he can do.  Stove work is ok too as long as I’m right next to him.

Ingredients

  • 2 cups Rice Chex
  • 2 cups Corn Chex
  • 1 cup broken bagel or pita chips
  • 1 1/2 cup pretzel sticks
  • 1 cup oyster crackers
  • 1 cup lightly salted, roasted almonds
  • 1/2 stick butter
  • 1/4 cup olive oil
  • 1/2 tsp salt
  • 1/4 tsp pepper
  • 1/2 tsp garlic powder
  • 1 tsp dried oregano, crushed
  • 1 tsp dried basil, crushed
  • pinch red pepper flakes, crushed
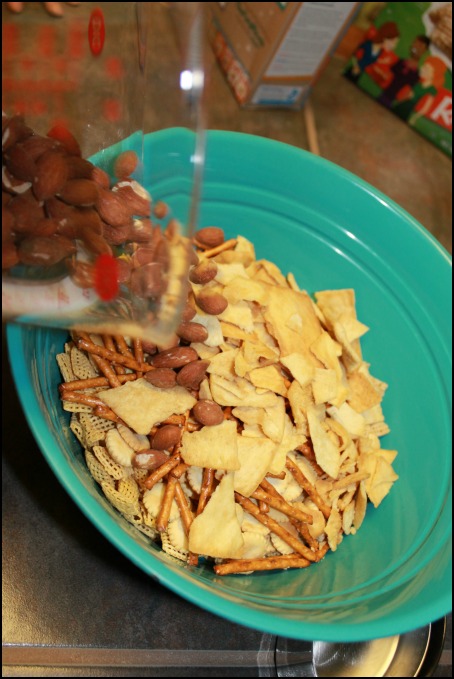
  • 3/4 cup grated parmesan cheesemaking chex mix #kidsinthekitchen

Directions

In a large bowl mix all of your snack ingredients.

making chex mix #kidsinthekitchen

making chex mix #kidsinthekitchen

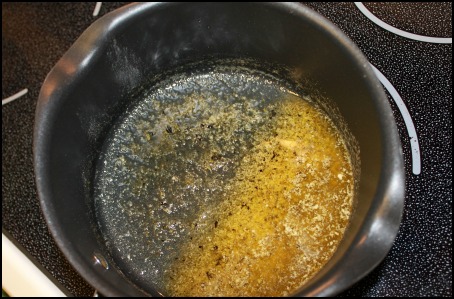
In a small saucepan over medium low heat combine butter, oil, herbs and spices and blend till hot but not bubbling.

making chex mix #kidsinthekitchen

Pour over snack mix and gently but quickly stir to coat. Sprinkle cheese over mixture and blend again till coated.

Pour onto a cookie sheet and pop into a 350° oven for 10-12 minutes.  Let cool then enjoy.

Garlic Parmesan Chex Mix #KidsintheKitchen

The beauty of these snack mixes is you can adjust the ingredients to suit your tastes. Adding popcorn, goldfish, bacon bits or even switching the nuts can make any snacker happy. The same goes for the flavors.  If you enjoy the rosemary over oregano, make the switch.

These are simple go to recipes especially for the holidays. Get your kids in the kitchen and get their hands dirty with some mixing, prepping and cooking.
Come join me and my co-hosts, Sarah of Play to Learn with Sarah, Paula at Frosted Fingers and Sara at Sensibly Sara, each week linking up a post, new or old, that feature the theme Kids in the Kitchen. It doesn’t matter what you are doing as long as you are doing it together, enjoying it and learning something along the way.

You’ll find so many more ideas on the #KidsintheKitchen Pinterest Board.

Linky Rules, #kidsinthekitchen

#KidsintheKitchen Weekly Linky


Subscribe to the #KidsintheKitchen Mailing List.

* indicates required


Email Format


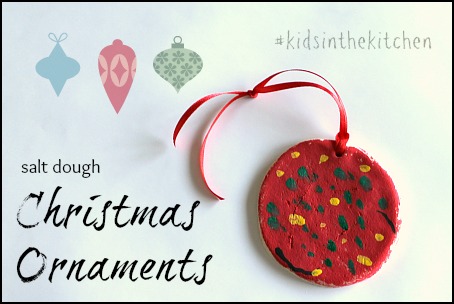
Salt Dough Christmas Ornaments

With Christmas coming up in less than 3 weeks Shae’s on a mission to get her ornament making in full swing. Salt Dough is so simple and versatile it only makes sense to make ornaments from them making it a great addition for #kidsinthekitchen. The final product is sturdy enough to last years.
Salt Dough Ornaments #craft #kidsinthekitchen
One tip when making ornaments and decor from the kids, write the date in a hidden spot so you know how long it’s been hanging around.

Salt Dough

Ingredients

  • 1 cup of flour
  • 1/2 cup fine salt
  • 1/2 cup slightly warm water
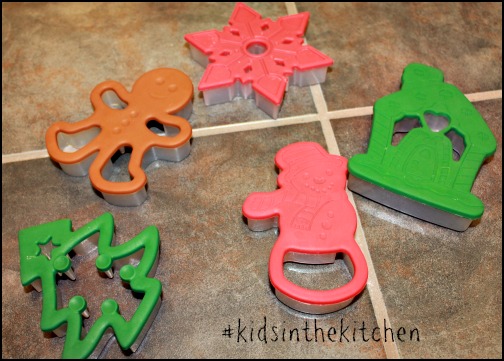
  • cookie cutters
  • rolling pin
  • Paint & brushes
  • ribbon or twine

Directions
Preheat oven to 250°.

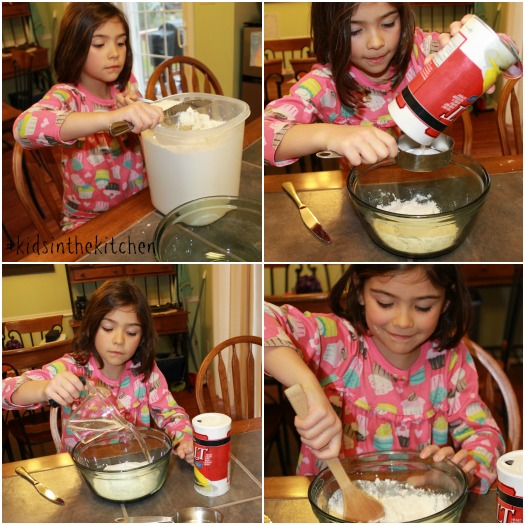
In a large bowl mix flour, salt and water until combined. Turn out onto a smooth surface and knead till smooth. Dough should be soft but not sticky. Add flour or water by the spoonful if needed to achieve the right consistency.

Salt Dough Ornaments #craft Salt Dough Ornaments #craft #kidsinthekitchen

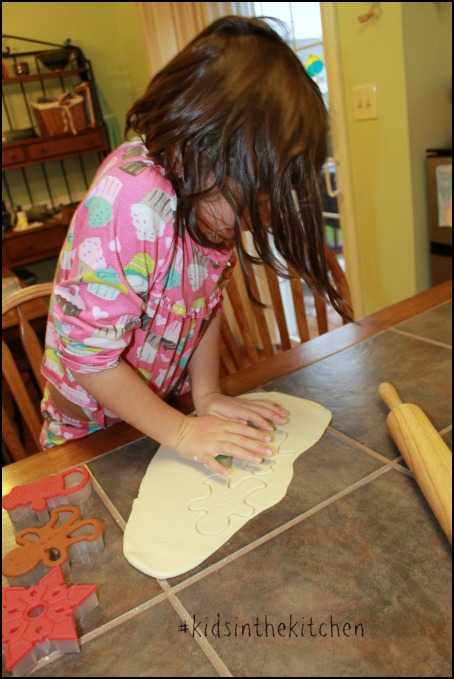
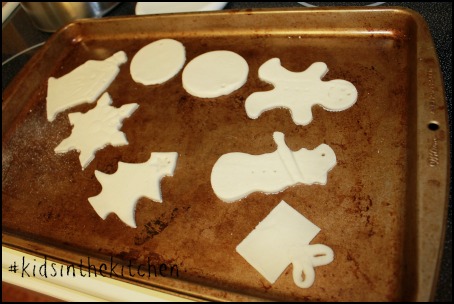
Roll the dough out to 1/4 inch thickness, cut with cookie cutters and place on cookie sheets. Use a toothpick to add hole for hanging and to emphasize details like smiles or eyes.

Salt Dough Ornaments #craft

Salt Dough Ornaments #craft #kidsinthekitchen

Bake for 2 hours. Remove from oven and move to a cooling rack for 1 hour.

Salt Dough Ornaments #craft

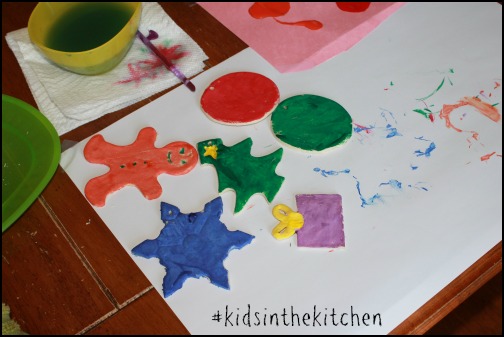
Your shapes are ready to decorate however your child pleases. Thread with ribbon and hang. Don’t forget to add your child’s name and the current year.

Salt Dough Ornaments #craft #kidsinthekitchen

These can be made in advanced and painted whenever the chance comes up. We gave some to my nieces on Thanksgiving so they could paint on their own at home.

Aside from removing from the oven Shae did everything thing by herself. You realized this doesn’t have to be a kid only craft.

Come join me and my co-hosts, Sarah of Play to Learn with Sarah, Paula at Frosted Fingers and Sara at Sensibly Sara, each week linking up a post, new or old, that feature the theme Kids in the Kitchen. It doesn’t matter what you are doing as long as you are doing it together, enjoying it and learning something along the way.

Linky Rules, #kidsinthekitchen

Find even more inspiration and ideas for your own home from our #kidsinthekitchen Pinterest Board.


Follow Melinda Babiak’s board #KidsintheKitchen on Pinterest.

#KidsintheKitchen Weekly Linky


Making Farro Risotto #kidsinthekitchen

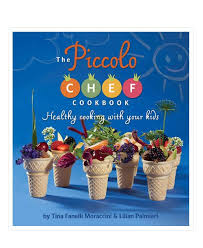
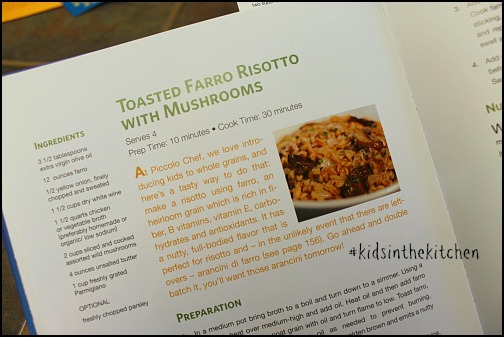
This week for #kidsinthekitchen we each are showcasing The Piccolo Chef Cookbook. We’ve chosen to create a recipe call Toasted Farro Risotto with Mushrooms. Farro is something we’ve never had before but thought it was a good way to introduce a new ingredient. Shae helped with MOST of the cooking. Risotto is a bit time consuming so Shaun lost interest after toasting the farro in olive oil.

Farro Risotto #kidsinthekitchen

“The Piccolo Chef Cookbook” was developed by the owners of the award winning cooking school in Los Angeles, California. Piccolo Chef was created by Italian mom-preneurs with a vision to make healthy eating attainable and fun for children of all ages and economic backgrounds. Their inspiration are their children, and teaching kids and parents the art of fresh cooking and reconnecting with one another through all phases of cooking, from garden to the table.

Shae on the other hand was by my side almost the entire time asking questions, tasting ingredients (raw onion), stirring, asking more questions and overall being the ideal sous chef.

Risotto is a straightforward process and this variation wasn’t very different. I adjusted some ingredients and left out others but we ended up with a very tasty meal that I would definitely try again. Farro wasn’t weird or gross, in fact in tasted like a cross between steel cut oats and brown rice just much larger in texture.Farro Risotto #kidsinthekitchen Shae and Shaun said it smelled like popcorn when it was toasting in olive oil.Farro Risotto #kidsinthekitchen I added some steamed broccoli to the finished product and added a blend of sauteed mushrooms, onions and garlic to the risotto.
Come join me and my co-hosts, Sarah of Play to Learn with Sarah, Paula at Frosted Fingers and Sara at Sensibly Sara, each week linking up a post, new or old, that feature the theme Kids in the Kitchen. It doesn’t matter what you are doing as long as you are doing it together, enjoying it and learning something along the way.

Don’t have a blog? Share an instagram photo or Facebook update.

Linky Rules, #kidsinthekitchen

#KidsintheKitchen Weekly Linky


Come join our #kidsinthekitchen Pinterest Board for more ideas, kid-friendly recipes and kitchen centered crafts and activities.


Making Bread Sticks with the Kids

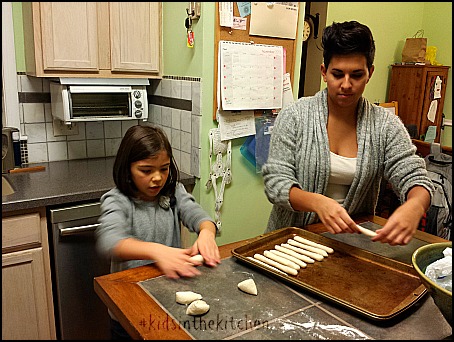
Family Dinners are becoming  little less frequent lately, at least in the traditional sense. Rob is coming home later and later due to work, I head out for a girls night out once in a while and Sabreena tends to work all weekend.  I’m using #kidsinthekitchen as an excuse to get the kids to help prepare dinner and make bread sticks.

Making Bread Sticks #kidsinthekitchen

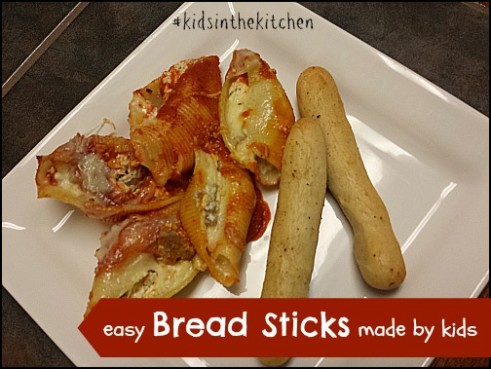
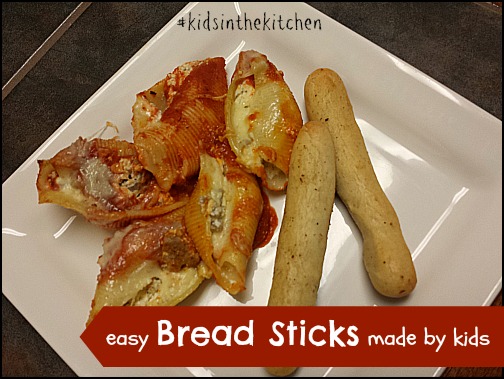
This week I prepared homemade stuffed shells. That means I boiled the shells and made the filling and stuffed the shells with the filling and baked them. If you’ve ever done this you know it’s a bit tedious. I then also decided to make homemade bread sticks.  This were simple. In fact we made these while the stuffed shells were baking.

Ingredients

  • 1 tbls active yeast
  • 1 tbls sugar
  • 1 1/2 cups warm water (100-110°)
  • 3-3 1/2 cups flour
  • 1 tsp salt
  • 3 tbls melted butter
  • 1 tsp garlic salt, Parmesan cheese or other seasoning of choice

Directions

Preheat oven for 400°

In a large mixing bowl combine yeast, sugar and water, allow to proof for 5-10 minutes.  Using your electric mixer’s dough hook mix in flour & salt till a smooth dough forms and pulls away from the bowl, about 4-6 minutes. Adjust your water and flour measurements a tablespoon at a time to get the right consistency. It should be slightly tacky but bounce back when touched.

(If you are doing this by hand start with a fork till mixture comes together and turn out in a floured surface and knead by hand for approx 10 minutes)

Turn your dough onto a floured surface and roll into a smooth ball and divide into 16 (long bread sticks) or 32 (short bread sticks) portions.

Roll each portion between hands into your desired shape and place on lightly oiled baking sheet.  Once all of your bread sticks have been rolled set them aside for a few minutes to rest.

Making Bread Sticks #kidsinthekitchen

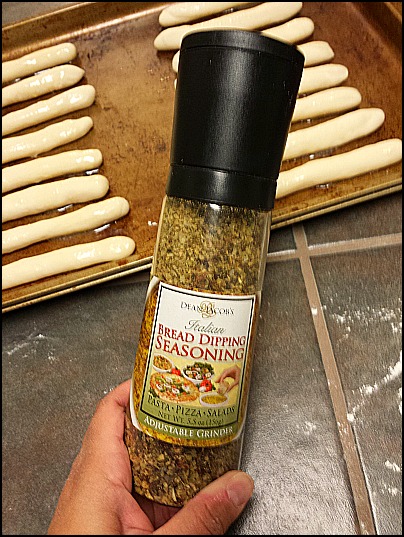
Once the bread sticks have grown a bit these are ready to “dress up”.  Brush them lightly with your melted butter then add the seasoning of choice.  Simple garlic salt is good enough but you can get fancy with rosemary and grated lemon peel or parmesan and oregano. I have this dipping oil mix that gets put on everything.

Making Bread Sticks #kidsinthekitchen

Bake in a preheated oven for 12-15 minutes until golden brown.  Serve warm with extra butter or dipping oil.

The kids are capable of doing just about everything on their own with this recipe. it’s a small enough batch that even the littlest hands can play with it easily. Make it more fun by letting the kids make shapes from the dough.  Heart shaped bread sticks make for a much more enjoyable meal.

Did you have fun in the “kitchen” this week? Did you try a new food or a new kid friendly restaurant? Did your littlest ones use their snacks to count to 10? We invite you to share your experiences, photos, stories or recipes that include your #kidsinthekitchen.

Come join me and my co-hosts, Sarah of Play to Learn with Sarah, Paula at Frosted Fingers and Sara at Sensibly Sara, each week linking up a post, new or old, that feature the theme Kids in the Kitchen. It doesn’t matter what you are doing as long as you are doing it together, enjoying it and learning something along the way.

Don’t have a blog? Share an instagram photo or Facebook update.
Linky Rules, #kidsinthekitchen

#KidsintheKitchen Weekly Linky


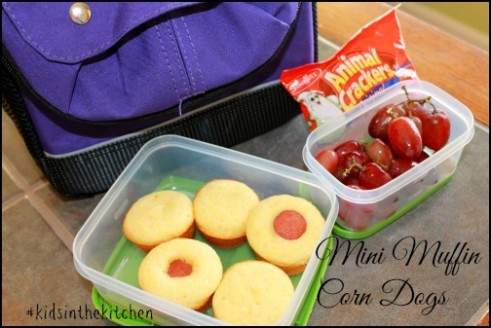
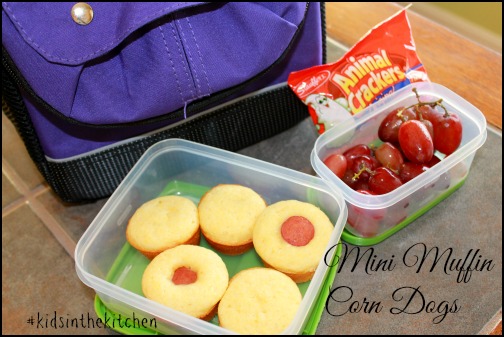
Making Mini Muffin Corn Dogs #kidsinthekitchen

“I’ll take the mini corn dogs please”. This has become Shae’s meal of choice at our favorite restaurant. At first I used to cringe at the thought but they weren’t that bad but I knew we could make them better.  This was Shae and Shaun could have them for school lunch, something very different than sandwiches.

Mini Muffin Corn Dogs #kidsinthekitchen

Using this packaged cornbread mix is definitely a shortcut. Honestly I’ve never been able to master homemade cornbread. Either the texture is off or the flavor is dull.  This one is very tasty and sweet so it’s nice match to the salty taste of the hot dog.

Mini Muffin Corn Dogs #kidsinthekitchen

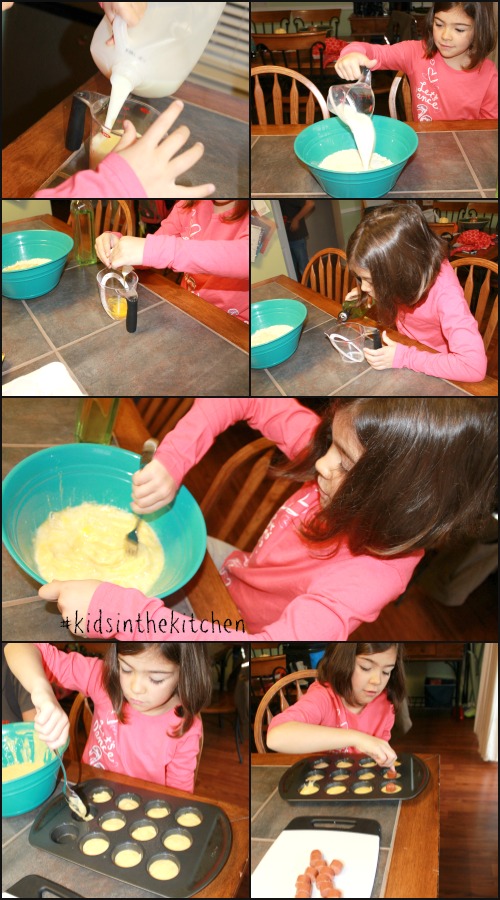
Shae prepared the muffin mix according to package directions and mixed it up.  I sliced the uncooked hotdogs into small bites.  As you can see she did most of the work, like usual.

As she was popping the hot dogs in the muffin mix she said “It’s like putting a cherry on top just different”.

After 22-25 minutes in a 350 degree oven they were done.  Package them up for lunches, snacks or even have for dinner.

Mini Muffin Corn Dogs #kidsinthekitchen

Shae likes her with honey mustard.

Did you have fun in the “kitchen” this week? Did you try a new food or a new kid friendly restaurant? Did your littlest ones use their snacks to count to 10? We invite you to share your experiences, photos, stories or recipes that include your #kidsinthekitchen.

Come join me and my co-hosts, Sarah of Play to Learn with Sarah Paula at Frosted Fingers and Sara at Sensibly Sara, each week linking up a post, new or old, that feature the theme Kids in the Kitchen. It doesn’t matter what you are doing as long as you are doing it together, enjoying it and learning something along the way.

Don’t have a blog? Share an instagram photo or Facebook update.
Linky Rules, #kidsinthekitchen

#KidsintheKitchen Weekly Linky


Candy Bar Chex Mix Recipe #kidsinthekitchen

My focus seems to be on snacks lately.  My pantry and fridge are full but nothing is grabbing my attention. Chex Mix to the day.  I love snagging a bag of Chex Mix at the grocery store and gobbling it down while watching a show with Rob.  The kids come home from school ravenous and are instantly digging through the pantry for a snack.  Since Halloween was around the corner they instantly ask for candy.  I’m not a mean mom but I really hate saying ok to candy. BUT I’m ok with making my own candy and letting them eat that.

Candy Bar Chex Mix is the creature that come from that wacky thought process.

Candy Bar Chex Mix #kidsinthekitchenWith $50 in hand, a list of ingredients a 1/2 page long and 4-5 recipe ideas in my head I went to the store to load up on Chex cereal varieties and all kinds of “toppings”.  Then once dinner was done and cleaned up Shae and I made dessert, Candy Bar Chex Mix. Making any kind of Chex Mix usually requires very little to no cooking.  For some mix-ups you’ll want some kind of liquid to coat the cereal and ingredients. For this particular recipe a caramel was made. Since making caramel can get really hot I did that part on my on.

Shae measured out and put all the dry ingredients in the bowl. I showed her 1/4 and 1/2 on the measuring cup so she could do it all by herself.  Mixing in the caramel was my job.

Candy Bar Chex Mix #kidsinthekitchen

Ingredients

4 cups Chocolate Chex

1/4 cup chocolate chips

1/4 cup white chocolate chips

1/2 cup mini marshmallows

1/2 cup butter

1/2 cup brown sugar

pinch salt (optional)

1 tsp vanilla

1 cup lightly salted peanuts

Directions

In a large mixing bowl add in cereal, chocolate chips and marshmallows, stir to combine and set aside.

Candy Bar Chex Mix

In a saucepan over medium heat melt down butter and brown sugar. Bring to a boil for couple minutes till it reaches 220°. Having a candy thermometer comes in handy but the mixture should have a foamy bubbly look and getting darker in color.

Remove from heat, add salt, vanilla and peanuts and stir.

Using a rubber spatula stir the cereal mixture as you pour the caramel on top.  Stir and stir until everything is coated. Some of the marshmallows and chocolate chips will melt, that is OK.

Once everything is combined pour this mixture out onto a sheet of foil or parchment that has been lightly sprayed with cooking spray.  Let it cool down.

Candy Bar Chex MixEnjoy slightly warm and messy or package up into treat bags to pop into the kids lunch bag or to give to the kids.

Candy Bar Chex Mix
Did you have fun in the “kitchen” this week? Did you try a new food or a new kid friendly restaurant? Did your littlest ones use their snacks to count to 10? We invite you to share your experiences, photos, stories or recipes that include your #kidsinthekitchen.

Come join me and my co-hosts, Sarah of Play to Learn with Sarah Paula at Frosted Fingers and Sara at Sensibly Sara, each week linking up a post, new or old, that feature the theme Kids in the Kitchen. It doesn’t matter what you are doing as long as you are doing it together, enjoying it and learning something along the way.

Don’t have a blog? Share an instagram photo or Facebook update.

Linky Rules, #kidsinthekitchen

#KidsintheKitchen Weekly Linky