RSS Email

5 Fun DIY Halloween Costume Ideas for Your Kids

Halloween means getting ready for the trick-or-treat shenanigans. Halloween costumes can get expensive and more often than not finding something that makes you and your kid happy can be difficult. Make your own costume or you’re thinking of a Harry Potter character costume isn’t difficult. Here are some ideas to help your kids make their own costumes.
 
halloween

1. Baby Shark Baby Costume

If you start singing as soon as you listen to Baby Shark, then you are well aware of how the tune had taken over the internet a while back. Dressing your kid up as one of the annoyingly funny Internet meme cultures can be a fun idea. Kids anyway look adorable in shark costumes.

All you need is:

  • Grey hoodie
  • Pink, white, and black felt
  • Hot glue gun and hot glue sticks
  • Grey footie pajamas

2. Donut Costume

Kids love dressing up as desserts. They also look adorable in them and most desserts are easy to replicate at home using felt and basic clothes. You can dress your kids in basic beige overalls and then for the donut – draw a circle on the cardboard, cut to shape, add tan or brown felt for the donut. Add other colors to glaze it to represent your kid’s favorite one. Add velcros to attach the pieces of cardboard donut to your kid and you are done.

All you need is:

  • Round objects to trace
  • Cardboard
  • Pencil
  • Scissors or Craft knife
  • Tan or brown felt
  • Hot glue gun and hot glue sticks
  • Self-adhesive Velcro squares
  • Fabric glue and paintbrush (optional)
  • Any other color paint or felt for the glaze or sprinkles (optional)

3. Dragon Costume

Dragons are somehow one of the favorite toys kids will play with, one of their favorite characters they will draw and want to be. It is actually easy to make a DIY dragon costume if your kid is okay with not going into too much detail. You can get a onesie in the color that your kid wants their costume to be.

Take bubble wrap and roll it into a tapered tail shape, you can also do that with cardboard and then cover it with felt but bubble wrap gives a more realistic feel. Use a duct tape the same color as the onesie and cover the tail with it to match the costume. Make spikes and attach the tails and spikes to the onesie or top and pants that you choose. You can also add face painting if you want.

All you need is:

  • Bubble wrap (or cardboard)
  • Color onesie or top and pants
  • Color Duct tape
  • Scissors
  • Self-adhesive Velcro

4. Unicorn Costume

Unicorn is one of the most popular mythical creatures especially for little girls who are in an all things glitter and sparkles phase. All this costume takes is an all-white outfit and a unicorn horn to make your kid happy. You can DIY the horn with some foam or by making a cardboard cone or felt cone stuffed with cotton and covering it in glittering then attaching it to a headband. Cut two ear shapes and attach them to the headband as well.

All you need is:

  • Off-white outfit
  • Cardboard or felt and stuffing
  • Glitter
  • Headband
  • Hot glue gun and hot glue sticks

5. Medusa Costume

If your kid is going for a costume party or a competition. This is one of the easy ways to make a creative outfit for cheap and with minimal efforts. No fancy crafting is required. Buy tons of plastic snakes and/or rubber snakes depending on how realistic you want it to look. Attach the snakes with zip ties or hot glue gun to the headband to make snake hair. Do the same for the neckpiece. Add some eye makeup and you are done. If you want you can spray paint the headpiece in a uniform color. Pair it with a dark gown and you are done.

All you need is:

  • A dark gown
  • Plastic snacks and/or rubber snakes
  • Zip ties or Hot glue gun and sticks
  • Headbands
  • Scissors

Final Thoughts

Making costumes can be a fun process. Make sure to involve your kids when you make their costumes. This gives them a chance to be creative and to wear their creations. When they are a part of the process, they feel proud of the costume and it makes Halloween more fun for them. Costumes are supposed to make you happy, putting efforts into their own costumes and watching their ideas come to life is sure to make your kids happy.


3D Paper Pumpkins #fall #crafts

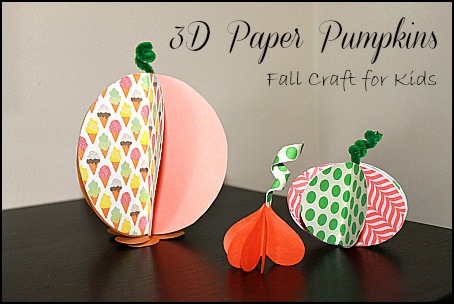
Creating crafts for the holidays is always fun. Giving kids creative opportunities to decorate and personalize anything they can get their hands on. Halloween and Fall is one our favorite times of the year to decorate. Black cats, bats, pumpkins, witches, ghosts and SO MUCH MORE can be used to highlight the season.3D Paper Pumpkins #fall #craft #kids
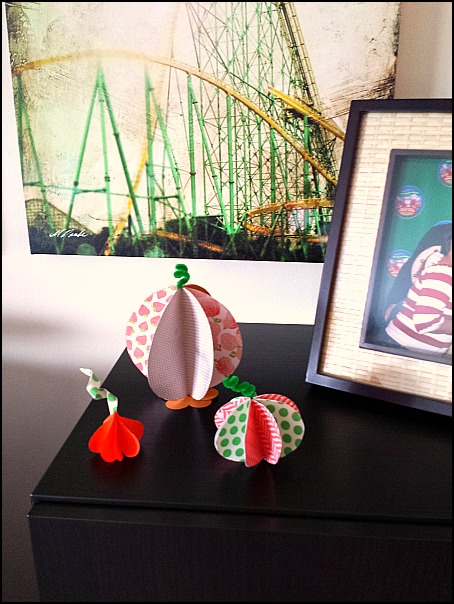
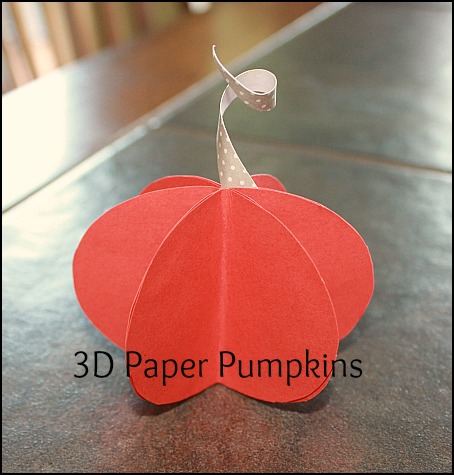
These paper pumpkins can stick around the house till Thanksgiving and they are easy to make using just 2 supplies, glue and paper. Embellishments can be added but definitely aren’t necessary.
3D Paper Pumpkins #fall #craft #kids
Supplies
6-8 paper shapes cut from cardstock or heavy weight paper per pumpkin
school glue
3D Paper Pumpkins #fall #craft #kids

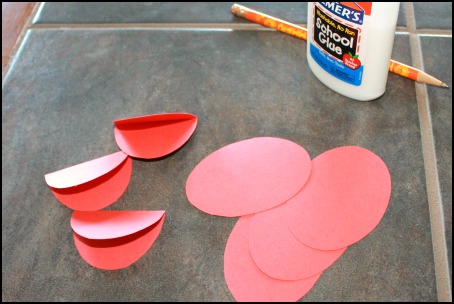
Getting the right paper shapes took some time to figure out. Circles seem like the best option but when put together it didn’t work well.  Trimming off a small clean edge will make them stand up straight or you can build a little base like I did out of scrap paper.

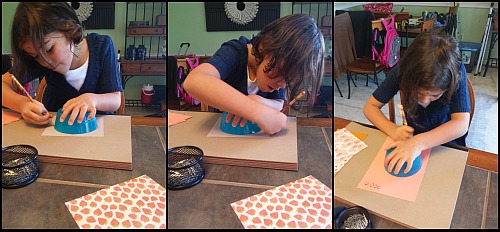
Shae traced bowls, fridge magnets and punched heart shapes on a variety of scrapbook paper and cardstock.  I prefer heavy paper because too much glue will make lightweight paper curl and bend easily. And when there are kids there is always too much glue.

3D Paper Pumpkins #fall #craft #kids

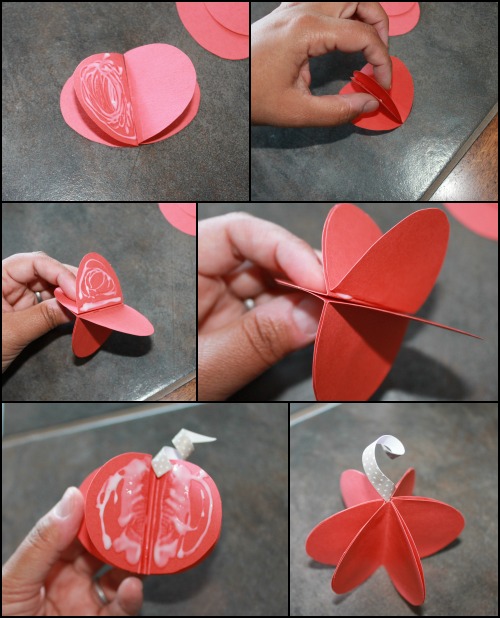
To start your pumpkin fold each shape in half. Using school glue attach the outside half of one shape to the outside half of another shape. Make sure they are lined up evenly.

3D Paper Pumpkins #fall #craft #kids

Continue until all the pieces are glued together and you have an accordion looking piece. Now add your pumpkin stem to the middle with a touch of glue. This could be a piece of pipe cleaner, a strip of curled paper, a leaf shape or anything else that comes to mind.

Now it’s time to close up your 3D shape. With a little bending and twisting arrange your pumpkin so the paper is evenly spaced. Set aside to let dry until you find its final display spot.

3D Paper Pumpkins #fall #craft #kids


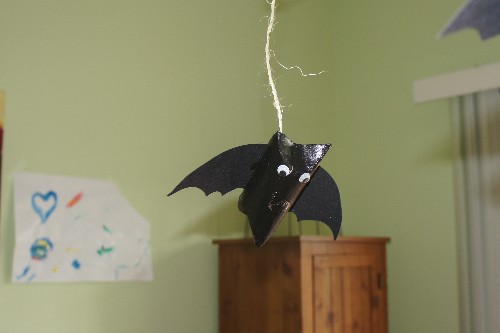
Halloween Hanging Bat Craft

It’s Halloween and I knew I needed to step up the crafting.  I looked at what we had on hand and figured I could do something with the random toilet paper rolls I had been saving.  I only save a couple at a time but I know they come in handy.

halloween-kids-craft-bat

hanging halloween bat

Halloween Bats
toilet paper rolls (or paper towel rolls cut in half)
black construction paper or foam or cardstock for wings
black paint, we used acrylic but poster paint would work well
googly eyes
glitter glue pens
string, twine or fishing line to hang finished bats

craft-supplies-halloween-bat

get your supplies ready and wings cut

Start off with covering your work area. I know paint is washable but I still like to put something down to protect my dining table. I use scrap cardboard most of the time because it dries fast and can be reused then tossed when it’s too gross.

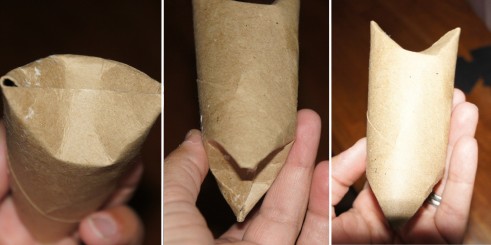
As you can see from the picture below the tube ends need to be folded a certain way to establish the looks of bat ears and the bottom.

folding-toilet-paper-roll-bat-halloween

folding your toilet paper roll

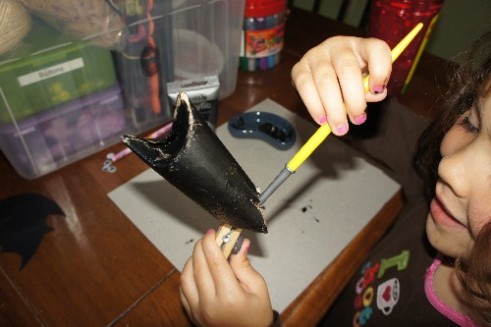
Paint your toilet paper roll. I had Shae unfold the ends to paint it thoroughly but quickly folded them back down before it dried. This helped with the overall look; no brown peeking out.

painting-toilet-paper-roll-halloween-bat

shae uses a clothespin to hold wet painted bat


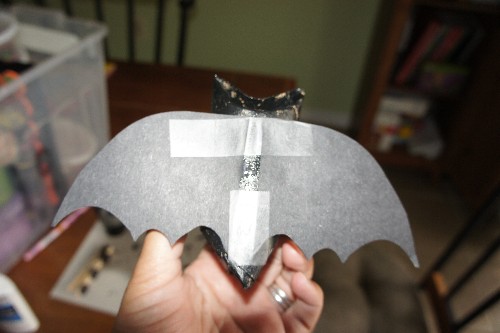
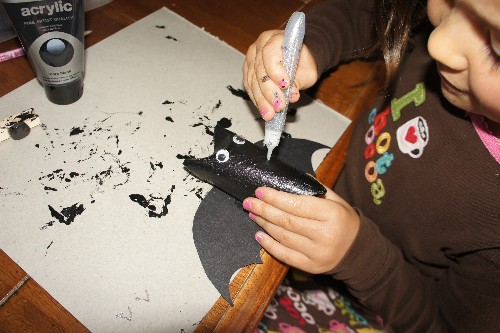
Once your bat is dry ( 15 minutes with acrylic paint) add dabs of glue to secure wings( cut from black paper) and googly eyes. Shae then used a silver glitter pen to add fangs. A red glitter pen would be good too if you want a more spooky bat with blood dripping fangs.
bat-wings-halloween-kids-craft

tape adds a little more security to glued wings


glitter-glue-fangs-halloween-bat-kids-craft

fangs all by herself

Once everything is completely dry and secure punch a little hole near the wings and hang from your desired spot. We use our dining chandelier a lot. I used twine this time because I liked the rustic look. Fishing line would disappear and make your bats look like they are floating.

Share your Halloween kids crafts!


I Disclose