RSS Email

5 Key Tips to Host the Ideal Get-Together

There are so many ways to amp up your get-together but a couple of key points can really make or break any party. Whether you’ll be entertaining a large group of friends or having a last-minute impromptu party, you need to take care of certain things. Given below is a list of such key tips so that you end up hosting a successful get-together.

Cheap and easy finger food recipes

Not many people emphasize this but serving food can take up a lot of time and kill your opportunity to enjoy the party. So, make sure you optimize the food-serving process because a lot of the hosts end up not being able to get a taste of what they made.

Try serving snacks in the snack bags to avoid having to transfer them in bowls and cleaning them. Furthermore, you could try using a muffin tin to take out condiments to the backyard. A six-pack carrier also works fine as an outdoor dining kit. Plating the food properly is also important because that could make the food look and taste better.

Also, read Easy-to-Make Snacks Recipes to Try Out

Stock Up On Snacks

Always store extra snacks at hand because you never know how long the party might go or if someone doesn’t get enough food. Standard snacks like chips, dips, and crackers along with simple and easy dinner items for quick recipes are recommended. If your pantry is well-stocked, then you could easily host an impromptu party as well.

Good Music And Lighting

Nothing else will set the mood for the party like good music and of course, the lighting. Decide what ambience and vibe you want from your get-together and select songs for your playlist accordingly. If it is a backyard get-together, then you could use LED deck lights. For interiors, custom color-changing lights or twinkly lights would rejuvenate the setting. You could also sync up the music with the lights.

Keep The Bathroom Tidy

You might think that this is a simple thing but you’ll be surprised to know how often people forget to do this no-brainer task. While hosting a party, you can be very certain that the guests will be using the bathroom at least once. So, if the bathroom looks dirty or stinks, then that could be a real let down for the guests. Quickly freshen up the restroom for your guests and you could amp up the mood by placing a candle and a small flower vase somewhere.

Don’t Forget To Have Fun

Hosts can often forget to share the spirit of the get-together while getting way too engaged in managing it. Some hosts will even wish for the party to get over even before it starts. So, keep a plan ready and even if things go wrong, don’t fret. You tried your best and let’s admit it, we can’t control everything. Rather than allowing a trifling matter to ruin your efforts, it’s better to enjoy yourself at the party.

Bottom Line

Those were our top tips to host the perfect get-together. And while you’re at it, do not forget to keep a check on your party budget because it makes no sense to overextend yourself. Follow these tips and your friends and family will be all praises about your classy get-together for weeks.

Host the ideal get-together


4 Tips for Making the Most of Your Ikea Visits

Window shopping can be more treacherous than you think. Most people visit stores without being aware of the common traps laid for them by the store management. Brands like Ikea know how to convert a naive visitor into a regular shopper. However, no other brand except Ikea offers premium furniture at such a low rate. Hence, it is difficult to overlook them. 

Here Are a Few Tips to Make the Most of Your Ikea Visits

1) Use a To-Do List App 

When shopping for furniture, it is essential to have to list of items you want to purchase. Even if you are heading to the store just to window shop or check out the items, it’s best to know what to look for. Or else, you might end up buying things you don’t want. 

Ikea is very smart about the positioning of items in their store. They are aware of window shoppers and know how to convert them into customers. To avoid impulse buying, download and install Google Keep, a to-do list app. 

2) Head Over to the As-Is Section

For extreme frugal shoppers, Ikea has a separate area in the store known as “the as-is section. This section is usually located somewhere near the cashier or the check out area. All returned, slightly damaged, scratched, or experimental furniture is kept here–for sale at low prices. 

Frugal shoppers should head over to this area instead of walking around the huge Ikea store. I don’t think a lot of people will mind having a tiny scratch on the seat of the chair if they are offered a 60-70 percent discount. Especially, if they are going to use that chair someplace other than the living room.

3) Use Your DIYing Skills

Instead of purchasing one expensive item, create something useful with a combination of 2-3 cheap items from Ikea. You will find a lot of videos on YouTube on this topic. By doing this, you can also satisfy your need for creativity. Plus, you will have something in your home this is unique and unseen.

4) Make the Best of IKEA’s Rewards Programs

You can unlock the rewards program by becoming a member of the Ikea family. As an Ikea family member, you get to save money, save your precious time and also skip all the hassle that comes with buying furniture. 

You can also save a lot of money on food by eating in the Ikea Restaurant. Ikea offers it’s members a more than 20 percent discount on it’s most popular dishes. Plus, the more you spend, the more rewards points you rack up–which can be used later to claim a discount.

One point lesson on quality

The reason why Ikea is so popular among the frugal shoppers is that they sell the best-looking furniture for a discounted price. The quality of furniture may not be the best, but when it comes to price, Ikea best all it’s competitors. Hence, it is crucial to make think twice before buying items from Ikea. You only want to buy the items that can last longer than a year.


What is the American Dream? How to Live It?

The American dream is an ideology conceived by the founding members of the nation. It is an ethos that characterizes age-old values like democracy, rights, liberty, opportunity, and equality. American historian and writer defined the American dream as “life should be better and richer and fuller for everyone, with opportunity for each according to ability or achievement”. 

The country has stood strong since July 4, 1776. A lot of people give credit to the American dream for the success of the nation. However, there few who doubt the credibility of this concept. Many believe that the American dream is a lie perpetuated by the rich to enslave the poor and middle class. 

Work hard, get a college degree, get a job, buy and house, continue to pay mortgage till you retire in your 60s, and finally, live rest of the life on savings. For some, the tried and tested, beaten path works great, but there are plenty who fail to live up to society’s expectations. But how do you live the American dream? Is there a set structure that one can follow?

The Best Ways to Live the American Dream

1) Succeed With Hard Work and Determination

Hard work and determination are two major principals of the American dream. This is possibly the only country on earth where hard work and determination alone are enough for a person to reach the greater echelons of life. Just have a look at the number of self-made millionaires in this country– Do Won Chang, Oprah Winfrey, Tai Lopez are some recent ones.  

2) Have a Progressive Mindset

Having a progressive mindset requires one to accept and acknowledge more than one beliefs, values, and cultures. It is common for a person to develop a narrow and fixed mindset when they are surrounded by people of the same religion, ethnicity, financial status, caste, and creed. By letting new information flow in your brain you can break the same old pattern. Irrespective of your political affiliations, it is key to always look and move ahead in life. 

3) Get a College Degree

The American dream is incomplete without earning a college degree. Contrary to popular belief, a college degree is not a waste of time and money. It can turn out to be that way only if you do not make the most of your time in college. A college education is intended to prepare you for the road ahead. It enables you with the essential skills, knowledge, and expertise that is essential in the real world. 

4) Become a Homeowner

Apart from the fact that owning a home is one of the best investments you can make, there are several hidden benefits of homeownership that most people are not aware of. According to a report by the U.S. Census Bureau, the average home prices have nearly quadrupled since the year 1940. The value of an average home leapfrogged from $30,600 in 1940 to $119,600 in 2000.

People who represent the american dream

A lot of negativity is surrounded by some people about the American dream. The ones who don’t make it or the ones who want to seel products to the vulnerable and unfortunate people usually spread such stories. Despite all that, the American dream is still cherished and accepted in the nation.


3 Easy Christmas Craft Project Ideas To Try With Your Kids

Christmas is the perfect opportunity to spend quality time with your family and make cherishable memories! While you can have fun with your kids in a million different ways, but there are some exciting indoor ideas too. Bring in the holiday spirit by joining your little ones for a Christmas craft project for kids.

Christmas ideas for 9 year old

Snowflake Popsicle Ornaments

Christmas is incomplete without decorating your Christmas tree with some sparkly ornaments. So, how about we make some on our own? All you need for this craft project are some Popsicle sticks, string, glitter, shiny decorations, and any other decoration of your choice.

Color the Popsicle sticks with a couple of your favorite colors, or you can even use the Christmas themed colors. Now, glue the sticks together to create the shape of a snowflake. Then create a twine using a string and glue it to the back.

Decorate with your kids using glitters, stars, stones, and pompoms. And hang this beautiful masterpiece on a branch of your Christmas tree.

Pinecone Christmas Trees

This is the easiest Christmas craft project you’ve ever come across. So much so that you can even have a 3-year-old try this out. Moreover, it looks super chic when you place it on a side table as a Christmas decoration item.

To gather the supplies, you just need to go out into your backyard to collect some pine cones. Also, grab some wooden slices lying here and there. Now, the kids can paint the cones with solid green acrylic color.

Leave it for drying and once it is completely dry, make snow on the branches by painting the tips of the cone white. Next, add tiny colorful dots on the leaves of the tree. These will work for the Christmas tree lightings. Finish it off by placing a star on top of your pine cone Christmas tree.

Sock Snowman

Do you want a cute little snowman sitting on your table? Let’s make one! For this easy craft, you need a white sock, a colored sock, a handful of rice, elastic bands/threads, buttons, ribbons, and pompoms.

First, fill in the sock with rice, then tie the top with an elastic or a thread. Now, grab another elastic and tie the middle of the sock to form the head and body. Then, glue some colorful buttons to his body in a line and draw his mouth and eyes with a marker.

You could also add some pinkish cheeks and make his nose out of orange-colored pom poms. Then, you can glue a ribbon piece to its neck for a scarf and cut out the excess of the white sock. For the hat, you need to cut the foot of a colored sock and roll it a little bit. Now, secure it on the snowman’s head with some glue.

Final Thoughts

Regardless of whatever you and your kids decide to do this Christmas, the most significant thing is you spending time with them. What more could anybody have asked for? So, give outdoor activities a bit of rest and get on with those creative crafty ideas!


Utility And Stylish Bags And Accessories For Every Mom

Life gets busy being a mom. Especially, if you are a working woman, taking care of your appearance is probably not on your priority list. Carrying the right bag and accessories does wonders to your outfit and you don’t have to burn your pocket to look good and chic. Utility bags come in style and take your style quotient up a few notches. Right accessories with basic clothing, make you pretty and a few years younger.

Classic leather or canvas tote

A mom’s best friend is a nice looking, suave tote that comes with many compartments and fits in everything. From solid colors to patterns, your choice is not limited only to a few designs or colors. Stay stylish being a busy mom. It only takes a few minutes to choose the right accessories for any outfit. Get glamorous with motherhood and put all the woes on the shelf, will ya? You have a reason to smile and throw around some chic tidbits in style, and dust off the weariness running around chores with visually stunning choices. 

Trendy shades with color tints

Shades are chic and never go out of style. Cat-style, oversized, aviators, pop, or funky frames, wear them right that goes well with the outfit and mood. A unique cut-out frame, colors that put a smile on your face on a sunny day, is just the accessory you need to style your outfit. Bold, funk, suave, or quirky, pick a style for the occasion and the mood and who said, moms can’t have all the fun.

Earrings for everyday

Studs and hoops are common and are available in the most uncommon motifs and varieties. Drops, clusters, and jacket earrings for the classy style. Get minimalistic with the threader earrings that go well with almost every outfit. A nice pair of earrings go well with formal, party, and informal outfits. The minimalist fashion you want to adopt is a style of earrings that suit your couture, color and style of outfits. 

Victorian barrette clips and hair accessories

Ornate victorian barrette clips are great for a tea time or a soiree with your girlfriends. Chit chat in style and do away with all the itsy-bitsy details off your shoulders. Handmade victorian barrette clips are the best. Mom and daughter pair of sweet and decorative hairbands and clips are adorable to adorn. Bows, clips with pearl, crochet detail, and any embellishment you may please. Glitter might look like a faux paus, it’s left in the bygone shelf of pre-teen life, unless you want to please your daughter and get chummy on a special occasion in unison. 

Classic looking watches for women

Time in style? Time to change the strapped wrist watch and add some vigor, sheen, and glamour. A basic outfit and a lux, or an ornate wrist watch with victorian motifs is the minimalist fashion at its best. Antique, metallic straps, studded details, beaded, or vintage straps, you have it all. Make your time interesting letting go off the boring matte strappy wrist watch. Add the trinkets letting go off the leather. The good feeling you get making that small change? Priceless. 

Scarfs, sashes, belts, and hats

Printed silk scarfs, textured or embellished sashes for the empire line of a sheath or a summer dress. Waist belts and hats add a fun element to any dress. Berets, summer hats, bandana or turban style keeps the hair intact and raises your style quotient a few notches up. Leather, denim, silk, textured fabric belts and sashes anyone? 

Charm, beaded necklaces, and more

Styling in an elegant necklace with beads, charms, shells make your outfit a hit. Metallic chokers for formals, is never passe or a faux paus. Look that makes you look bold or elegant is the magic created by the necklace style you choose. Layered necklaces go well with all ages and are timeless pieces that style any outfit, formal or informal.

Comfort and style in shoes

Talking of comfort, sneakers come to your mind first, doesn’t it? Sneakers in mellow colors with all the gears right in place when you are all on the run to get things done. Then comes the time to unwind, and you throw in a pair of wedges for holiday brunches, laughter, and fun times. Sassy peep-toes with extra cushioning for a night out with nice music and cocktails. With some bling on and a sheen smile. Sandals for casual walks or an errand with mute colors, nothing flashy, really.

Western boots are timeless. Easy to wear without a lot of zipper or strappy details. They look chic on most of the casual and semi formal outfits. A good option for the working mom who is always on the go and wants to look chic too. Ankle boots shall reign the footwear style for long. The small heel and ankle length make them suitable for most of the clothing, a blend of comfort and style. 

Stylish and utility jackets

Cargo, denim, and utility jackets are a must inside a mom’s wardrobe. Cargos are lightweight with many pockets and zippers making life easy for a busy mom. A blazer or a dress jacket keeps you warm and stylish during the cold seasons. A t-shirt, denim, and a blazer, a simpatico style every mom can adorn. Woolen leggings, a shirt and a jacket when you have to go out and about. 

Water resistance, fabric, finishes

These are the features to keep in mind when buying a jacket for a busy day. It is essential to have at least three styles of jackets for various occasions. Picking up kids from school, workmode, casual dinners, nighouts, all can get dressier and chic with an add-on of jacket. A knock-off would be an easy pick, but it is good to focus on the style of hemlines and finishing touches when choosing one for a long run. 

Conclusion

Moms can look chic at any age. With a little time spent making that perfect choice of accessories, you give yourself a big smile and a boost of confidence walking a sassy gait in haute chic and style. Choose the right set of accessories, and viola! You have already taken over the world.


3 Simple And Fun Christmas Recipes to Try Out With Your Kids

The Christmas vibes are here and you need to prep your kitchen to make all the tasty Christmas treats. And what better way to bond with your kids than cooking some kid-friendly delicacies with them? Here are some tasty recipes to satiate your sweet tooth and have a fun time in the kitchen with your kids.

Fun Christmas treats to make with toddlers

1. Christmas Tree Brownies

These cute Christmas Tree Brownies will light up your child’s face like anything. You need to set the stage by preheating your oven to around 180°C. Now, line a cake tin with baking powder.

Keep it aside and grab a bowl. Beat some sugar and eggs to make them light and fluffy. You could also ask your kid to help with this. They might create a bit of mess doing this, but honestly who cares!

Now, add some flour, butter, vanilla, and cocoa powder to the bowl. Again, your little one could pass the ingredients to you. Beat them until they all come together. Then pour this batter into the cake tin.

Wait for about 25 minutes as the cake gets baked. Once done, cool the cake and make wedge-shaped slices out of it. Now, you and the kids can pipe out some green icing on the cake slices to make them look like Christmas trees.

Decorate them further with sprinkles, stars, and pearls. And don’t forget to stick in a rice cracker at the bottom to make the tree stump.

2. Reindeer Cookies

Christmas isn’t complete without reindeers, right? So, let’s make some chocolate reindeer cookies with the toddlers. First, you need to grab a bowl and whisk some flour, salt, and baking soda.

Take a saucepan and place some butter, water, and brown sugar in it. Stir it on low flame until the butter melts. Remove from the flame and add some chocolate chips into the mixture. Now, add this into the flour batter along with some eggs and vanilla extract. Stir them all until combined well.

Let it rest and meanwhile preheat the oven to 350°C. Make small dough balls and place them on a tray lined with a greased baking sheet. Flatten the dough balls and bake them for 12 to 14 minutes.

Now, put your kids to service and ask them to coat the cookies with chocolate. Then, make reindeer faces on them with the help of candy eyes, peanut butter cup snouts, pretzel antlers, and M&M noses. For the final touch, pipe out the mouths of the reindeers.

3. Snowman Marshmallow Pop Sticks

What could be yummier than white chocolate and marshmallow? These snowman sticks are easy to make and delicious to devour. Start with melting white chocolate on a bowl placed over simmering water. Once done, stir it thoroughly with vegetable oil until its texture is smooth.

Now, take a skewer and push 3 marshmallows into it. Then, dip them in the chocolate until coated properly and drip off the excess.

After that, decorate the marshmallow sticks with M&Ms to make eyes, buttons, and nose. Lastly, make the snowman’s mouth with licorice.

Final Thoughts

Creating Christmas titbits with your kids could be a really fun activity to laugh, bond, and eat together. But, be careful while cooking with children. Make sure you do not allow your child near the stove, oven, or any sharp object. Allow them to do easy tasks like decorations and mixing. This way they will be able to enjoy the tasty recipes without hurting themselves.


Teaching Your Child Their ABCs

Teaching Your Child Their ABCs

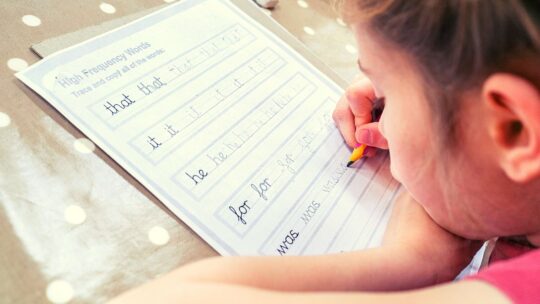
For toddlers, the world is their oyster. Everything they come across sparks their curiosity. For them, the world is their classroom, and everything is their teacher. They love learning new things, and if they can put it to use, then better.

It is really easy to get toddlers interested in new concepts. So far we have talked about fun ways to teach them various things like identifying colors, learning about shapes, playing with numbers and counting, the only fundamental thing left is the alphabet.

Make Them Learn Their Name

Getting them interested in learning letters is really easy. All you have to do is play off of their curiosity. Start by teaching them how to read or write their name. You can have their name on their toys and their bedroom door and teach them to recognize the letters.

Knowing how to read and write their own name is one of the accomplishments that they cherish when starting out. This motivates them to learn your names, and then their toys’ names, and then everything else’s as well.

  • Point to the letters while saying them out loud. This will help them associate the letter to its sound.
  • Group things that begin with the same letter so that the association for the letter grows stronger.
  • Point out street signs and let them identify as many letters as they can and help them with the rest.

These are some practical uses that can excite them. One thing that I have learned is that kids get more excited to learn about things when they can use it somehow and showoff to the adults. So, if you can show them the uses of the things they are learning, they will catch on pretty quickly.

Make Them Read

Now that they know they will be able to spell out their name and read their favorite candy store’s name, they will be more interested in learning the letters. 

  • Make sure to point to the letters, teach them to read by placing their finger under the letter or word as they read so that they connect the sound to the letter. 
  • Make sure to speak slowly and enunciate every word and letter clearly as they will imitate what we say.

Help them read their own bedtime story. Start with their favorites and help them read along. Get picture books or help them make their own by following the same tips we talked about in the learning shapes post.

How to make a game of your own

Letters are one of the basic knowledge partings we give our children. You can teach them their alphabet by starting with their name. Help them label their things. Hangs a letter chart in their bedroom. Let them group their things that start with the same letter. Make a game out of learning.


How to Make Your Own Pegboard for Your Children’s Bedroom

How to Make Your Own Pegboard for Your Children’s Bedroom

A pegboard is usually used as a display/storage structure in most garages. But, it doesn’t have to be limited to only industrial use. It can be used in your home as well. Pegboards are a really great way to use your cute stationery as decoration while giving them a home of their own. 

If you have a playroom or an arts and crafts room – someplace where your kids play the most and do arts and crafts activities, this is a great way to use vertical space and also add some functional decor.

The stationery you get for your children are anyway colorful and more of a statement piece in themselves. Give them a moment on the wall. Let them shine. Here’s how to make a pegboard on your own.

Materials You Will Need:

  • Plywood
  • Tools (jigsaw, power drill, drill bit)
  • Wood Glue
  • Chalk Paint and a Paintbrush 

You can also get a proper pegboard if you do not want to make it from scratch.

Pegboard headboard ideas

STEP 1: Measure Your Plywood

Start by measure the area of the wall you want to cover with your pegboard. Use this measurement to mark out the plywood.

STEP 2: Cut Your Plywood

Cut the plywood to the measurement required. You can use a jigsaw, which is a power tool. You can also use a hand saw, but that will take a lot of your time and energy.

STEP 3: Drill Holes to Hang Your Organizer or Dowels

You now need to mark out where you need the holes to go. Mark them out at equal distances and then use a power drill to cut out the holes.

STEP 4: Glue the Dowels and Organizers to the Board

You can glue some of the dowels and organizers to the board so that they are sturdy. If you are going to changing things up, then you can glue in just the dowels that will hold things that you do not want falling. The organizers can be hung using hooks as well.

STEP 5: Hang It Up

You can drill the pegboard onto the wall so that it stays nice and secure. Start by drilling and securing the four corners and then add additional in the centers to ensure the security.

BONUS: Decorate!

Just because it is a functional decor piece in itself, it doesn’t mean that you cannot bring in some decor elements to up the wow factor. There are so many things that you can add, here are some examples and tips:

  • Add some greenery with some hanging plants.
  • Hang some pictures or quotes or posters.
  • Throw in something bright at random intervals.
  • Display your child’s artwork.
  • Use some of your child’s old toys as decorations.

Final Thoughts

Making your own pegboard isn’t difficult but is going to need power tools. You can buy readymade pegboards and then create the organizers yourself. A pegboard lets you have all your supplies on display. They are easily accessible, easy to maintain, and also make use of the vertical space. 

A pegboard can help your child be creative with the supplies and the decorations. With the things on display, they will reach for different things more often. You can decorate it with plants and memorabilia to add some personality.


Fun Activities with your Family

Who doesn’t like spending some quality time with one’s family? With our busy schedules, we hardly manage to get any time to be with our families. Moreover, even if we get time, we tend to go out with our friends, or mostly waste time on our mobile phones. But, it is essential to bond with our families, especially given the present scenario. That’s why here is a list of fun activities we can do with our families, and hence, spend some quality time together.

Ways to have fun with your family

List of activities to do for fun

  • Gardening:

Though gardening can get tiring after a while, it is one of the most fun activities to do with your family. It is exciting to work together and build a garden, but it also helps you learn new skills and inspire you to grow your own vegetables and flowers.

  • Playing indoor games:

You can arrange cards, board games, puzzles, and other indoor games to play with your family. Isn’t this fun? You can play in groups and bond over the match, or also, do little indoor tournaments of your own. It would be more exciting if you add a small prize for the winning team.

  • Painting Walls:

One of the most exciting ways to bond together and bring out your artistic side, is by painting the walls. You can spend the day painting vibrant colors on the walls or trying out spray paints. Also, you can try painting some butterflies, too.

  • Watching Movies:

Nowadays, most families have subscriptions to Netflix or Amazon Prime, and even if you don’t have any, you can always rent a movie or watch one on YouTube. Wouldn’t it be fun to make some popcorns, dim the lights and watch a film together with cushions everywhere?

  • Arranging picnics on the lawn:

You can definitely arrange for a nice little picnic, just outside your home, on the grass. It would be nice to lie around, basking in the sun, having sandwiches, and remembering old days with your family.

  • Cooking a nice dinner:  

One of the most exciting chores, in my view, is preparing a nice warm dinner with your family. All of you can divide the tasks among yourselves, and trust me, too many cooks won’t spoil the food. But, too many laughs would definitely make the entire dinner fun.

  • Jamming to Retro Music:

Music definitely cheers everyone’s mood up and makes the day brighter, isn’t it? Once in a while, you all can jam on retro music and play instruments together. Also, arrange for a disco ball and bright lights. Undoubtedly, it would be one of the most happening parties ever.

Fun activities are always exciting, and it becomes much more enjoyable when they are done with your family members. For instance, any action, baking a cake or taking a stroll in the neighborhood, becomes fun if you are with your family. Hence, switch off your mobile phones and spend some amazing moments with your family, and you are going to cherish them throughout your life.


Top 3 Biscuit Recipes

Are you craving those delicious biscuits from your favorite bakery? Is your coffee break missing some accompaniment on the plate? Well, worry, not! We have some awesome home-made biscuit recipes that you can try out today!

Biscuit Recipes

Biscuit recipes easy to make

#1 Easy Plain biscuit

For our first easy-to-make biscuit, you will need the following ingredients,

  • 3 cups all-purpose flour
  • 3 tbsp sugar
  • 1/2 tsp salt
  • 4 tsp baking powder
  • 1/2 tsp cream of tartar
  • 3/4 cup cold butter
  • One egg
  • 1 cup whole milk

Directions: 

  • First of all, preheat the oven to 450 degrees.
  • Next, put in all the dry ingredients in a large bowl and mix well.
  • Use a pastry cutter to cut out the butter. It is important to note here that the butter should be cold. Once you are done making small pieces of the cold butter, put them into the dough and incorporate them nicely.
  • Now, add in the milk and egg. Mix well until the ingredients have adequately combined. The dough should be sticky by now, and the butter pieces should be visible in it. 
  • Once your dough is ready, spread it on a counter or kitchen top sprinkled with flour. Sprinkle some more flour on top and knead well about 10-15 times. 
  • Now, pat out the dough to about 3/4 – 1-inch in thickness and cut it with a biscuit cutter or glass. It is up to you to decide how many pieces you want to cut out, depending on what size you are choosing. 
  • After that, place them on a lightly greased baking sheet or parchment-lined baking sheet and bake for 10 to 15 minutes or until golden brown on top. 
  • Finally, brush it off with some molten butter.

Your biscuits are ready for tasting!

#2 Peanut-butter Biscuit

This is a really simple recipe with only three ingredients,

  • 250 g crunchy peanut butter
  • 200 g light brown soft sugar
  • One medium egg

Directions:

  1. At first, preheat the oven to 180°C (160°C fan). 
  2. Now, line two baking sheets with baking parchment. Beat all the ingredients together in a medium-sized bowl until they have combined well.
  3. After that, scoop out tablespoons of the mixture and roll them into balls. Arrange on the prepared sheets, spacing apart. Press down with the back of a fork to flatten them slightly. 
  4. Now, bake for approximately 12 minutes. Next, leave them to cool on the baking sheet for about 5 minutes. Wait for them to cool out completely.

The peanut-butter biscuits are ready to be served!

#3 Chocolate Mini Egg and Cornflake Biscuits

The ingredients you will need for this recipe are, 

  • 100 g butter (very soft)
  • 100 g light brown muscovado sugar
  • 75 g caster sugar
  • One large egg
  • 1 tsp vanilla extract
  • 175 g plain flour
  • 1/2 tsp bicarbonate of soda
  • 100 g milk or dark chocolate chips
  • 25 g cornflakes
  • 125 g mini eggs

Directions:

  1. First, in a large bowl, beat butter and sugars, using a handheld electric whisk until it becomes light and fluffy. Now add in the egg and vanilla, followed by the flour, soda, and chocolate chips, until they have combined well. Chill the mixture for 30 minutes to allow it to set.
  2. Now line three baking sheets with baking parchment. Put the cornflakes into a bowl and crunch them with your hands. Roll the dough into golf ball-sized balls, along with the cornflakes, and place them spaced out on the lined sheets.
  3. After that, flatten out each ball slightly with the palm of your hand and press the mini eggs on top of them. Chill them again for about 15 minutes.
  4. Now, preheat the oven to 190°C (170°C fan) and bake for 15-20 minutes, until they turn golden. Cool them out entirely on the sheets.

Your mini-egg, chocolatey delight is ready to be munched!

Final Words

So, what are you waiting for? Get-set-baking today!