RSS Email

Double Chocolate Cupcakes with Pink Buttercream #kidsinthekitchen

The kid’s and I have been chatting Valentine’s Day desserts this week. They have off of school on the 14th so I said we could make something special.
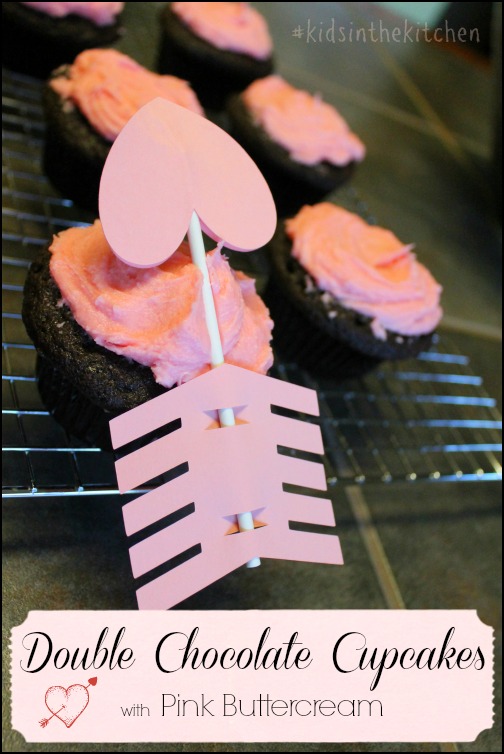
Double Chocolate Cupcakes with Pink Buttercream #kidsinthekitchen #valentines #arrow

We made a test batch of these Double Chocolate Cupcakes with Pink Buttercream and Arrow decorations. They are adorbs! The icing was done with a butter knife by Shae so it isn’t fancy but it’s handmade.

Here is the recipe for cupcakes & icing.

Double Chocolate Cupcakes

  • 2 ounces bittersweet or semi sweet chocolate
  • 1/2 cup butter (1 stick)
  • 3/4 cup flour
  • 1/2 cup unsweetened cocoa powder
  • 1 tsp baking powder
  • 1/4 tsp salt
  • 1/2 cup sugar
  • 1/4 cup brown sugar
  • 2 eggs
  • 1 tsp vanilla extract
  • 1/2 cup buttermilk

Preheat your oven to 350° and prep a 12 muffin cups with liners.

Gather all of your ingredients, measured and ready to use. If you don’t have buttermilk now if the time to make some. In a measuring cup add 2 tsp of lemon juice or white vinegar and fill to the 1/2 cup line with milk. Let this sit for 5 minutes till thick and curdled.

In a microwave proof bowl melt the butter and chocolate in 30 second increments till smooth and shiny. Set aside to cool.

In a large bowl whisk together the flour, cocoa powder, baking powder and salt till thoroughly combined. Set aside.

In the bowl of your mixer with the whisk attachment combine sugars, eggs and vanilla till silky smooth. Slowly add in the butter/chocolate mixture till combined.
Add the remaining ingredients, flour mixture & buttermilk half at a time and mix just till combined. Doing the final mixing by hand ensures you won’t over mix the batter. You’ll have a very thick batter, one that resembles brownie mix more than cake batter.
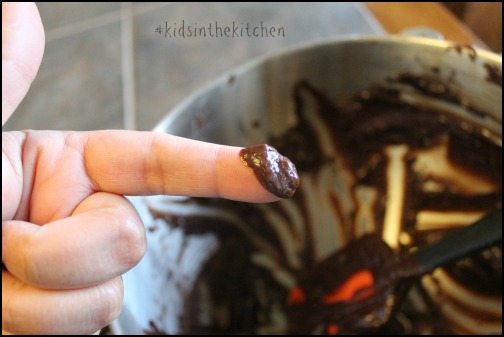
eating cake batter #kidsinthekitchen
Evenly scoop into muffin cups and bake for 17-19 minutes. A toothpick should come out with specks of crumbs.

Remove from oven, set aside to cool for 5 minutes then transfer cupcakes to cooling rack.

Let come to room temperature before icing.

Simple Buttercream Icing (easily doubles or triples)
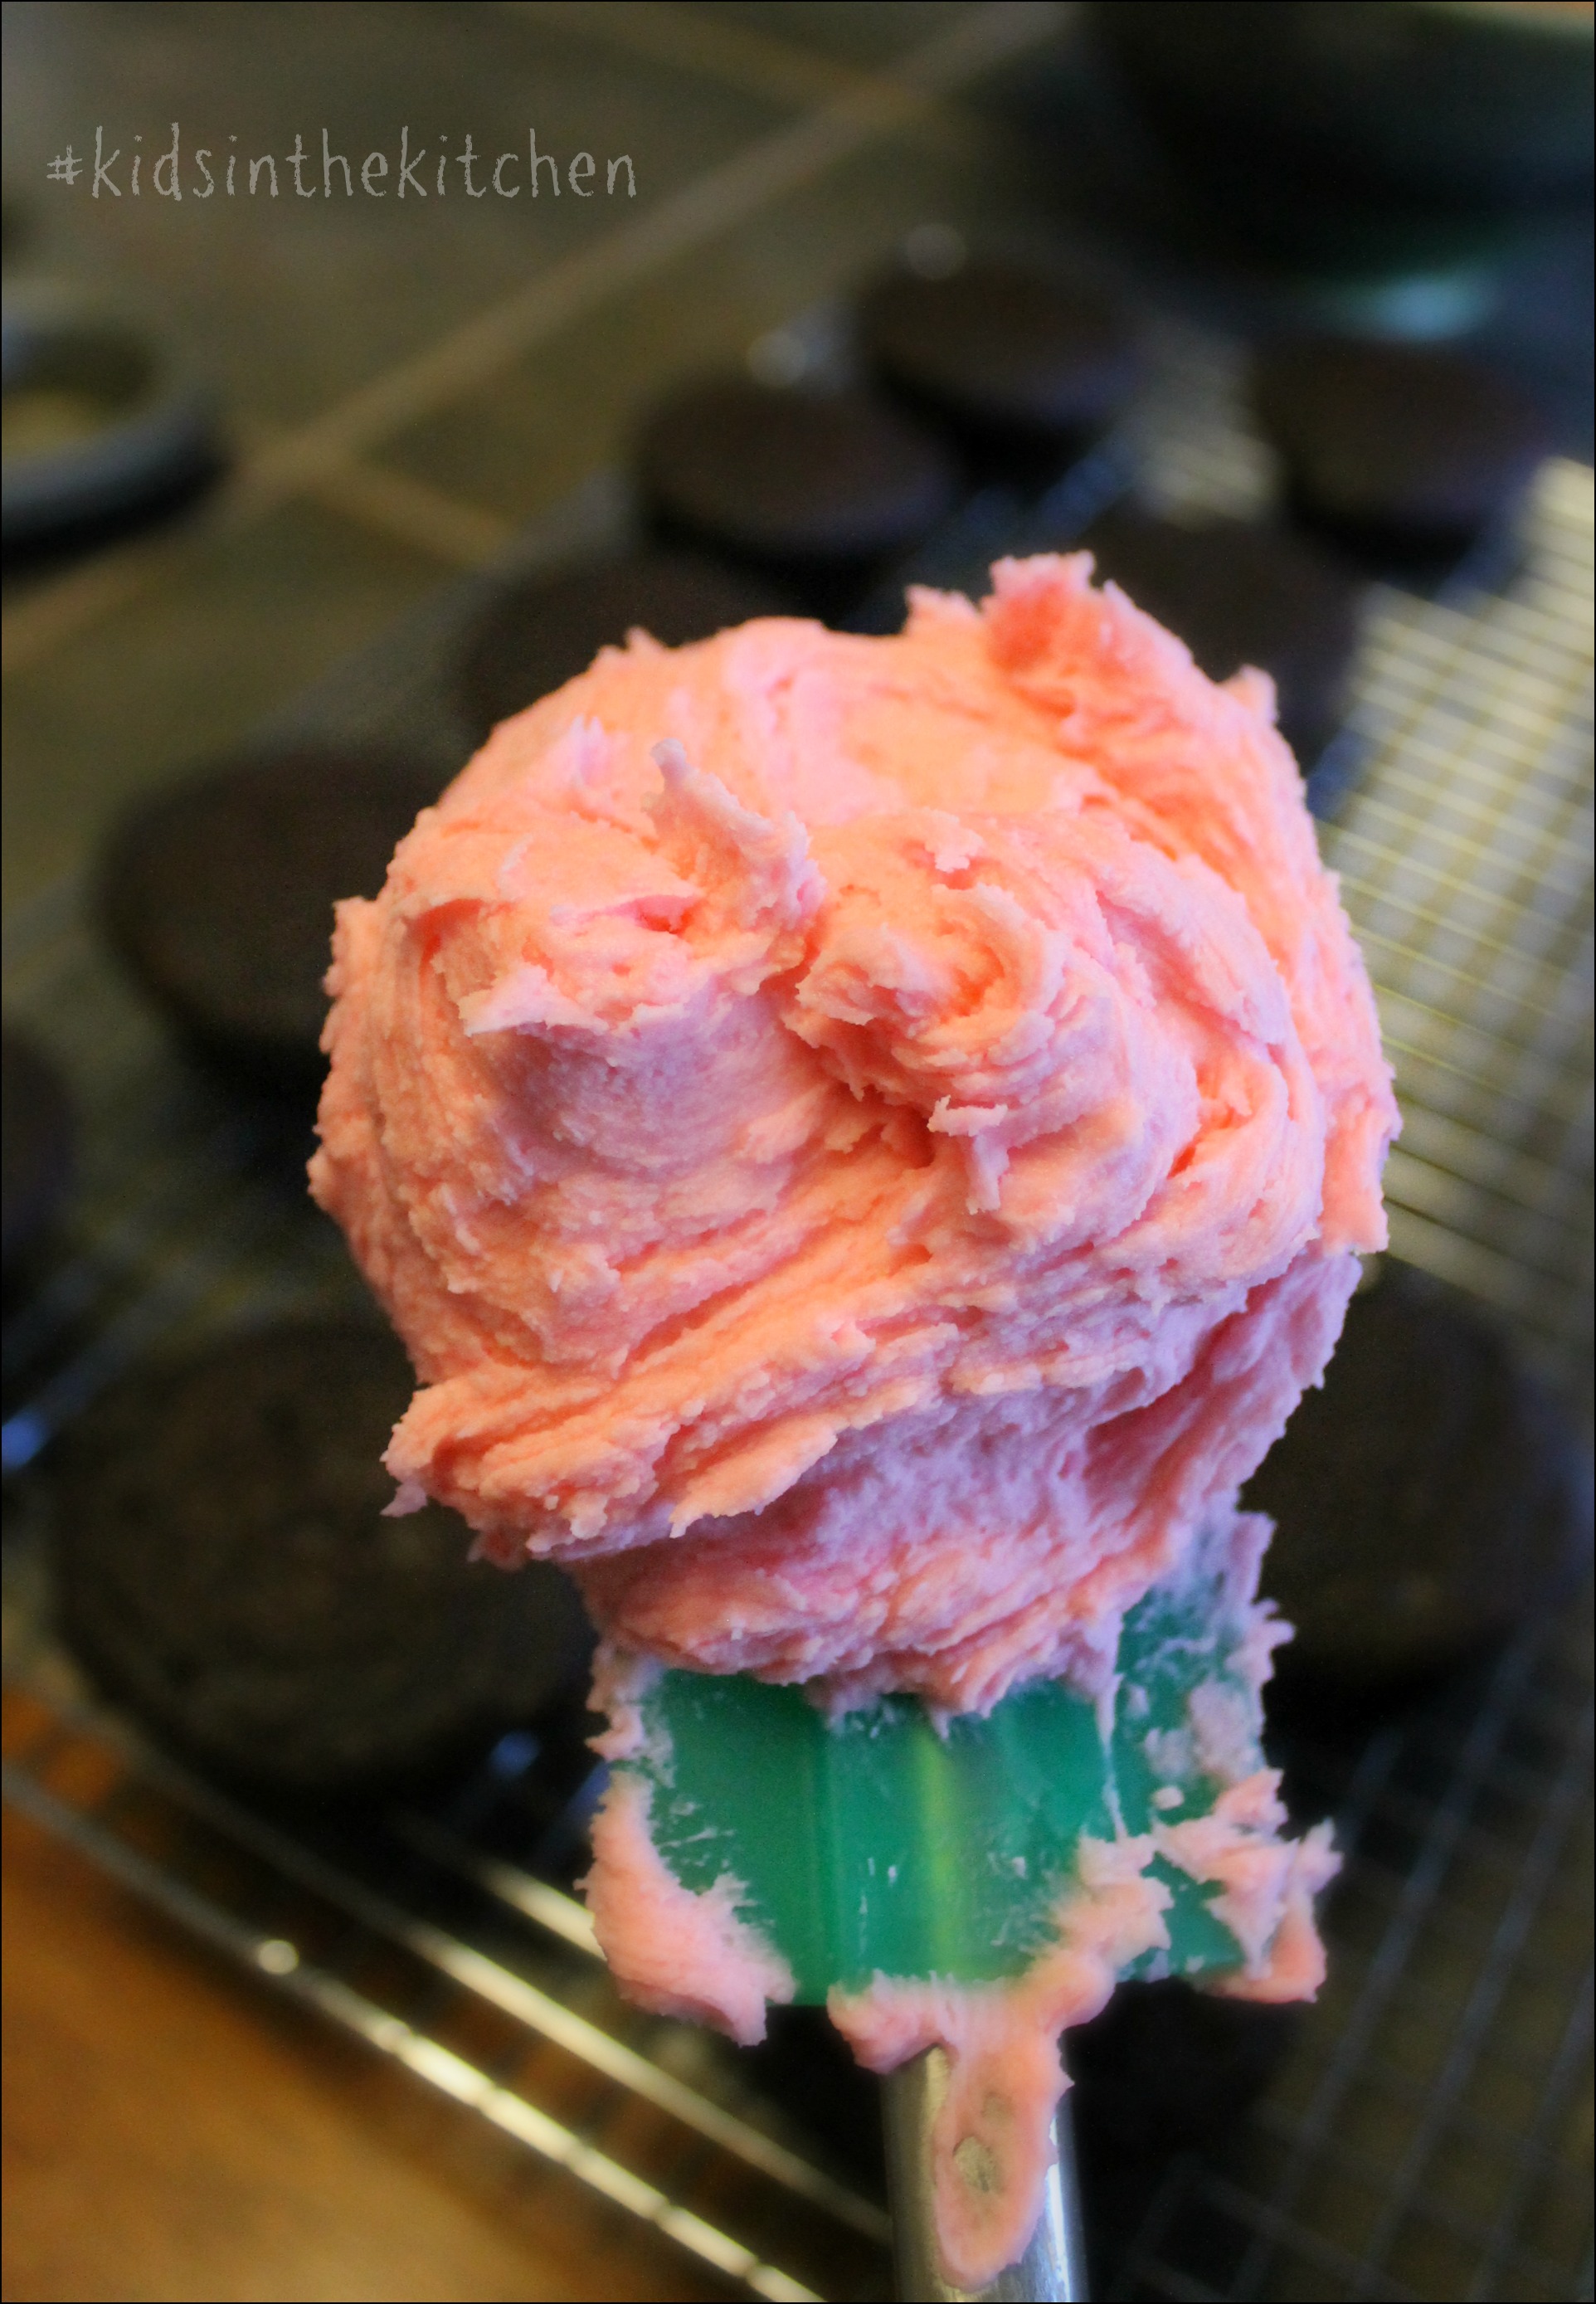
pink buttercream #kidsinthekitchen #valentines

  • 2 sticks softened NOT MELTED butter
  • 4-5 cups confectioners’ sugar
  • 1 tsp vanilla
  • pinch of salt
  • 2-3 drops pink food coloring
  • 1-2 tbls heavy cream

Mix all of your ingredients except for heavy cream with a paddle attachment on your mixer until you achieve smooth consistency. Slowly add cream 1 tbls at a time for a soft frosting. Your icing should not be stiff but not runny. If you add too much cream add in more sugar a couple tablespoons at a time.

Ice you cupcakes with a piping bag and tip or keep it rustic and family style with just a warm butter knife.

Decorate as you wish and share with your loved ones.

Come join me and my co-hosts, Sarah of Play to Learn with Sarah, Paula at Frosted Fingers and Sara at Sensibly Sara, each week linking up a post, new or old, that feature the theme Kids in the Kitchen. It doesn’t matter what you are doing as long as you are doing it together, enjoying it and learning something along the way.

You’ll find so many more ideas on the #KidsintheKitchen Pinterest Board.
Follow Melinda Babiak’s board #KidsintheKitchen on Pinterest.
Linky Rules, #kidsinthekitchen

#KidsintheKitchen Weekly Linky


Making Fortune Cookies, Chinese New Year #kidsinthekitchen

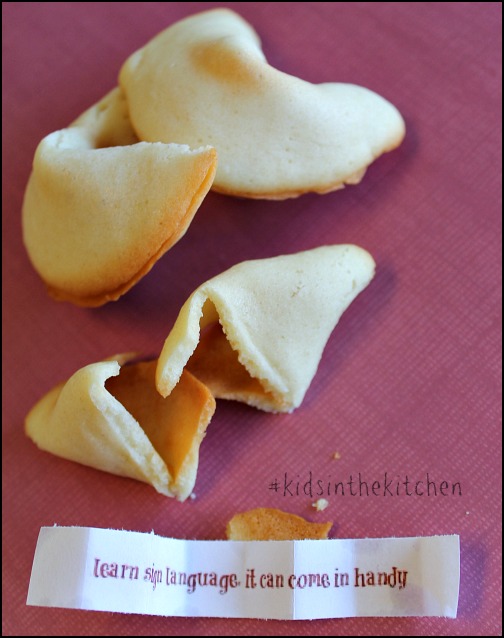
Today is Chinese New Year. It’s the Chinese culture’s most important celebration as it is a time for family reunion. Our plan was to celebrate with a fun food activity, making Fortune Cookies.Making Fortune Cookies #kidsinthekitchen
What I thought was going to be a fun group activity was way wrong. There was nothing kid friendly about it. In fact I should’ve just left the kids out of the kitchen. Things weren’t as “easy-going” as YouTube made it out to be.  The kids did help with the fortunes and cutting them and folding them and adding them to the scorching cookie as I tried to fold them.

Fortunes in a Fortune Cookie #kidsinthekitchen
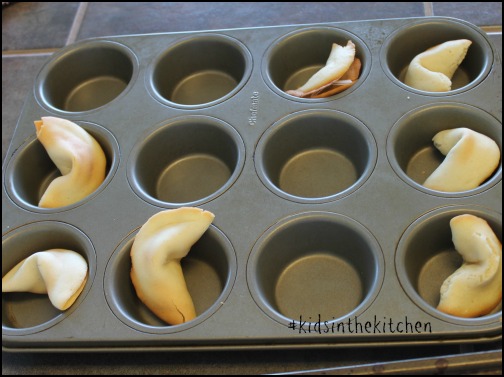
We started off with a very simple cookie batter recipe then I had to spread 2 circles of batter on a cookie sheet and bake for 12 minutes. That turned out to be the longest 12 minutes ever.  As soon as they came out of the oven they had to be handled, bent, shaped and stuffed with a fortune. These babies were HOT. Sabreena was using her sweatshirt sleeves so she didn’t burn her fingers. I was using silicon oven mitts. I always hear about chefs having “asbestos fingers”, I guess I’m nowhere near that level.

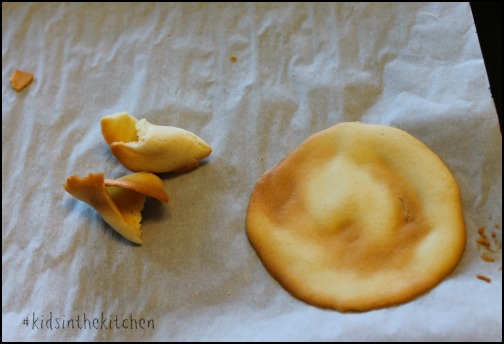
Making Fortune Cookies #kidsinthekitchen Sabreena and I thought we had it under control and put 4 circles of batter in at once to speed up the process. We had 2 casualties that time. One cookie that didn’t take on a very good shaped and one that never made it off the baking sheet.

Making Fortune Cookies #kidsinthekitchen Was it fun? YES. Will I ever attempt it again? Probably Not. Best part though is they tasted really good.

Come join me and my co-hosts, Sarah of Play to Learn with Sarah, Paula at Frosted Fingers and Sara at Sensibly Sara, each week linking up a post, new or old, that feature the theme Kids in the Kitchen. It doesn’t matter what you are doing as long as you are doing it together, enjoying it and learning something along the way.

You’ll find so many more ideas on the #KidsintheKitchen Pinterest Board.

Follow Melinda Babiak’s board #KidsintheKitchen on Pinterest.

Linky Rules, #kidsinthekitchen
#KidsintheKitchen Weekly Linky


Homemade Baked Soft Pretzels #kidsinthekitchen

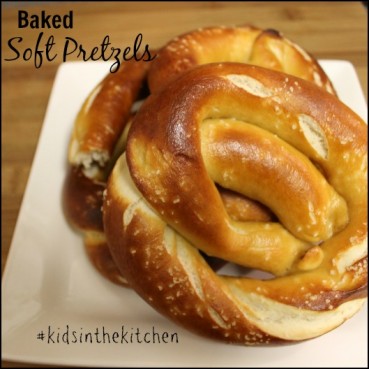
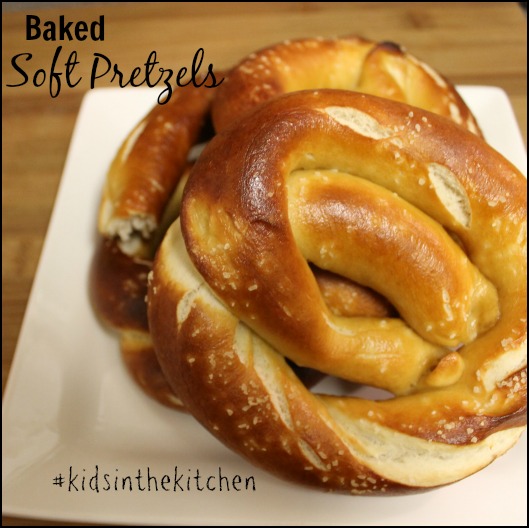
With all the snow we had this week i vowed it would be a a baking week. Shae said “YAY” and Rob said “Nope, not for you”.  Her poor little spirit was crushed. Ok, it really wasn’t, she knew he was kidding. I decided on a couple of things but this is what turn out successful. Baked Soft Pretzels.Baked Soft Pretzels #kidsinthekitchen

Soft Baked Pretzels were made and they will be made again and again and again. They were THAT good.  The whole process wasn’t hard. As with just about any recipe where dough is used it’s a long process but so worth it. Next time we are doubling.

Baked Soft Pretzels #kidsinthekitchen

We followed Alton Brown’s Homemade Soft Pretzel recipe from 2007 to a tee, no adjustments, no modifications, just as he posts it here.  Watch Shae roll out and shape the pretzels all on her own. We ate them while they were still hot with spicy brown mustard and honey mustard.

Baked Soft Pretzels #kidsinthekitchen

Come join me and my co-hosts, Sarah of Play to Learn with Sarah, Paula at Frosted Fingers and Sara at Sensibly Sara, each week linking up a post, new or old, that feature the theme Kids in the Kitchen. It doesn’t matter what you are doing as long as you are doing it together, enjoying it and learning something along the way.

You’ll find so many more ideas on the #KidsintheKitchen Pinterest Board.
Follow Melinda Babiak’s board #KidsintheKitchen on Pinterest.

Linky Rules, #kidsinthekitchen

#KidsintheKitchen Weekly Linky


Valentine’s Day Thumbprint Heart Cookies

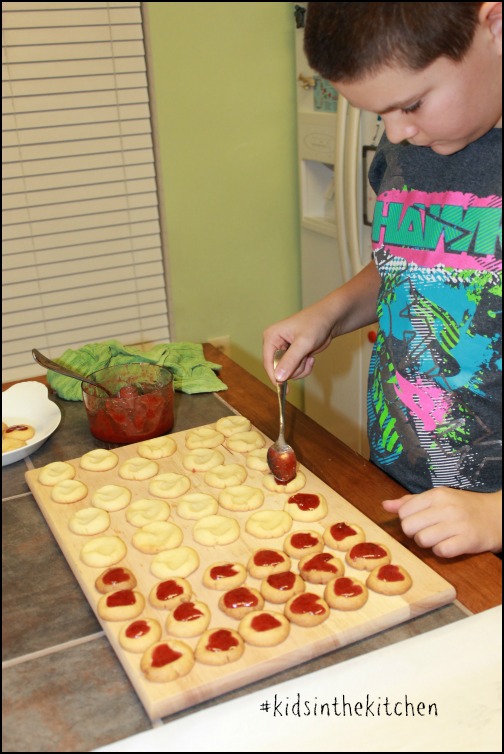
To wrap up our week of Valentine’s Day themed crafts and activities we’re showing off our Thumbprint Heart Strawberry Preserve Cookies. As you’ll see Shae and Shaun didn’t really use their thumbs but Fingerprint cookies don’t have the same ring to it.

Strawberry Jam Heart Thumbprint Cookies

We started with a simple soft cookie dough.

Ingredients

  • 1cup butter, softened
  • 2/3 cup sugar
  • 1tsp vanilla or almond extract
  • 2 egg yolks, room temperature
  • 2 cups flour
  • 1/2 tsp salt
  • 1/2 cup strawberry/raspberry jam or preserves

Directions
In bowl of stand mixer combine butter and sugar till fluffy then add vanilla and eggs, beat till smooth.

Add flour and salt and blend till combined. Set aside in fridge for 1 hour to chill.

Form 1inch balls of chilled cookie dough and place on parchment covered baking sheet .

Strawberry Jam Heart Thumbprint Cookies

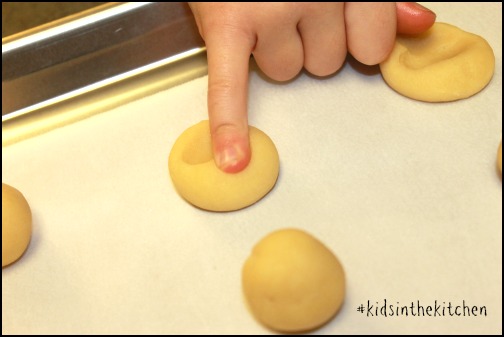
Using fingers press a heart shape into the cookie dough. Reform edges if needed.Strawberry Jam Heart Thumbprint Cookies Bake at 350 degrees for 12-15 minutes or until golden brown. Fill with 1/2 tsp of favorite jam.

Strawberry Jam Heart Thumbprint Cookies
Cool and enjoy.

Come join me and my co-hosts, Sarah of Play to Learn with Sarah, Paula at Frosted Fingers and Sara at Sensibly Sara, each week linking up a post, new or old, that feature the theme Kids in the Kitchen. It doesn’t matter what you are doing as long as you are doing it together, enjoying it and learning something along the way.

You’ll find so many more ideas on the #KidsintheKitchen Pinterest Board.
Follow Melinda Babiak’s board #KidsintheKitchen on Pinterest.

Linky Rules, #kidsinthekitchen

#KidsintheKitchen Weekly Linky


Waffle Sandwiches for Dinner #kidsinthekitchen

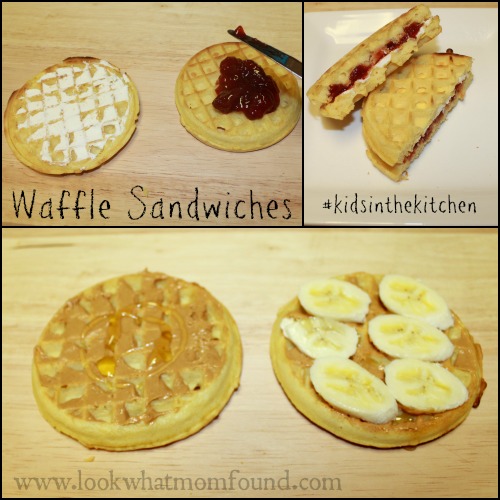
Dinners typically are comforting and delicious according to my kids but they aren’t fun.  The kids have been seeing these Eggo Waffle commercials where they are experimenting with ingredients turning them into sandwiches & desserts. So being the good mom that I am we had waffle sandwiches for dinner.

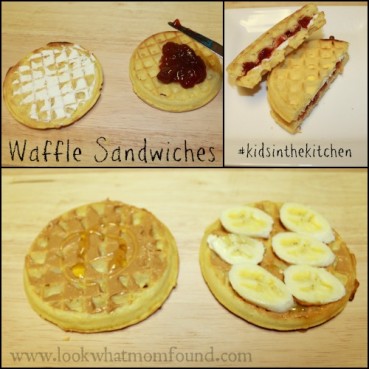
Using ingredients I know they love is the first step.  I toasted the waffles like I usually do then let the kids pick out combinations of their choice.

Shae was the only one not distracted enough to stick around while the waffles toasted so the sandwiches were her pick.

Peanut Butter, Honey and Banana & Cream Cheese and Strawberry Preserves
Waffle Sandwiches for Dinner #KidsintheKitchen

In case you’re wondering, this is the face of enjoyment. Shae much prefers goofy faces over typical smiles.
Waffle Sandwiches for Dinner #KidsintheKitchen
Come join me and my co-hosts, Sarah of Play to Learn with Sarah, Paula at Frosted Fingers and Sara at Sensibly Sara, each week linking up a post, new or old, that feature the theme Kids in the Kitchen. It doesn’t matter what you are doing as long as you are doing it together, enjoying it and learning something along the way.

You’ll find so many more ideas on the #KidsintheKitchen Pinterest Board.
Follow Melinda Babiak’s board #KidsintheKitchen on Pinterest.
Linky Rules, #kidsinthekitchen

#KidsintheKitchen Weekly Linky


Making Chicken and Cheese Taquitos #kidsinthekitchen

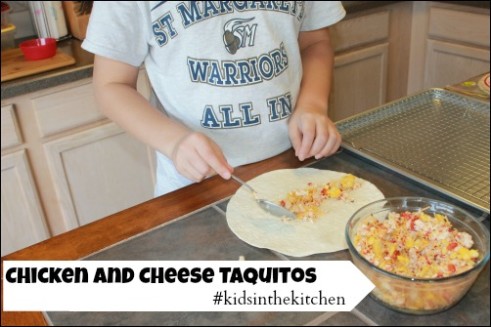
I know teaching my son to cook and be self sufficient in the kitchen is so very important but it’s hard to do when he doesn’t want to learn. Shaun is 10 and uninterested in doing things for himself. He’s much rather spend his time playing video games and other boy stuff. Making these Chicken and Cheese Taquitos was a lesson in chopping, patience and listening to details.

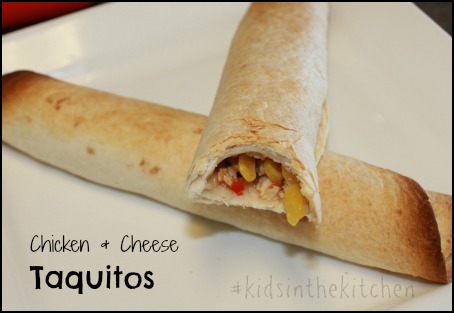
Using leftover roasted chicken, veggies, and artisan cheese with some seasoning, we made a surprisingly tasty lunch. Consider checking artisan cheese online to get the right cheesy flavor while preparing the taquitos.

I would’ve preferred smaller corn tortillas but we used what we had on hand, burrito sized flour.

Making Taquitos #kidsinthekitchen

Shaun chopped up a couple cups of cooked chicken while Sabreena finely chopped red peppers. We added frozen corn, a cup of frozen corn and then spiced it up. I had the kids sniff each herb/spice and tell me what it reminded them of. Oregano smells like pizza and cumin smells like tacos.

Making Taquitos #kidsinthekitchen The details and patience part of this task came when it was time to roll up the taquitos. I had Shaun redo the rolling part if it wasn’t tight enough or if the filling came out. Moving them from the counter to the baking tray needed a gentle hand, one he doesn’t have. By the 5th one he understood to take it slow.

They got a brush of olive oil, went into a 425° oven and baked for 15 minutes. They were surprisingly very very good. I didn’t even complaints about the red pepper.

Making Taquitos #kidsinthekitchen

We’ll be making these again with a whole array of ingredients. Next time we’ll make pizza taquitos.

Come join me and my co-hosts, Sarah of Play to Learn with Sarah, Paula at Frosted Fingers and Sara at Sensibly Sara, each week linking up a post, new or old, that feature the theme Kids in the Kitchen. It doesn’t matter what you are doing as long as you are doing it together, enjoying it and learning something along the way.

You’ll find so many more ideas on the #KidsintheKitchen Pinterest Board.

Follow Melinda Babiak’s board #KidsintheKitchen on Pinterest.

#KidsintheKitchen Weekly Linky


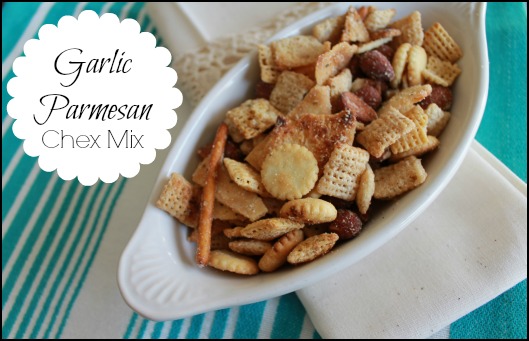
Making Garlic Parmesan Chex Mix

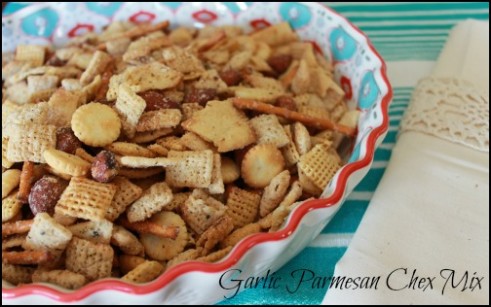
We’re getting ready for the holidays around here. The decorations are up, the baking has started and the gifts are piling up in their secret spot.  The kids are on a snack kick. Shaun is only ten but can eat like a man so I have to come up with new ideas. This Garlic Parmesan Chex Mix is a new snack mix that I prefer much better than chips or cookies.  And the best thing was he was able to make it pretty much on his own.Garlic Parmesan Chex Mix #KidsintheKitchen

 The idea for Chex Mix is simple, put together a bowl of related ingredients, add the flavoring and mix it up.  To get an extra crunch on savory mixes I like to toss them in oven for 10 minutes. For sweet mixes I like to pop in the fridge for the chocolate or caramel to harden up.

Shaun made this one for Rob because he knows his dad loves snacking food while watching tv. I like getting him in the kitchen helping out as much as possible. His attention span for cooking is short so I need to keep him busy. Chex Mix does the trick because there’s a lot of measuring and mixing he can do.  Stove work is ok too as long as I’m right next to him.

Ingredients

  • 2 cups Rice Chex
  • 2 cups Corn Chex
  • 1 cup broken bagel or pita chips
  • 1 1/2 cup pretzel sticks
  • 1 cup oyster crackers
  • 1 cup lightly salted, roasted almonds
  • 1/2 stick butter
  • 1/4 cup olive oil
  • 1/2 tsp salt
  • 1/4 tsp pepper
  • 1/2 tsp garlic powder
  • 1 tsp dried oregano, crushed
  • 1 tsp dried basil, crushed
  • pinch red pepper flakes, crushed
  • 3/4 cup grated parmesan cheesemaking chex mix #kidsinthekitchen

Directions

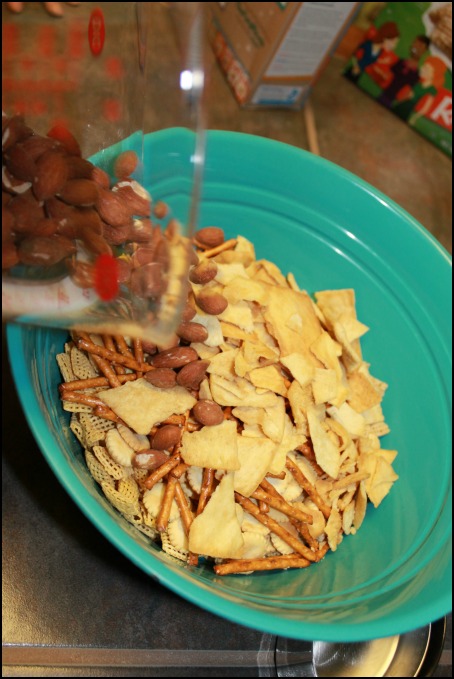
In a large bowl mix all of your snack ingredients.

making chex mix #kidsinthekitchen

making chex mix #kidsinthekitchen

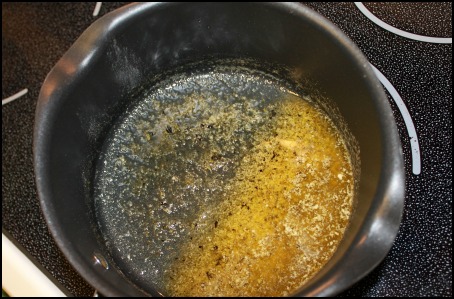
In a small saucepan over medium low heat combine butter, oil, herbs and spices and blend till hot but not bubbling.

making chex mix #kidsinthekitchen

Pour over snack mix and gently but quickly stir to coat. Sprinkle cheese over mixture and blend again till coated.

Pour onto a cookie sheet and pop into a 350° oven for 10-12 minutes.  Let cool then enjoy.

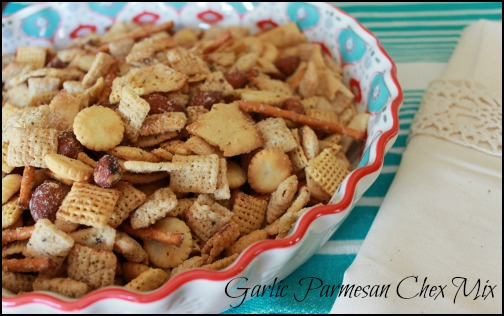
Garlic Parmesan Chex Mix #KidsintheKitchen

The beauty of these snack mixes is you can adjust the ingredients to suit your tastes. Adding popcorn, goldfish, bacon bits or even switching the nuts can make any snacker happy. The same goes for the flavors.  If you enjoy the rosemary over oregano, make the switch.

These are simple go to recipes especially for the holidays. Get your kids in the kitchen and get their hands dirty with some mixing, prepping and cooking.
Come join me and my co-hosts, Sarah of Play to Learn with Sarah, Paula at Frosted Fingers and Sara at Sensibly Sara, each week linking up a post, new or old, that feature the theme Kids in the Kitchen. It doesn’t matter what you are doing as long as you are doing it together, enjoying it and learning something along the way.

You’ll find so many more ideas on the #KidsintheKitchen Pinterest Board.
Linky Rules, #kidsinthekitchen

#KidsintheKitchen Weekly Linky


Subscribe to the #KidsintheKitchen Mailing List.

* indicates required


Email Format


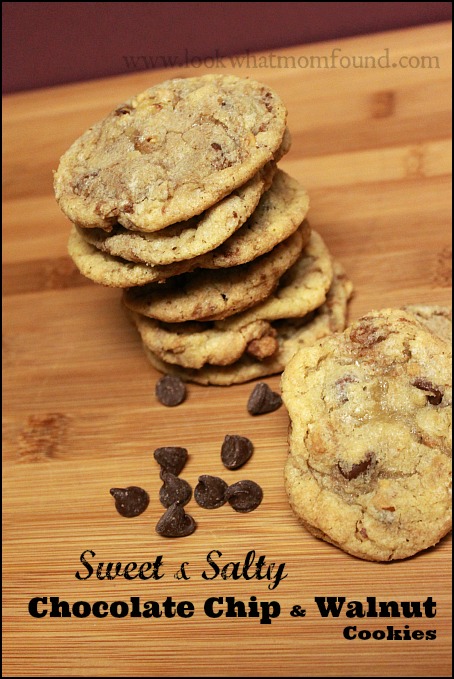
Sweet and Salty Chocolate Chip and Walnut Cookies

There’s nothing like a classic chocolate chip cookie but taking that simple recipe in another direction can transform the flavor to something more decadent and appealing for new taste buds. These Sweet and Salty Chocolate Chip Walnut Cookies are of course sweet from the chocolate but the addition of coarse salt & toasted walnuts give them a whole new flavor profile.

If you’ve ever wondered what is white chocolate, you could also experiment with substituting it for regular chocolate chips in this recipe to add a unique twist.
Sweet and Salty Chocolate Chip and Walnut Cookies #recipe

The basic recipe is one I’ve been making for years. They are my go to chocolate chip cookies and this particular one makes a batch big enough for gatherings or gift giving.

No special ingredients are needed so these can be made using your pantry staples.

Ingredients
1 cup softened butter
1 cup white sugar
1 cup brown sugar, packed
2 eggs
2 tsp vanilla extract
1 tsp baking soda
3 cups flour
3/4 tsp coarse salt
2 cups chocolate chips
1 cup chopped, toasted nuts of choice

Sweet and Salty Chocolate Chip and Walnut Cookies #recipe

Directions

Preheat your oven to 350°. Cream your butter and sugars till smooth.

Add eggs and vanilla and beat till combined.

Dissolve baking soda in 2 tsp of hot water and mix into mixture.

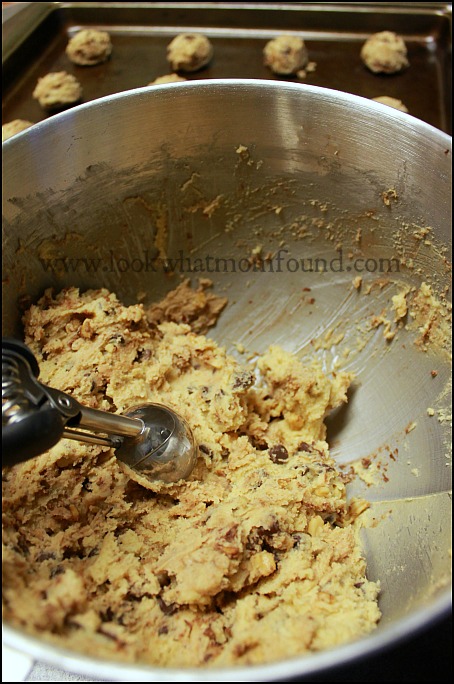
Blend flour, salt, chocolate and nuts into butter/sugar/egg mixture till well incorporated.

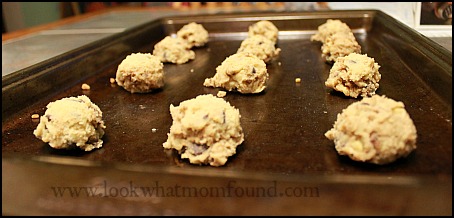
Drop equal spoonfuls onto ungreased cookie sheets 2″ apart.

Sweet and Salty Chocolate Chip and Walnut Cookies #recipe

Bake for 9-10 minutes till cookies have risen and edges are browned. Let them set on cookie sheets for 1 minute then move to a cooling rack for several minutes.

Makes 4-5 dozen cookies.

Sweet and Salty Chocolate Chip and Walnut Cookies #recipe


The last minute addition of the course salt gives it little opportunity to melt into dough. This salty bite is a delicious contrast to the expected sweet you get from cookies.

Store in a plastic container for up to a week or package along with recipe for a sweet gift.

Do you have a go-to cookie recipe?


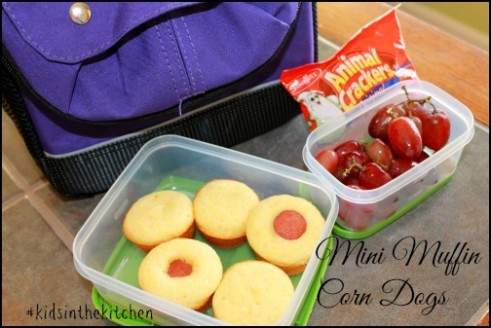
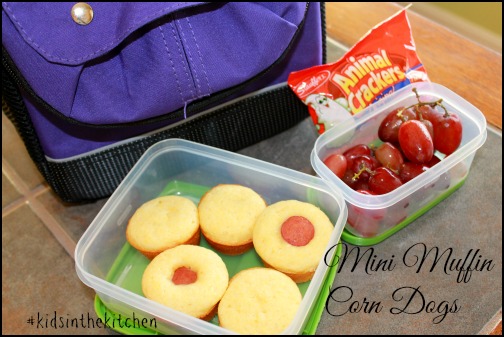
Making Mini Muffin Corn Dogs #kidsinthekitchen

“I’ll take the mini corn dogs please”. This has become Shae’s meal of choice at our favorite restaurant. At first I used to cringe at the thought but they weren’t that bad but I knew we could make them better.  This was Shae and Shaun could have them for school lunch, something very different than sandwiches.

Mini Muffin Corn Dogs #kidsinthekitchen

Using this packaged cornbread mix is definitely a shortcut. Honestly I’ve never been able to master homemade cornbread. Either the texture is off or the flavor is dull.  This one is very tasty and sweet so it’s nice match to the salty taste of the hot dog.

Mini Muffin Corn Dogs #kidsinthekitchen

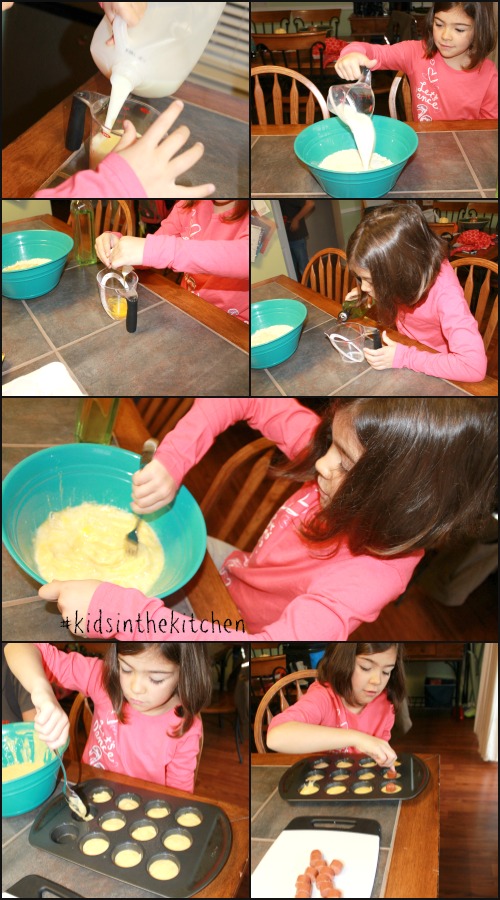
Shae prepared the muffin mix according to package directions and mixed it up.  I sliced the uncooked hotdogs into small bites.  As you can see she did most of the work, like usual.

As she was popping the hot dogs in the muffin mix she said “It’s like putting a cherry on top just different”.

After 22-25 minutes in a 350 degree oven they were done.  Package them up for lunches, snacks or even have for dinner.

Mini Muffin Corn Dogs #kidsinthekitchen

Shae likes her with honey mustard.

Did you have fun in the “kitchen” this week? Did you try a new food or a new kid friendly restaurant? Did your littlest ones use their snacks to count to 10? We invite you to share your experiences, photos, stories or recipes that include your #kidsinthekitchen.

Come join me and my co-hosts, Sarah of Play to Learn with Sarah Paula at Frosted Fingers and Sara at Sensibly Sara, each week linking up a post, new or old, that feature the theme Kids in the Kitchen. It doesn’t matter what you are doing as long as you are doing it together, enjoying it and learning something along the way.

Don’t have a blog? Share an instagram photo or Facebook update.
Linky Rules, #kidsinthekitchen

#KidsintheKitchen Weekly Linky


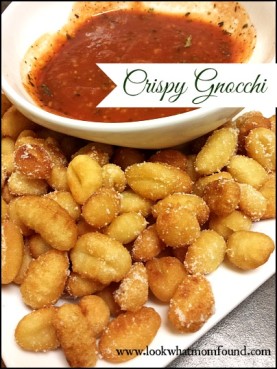
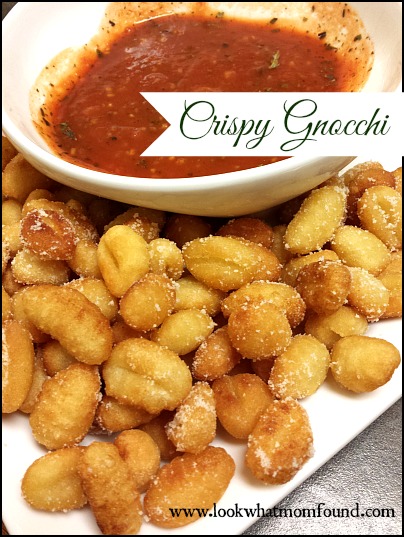
Crispy Gnocchi #recipe

Crispy Fried Gnocchi have become my kids new favorite food. These now trump sausage sandwiches and pizza.  I can’t blame them. I dream about these. I crave them.

Crispy Gnocchi #recipe

One would think that we would eat them way more often with how much we all love them but honestly I hate fried food. Well actually I love fried food I just try really hard not to fry too much. It’s just not healthy. I won’t eat gnocchi any other way though.  The traditional boiled balls of dough are gross to me. These are completely different.

Ingredients

  • Gnocchi
  • Salt
  • Parmesan cheese
  • Oil for Frying
  • Spicy Tomato Sauce

Directions

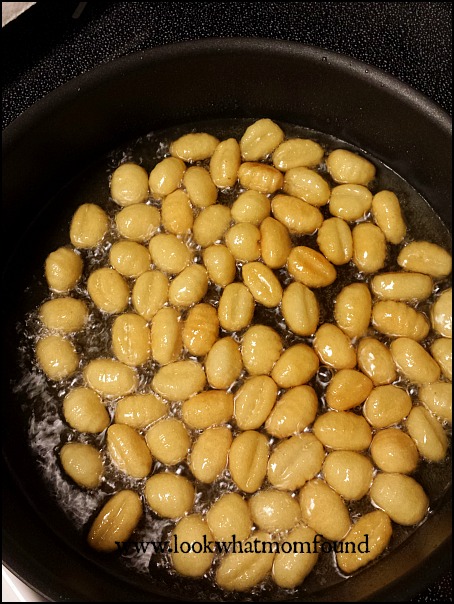
In a wide pan at least 3 inches deep add about 1/4 inch of oil.  I like to mix canola and olive but since it’s such a quick process any oil will work.

Heat this up to medium – high for several minutes till you see it ripple.  Carefully add a single layer of gnocchi to hot oil.

Crispy Gnocchi #recipe

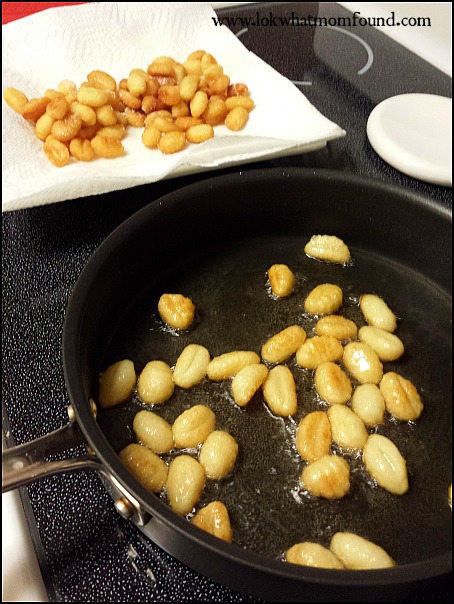
Cook for a few minutes each side but be careful it’s easy to overcook them then you’re left with little bullets.  I flip mine around with a wooden skewer, so simple.

Crispy Gnocchi #recipe


Once they’ve reached a beautiful golden brown remove them from the oil with a large slotted spoon. Drain on paper towels then sprinkle with salt and parmesan cheese.

I serve mine with a spicy tomato sauce.  I make mine with a simple pasta sauce doctored up with LOTS of garlic, red pepper flakes and crushed basil.