RSS Email

DIY Necklace and Pendant Upcycle #craft #jewelry

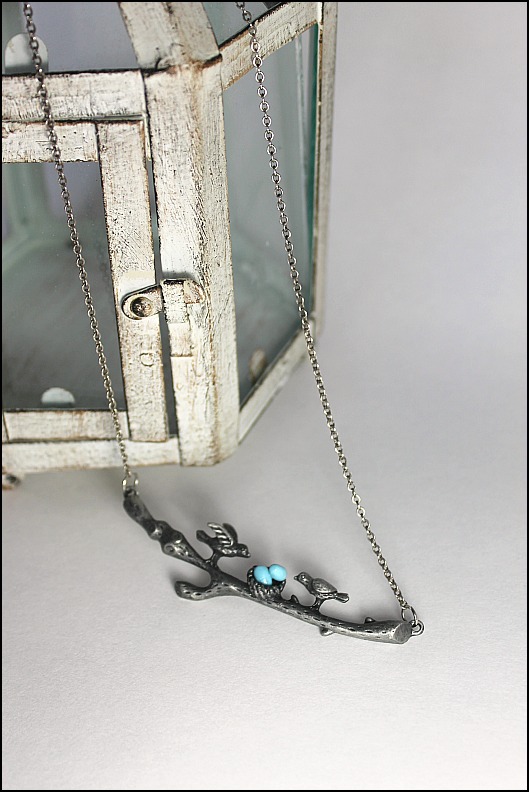
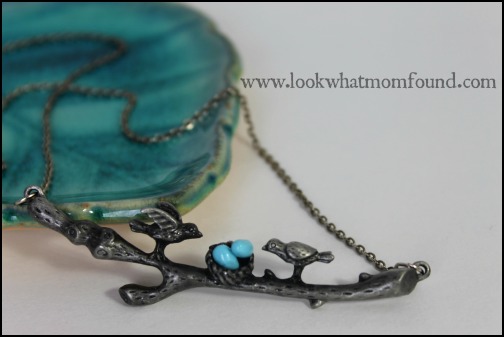
I love love love jewelry.  I especially love necklaces.  My earrings are diamond studs Rob got me a few years ago that I never take out. My wedding band stays in place with the occasional fashion ring on the other hand. But necklaces get changed often dependent on my mood. I have some favorites like this Lisa Leonard Lots of Love pendant and necklace. I was shopping last week and rummaging through a clearance section in the craft aisle and found a pendant. I knew it was missing something but knew immediately I could rescue it and upcycle it into something adorable.
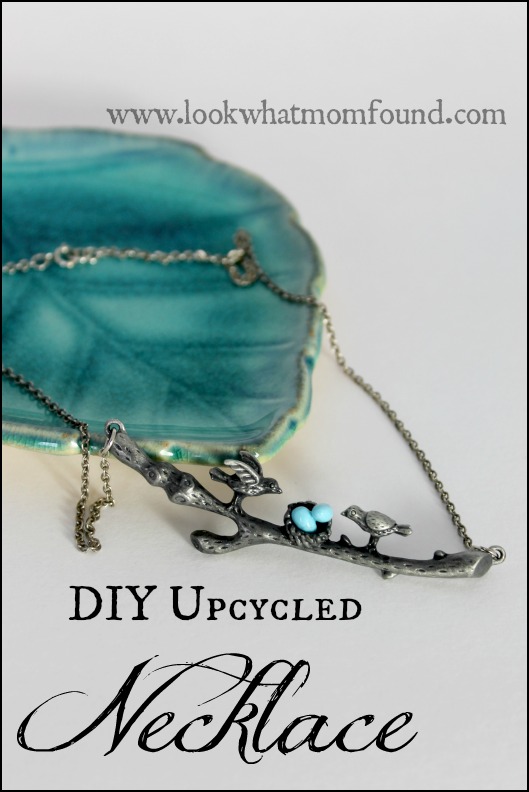
DIY Upcycled Necklace #bird #clay

I had a broken silver necklace at home so I knew I could resurrect it into something pretty.DIY Upcycled Necklace #bird #clay
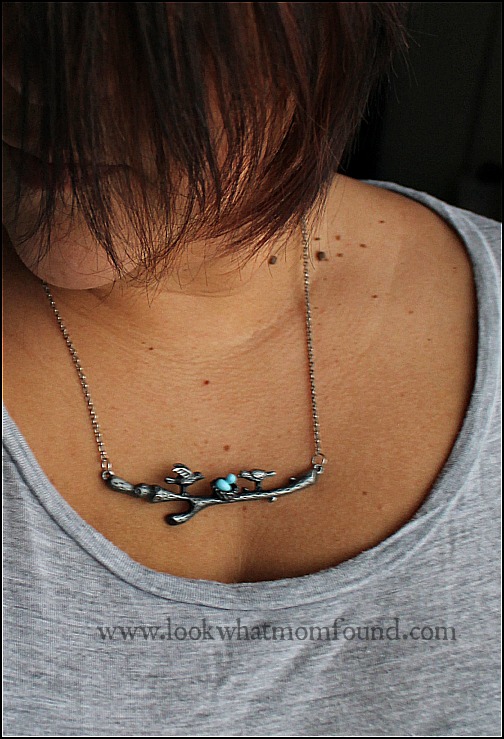
 

I started by fixing the necklace with a heavy gauge jump ring and then cutting the chain right in the center. Fixing Broken Necklace #bird #clay
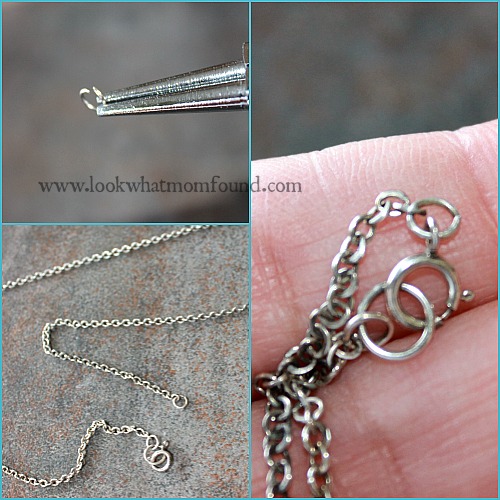
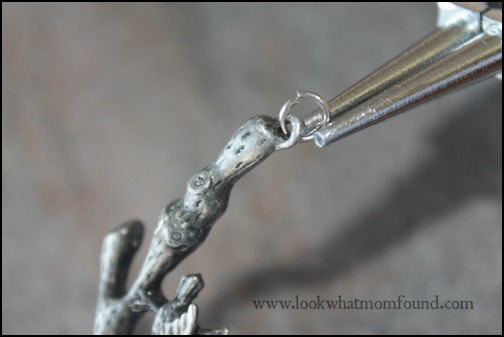
Then I added the same heavy gauge jump rings to the pendant and attached it to the necklace. This is an instructional video on how to work with jump rings correctly. Using a heavy/thick ring will lessen the chance of it coming apart while wearing. There is always the soldering option but I’m not there yet.
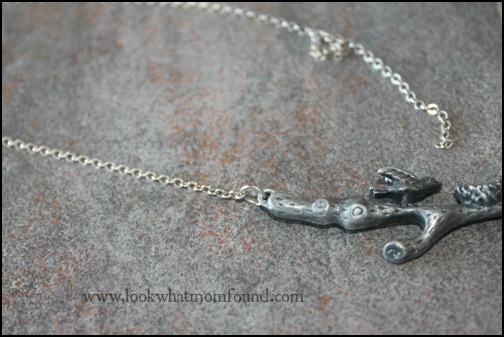
necklace on pendant

attaching jumprings

The empty nest needed eggs. Blue is a my favorite color so I knew a couple Robin’s eggs would look like they belonged.  Rolling out the clay into the right shape took the longest time;  making sure to tap the ends to get it round but not flat. After getting 2 almost identical eggs  I was ready to bake. It just takes 20 minutes in a 225° oven and they are hard like little pebbles.

I have a glaze that gives the clay a shine after baking but clear nail polish would work just fine.

Using a couple dabs of glue I placed the eggs in the nest and let it set for a couple hours. This glue dries completely clear.
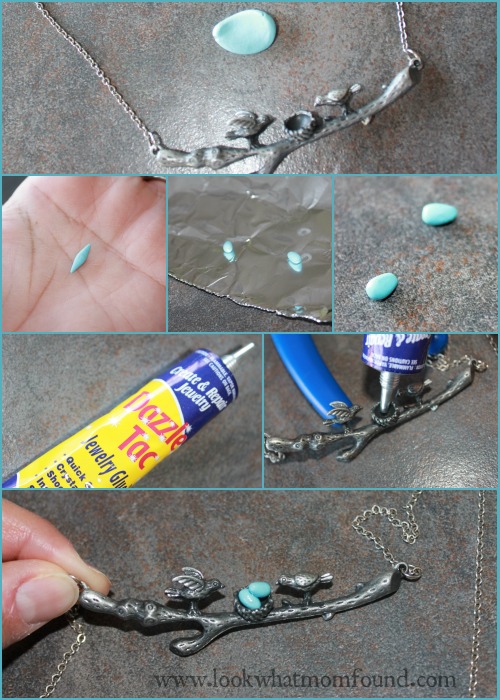
making eggs for necklace

Don’t throw away broken jewelry. Give it a new life with the purchase of a $2 pendant or create your own pendant with buttons, clay, earrings or beads.DIY Upcycled Necklace #bird #clay
 DIY Upcycled Necklace #bird #clay


A Family of Christmas Stockings #PCHoliday

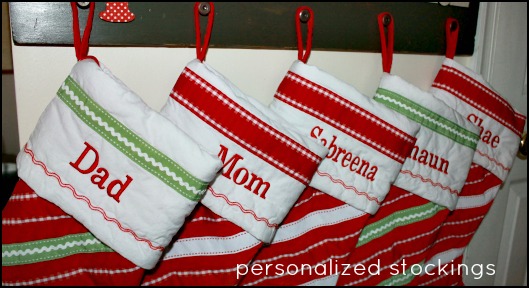
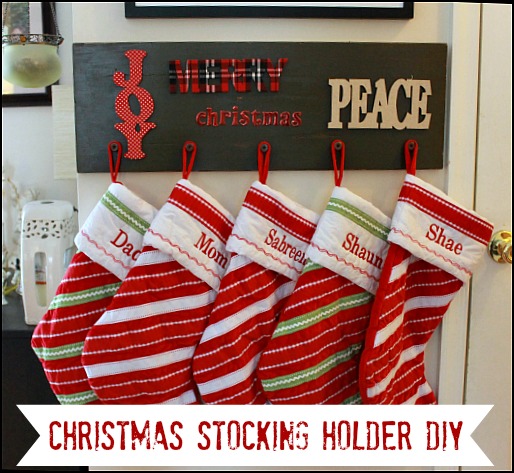
trackable pixelBlog Post Disclosure BannerWay back in the day when  we were just a family of 4 I spent a Christmas finding the “perfect” stockings and stocking hangers to display on our mantel.  I trudged out in the cold, snipped fresh holly branches and weave tiny twinkling lights through them and flaunted the beautiful design I had come up with.  Fast forward to the next 6 years and you’ll see only 3 stockings each Christmas attached to anything that had a flat surface. This year when the note came through that I could pick out new stockings for the whole family from Personal Creations I almost leapt out of my seat.  I knew we’d finally have what I’ve been wanting for a long time, these Ribbon Stockings personalized with our names.

Personalized Christmas Stockings

Personal Creations carries a HUGE selection for just about everyone.  The best part of their choices are most of them can be personalized to reflect a name, initial, special date or even more.  With hundreds of gifts to choose from for any occasion Personal Creations can be your shopping destination throughout the year.

I knew our stocking were on their way so I knew I had to come up with a new idea to hang all five of them. this house does not have the fireplace mantel that we used to have so I knew I had to get creative.  I scoured our makeshift workshop and found something that would work perfectly with some tweaking.

Christmas Stocking Holder DIY

Christmas Stocking Holder DIY

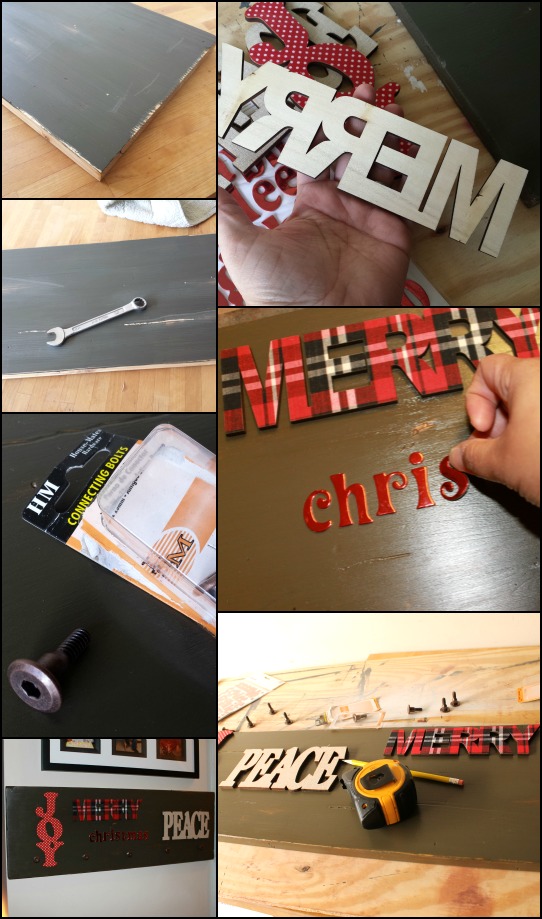
Using a simple unused wood shelf, existing paint & stain and some bought decorations and hardware I came up this Christmas Stocking Holder. The project was very easy. I painted and stained a plain wood shelf till I achieved a color I like and took an old wrench and a hammer to it to add some distressed details.  The words and stickers were less than $10 from the craft store and Rob found these antique brass bolts. I thought there were a unique and better alternative to plain hooks.

Christmas Stocking Holder DIY

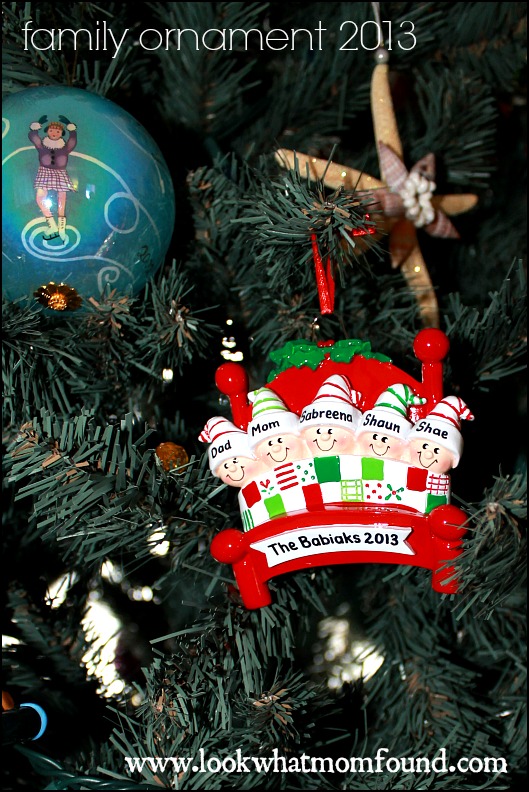
The stockings look great hanging up.  Even without a mantel they stand out with this special new home. I’m not forgetting about our new ornament.  Each year I get new ornaments for the kids or family that mark a significant point in the year or commemorate another wonderful year together.  The Family in Bed ornament was adorable and I knew it was a good fit for our family.

Family Ornament

This ornament will stay on the family tree but individual ornaments that the kids received are put right on their own trees. When they are grown up and have families of their own they’ll have a great start for the holidays and great stories and memories to share.

Shop today for your own personalized ornaments and stockings to ensure availability and delivery in time for the holidays. Personal Creations is offering you 20% off all of your purchases through the end of December. Click here to start shopping and the 20% will be applied in your shopping cart.

Follow Personal Creations Blogger Board: Christmas Ideas on Pinterest


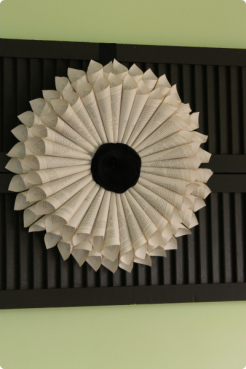
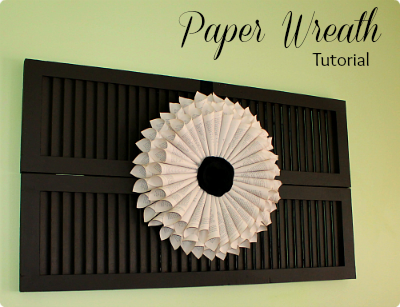
Book Page Wreath Tutorial

Back in the Fall I stumbled onto a blog post that featured this beautiful book page wreath over shutters. I’m not one to copy a design but I was completely in love with it. I bookmarked it, showed it to Rob and made it my mission to get that look in my house.

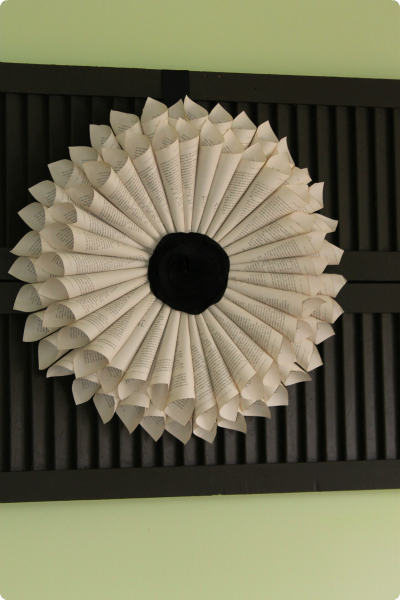
paper wreath, tutorial, book page wreath, painted shutters
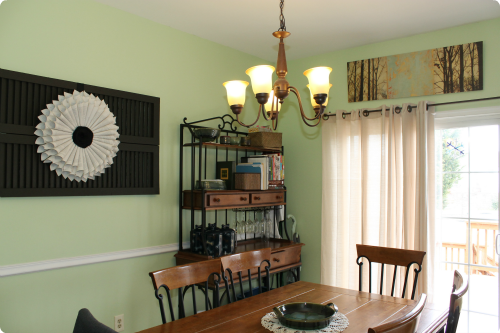
I knew where I wanted it, I knew what I wanted to go along with it and that was it, my mind was made up. I found someone selling 20 year old louvered doors for $15. I got those and Rob and I worked on stripping layer upon layer of paint off of them. It wasn’t working so well so it was decided to clean them up as best as we could and just paint over the half done shutters. Honestly I loved the look. They look old. That was the point. This process took the longest. Months to be honest thanks to an early winter.

Rob did an amazing job finishing them and hanging them, surprising me one day while I was out. Next step was to get that wreath done. I knew it would be tedious but didn’t expect it to take the 4-5 hours it did. Was it worth it? Yes. I love it that much.

For the whole look you need 2 shutters, painted in the color you choose. We chose a Stealth Jet, not quite black but close; think wet chalkboard. Rob hung them with simple D rings and picture anchors. He also attached them together with 2 T shaped brackets. Hanging on the wall by itself, it looked GOOD.

The paper wreath takes more creativity. You have to decide what you want to use for paper. I thought sheet music would look good but didn’t know where to get any really cheap. I went for a novel that was stuffed in a swag bag from an event. It wasn’t a book I was ever going to read so I didn’t feel that bad. I did get an old atlas from the thrift store and thought that might work but the more I looked at paper crafts using maps the more I realized that wasn’t the look I wanted.

paper wreath hanging

book page wreath, paper wreath in kitchen

Supplies
6-8 inch round cardboard circle
Book, atlas or music sheets (thrift store find would be great here)
box cutter
Hot glue gun & lots of glue sticks
Wide Ribbon of choice to hang wreath, 18-24″
decorative flower, brooch or other ornament to place in center of wreath

Directions
I started with taking a damp tea bag and lightly rubbing the sides of the book. I wanted a very light color variation, not vintage but just a touch of contrast. A marker would work too.

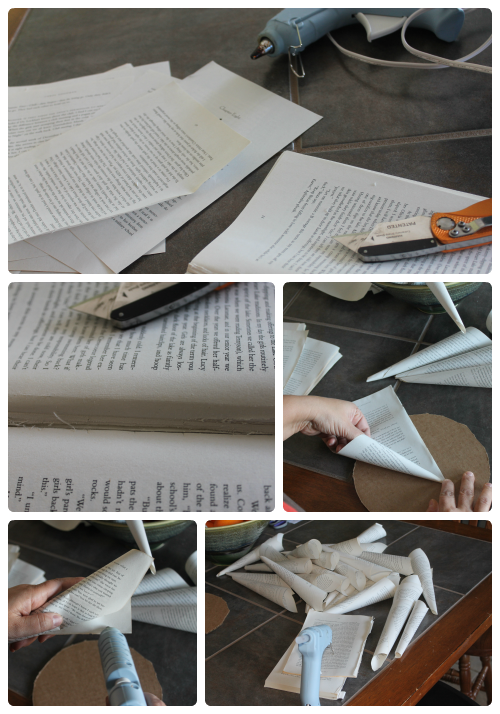
Break the binding of the book as much as you can. Taking a sharp box cutter or exacto knife cut out the sheets as cleanly as possible. I used about 80-90 sheets for the wreath but had many mess ups so I cut out about 125.

Determine the direction you will be rolling and the direction of your paper. This was my biggest mistake in the beginning and led to lots of paper in the recycling bin. I used the bottom right corner as my point and the top right corner ended on top of the cone. Doing this every time gave me a more uniform look even though they weren’t all perfect.

book page wreath tutorial

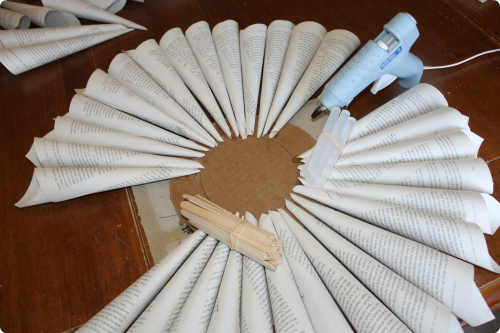
I rolled and rolled and rolled for 2-3 hours, hot gluing each sheet closed. Tape would work but would show. School glue would work but takes too long to set. The hot glue dries fast and holds tight.

Before you start gluing your cones take your cardboard circle make an inner circle about halfway from the center. This line gives you a guide as to where to start your 1st layer of paper cones. Then attach your ribbon with staples or hot glue. I didn’t do this before glue and had a mini disaster on my hands.

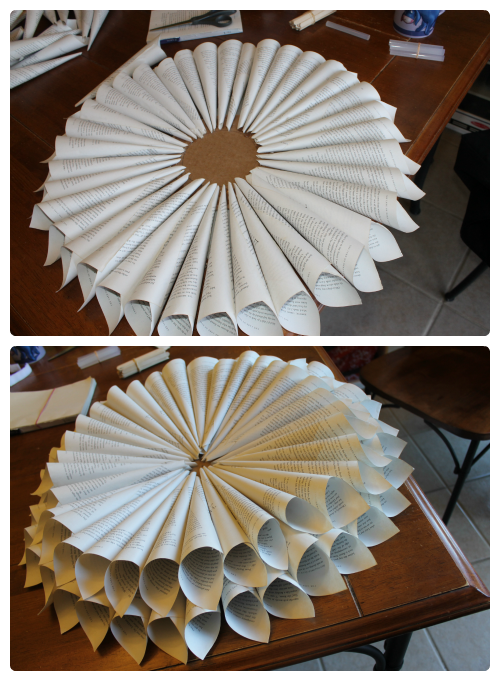
When it’s time to start gluing your 1st layer start in small sections so you get good spacing. If you try to focus on getting all the points together you’ll end up with a lopsided wreath. The focus should be getting good even coverage on the part that is showing. The second layer is the same as the first just this time you at gluing the points closer to the center of the circle.
glueing paper wreathpaper wreath layers

When it’s completed pick it up and shake to find loose cones.

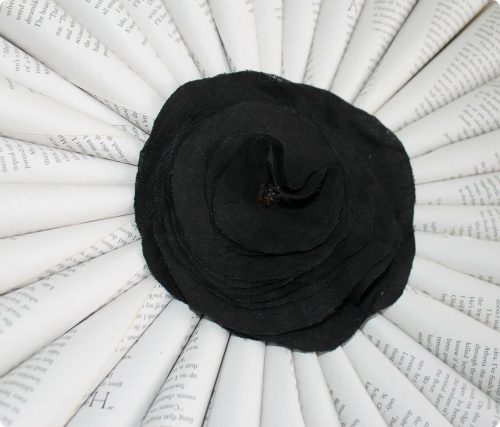
At this point attach your centerpiece. I made a flower from black linen; 8-10 circles in varying sizes, sewn together in a haphazard way with some tucks and a tiny middle embellishment.

fabric flower

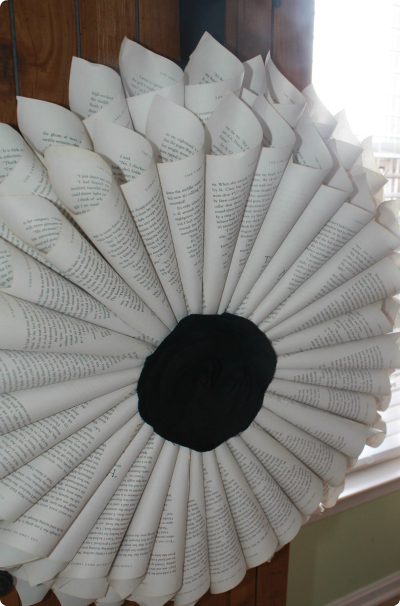
finished paper wreath
I then stapled the ribbon to the back of the shutter and it was done. Attach your ribbon before glueing the paper cones on your cardboard Again, I truly love this and thank Denise of The Painted Home for the inspiration.


TShirt Tote Bag #ExpressYourself #CBias

I was recently asked to come up with a craft for the #ExpressYourself campaign using Elmers Painters Paint Markers and fabric. The fabric part got me stumped. I thought I’d make Shae a cute shirt, draw a flower or fun saying on it but what’s so original and creative about that. Then it hit me, go DIY with it. I stood in the middle of my living room at a pile of laundry and I got the idea of making a t-shirt tote bag.

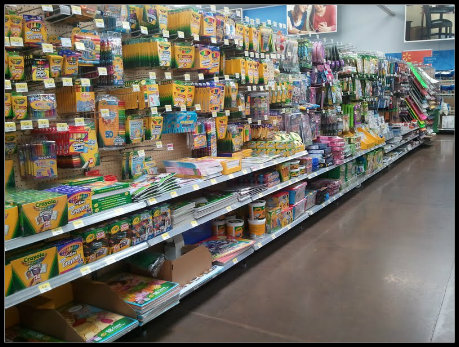
I’ve seen tutorials before and figured this would be easy. I got the kids in the car and headed to Walmart to find the Elmers Painters Paint Markers. It actually took me a little while to find them and I got worried that they didn’t carry them but finally found them with the acrylic paints and stencils.
walmart craft aisle #expressyourself elmers #collectivebias
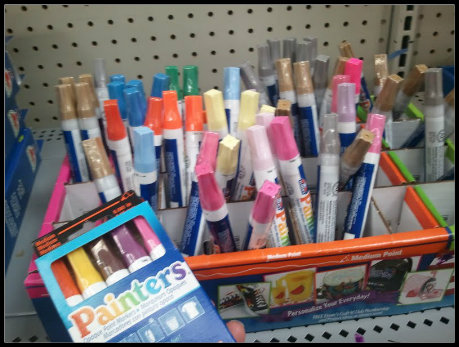
I chose the Sherbet collection in Medium Point. I wasn’t exactly sure what I was going to do to the bag but figured medium point was a safe option.  Instead of purchasing a box of set colors all with the same point you can always buy individuals.  Priced @ $1.97 each at your local Walmart it’s a cheap craft supply when you only need one to two for a specific project.  My Walmart didn’t have a ton of bright color choices.  I almost bought the silver and gold Painters Paint Markers but figured I would wait to see how my project came out.  I’ll be getting more colors next visit to Walmart.
walmart painters paint markers #expressyourself elmers #collectivebias
Setting up my project took longer than the actual crafting but wait till you see what I came up with.
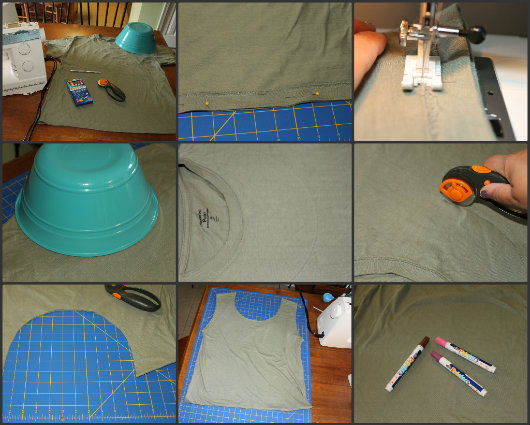
I scoured Rob’s t-shirt drawer and found an earthy green tee that he never wore. I grabbed my sewing machine and other tools and set out to get it done early in the morning.  The bag itself literally took minutes. Simply sewing shut the bottom of an inside out tee, cutting off the sleeves and making a larger opening was all it took to get a great bag. The trick here was to give it a unique and fun design with the Elmers Painters Paint Markers.

tshirt tote bag tutorial diy step by step craft project

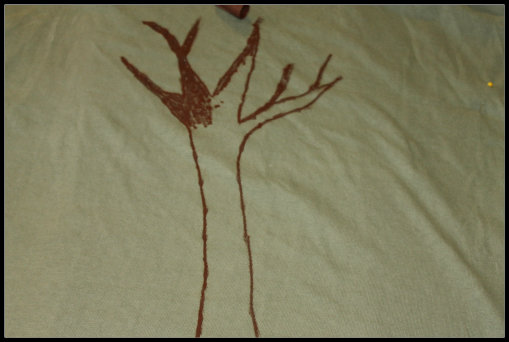
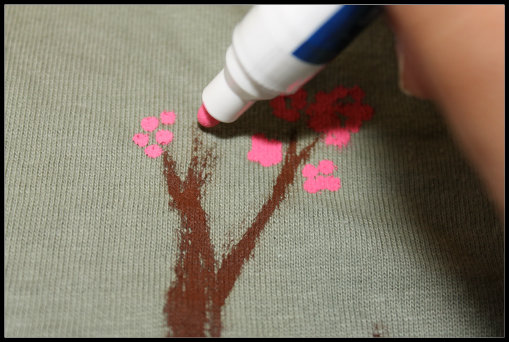
I figured since the bag already had a “green” feel to it being a neutral color and a recycled/reused item I’d stick with the crunchy theme and go for a tree. I drew out a couple trees on paper to get the right look and size and them totally free-handed it on the bag.

elmers painters paint markers drawing shirt craft

elmers painters paint markers flower craft

A large brown tree with pink and purple flowers on a handmade upcycled tote bag is my final project.

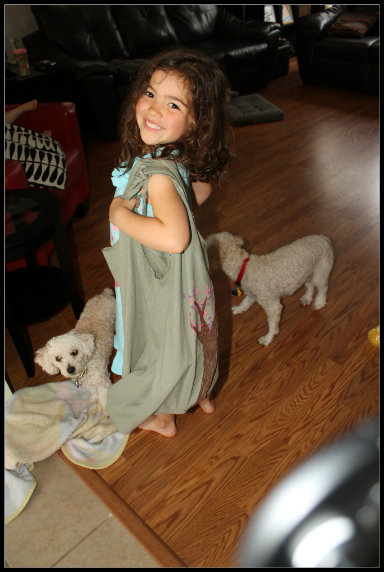
handmade tote from t shirt upcycled recycled craftThese markers were so easy to use I let my 4 year old make her own upcycled tote bag but an old tank top sewn shut on the bottom. She copied mommy’s design and drew a tree with flowers.
painted tote kids craft

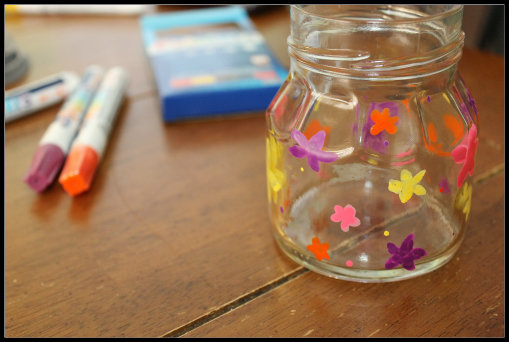
As she did her craft I did a quick second craft for myself; a decorated vase. This is the perfect size for thumbtacks, paperclips or even buttons.  It only took minutes and was simple.

painted jar craft project

Elmers Painters Paint Markers can be found at your local Walmart and other retail locations.  At about $10 for a pack of 5 it’s a small investment for tools that can be used for almost any project you may have.  As you can see from above these Painters Paint Markers easily go on fabric and glass but can also be used on wood, plastics, ceramics and more.  They are now a staple in my craft supplies closet since they are a cleaner and easier option than paintbrushes and tubs of paint.  Stay connected with Elmers and all of their other crafty supplies and projects on Facebook and Twitter.

“I am a member of the Collective Bias™ Social Fabric® Community. This shop has been compensated as part of a social shopper insights study for Collective Bias™. #CBias #SocialFabric”