RSS Email

Double Chocolate Cupcakes with Pink Buttercream #kidsinthekitchen

The kid’s and I have been chatting Valentine’s Day desserts this week. They have off of school on the 14th so I said we could make something special.
Double Chocolate Cupcakes with Pink Buttercream #kidsinthekitchen #valentines #arrow

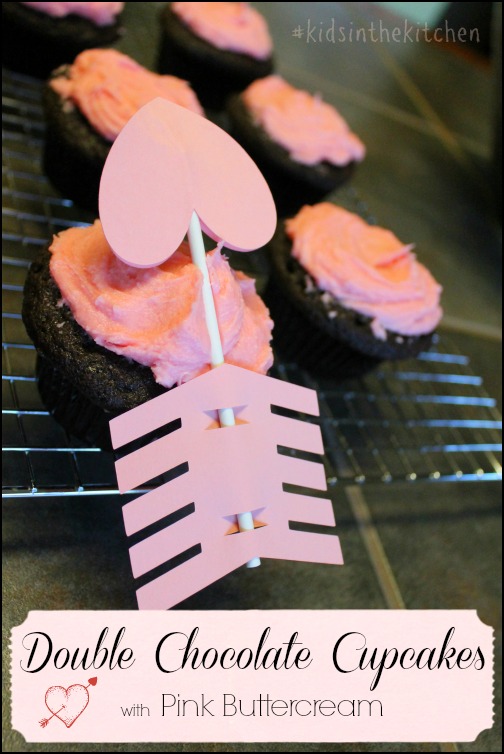
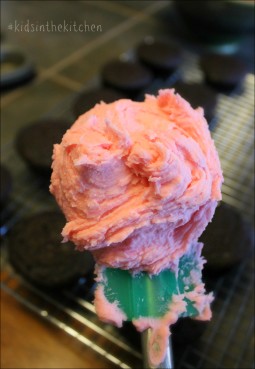
We made a test batch of these Double Chocolate Cupcakes with Pink Buttercream and Arrow decorations. They are adorbs! The icing was done with a butter knife by Shae so it isn’t fancy but it’s handmade.

Here is the recipe for cupcakes & icing.

Double Chocolate Cupcakes

  • 2 ounces bittersweet or semi sweet chocolate
  • 1/2 cup butter (1 stick)
  • 3/4 cup flour
  • 1/2 cup unsweetened cocoa powder
  • 1 tsp baking powder
  • 1/4 tsp salt
  • 1/2 cup sugar
  • 1/4 cup brown sugar
  • 2 eggs
  • 1 tsp vanilla extract
  • 1/2 cup buttermilk

Preheat your oven to 350° and prep a 12 muffin cups with liners.

Gather all of your ingredients, measured and ready to use. If you don’t have buttermilk now if the time to make some. In a measuring cup add 2 tsp of lemon juice or white vinegar and fill to the 1/2 cup line with milk. Let this sit for 5 minutes till thick and curdled.

In a microwave proof bowl melt the butter and chocolate in 30 second increments till smooth and shiny. Set aside to cool.

In a large bowl whisk together the flour, cocoa powder, baking powder and salt till thoroughly combined. Set aside.

In the bowl of your mixer with the whisk attachment combine sugars, eggs and vanilla till silky smooth. Slowly add in the butter/chocolate mixture till combined.
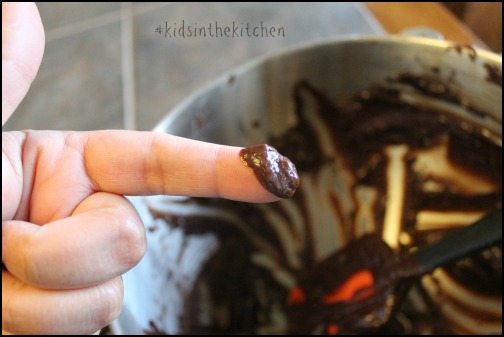
Add the remaining ingredients, flour mixture & buttermilk half at a time and mix just till combined. Doing the final mixing by hand ensures you won’t over mix the batter. You’ll have a very thick batter, one that resembles brownie mix more than cake batter.
eating cake batter #kidsinthekitchen
Evenly scoop into muffin cups and bake for 17-19 minutes. A toothpick should come out with specks of crumbs.

Remove from oven, set aside to cool for 5 minutes then transfer cupcakes to cooling rack.

Let come to room temperature before icing.

Simple Buttercream Icing (easily doubles or triples)

pink buttercream #kidsinthekitchen #valentines

  • 2 sticks softened NOT MELTED butter
  • 4-5 cups confectioners’ sugar
  • 1 tsp vanilla
  • pinch of salt
  • 2-3 drops pink food coloring
  • 1-2 tbls heavy cream

Mix all of your ingredients except for heavy cream with a paddle attachment on your mixer until you achieve smooth consistency. Slowly add cream 1 tbls at a time for a soft frosting. Your icing should not be stiff but not runny. If you add too much cream add in more sugar a couple tablespoons at a time.

Ice you cupcakes with a piping bag and tip or keep it rustic and family style with just a warm butter knife.

Decorate as you wish and share with your loved ones.

Come join me and my co-hosts, Sarah of Play to Learn with Sarah, Paula at Frosted Fingers and Sara at Sensibly Sara, each week linking up a post, new or old, that feature the theme Kids in the Kitchen. It doesn’t matter what you are doing as long as you are doing it together, enjoying it and learning something along the way.

You’ll find so many more ideas on the #KidsintheKitchen Pinterest Board.

Follow Melinda Babiak’s board #KidsintheKitchen on Pinterest.
Linky Rules, #kidsinthekitchen

#KidsintheKitchen Weekly Linky


Making Fortune Cookies, Chinese New Year #kidsinthekitchen

Today is Chinese New Year. It’s the Chinese culture’s most important celebration as it is a time for family reunion. Our plan was to celebrate with a fun food activity, making Fortune Cookies.Making Fortune Cookies #kidsinthekitchen
What I thought was going to be a fun group activity was way wrong. There was nothing kid friendly about it. In fact I should’ve just left the kids out of the kitchen. Things weren’t as “easy-going” as YouTube made it out to be.  The kids did help with the fortunes and cutting them and folding them and adding them to the scorching cookie as I tried to fold them.

Fortunes in a Fortune Cookie #kidsinthekitchen
We started off with a very simple cookie batter recipe then I had to spread 2 circles of batter on a cookie sheet and bake for 12 minutes. That turned out to be the longest 12 minutes ever.  As soon as they came out of the oven they had to be handled, bent, shaped and stuffed with a fortune. These babies were HOT. Sabreena was using her sweatshirt sleeves so she didn’t burn her fingers. I was using silicon oven mitts. I always hear about chefs having “asbestos fingers”, I guess I’m nowhere near that level.

Making Fortune Cookies #kidsinthekitchen 
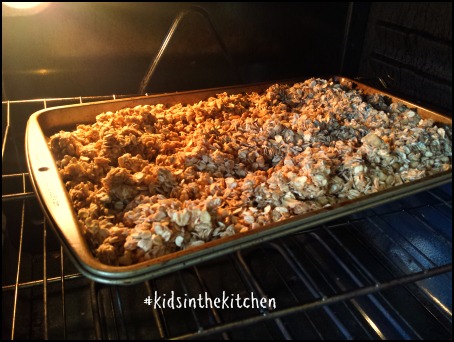
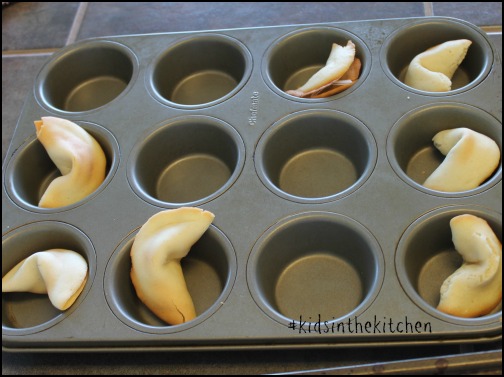
Sabreena and I thought we had it under control and put 4 circles of batter in at once to speed up the process. We had 2 casualties that time. One cookie that didn’t take on a very good shaped and one that never made it off the baking sheet.

Making Fortune Cookies #kidsinthekitchen 
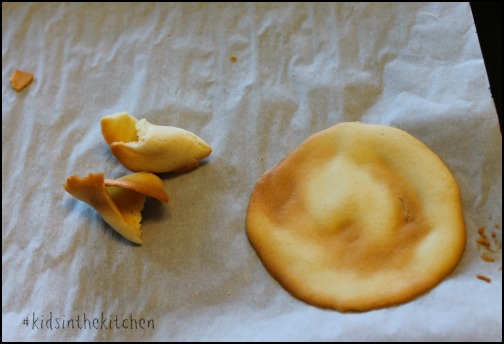
Was it fun? YES. Will I ever attempt it again? Probably Not. Best part though is they tasted really good.

Come join me and my co-hosts, Sarah of Play to Learn with Sarah, Paula at Frosted Fingers and Sara at Sensibly Sara, each week linking up a post, new or old, that feature the theme Kids in the Kitchen. It doesn’t matter what you are doing as long as you are doing it together, enjoying it and learning something along the way.

You’ll find so many more ideas on the #KidsintheKitchen Pinterest Board.

Follow Melinda Babiak’s board #KidsintheKitchen on Pinterest.

Linky Rules, #kidsinthekitchen
#KidsintheKitchen Weekly Linky


Homemade Baked Soft Pretzels #kidsinthekitchen

With all the snow we had this week i vowed it would be a a baking week. Shae said “YAY” and Rob said “Nope, not for you”.  Her poor little spirit was crushed. Ok, it really wasn’t, she knew he was kidding. I decided on a couple of things but this is what turn out successful. Baked Soft Pretzels.Baked Soft Pretzels #kidsinthekitchen

Soft Baked Pretzels were made and they will be made again and again and again. They were THAT good.  The whole process wasn’t hard. As with just about any recipe where dough is used it’s a long process but so worth it. Next time we are doubling.

Baked Soft Pretzels #kidsinthekitchen

We followed Alton Brown’s Homemade Soft Pretzel recipe from 2007 to a tee, no adjustments, no modifications, just as he posts it here.  Watch Shae roll out and shape the pretzels all on her own. We ate them while they were still hot with spicy brown mustard and honey mustard.

Baked Soft Pretzels #kidsinthekitchen

Come join me and my co-hosts, Sarah of Play to Learn with Sarah, Paula at Frosted Fingers and Sara at Sensibly Sara, each week linking up a post, new or old, that feature the theme Kids in the Kitchen. It doesn’t matter what you are doing as long as you are doing it together, enjoying it and learning something along the way.

You’ll find so many more ideas on the #KidsintheKitchen Pinterest Board.
Follow Melinda Babiak’s board #KidsintheKitchen on Pinterest.

Linky Rules, #kidsinthekitchen

#KidsintheKitchen Weekly Linky


Making Garlic Parmesan Chex Mix

We’re getting ready for the holidays around here. The decorations are up, the baking has started and the gifts are piling up in their secret spot.  The kids are on a snack kick. Shaun is only ten but can eat like a man so I have to come up with new ideas. This Garlic Parmesan Chex Mix is a new snack mix that I prefer much better than chips or cookies.  And the best thing was he was able to make it pretty much on his own.Garlic Parmesan Chex Mix #KidsintheKitchen

 The idea for Chex Mix is simple, put together a bowl of related ingredients, add the flavoring and mix it up.  To get an extra crunch on savory mixes I like to toss them in oven for 10 minutes. For sweet mixes I like to pop in the fridge for the chocolate or caramel to harden up.

Shaun made this one for Rob because he knows his dad loves snacking food while watching tv. I like getting him in the kitchen helping out as much as possible. His attention span for cooking is short so I need to keep him busy. Chex Mix does the trick because there’s a lot of measuring and mixing he can do.  Stove work is ok too as long as I’m right next to him.

Ingredients

  • 2 cups Rice Chex
  • 2 cups Corn Chex
  • 1 cup broken bagel or pita chips
  • 1 1/2 cup pretzel sticks
  • 1 cup oyster crackers
  • 1 cup lightly salted, roasted almonds
  • 1/2 stick butter
  • 1/4 cup olive oil
  • 1/2 tsp salt
  • 1/4 tsp pepper
  • 1/2 tsp garlic powder
  • 1 tsp dried oregano, crushed
  • 1 tsp dried basil, crushed
  • pinch red pepper flakes, crushed
  • 3/4 cup grated parmesan cheesemaking chex mix #kidsinthekitchen

Directions

In a large bowl mix all of your snack ingredients.

making chex mix #kidsinthekitchen

making chex mix #kidsinthekitchen

In a small saucepan over medium low heat combine butter, oil, herbs and spices and blend till hot but not bubbling.

making chex mix #kidsinthekitchen

Pour over snack mix and gently but quickly stir to coat. Sprinkle cheese over mixture and blend again till coated.

Pour onto a cookie sheet and pop into a 350° oven for 10-12 minutes.  Let cool then enjoy.

Garlic Parmesan Chex Mix #KidsintheKitchen

The beauty of these snack mixes is you can adjust the ingredients to suit your tastes. Adding popcorn, goldfish, bacon bits or even switching the nuts can make any snacker happy. The same goes for the flavors.  If you enjoy the rosemary over oregano, make the switch.

These are simple go to recipes especially for the holidays. Get your kids in the kitchen and get their hands dirty with some mixing, prepping and cooking.
Come join me and my co-hosts, Sarah of Play to Learn with Sarah, Paula at Frosted Fingers and Sara at Sensibly Sara, each week linking up a post, new or old, that feature the theme Kids in the Kitchen. It doesn’t matter what you are doing as long as you are doing it together, enjoying it and learning something along the way.

You’ll find so many more ideas on the #KidsintheKitchen Pinterest Board.

Linky Rules, #kidsinthekitchen

#KidsintheKitchen Weekly Linky


Subscribe to the #KidsintheKitchen Mailing List.

* indicates required


Email Format


Making Bread Sticks with the Kids

Family Dinners are becoming  little less frequent lately, at least in the traditional sense. Rob is coming home later and later due to work, I head out for a girls night out once in a while and Sabreena tends to work all weekend.  I’m using #kidsinthekitchen as an excuse to get the kids to help prepare dinner and make bread sticks.

Making Bread Sticks #kidsinthekitchen

This week I prepared homemade stuffed shells. That means I boiled the shells and made the filling and stuffed the shells with the filling and baked them. If you’ve ever done this you know it’s a bit tedious. I then also decided to make homemade bread sticks.  This were simple. In fact we made these while the stuffed shells were baking.

Ingredients

  • 1 tbls active yeast
  • 1 tbls sugar
  • 1 1/2 cups warm water (100-110°)
  • 3-3 1/2 cups flour
  • 1 tsp salt
  • 3 tbls melted butter
  • 1 tsp garlic salt, Parmesan cheese or other seasoning of choice

Directions

Preheat oven for 400°

In a large mixing bowl combine yeast, sugar and water, allow to proof for 5-10 minutes.  Using your electric mixer’s dough hook mix in flour & salt till a smooth dough forms and pulls away from the bowl, about 4-6 minutes. Adjust your water and flour measurements a tablespoon at a time to get the right consistency. It should be slightly tacky but bounce back when touched.

(If you are doing this by hand start with a fork till mixture comes together and turn out in a floured surface and knead by hand for approx 10 minutes)

Turn your dough onto a floured surface and roll into a smooth ball and divide into 16 (long bread sticks) or 32 (short bread sticks) portions.

Roll each portion between hands into your desired shape and place on lightly oiled baking sheet.  Once all of your bread sticks have been rolled set them aside for a few minutes to rest.

Making Bread Sticks #kidsinthekitchen

Once the bread sticks have grown a bit these are ready to “dress up”.  Brush them lightly with your melted butter then add the seasoning of choice.  Simple garlic salt is good enough but you can get fancy with rosemary and grated lemon peel or parmesan and oregano. I have this dipping oil mix that gets put on everything.

Making Bread Sticks #kidsinthekitchen

Bake in a preheated oven for 12-15 minutes until golden brown.  Serve warm with extra butter or dipping oil.

The kids are capable of doing just about everything on their own with this recipe. it’s a small enough batch that even the littlest hands can play with it easily. Make it more fun by letting the kids make shapes from the dough.  Heart shaped bread sticks make for a much more enjoyable meal.

Did you have fun in the “kitchen” this week? Did you try a new food or a new kid friendly restaurant? Did your littlest ones use their snacks to count to 10? We invite you to share your experiences, photos, stories or recipes that include your #kidsinthekitchen.

Come join me and my co-hosts, Sarah of Play to Learn with Sarah, Paula at Frosted Fingers and Sara at Sensibly Sara, each week linking up a post, new or old, that feature the theme Kids in the Kitchen. It doesn’t matter what you are doing as long as you are doing it together, enjoying it and learning something along the way.

Don’t have a blog? Share an instagram photo or Facebook update.
Linky Rules, #kidsinthekitchen

#KidsintheKitchen Weekly Linky


Candy Bar Chex Mix Recipe #kidsinthekitchen

My focus seems to be on snacks lately.  My pantry and fridge are full but nothing is grabbing my attention. Chex Mix to the day.  I love snagging a bag of Chex Mix at the grocery store and gobbling it down while watching a show with Rob.  The kids come home from school ravenous and are instantly digging through the pantry for a snack.  Since Halloween was around the corner they instantly ask for candy.  I’m not a mean mom but I really hate saying ok to candy. BUT I’m ok with making my own candy and letting them eat that.

Candy Bar Chex Mix is the creature that come from that wacky thought process.

Candy Bar Chex Mix #kidsinthekitchen
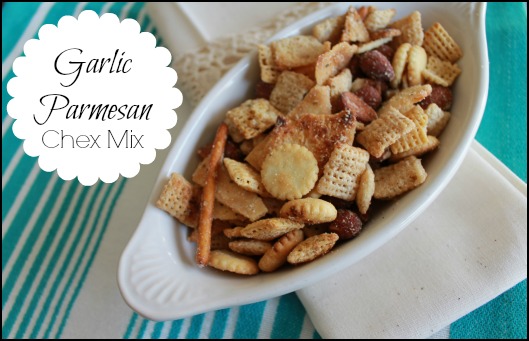
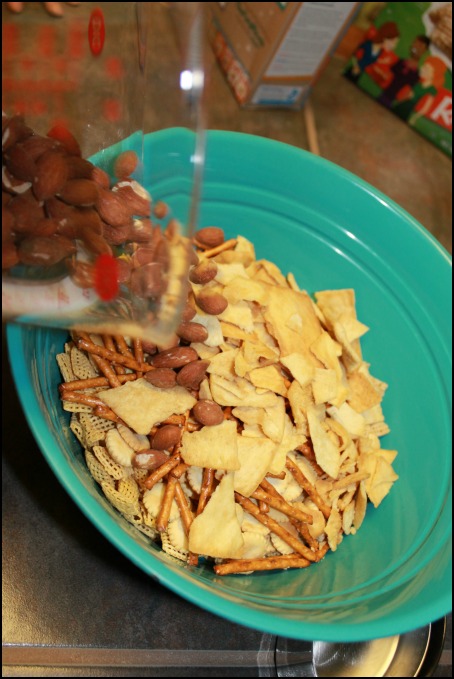
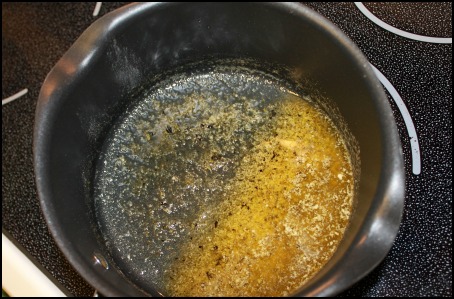
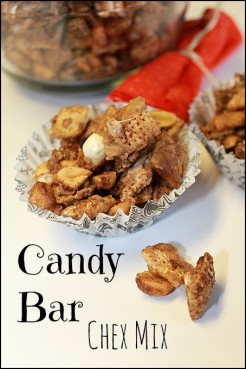
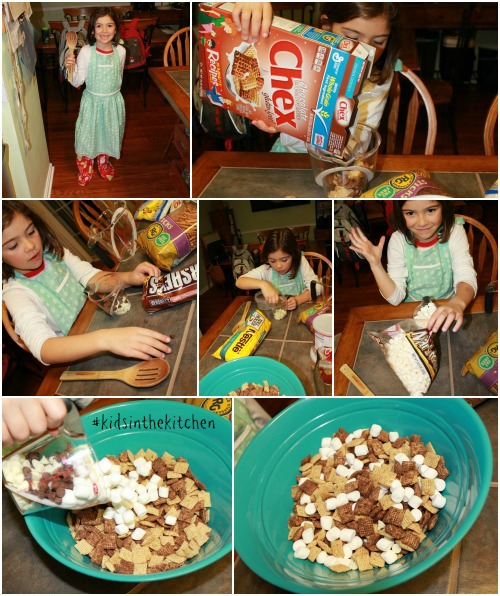
With $50 in hand, a list of ingredients a 1/2 page long and 4-5 recipe ideas in my head I went to the store to load up on Chex cereal varieties and all kinds of “toppings”.  Then once dinner was done and cleaned up Shae and I made dessert, Candy Bar Chex Mix. Making any kind of Chex Mix usually requires very little to no cooking.  For some mix-ups you’ll want some kind of liquid to coat the cereal and ingredients. For this particular recipe a caramel was made. Since making caramel can get really hot I did that part on my on.

Shae measured out and put all the dry ingredients in the bowl. I showed her 1/4 and 1/2 on the measuring cup so she could do it all by herself.  Mixing in the caramel was my job.

Candy Bar Chex Mix #kidsinthekitchen

Ingredients

4 cups Chocolate Chex

1/4 cup chocolate chips

1/4 cup white chocolate chips

1/2 cup mini marshmallows

1/2 cup butter

1/2 cup brown sugar

pinch salt (optional)

1 tsp vanilla

1 cup lightly salted peanuts

Directions

In a large mixing bowl add in cereal, chocolate chips and marshmallows, stir to combine and set aside.

Candy Bar Chex Mix

In a saucepan over medium heat melt down butter and brown sugar. Bring to a boil for couple minutes till it reaches 220°. Having a candy thermometer comes in handy but the mixture should have a foamy bubbly look and getting darker in color.

Remove from heat, add salt, vanilla and peanuts and stir.

Using a rubber spatula stir the cereal mixture as you pour the caramel on top.  Stir and stir until everything is coated. Some of the marshmallows and chocolate chips will melt, that is OK.

Once everything is combined pour this mixture out onto a sheet of foil or parchment that has been lightly sprayed with cooking spray.  Let it cool down.

Candy Bar Chex Mix
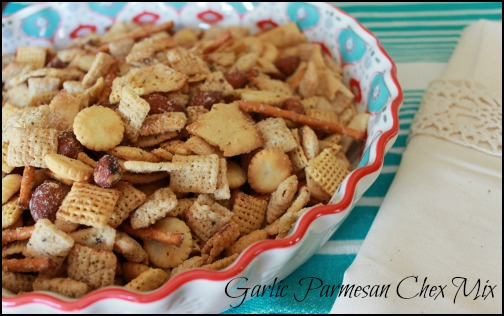
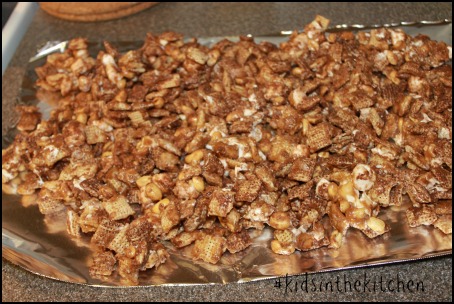
Enjoy slightly warm and messy or package up into treat bags to pop into the kids lunch bag or to give to the kids.
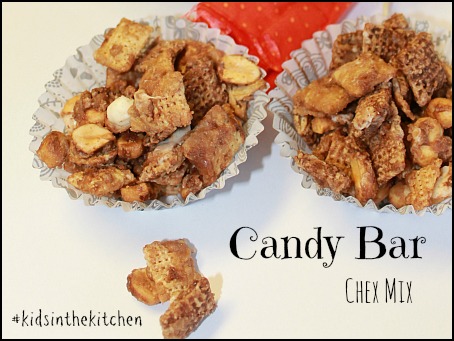
Candy Bar Chex Mix
Did you have fun in the “kitchen” this week? Did you try a new food or a new kid friendly restaurant? Did your littlest ones use their snacks to count to 10? We invite you to share your experiences, photos, stories or recipes that include your #kidsinthekitchen.

Come join me and my co-hosts, Sarah of Play to Learn with Sarah Paula at Frosted Fingers and Sara at Sensibly Sara, each week linking up a post, new or old, that feature the theme Kids in the Kitchen. It doesn’t matter what you are doing as long as you are doing it together, enjoying it and learning something along the way.

Don’t have a blog? Share an instagram photo or Facebook update.

Linky Rules, #kidsinthekitchen

#KidsintheKitchen Weekly Linky


Peanut Butter Nutella Graham Treats #kidsinthekitchen

I was in the mood for a new sweet treat this week so Shae and I worked on a spin of something that we made over a year ago. Using graham crackers as a base we decided to combine some of our FAVORITE flavors into a “bark” kinda dessert.

Peanut Butter Nutella Graham Treats #kidsinthekitchen

Shae was definitely main chef for this project. She laid out all the graham crackers, scooped peanut butter and nutella and spread the mixtures all over.

A quick set in the fridge and they are ready to eat.

Peanut Butter Nutella Graham Treats #kidsinthekitchenIngredients

  • graham crackers
  • peanut butter
  • Nutella
  • vanilla candy wafers

Directions

Cover a large baking dish in foil (reduces mess).

Spread graham crackers in an even layer.

Microwave a cup of peanut butter to a spreadable consistency, about 20 seconds.

Add a large spoonful of Nutella to the peanut butter and gently mix but don’t blend completely. You should still have a marbled look.

Pour this mixture over the graham crackers and spread evenly. Place in fridge to set.

Microwave 1 cup of vanilla candy wafers till melted. Pour this over your set peanut butter mixture and spread evenly.

Set aside in fridge again for 15 minutes. Break apart and enjoy.

Did you have fun in the “kitchen” this week? Did you try a new food or a new kid friendly restaurant? Did your littlest ones use their snacks to count to 10? We invite you to share your experiences, photos, stories or recipes that include your #kidsinthekitchen.

Come join me and my co-hosts, Sarah of Play to Learn with Sarah Paula at Frosted Fingers and Sara at Sensibly Sara, each week linking up a post, new or old, that feature the theme Kids in the Kitchen. It doesn’t matter what you are doing as long as you are doing it together, enjoying it and learning something along the way.

Don’t have a blog? Share an instagram photo or Facebook update.

Linky Rules, #kidsinthekitchen

#KidsintheKitchen Weekly Linky


Peanut Butter Granola Recipe #kidsinthekitchen

We’ve been back to school for 2 months and I’m already running out of ideas for healthy snacks. The go to are granola bars and fruit. They are easy and always in stock in the house. I knew I needed to add something a little different and I then I remembered my kids LOVE granola.  I used to make granola A LOT a couple of years ago so maybe I should start again.
Peanut Butter Granola #kidsinthekitchen
This time Shae helped me with a Peanut Butter Granola recipe.  It’s as simple as dump the ingredients in a bowl, stir, bake, eat.
Peanut Butter Granola #kidsinthekitchen
Ingredients

  • 1 cup of peanut butter (i use creamy, if you use chunky you’ll have to increase oil)
  • 1/2 cup brown sugar
  • 1/4 cup honey
  • 1/4 canola oil
  • 1 tsp vanilla
  • pinch of salt
  • 6 cups of old fashioned oatmeal
  • 1 cup chopped nuts of choice
  • 1 cup shredded coconut (optional)
  • 1 cup dried fruit (optional)

Directions

Preheat your oven to 275°.

In a LARGE microwave proof bowl combine peanut butter, sugar, honey and oil. Place in microwave for 2-3 minutes on medium occasionally stirring and wiping down bowl.

Your mixture should be melty but not completely liquid. Add vanilla, salt, oats and nuts and quickly stir together to coat all of the oatmeal. This is where the muscles come in handy.  Shae did all the stirring with a little help from her big brother.
Peanut Butter Granola #kidsinthekitchen
Pour the granola mixture on a large baking sheet. If you prefer 2 pans that is fine too, I’d rather not make any more dirty dishes.
Peanut Butter Granola #kidsinthekitchen
Bake for 30-40 minutes, gently stirring at 10 minute intervals.  When it has gotten to a golden brown remove it from the oven and stir in additional ingredients. If you decide on chocolate chips they will melt and you’ll get more of a drizzle effect. Let this cool completely before eating, it will get crisp as it cools.

This stores easily in a container with a tight fitting lid and will last about a week. This works perfectly over yogurt, ice cream or by itself.

Did you have fun in the “kitchen” this week? Did you try a new food or a new kid friendly restaurant? Did your littlest ones use their snacks to count to 10? We invite you to share your experiences, photos, stories or recipes that include your #kidsinthekitchen.

Come join me and my co-hosts, Sarah of Play to Learn with Sarah Paula at Frosted Fingers and Sara at Sensibly Sara, each week linking up a post, new or old, that feature the theme Kids in the Kitchen. It doesn’t matter what you are doing as long as you are doing it together, enjoying it and learning something along the way.

Don’t have a blog? Share an instagram photo or Facebook update.
Linky Rules, #kidsinthekitchen

#KidsintheKitchen Weekly Linky


Pudding Sundae Bar #kidsinthekitchen

Dessert time on our home is like Christmas Day. My kids love treats but we limit them to mostly weekends because ice cream makes a brief appearance in our home. Meaning that the time between when it’s bought and the time it’s devoured is short.

I want to be able to give my kids special desserts more often without it being a total bingefest. We have popsicles and frozen fruit on hand all the time but those just don’t have the same indulgent feel as a sundae. I figured we’d try a Pudding Sundae Bar instead. Pudding can be fat free and/or sugar-free making that a better option over ice cream from the beginning but adding a couple tasty toppings makes it a sweet treat for any day of the week.

Pudding Sundaes #kidsinthekitchen

What you see is Shaun and Shae discussing how to get the most bang for their buck. Shae tried to add both cookies but I knocked that down. She instead chose crumbled chocolate chip cookies and reeses ice cream topping sprinkles.  Shaun shocked me the most choosing chocolate chips and raisins. RAISINS!  He said with the cheesecake flavored pudding it was a really good combination.

Pudding Sundaes #kidsinthekitchen

Pudding Sundaes #kidsinthekitchen


Try this un-traditional sundae bar in your home.

Did you have fun in the “kitchen” this week? Did you try a new food or a new kid friendly restaurant? Did your littlest ones use their snacks to count to 10? We invite you to share your experiences, photos, stories or recipes that include your #kidsinthekitchen.

Come join me and my co-hosts, Paula at Frosted Fingers, Sarah of PlaytoLearnwithSarah and Sara at Sensibly Sara, each week linking up a post, new or old, that feature the theme Kids in the Kitchen. It doesn’t matter what you are doing as long as you are doing it together, enjoying it and learning something along the way.

Don’t have a blog? Share an instagram photo or Facebook update.

Linky Rules, #kidsinthekitchenInsert Linky Rules Image Here

#KidsintheKitchen Weekly Linky


Gluten Free Chewy Oatmeal Peanut Butter Cookie #kidsinthekitchen

I had my niece Madi over last week for a few hours but my own kids weren’t home so I needed something fun to do. I figured BAKE! Kids like to eat and play with their food so the answer was easy. The problem lies with her Celiac Disease. Madi can’t have wheat, rye or barley. This crosses off most breads, cakes, cookies and treats off the lists of allowable food. This is hard for a 3 year old. She’s a trooper though.

Gluten Free Chewy Oatmeal Peanut Butter Cookie #kidsinthekitchen

As I was scanning labels in my pantry she asked “Are you checking to see if that has gluten?”. I got your back kid! I found a recipe online a Gluten Free Chewy Oatmeal Peanut Butter Cookie.

Gluten Free Chewy Oatmeal Peanut Butter Cookie #kidsinthekitchen
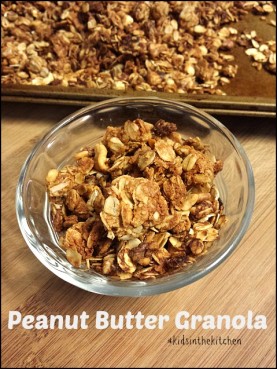
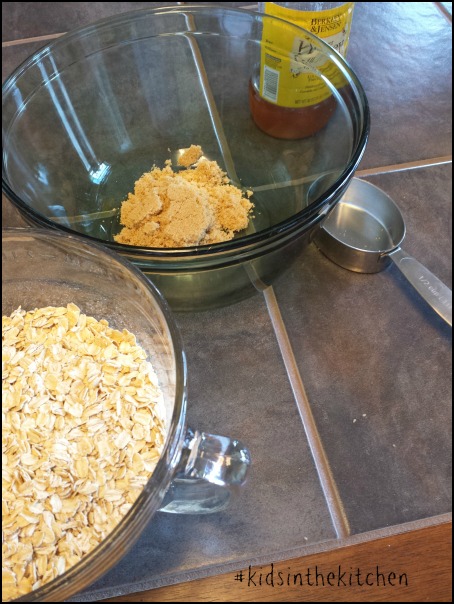
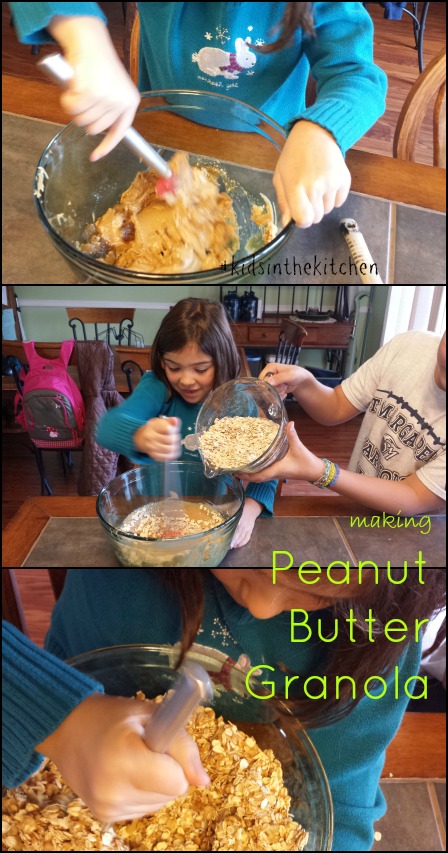
As I got all the ingredients into the mixer she washed her hands and then pulled herself up to the table.
The dough took a couple minutes to put together so I did that on my own but then handed over the mixing bowl and a cookie sheet for Madi to roll the dough into balls.

The recipe can easily be doubled as this only makes 12-15 cookies

Ingredients
1/2 cup chunky peanut butter
1/2 cup brown sugar
1 egg
1 1/4 cups old fashioned oats
1/2 teaspoon baking soda
Preheat oven to 350°F.
Directions

In a mixer, cream together peanut butter and brown sugar until fluffy.
Beat in the egg.
Add oats and baking soda, and mix until it comes together
Roll dough into 2″ ball and place on cookie sheet
Using a fork press to flatten cookies
Bake for eight minutes or until the cookies turn slightly brown.
Cool cookies on a rack, Enjoy!

Gluten Free Chewy Oatmeal Peanut Butter Cookie #kidsinthekitchenI would make these again. They were easy and they tasted good. I don’t like peanut butter cookies but I ate 2 of these. Next time I’m going to add raisins or chocolate chips and a couple squirts of honey to enhance the sweetness from the brown sugar. These additions will keep it gluten free too!

Did you have fun in the “kitchen” this week? Did you try a new food or a new kid friendly restaurant? Did your littlest ones use their snacks to count to 10? We invite you to share your experiences, photos, stories or recipes that include your #kidsinthekitchen.

Come join me and my co-hosts, Paula at Frosted Fingers, Sara at Sensibly Sara, Lisa of HooplaPalooza and Sarah of Play2LearnwithSarah each week linking up a post, new or old, that feature the theme Kids in the Kitchen. It doesn’t matter what you are doing as long as you are doing it together, enjoying it and learning something along the way.

Don’t have a blog? Share an instagram photo or Facebook update.
Linky Rules, #kidsinthekitchen

#KidsintheKitchen Weekly Linky