RSS Email

Candy Bar Chex Mix Recipe #kidsinthekitchen

My focus seems to be on snacks lately.  My pantry and fridge are full but nothing is grabbing my attention. Chex Mix to the day.  I love snagging a bag of Chex Mix at the grocery store and gobbling it down while watching a show with Rob.  The kids come home from school ravenous and are instantly digging through the pantry for a snack.  Since Halloween was around the corner they instantly ask for candy.  I’m not a mean mom but I really hate saying ok to candy. BUT I’m ok with making my own candy and letting them eat that.

Candy Bar Chex Mix is the creature that come from that wacky thought process.
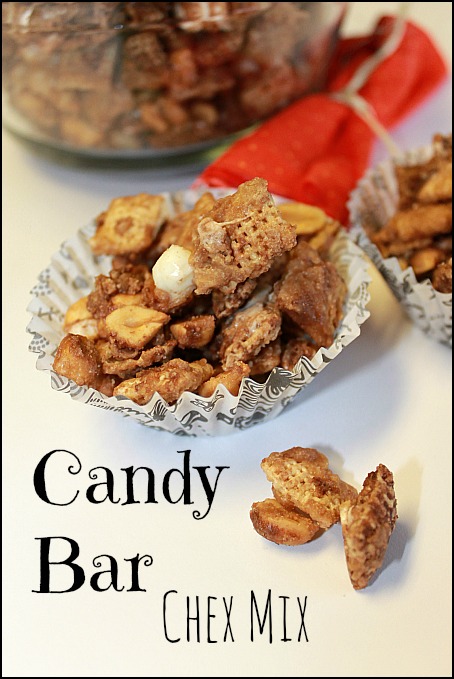
Candy Bar Chex Mix #kidsinthekitchenWith $50 in hand, a list of ingredients a 1/2 page long and 4-5 recipe ideas in my head I went to the store to load up on Chex cereal varieties and all kinds of “toppings”.  Then once dinner was done and cleaned up Shae and I made dessert, Candy Bar Chex Mix. Making any kind of Chex Mix usually requires very little to no cooking.  For some mix-ups you’ll want some kind of liquid to coat the cereal and ingredients. For this particular recipe a caramel was made. Since making caramel can get really hot I did that part on my on.

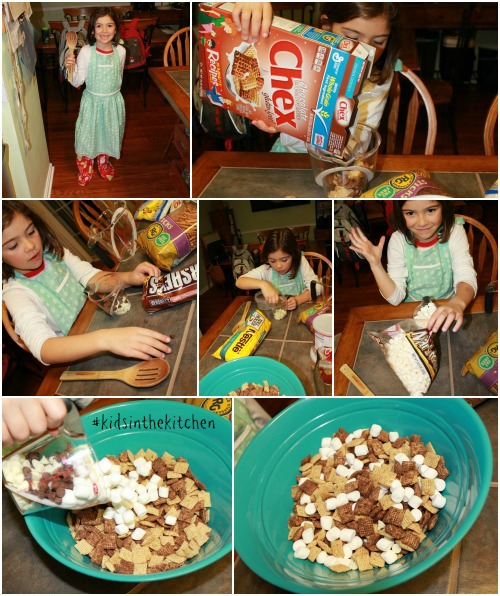
Shae measured out and put all the dry ingredients in the bowl. I showed her 1/4 and 1/2 on the measuring cup so she could do it all by herself.  Mixing in the caramel was my job.

Candy Bar Chex Mix #kidsinthekitchen

Ingredients

4 cups Chocolate Chex

1/4 cup chocolate chips

1/4 cup white chocolate chips

1/2 cup mini marshmallows

1/2 cup butter

1/2 cup brown sugar

pinch salt (optional)

1 tsp vanilla

1 cup lightly salted peanuts

Directions

In a large mixing bowl add in cereal, chocolate chips and marshmallows, stir to combine and set aside.
Candy Bar Chex Mix

In a saucepan over medium heat melt down butter and brown sugar. Bring to a boil for couple minutes till it reaches 220°. Having a candy thermometer comes in handy but the mixture should have a foamy bubbly look and getting darker in color.

Remove from heat, add salt, vanilla and peanuts and stir.

Using a rubber spatula stir the cereal mixture as you pour the caramel on top.  Stir and stir until everything is coated. Some of the marshmallows and chocolate chips will melt, that is OK.

Once everything is combined pour this mixture out onto a sheet of foil or parchment that has been lightly sprayed with cooking spray.  Let it cool down.
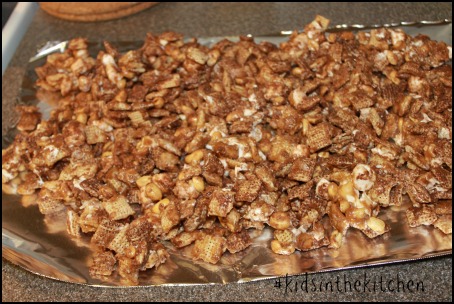
Candy Bar Chex MixEnjoy slightly warm and messy or package up into treat bags to pop into the kids lunch bag or to give to the kids.
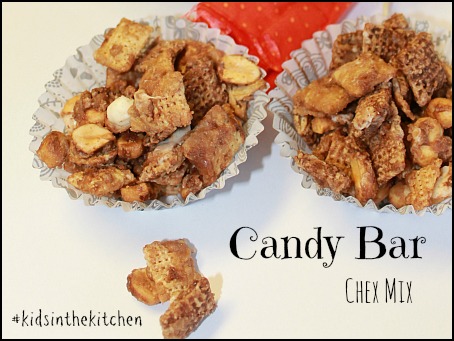
Candy Bar Chex Mix
Did you have fun in the “kitchen” this week? Did you try a new food or a new kid friendly restaurant? Did your littlest ones use their snacks to count to 10? We invite you to share your experiences, photos, stories or recipes that include your #kidsinthekitchen.

Come join me and my co-hosts, Sarah of Play to Learn with Sarah Paula at Frosted Fingers and Sara at Sensibly Sara, each week linking up a post, new or old, that feature the theme Kids in the Kitchen. It doesn’t matter what you are doing as long as you are doing it together, enjoying it and learning something along the way.

Don’t have a blog? Share an instagram photo or Facebook update.
Linky Rules, #kidsinthekitchen

#KidsintheKitchen Weekly Linky


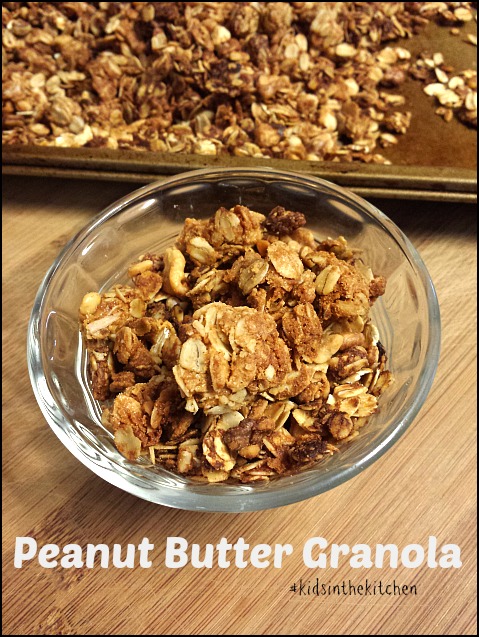
Peanut Butter Granola Recipe #kidsinthekitchen

We’ve been back to school for 2 months and I’m already running out of ideas for healthy snacks. The go to are granola bars and fruit. They are easy and always in stock in the house. I knew I needed to add something a little different and I then I remembered my kids LOVE granola.  I used to make granola A LOT a couple of years ago so maybe I should start again.
Peanut Butter Granola #kidsinthekitchen
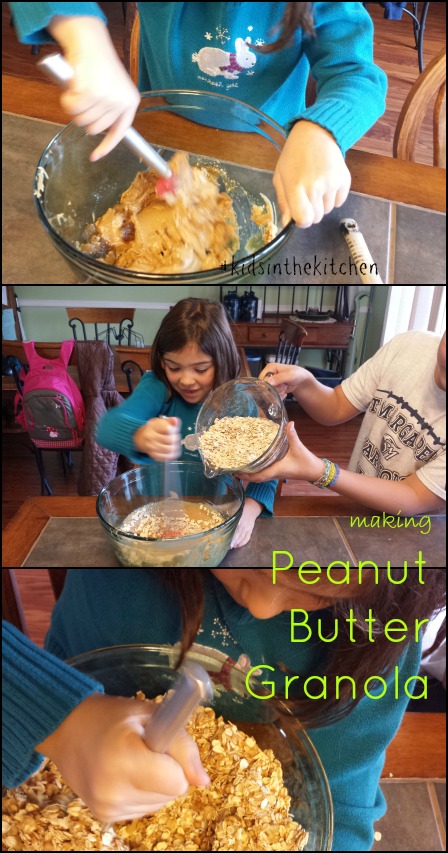
This time Shae helped me with a Peanut Butter Granola recipe.  It’s as simple as dump the ingredients in a bowl, stir, bake, eat.
Peanut Butter Granola #kidsinthekitchen
Ingredients

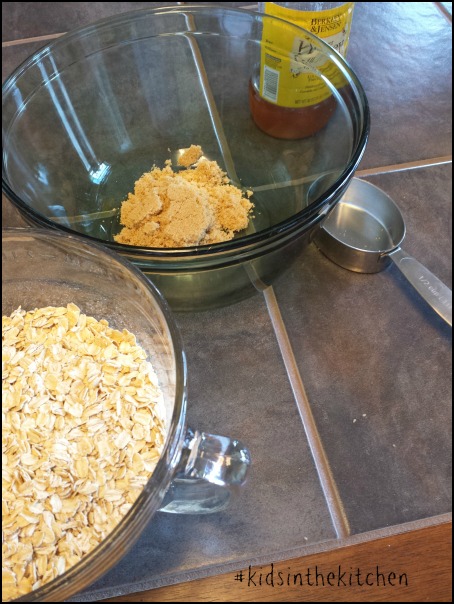
  • 1 cup of peanut butter (i use creamy, if you use chunky you’ll have to increase oil)
  • 1/2 cup brown sugar
  • 1/4 cup honey
  • 1/4 canola oil
  • 1 tsp vanilla
  • pinch of salt
  • 6 cups of old fashioned oatmeal
  • 1 cup chopped nuts of choice
  • 1 cup shredded coconut (optional)
  • 1 cup dried fruit (optional)

Directions

Preheat your oven to 275°.

In a LARGE microwave proof bowl combine peanut butter, sugar, honey and oil. Place in microwave for 2-3 minutes on medium occasionally stirring and wiping down bowl.

Your mixture should be melty but not completely liquid. Add vanilla, salt, oats and nuts and quickly stir together to coat all of the oatmeal. This is where the muscles come in handy.  Shae did all the stirring with a little help from her big brother.
Peanut Butter Granola #kidsinthekitchen
Pour the granola mixture on a large baking sheet. If you prefer 2 pans that is fine too, I’d rather not make any more dirty dishes.
Peanut Butter Granola #kidsinthekitchen
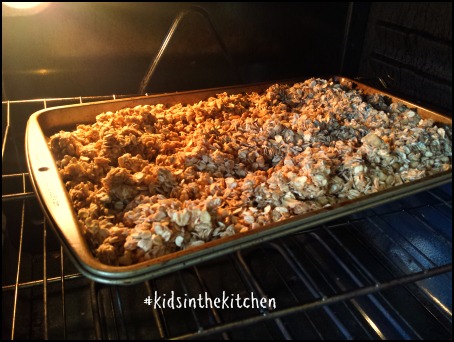
Bake for 30-40 minutes, gently stirring at 10 minute intervals.  When it has gotten to a golden brown remove it from the oven and stir in additional ingredients. If you decide on chocolate chips they will melt and you’ll get more of a drizzle effect. Let this cool completely before eating, it will get crisp as it cools.

This stores easily in a container with a tight fitting lid and will last about a week. This works perfectly over yogurt, ice cream or by itself.

Did you have fun in the “kitchen” this week? Did you try a new food or a new kid friendly restaurant? Did your littlest ones use their snacks to count to 10? We invite you to share your experiences, photos, stories or recipes that include your #kidsinthekitchen.

Come join me and my co-hosts, Sarah of Play to Learn with Sarah Paula at Frosted Fingers and Sara at Sensibly Sara, each week linking up a post, new or old, that feature the theme Kids in the Kitchen. It doesn’t matter what you are doing as long as you are doing it together, enjoying it and learning something along the way.

Don’t have a blog? Share an instagram photo or Facebook update.
Linky Rules, #kidsinthekitchen

#KidsintheKitchen Weekly Linky


Creamy Corn Chicken Chowder #recipe

The temperature dropped about 15 degrees in the last couple of days. I’m now sporting pants and sweatshirts and shoes that require socks.  With this dip in the weather comes the longing for comforting and nourishing food that warms the belly.  SOUP.  I love soup of all kinds but it’s not the most popular in this house. I told the kids  they were getting Corn Chicken Chowder for dinner and surprisingly I was greeted with OHs and mmmmmms.

Creamy Corn Chicken Chowder #recipe

I’ve only ever had Corn Chowder from one place, WAWA.  While I always like it I knew it was missing a freshness. I also knew  it wasn’t at all healthy. I made my own soup using inspiration from several recipes found online and adapting to my own tastes, time and ingredients. The ingredient list looks long but most of it can already be found in your pantry and fridge.

Light but Creamy Corn Chicken Chowder

Ingredients

  • 3 slices of uncooked bacon
  • 2 cups of diced chicken (cooked or uncooked)
  • 2 lbs diced potatoes
  • 1 small diced onion
  • 2 stalks diced celery
  • 1 cup diced carrots
  • 1/2 cup diced red pepper
  • 3 chopped garlic cloves
  • 1 1/2 tsp dried thyme
  • salt and pepper
  • 3 cups corn kernels (fresh or frozen)
  • 1 can cream style corn
  • 3-4 cups chicken broth
  • 1/2 -1 cup light half & half
  • pinch of Cayenne

Directions

In a large stock pot or dutch oven add your bacon and turn the heat up to medium.  I add mine in whole slices but you can chop it before hand. It WILL be used at the end.

When the bacon has crisped and rendered all of its fat remove it and all but 1 TBLS of the grease.

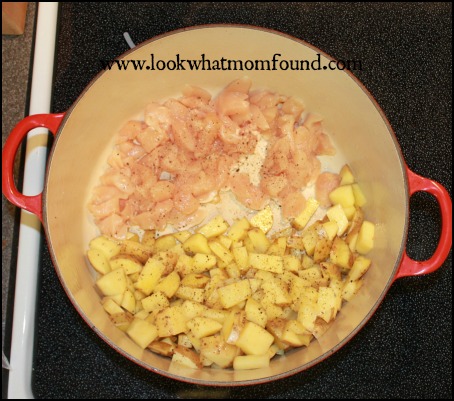
Add the potatoes, a sprinkle of salt and pepper and stir into the bacon grease and sauté for a few minutes. If your chicken is raw now is a good time it to capture some of the yummy bacon flavor.

Creamy Corn Chicken Chowder #recipe

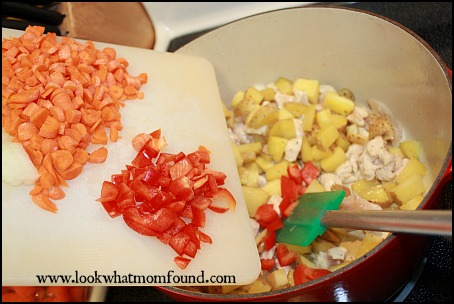
Once the chicken has mostly cooked through add in the rest of the veggies(except corn) the garlic and thyme. Cook for a several minutes till veggies soften then add corn and canned corn and salt and pepper if needed. If you are using cooked or leftover chicken now is the time to add it.

Creamy Corn Chicken Chowder #recipe

Add broth and simmer till potatoes are cooked through. Using a hand masher work through the soup to smash some potatoes, this will naturally thicken the soup instead of adding flour or cornstarch.

Add half & half and cayenne, stir and serve. Top with crumbled bacon.

Creamy Corn Chicken Chowder #recipe

Additional toppings could be sliced green onions, shredded cheese or sour cream.  The smashing of the potatoes and addition of SOME half and half make this a creamy soup without the guilt of heavy cream and lots of butter.  In fact besides the initial bacon slices there was additional oil added.  The key is to have flavorful ingredients.

Creamy Corn Chicken Chowder #recipe

Celery is key, switch other veggies to suit your tastes but don’t skip the celery.


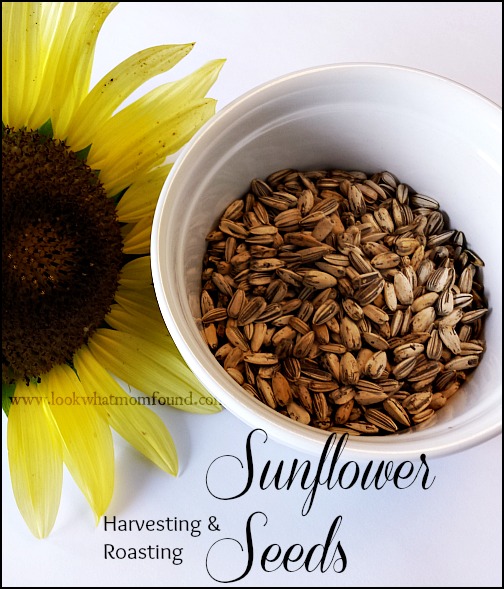
Harvesting and Roasting Sunflower Seeds

I’ve always loved sunflowers. Their cheery vivid golden yellow blooms always put a smile on my face. I finally planted them in our garden this year. They were easy to grow and I was greeted with new flowers every week.

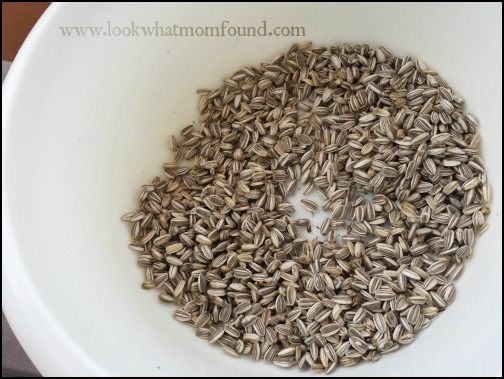
Sunflower Seeds from the Garden

I had always planned on harvesting the seeds but to plant for next year. Some point along the way I decided to harvest them for consumption. It could’ve been Rob’s new obsession with eating them during Shaun’s football practice.

Harvesting and Roasting Sunflower Seeds

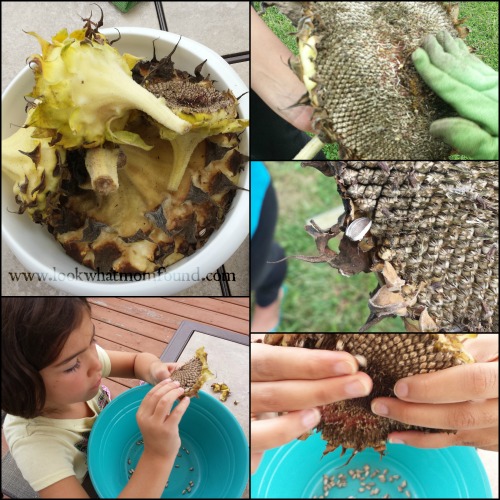
Start off with finding blossoms that are drooping, brown and dried on the back of the flower. Cut a

few inches down the stem and shake off any insects. Using gloves vigorously rub off the remaining buds until you see even speckled black and white. These are the tops of the seeds.

Harvesting Sunflower Seeds for Eating


Working over a bowl or large surface massage out the seeds. The drier the flower is the easier it will be.

Harvesting Sunflower Seeds


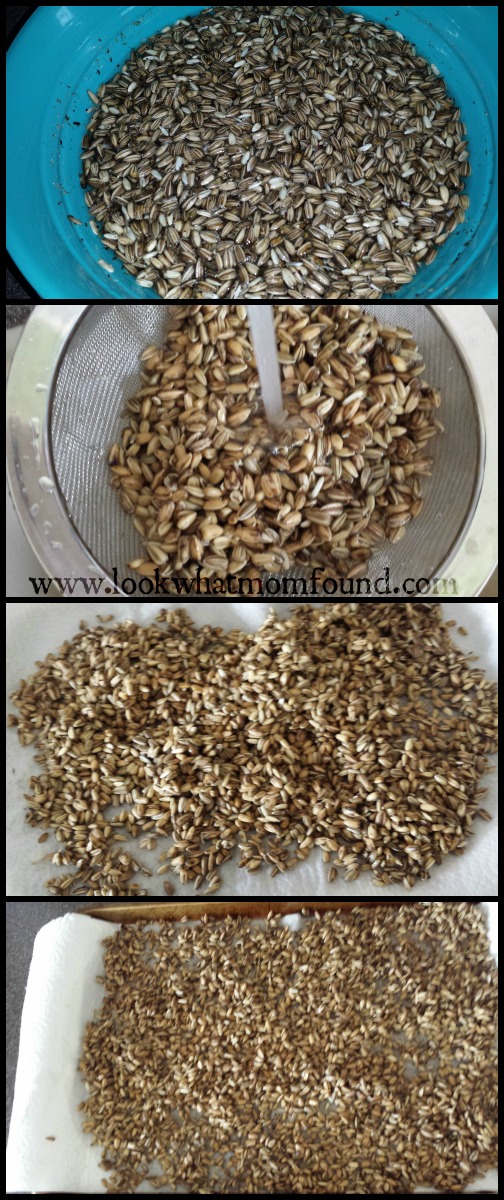
Remove leaves, pulp and bugs then set your seeds in a large bowl of water. Leave it alone for 24 hours.

Rinse your seeds in a fine colander and place on a paper towel lined cookie sheet. Pat dry and set aside for an hour or so to dry. I like to place them in a sunny spot to get as much moisture out as possible.

prepping sunflower seeds for roasting

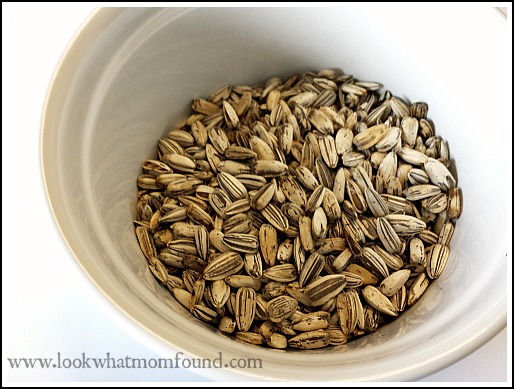
Preheat your oven to 300°. Move your seeds to a shallow cookie sheet in an even layer. Do not add oil or salt. Place into oven and roast for 30-40 minutes stirring every 10 minutes. Taste as you go to ensure they are done.

Roasted Sunflower Seeds

Remove from oven, allow to cool and enjoy.

  • The addition of oil, salt and flavorings can be done as soon as your seeds come out of the oven.
  • I recommend harvesting from the LARGE sunflowers. These will have larger seeds.
  • Don’t think you’ll get seeds as large as the ones that come packaged in the store.


#ad Tyson Project A+ Program plus Chicken Parm Pockets #Recipe #Clip4School #CBias

I’m the type if mom that plans out the family meals for the week to include  homemade mashed potatoes & mac and cheese and made from scratch pizza dough. I like being able to prepare balanced meals that everyone will enjoy.  But that doesn’t mean I’m not the first to admit I rely in some cheats to get me through a busy week.

Tyson is definitely one of our go-to brands for convenience foods for these exact moments.  Another reason I’m stocking up on Tyson favorites right now is the introduction of their Project A+ program for schools.

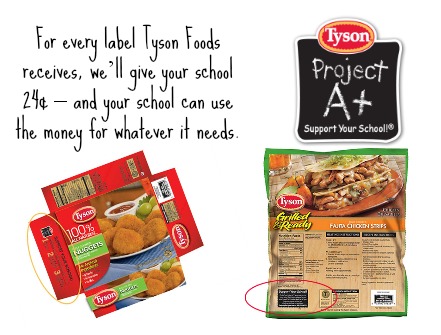
The Tyson Project A+ program is one of the simplest ways to support your school. Just clip and redeem Tyson Project A+ labels from packages of Tyson® products. For every label we receive, we’ll give your school 24¢ – and your school can use the money for whatever it needs.

Tyson Foods Project A+ program

These funds can be used school trips, school supplies, musical instruments, athletic gear and more.  Schools everyday are faced with budget cuts and the decision on what academic or extracurricular activity is going to have to suffer.  Getting started is simple.  Register your school, assign or volunteer as the administrator for the program and educate the families to clip and save the labels to cash in for CASH.  Set goals, make it a competition, spread the word, engage the families. Do whatever it takes to #Clip4School.

Tyson Foods is stepping up and giving schools and their communities the chance to make a difference by doing what they already do, shop for groceries to feed their families.

My grocery list usually consists of the things we need to get through the week but I like to toss in some “just in case” items such as Chicken Nuggets, Chicken Fries or Chicken Wings in case our dinner plans have gone awry.

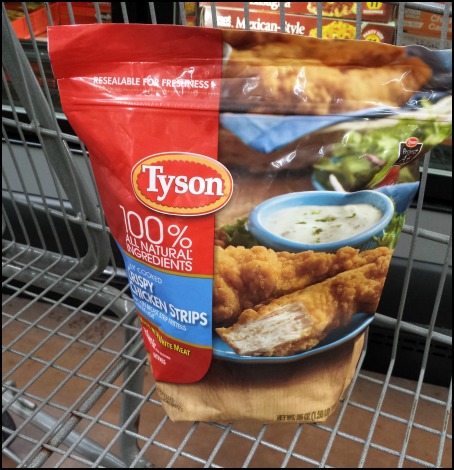
I used Tyson Foods Crispy Chicken Strips for a new meal idea, a twist on Chicken Parmesan.

Tyson Foods Crispy Chicken Strips #Clip4School

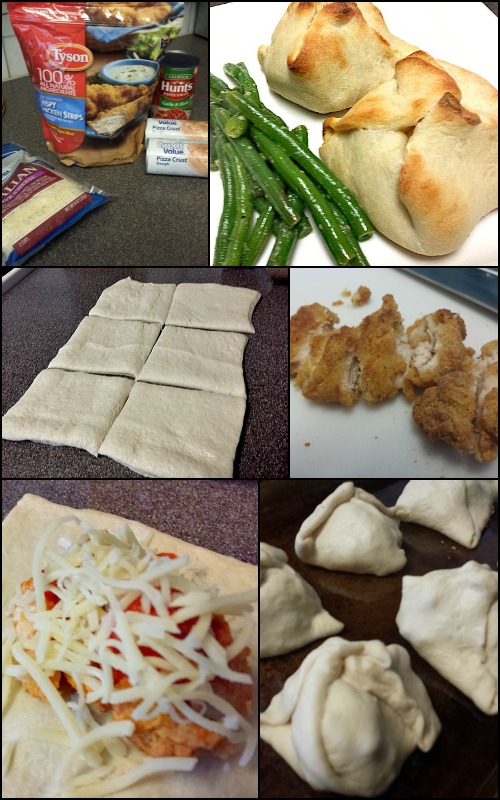
Chicken Parmesan Pockets #cbias #clip4school

Chicken Parmesan Pockets

  • Crispy Chicken Strips (25oz package)
  • 2 tubes of refrigerated Pizza Dough
  • Italian Blend Shredded Cheese
  • Pasta or Pizza Sauce

Chicken Parmesan Pockets #cbias #clip4school

Start by cooking chicken strips according to package directions.  Divide each pizza dough into 6 pieces and roll out into 6×8″ rectangles.

Chop cooked chicken into bite size pieces place a small handful on each rectangle of dough and top with sauce and cheese.

Pull up the corners to the top and press edges onto each other to seal closed.

Bake for 12-18 minutes until golden brown.  Serve with extra sauce and veggies for a balanced meal.

Modify this recipe to suit your family’s tastes by adding roasted red peppers, chunk mozzarella, spicy  marinara or Tyson Food Grilled Chicken Strips instead.

What meals can you change up just by using one of Tyson Foods many many wholesome choices?


Making Smoothies #kidsinthekitchen

Breakfast time this summer has been a bit lazy. We’re all getting out of bed late and no one is in the mood for a heavy meal. While I encourage healthy choices sometimes the entire meal is a bit unbalanced.
This week I wanted to start a couple of days right with a nice balance of sweetness and protein with smoothies.

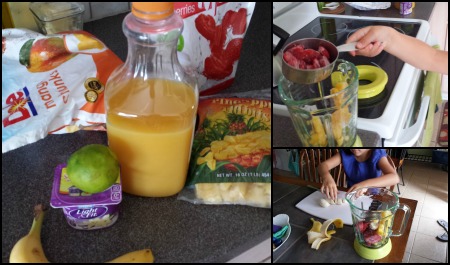
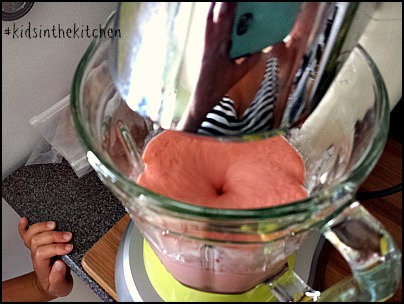
I let the kids choose what ingredients they wanted and Strawberries, Banana, Pineapple seemed to be a hit. With the addition of yogurt, orange juice and a squeeze of lime juice the final flavor and texture were spot on. I could’ve added some protein powder or peanut butter to enhance the nutritional content. Next time!

#kidsinthekitchen making a smoothie

I don’t own a blender so I used my margarita machine. It works great at chopping ice into a nice slushy margarita so why not a smoothie. I dumped almost a whole banana, 1 cup each of frozen strawberries and pineapple, 6oz of yogurt and 1/2 cup of OJ into the pitcher and blended till smooth. This was enough for 2 kid size drinks to go along with their cereal and milk.
#kidsinthekitchen making a smoothie
Did you have fun in the “kitchen” this week? Did you try a new food or a new kid friendly restaurant? Did your littlest ones use their snacks to count to 10? We invite you to share your experiences, photos, stories or recipes that include your #kidsinthekitchen.

Come join me and my co-hosts, Paula at Frosted Fingers and Sara at Sensibly Sara, each week linking up a post, new or old, that feature the theme Kids in the Kitchen. It doesn’t matter what you are doing as long as you are doing it together, enjoying it and learning something along the way.

Don’t have a blog? Share an instagram photo or Facebook update.

Linky Rules, #kidsinthekitchen

#KidsintheKitchen Weekly Linky


Lemon Blueberry Muffins #recipe

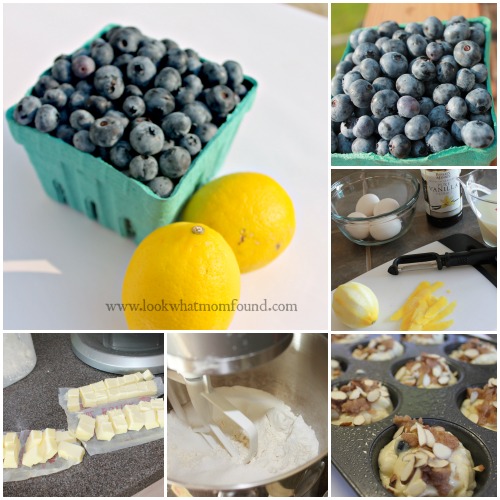
In the beginning of the season Shae was so excited about her Blueberry Bush growing and giving off fruit, she talked about the food she would make and couldn’t wait each morning to go out and eat right from the branches.  That all ended when the birds found where I had moved it.  That was the end of the berries for us. Fortunately Rob has been able to pass a produce stand everyday coming home from work and picked up this HUGE container of blueberries for just $3.

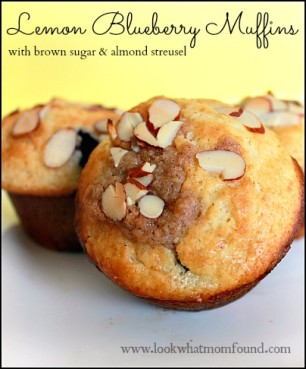
I knew what I was making,  Lemon Blueberry Muffins with Brown Sugar and Almond Streusel. The recipe was adapted from a few I found online; tweaked, edited and made my own.

I’ve made these twice and everyone LOVES them.  The best part is the burst of fresh lemon flavor from the juice and zest.

Muffin Batter

  • 4 cups flour
  • 2  tbls baking powder
  • 1/2 tsp salt
  • 1 3/4 cup sugar
  • 12 tbls cubed cold butter
  • 1 1/3 cup milk
  • 4 eggs (3 whole,  1 yolk)
  • 2 tsp vanilla
  • juice from 1 lemon (about 2 tbls)
  • zest from 1 lemon (about 1 tsp)
  • 2 cups of fresh blueberries (or frozen)

Muffin Topping

  • 1/2 cup sliced or slivered almonds (optional)
  • 4 tbls melted butter
  • 4 tbls flour
  • 5 tbls brown sugar
  • 1/2 tsp cinnamon
    Lemon Blueberry Muffins #recipe


Preheat your oven to 375 and thoroughly grease 24 muffin tins.

In a large mixing bowl of an electric mixer blend the flour, baking powder, salt and sugar for a few seconds.  Then add the cold butter and mix till butter resembles small pebbles.  In a small separate bowl add lemon juice, lemon zest, vanilla, eggs and milk and beat till combined then add to the flour mixture.

Mix till batter comes together but do not over mix.  Add blueberries and gently mix for a few seconds. You don’t want to break up the blueberries, that will make your batter purple.

Fill your muffin cups almost full.

For the streusel topping start with melting your butter then adding in the flour, brown sugar and cinnamon. Mix till crumbly.  Sprinkle on top of each muffin along with the almonds.

Bake for 19-22 minutes till golden brown.

Remove muffins from tins and allow to cool slightly before enjoying.

Lemon Blueberry Muffins #recipe

Lemon Blueberry Muffins

Serving Size: 24 regular size muffins

Lemon Blueberry Muffins

Ingredients

  • Batter
  • 4 cups flour
  • 2 tbls baking powder
  • 1/2 tsp salt
  • 1 3/4 cup sugar
  • 12 tbls cubed cold butter
  • 1 1/3 cup milk
  • 4 eggs (3 whole, 1 yolk)
  • 2 tsp vanilla
  • juice from 1 lemon (about 2 tbls)
  • zest from 1 lemon (about 1 tsp)
  • 2 cups of fresh blueberries (or frozen)
  • Topping
  • 1/2 cup sliced or slivered almonds (optional)
  • 4 tbls melted butter
  • 4 tbls flour
  • 5 tbls brown sugar
  • 1/2 tsp cinnamon

Instructions

  1. Preheat your oven to 375 and thoroughly grease 24 muffin tins.
  2. In a large mixing bowl mix the flour, baking powder, salt and sugar.
  3. Add the cold butter and beat till butter resembles small pebbles.
  4. In a small separate bowl add lemon juice, lemon zest, vanilla, eggs and milk.
  5. Beat till combined and add to flour mixture.
  6. Mix till batter comes together but do not over mix.
  7. Add blueberries and gently mix for a few seconds. You don't want to break up the blueberries, that will make your batter purple.
  8. Fill your muffin cups almost full.
  9. For the streusel topping start with melting your butter then adding in the flour, brown sugar and cinnamon.
  10. Mix till crumbly.
  11. Sprinkle on top of each muffin along with the almonds.
  12. Bake for 19-22 minutes till golden brown.
  13. Remove from tins and allow to cool slightly before enjoying.
https://lookwhatmomfound.com/2013/07/lemon-blueberry-muffins-recipe.html

Tips while baking

  • zest the lemon before juicing, it’s much easier this way
  • don’t make the lemon and milk mixture ahead of time, you’ll end up with curdled milk if it sits too long
  • omit almonds if desired
  • batter should be thick, much thicker than pancake mix

These make a great snack, breakfast or even dessert.  Switching out ingredients is simple to come up with new recipes such as Cranberry Orange Muffins or Lemon Strawberry Cake.  I would rehydrate dried fruit that was already in our pantry for these pairings.


Dessert Quesadillas #kidsinthekitchen

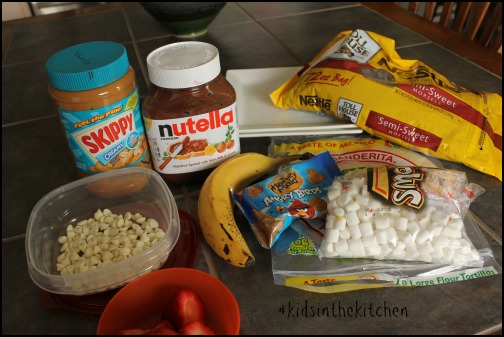
The kids like elaborate desserts at home. Make your own sundaes and homemade strawberry shortcakes usually top their list. This are delicious but I sometimes crave something a little different. Quesadillas are a regular lunch for us so I asked Shae and Shaun to come up with some Dessert Quesadilla ideas.

I pulled out ingredients that I thought would fit well into a dessert theme and let them create their own treats.

Dessert Quesadillas #kidsinthekitchen

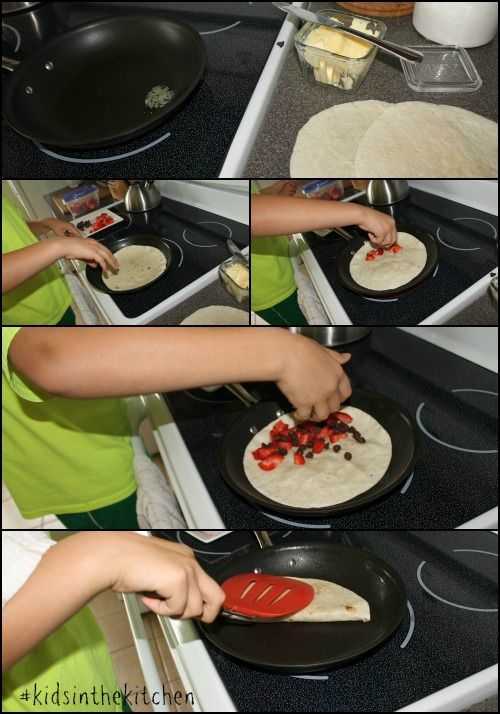
Shaun was first. He loves chocolate covered strawberries so he went with sliced strawberries and chocolate chips. He made it almost all by himself. I helped with flipping the quesadilla and moving it to a plate but he manned the stove pretty well.

Chocolate covered Strawberry Dessert Quesadillas #kidsinthekitchen

Shae went with  my favorite combination, S’mores.  She wasn’t as confident at the stove but was able to help quite a bit.

S'mores Dessert Quesadillas #kidsinthekitchen

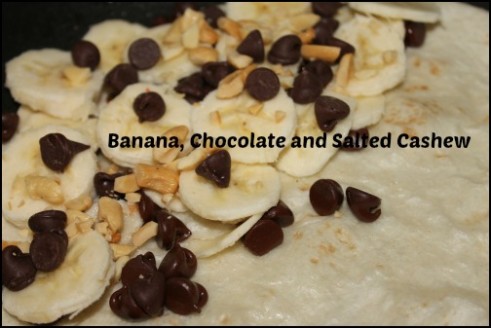
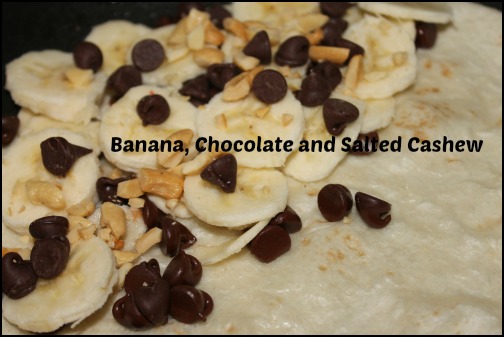
The final one was made for dad; bananas, chocolate chips and crushed salted cashews.  He loved it.  This is something we are going to keep experimenting with, coming up with new combinations and ingredient ideas.

Dessert Quesadillas made by kids
Did you have fun in the “kitchen” this week? Did you try a new food or a new kid friendly restaurant? Did your littlest ones use their snacks to count to 10? We invite you to share your experiences, photos, stories or recipes that include your #kidsinthekitchen.

Come join me and my co-hosts, Paula at Frosted Fingers and Sara at Sensibly Sara, each week linking up a post, new or old, that feature the theme Kids in the Kitchen. It doesn’t matter what you are doing as long as you are doing it together, enjoying it and learning something along the way.

Don’t have a blog? Share an instagram photo or Facebook update.

Linky Rules, #kidsinthekitchen

#KidsintheKitchen Weekly Linky


Veggie and Pasta Summer Salad Recipe Virtual Dinner Party Blog Hop

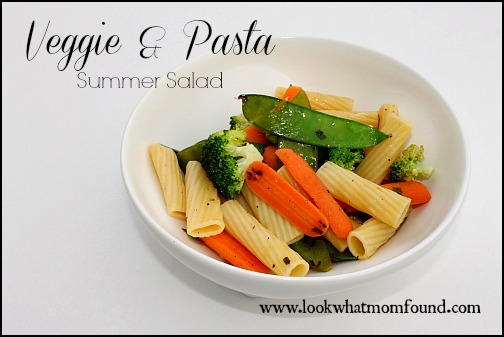
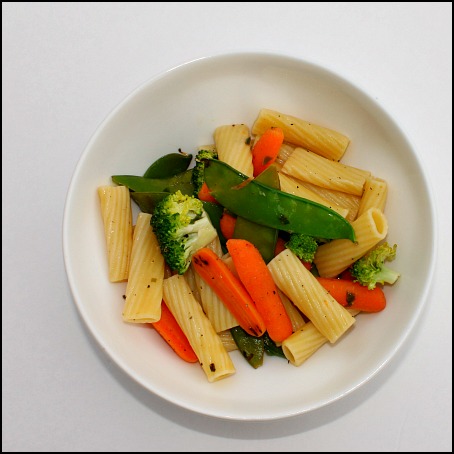
With Summer comes a whole new challenge with making dinner because I just don’t feel like it. We use the grill most of the time but sometimes I long for the cool weather standbys of pasta or potatoes. A cool crisp pasta salad is a great way to satisfy those carb cravings. This Summer Veggie Pasta Salad is the right balance of comfort food and fresh healthy lite fare.

Veggie and Pasta Summer Salad

Summer Veggie Pasta Salad

Ingredients
10 oz of pasta, I used rigatoni shape
2 cups of broccoli florets
1 cup snap peas
2 cups of baby carrots, quartered lengthwise
olive oil
salt and pepper

Dressing
1TBSP Dijon mustard
1/2 cup red wine vinegar
1/4 olive oil
1tsp finely chopped garlic
handful fresh basil or 2 tsp dried basil
2 sprigs oregano or 1 tsp dried oregano

Directions
Bring large pot of water to boil and cook pasta according to directions on box. While pasta is cooking heat up large skillet to cook veggies.

With a drizzle of oil in hot pan cook carrots with salt and pepper till just tender then set aside. Using the same pan add broccoli and 1/2 cup of water and cook broccoli till just tender then set aside. Do the same for the snap peas.

In a large bowl combine the mustard, vinegar, garlic and herbs. Add pasta and cooked veggies and mix into dressing. Add additional salt and pepper to taste.
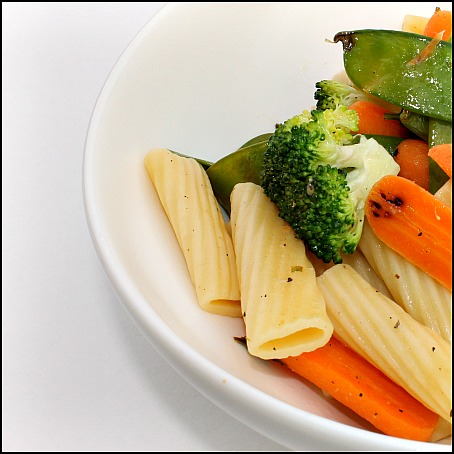
Veggie and Pasta Summer Salad

Veggie and Pasta Summer Salad

Use any vegetable that you can get your hands on. I’ve made this with jarred roasted red peppers, zucchini, fresh off the vine tomatoes and garden peas. Experiment with other flavored vinegars or even try roasting vegetables. Add the ingredients that best suit those you are feeding.


To get the full Progressively Perfect Virtual Dinner Party blog hop experience, click the links below in order:

Appetizers

Salad

Drinks

Entrees

Coffee, Tea & Dessert


  • A Grande Life- No Bake Strawberry Icebox Cake
  • The Naughty Mommy- Key Lime Pie
  • Latte and Legos – Spiced Vanilla Chai Latte

Late Night

  • The Turnip Farmer- Vodka Gummi Bears

Decorations, Outfits and Music


Homemade Rock Candy #FAIL #KidsintheKitchen

I was never a great student in science. I mean I did enjoy it but it didn’t always make total sense to me. Maybe that’s why I completely botched our homemade Rock Candy experience.
Shae wasn’t too sure what rock candy was until I showed her a picture of it online. I asked if she wasn’t to make some and she was excited. I figured this was something she was going to be able to see results over a few days making it really fun and interactive. I was wrong wrong wrong.

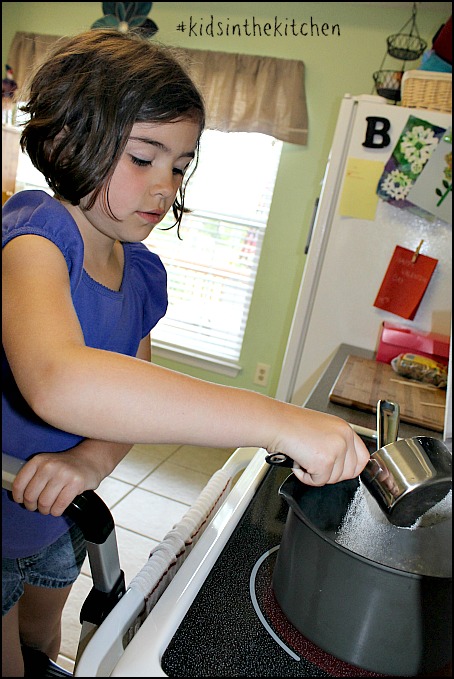
Shae was a great help with the stove work. She poured the water and sugar and helped stir but when it came to pouring I was in charge.

Rock Candy #Fail #kidsinthekitchen

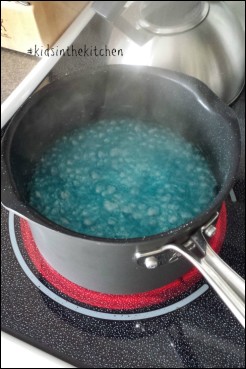
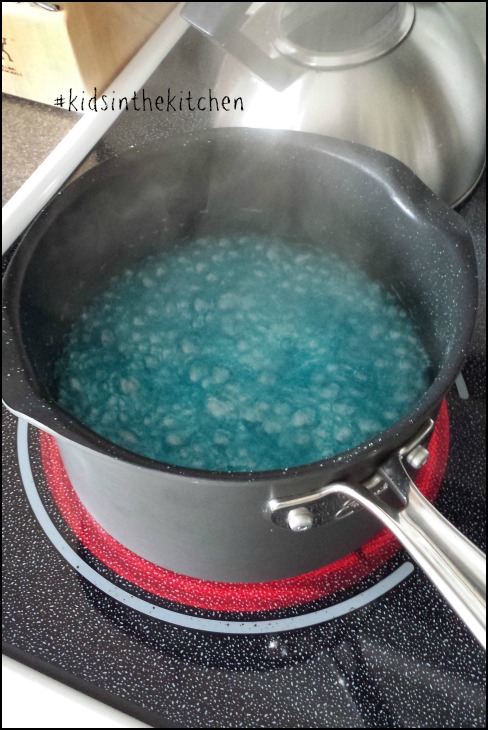
The gorgeous blue color reminded me of the Caribbean Sea and I thought we would have some pretty Rock Candy to eat afterwards.

Rock Candy #Fail #kidsinthekitchen

Something happened. The day after pouring it into the jar there was NOTHING to see.

Rock Candy #Fail #kidsinthekitchen

According to everything I read I was supposed to reboil and add sugar, so I did. I knew from the looks of the mixture after the reboil and sugar addition it wasn’t going to turn out well. I was right. Within an hour it had turned into a solid block of sugar with skewer sticking out of it.

Oh well.. Shae had fun helping to make it and had a few laughs when it didn’t turn out so well.

Did you have fun in the “kitchen” this week? Did you try a new food or a new kid friendly restaurant? Did your littlest ones use their snacks to count to 10? We invite you to share your experiences, photos, stories or recipes that include your #kidsinthekitchen.

Come join me and my co-hosts, Paula at Frosted Fingers and Sara at Sensibly Sara, each week linking up a post, new or old, that feature the theme Kids in the Kitchen. It doesn’t matter what you are doing as long as you are doing it together, enjoying it and learning something along the way.

Don’t have a blog? Share an instagram photo or Facebook update instead.

Linky Rules, #kidsinthekitchen

#KidsintheKitchen Weekly Linky