RSS Email

Chex Mix Sweet and Spicy Snack for the Holidays

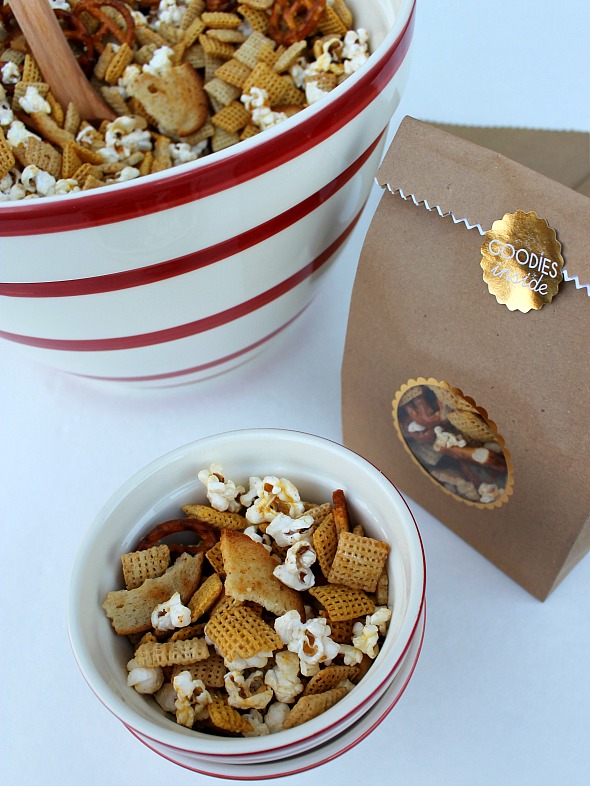
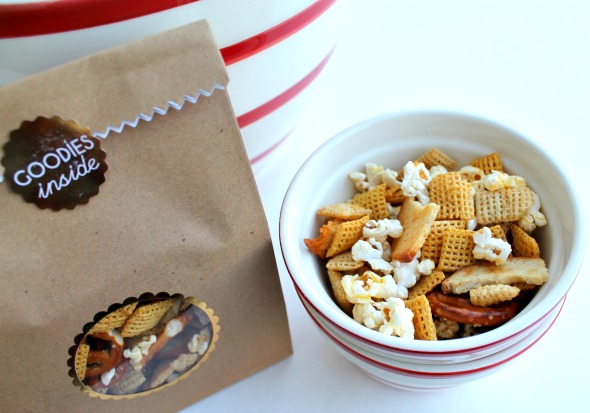
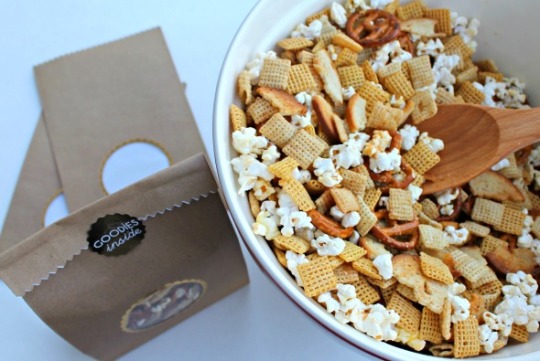
The stress is kicking in. I haven’t done enough prep to be ready for the holidays. I didn’t bake enough cookies, I didn’t make enough gifts, I didn’t assemble enough handmade ornaments. I DID however make another  HUGE batch of Chex Mix. This time I went with a Sweet and Spicy version that would be good for the whole family.  Rob loves spice but I wanted to make sure this one was tame enough for everyone to enjoy.
Chex Mix Sweet and Spicy Snack for the Holidays

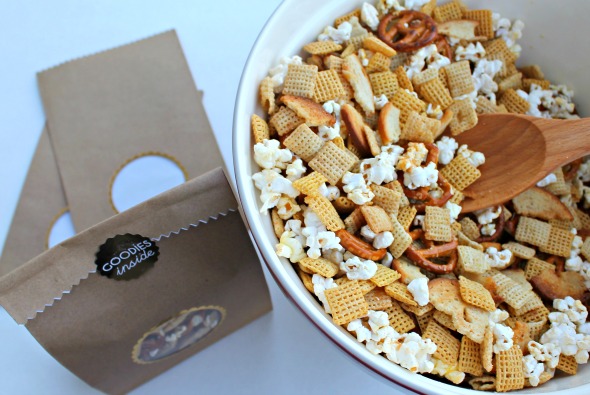
Chex Mix is one of those holiday and party staples. It’s easy to whip up and even easier to create a flavor mix that suits the season and the crowd’s tastebuds.Chex Mix Sweet and Spicy Snack for the Holidays
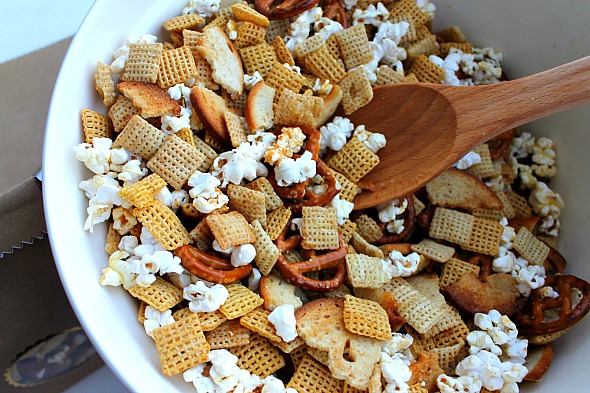
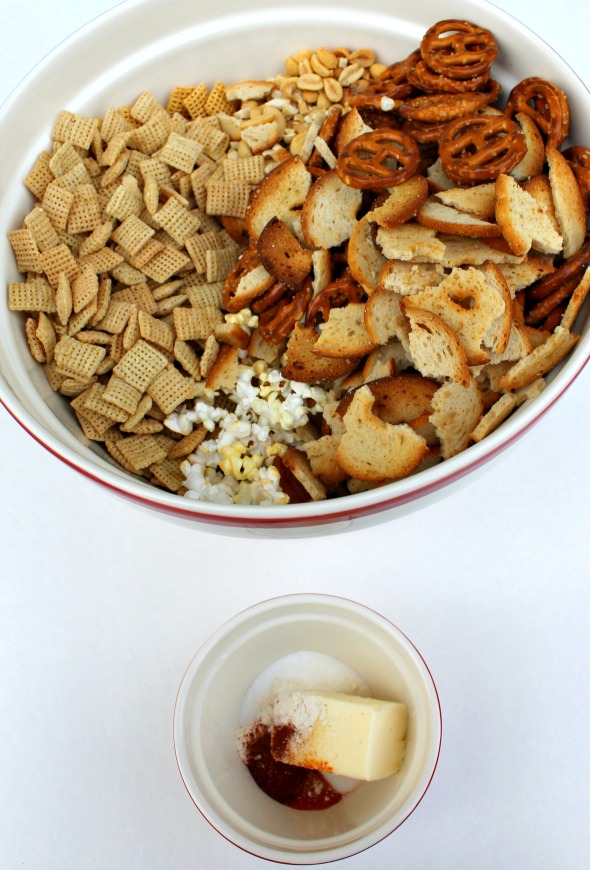
Open up your cabinets and see what you have on hand and start building something that will be a hit for years. Just remember to write down how you made it.

Sweet and Spicy Chex Mix

Ingredients

  • 8 Cups Chex Mix (combo of Corn, Rice and/or Wheat)
  • 1 bag of popped microwave popcorn
  • 2 cups broken garlic bagel chips
  • 3 cups small pretzels
  • 1 cups nuts of choice
  • 4 TBLS butter
  • 1/2 tsp salt
  • 1/2 tsp garlic powder
  • 1/2 tsp onion powder
  • 3 tsp sugar
  • 2 pinches cayenne
  • 1/4 tsp paprika
  • 1-2 tsp hot sauce (more if desired)
  • 2 TBLS olive oil

Directions

In a large microwave proof  bowl combine all of cereal, snacks and nuts.  In a small microwave bowl melt the butter and spices together, 30 seconds. Then add olive oil and hot sauce, stir and pour over the snack  mix.

Mix thoroughly with a wooden or rubber spoon to spread the seasoning blend.

Put the large bowl in the microwave for 4-5 minutes stirring thoroughly at each minute interval.

Stir Stir Stir

Allow to cool then enjoy.

*If you want more heat increase the hot sauce and cayenne pepper.
Chex Mix Sweet and Spicy Snack for the Holidays

Chex Mix Sweet and Spicy Snack for the Holidays

Chex Mix Sweet and Spicy Snack for the Holidays

This makes a giant portion, one that will lasts days for our family or for a get together. Package up individual treat bags to give as small gifts for teachers, neighbors or co-workers. Who doesn’t love a snack? If this recipe doesn’t sound good find many more on Chex.com or just click through to these delicious ideas

o   Chex Muddy Buddies (the original!)

o   Cinnamon Cider Chex

o   Peppermint and Chocolate Chex

o   Holiday Caramel Chex

o   Chex Brittle

o   Chocolate Mint Chex Mix

o   Gingerbread Chex Mix

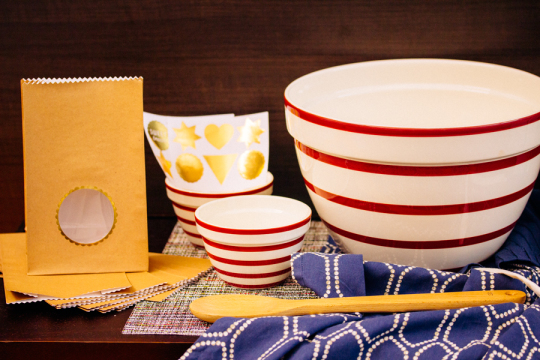
Enter to win a beautiful Party Box (shown below) to use for the holidays and all year. Tell me what your ideal Chex Mix flavor mix will include.Chex Mix Party Box for the Holidays Giveaway
EXTRA ENTRIES:
To receive these extra opportunities for entries, you must fulfill the first REQUIRED entry above. Please note the changes to the entries and frequency, entries that don’t follow rules may be disregarded/ignored/deleted

  • SUBSCRIBE to LookWhatMomFound…and Dad too! via NEW Email Subscription.
  • COMMENT on a recent Review/Our Life/Our Travels/Our Thoughts post, let us know where to find it
  • FOLLOW @Melinda & @ChexCereal on Twitter and TWEET this giveaway (1 time per day), please leave your twitter link each time: For Holidays & Everyday, Chex Mix Party Box #Giveaway from @ChexCereal @anddadtoo @melindababiak 
  • SHARE this giveaway & below image on Google +, leave your link in comments below
  • SHARE this giveaway & below image on Pinterest, leave your link in comments below
  • SHARE this giveaway & below image on Instagram, leave your link in comments below
  • SHARE this giveaway & below image on Facebook, leave your link in the comments below

Chex Mix Sweet and Spicy Snack for the Holidays #Giveaway

Your entries must follow the rules or they won’t be eligible for prizes. This contest ends 11:59 pm, Tuesday , January 6, 2015. The winners will be emailed and will have 48 hours to claim their prize. This contest is open to Contiguous US residents, age 18 or over. For complete rules please read our blog contest rules page.



Doctor Up Store Bought Ingredients

Creating meals and desserts from scratch might be the the best way to nourish your family but who really has time to home cook every single meal. Even though I work from home, meal plan and enjoy cooking and baking I can’t prepare everything for a meal homemade. When I can I do but when I can’t I doctor up store bought ingredients to make my own. These little cheats are a great way to create meals that are your own but without the hassle of too many pots, pans and ingredients when you’re low on time, budget and even interest.

Doctor Up Store Bought IngredientsI know my family would love the taste of a long, slow simmered tomato sauce for our pasta dishes but I just DON’T want to babysit something like that so I opt for my kitchen hack instead.
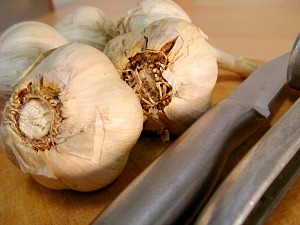
Create a wonderfully Spicy Pasta Sauce using what comes in a jar as a base. It’s easy to make it all your own with the addition of herbs, vinegar and browned meats. My little trick is to saute a lot of garlic, 5 cloves, in 1/4 cup of olive oil and 2 tsps of butter over low heat so it doesn’t burn. Let that go for a couple minutes, add 2-3 pinches of red pepper flakes, 2 tbsp of red wine vinegar then your jarred sauce. These couple little steps gives your sauce a whole new depth of flavor with very little effort.Doctor Up Store Bought Ingredients

With Holidays centered around the dining table you want to serve dishes that you are proud of. Boxed Stuffing mix can easily be elevated with the addition of sauteed diced veggies, chopped apples and cooked crumbled sausage. No one has to know you took a shortcut.

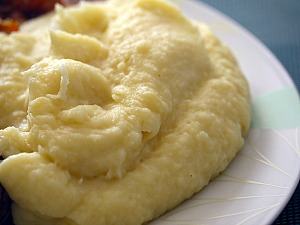
Instant Mashed Potatoes are not my favorite dish. I always have them on hand though. They make a delicious thickener for soups and stews and bulk up homemade smashed potatoes when I’m short on ingredients but making them taste good on their own takes a few extra steps.  Start with a flavorful stock instead of water and don’t be afraid to increase the butter to 4 tbls as well as 1/4 cup of sour cream. To get an extra creamy feel skip them milk and go for heavy cream.  Doctor Up Store Bought Ingredients

While we LOVE to use our smoker for pulled pork and wings and brisket I’m not big on BBQ Sauce. That doesn’t mean everyone else in my house isn’t. This means we always have bottled stuff in the house. This is one of the simpler things to spruce up.  With the addition of hot sauce, honey, Worcestershire and molasses you can prepare something that no one will ever expect came out of a bottle.

Homemade baked goods are the best things are earth, that is until it is you having to make them. There was a time when I loved baking cakes from scratch but these days I just don’t have the time. This goes for Frosting. Buy  what you can from the store and give a simple vanilla flavor a new life with the addition of 1/2 cup creamy peanut butter, pinch of sea salt and a drizzle of heavy cream.  Chocolate frosting can be made better with non other than MORE chocolate. Mix 1/4 cup melted chocolate and 1/2 cup powdered sugar till you get the right consistency.  For a more gourmand experience top your sweets with chopped nuts, coconut or even chocolate chips.

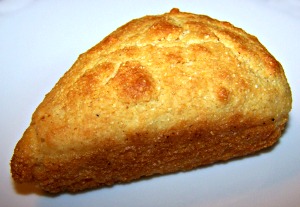
A $.69 box of corn muffin mix is hard to pass up so don’t. With the addition of a 6oz plain or vanilla yogurt you’ll end up with a sweeter moist Cornbread.Doctor Up Store Bought Ingredients

If you went through all the trouble of making a beautiful roast chicken you should also serve a delicious Gravy on the side. Start with caramelized chopped onions and garlic, crushed thyme and pan drippings and top that off with a jarred gravy of choice to ensure you have plenty.

There was a time when Shae didn’t like my homemade mac and cheese. This broke my heart but she was little so I knew it would just take a little time to change her taste buds. In order to get the rest of the family to eat boxed Mac and Cheese I doctored it up by adding 1/2 cup shredded cheese and whole milk. This 2 little changes make a huge difference, enough to get the rest of the family to eat it once in a while. For a bigger treat top the prepared dish with bread crumbs and toss under the broiler for 2-4 minutes for a crisp crust.

This are just some of the shortcuts we take on our home. What do you do to get through meal time when time is of the essence? What is your best kitchen hack?


Double Chocolate Candy Bar Milkshake #TruMooTreats

This is a Sponsored post written by me on behalf of TruMoo for SocialSpark. All opinions are 100% mine.

The candy is about to roll in. Trick or Treating is such a big deal with my  kids. It’s like a competition who can get the most candy. What they don’t seem to understand is they visit the same houses so the quantity is the same. Then when we get home everything goes into one bowl, a communal bowl, a family bowl of goodies to be enjoyed over the next few months.

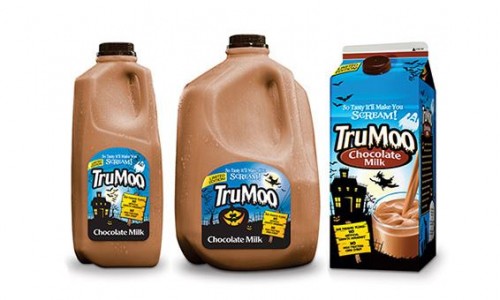
Candy is important for kids but that’s not how we live our lives all the time. We are pretty healthy eaters. The kids have balanced meals and snacks but we don’t deny some treats and sweets. Sometimes this means cakes, cookies and candy. Sometimes this means an icy cold glass of TruMoo Chocolate Milk.Double Chocolate Candy Bar Milkshake
 photo TruMooHALLOWEENOrangeLogo-1_zps3ce13877.jpg

TruMoo Chocolate Milk has just the right about of sweetness and the creamy silky finish. For a long time chocolate milk has been seen as an unhealthy choice for a kid’s diet due to the added extra sugar & calories. TruMoo offers their flavored milks with NO high fructose corn syrup and less sugar then other brands.Double Chocolate Candy Bar Milkshake #TruMooTreats

Nutritionally 1 cup of low fat chocolate milk comes in at 140 calories and provides 25% of your needed calcium. This equals the amount of calcium on 5 cups of broccoli. No matter how hard you try you’re not going to get a kid to sit and eat 5 cups of broccoli a day.  Give in and feel good about TruMoo Chocolate Milk.

I went above and beyond and made the kids one of their favorite treats. Milkshakes. Not just any milkshake. Double Chocolate Candy Bar Milkshakes.  This idea comes from knowing the candy bars are going to be making their way into our way very soon. Here’s a way to use up the candy in a new and fun way. This is meant to be a dessert, a fun dessert that the kids will remember and ask for over and over.
Double Chocolate Candy Bar Milkshake #TruMooTreats

Double Chocolate Candy Bar Milkshake-serves 2

Ingredients

  • 3-4 scoops Chocolate ice cream of choice (we used chocolate marshmallow)
  • 1-2 cups TruMoo Chocolate Milk
  • 4-6 fun size Snickers bars
  • chocolate syrup
  • caramel syrup
  • whipped cream
  • mini chocolate chips

Directions

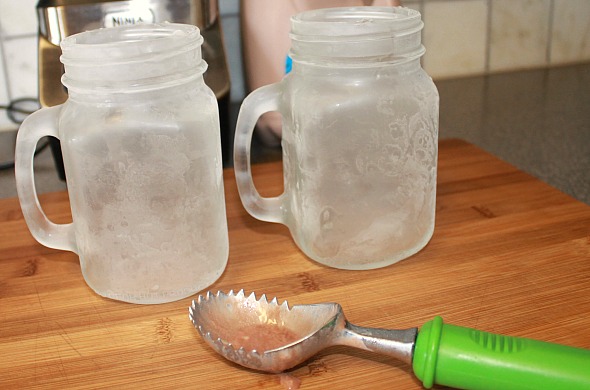
Rinse mugs/glasses with water and place in freezer while building milkshake.
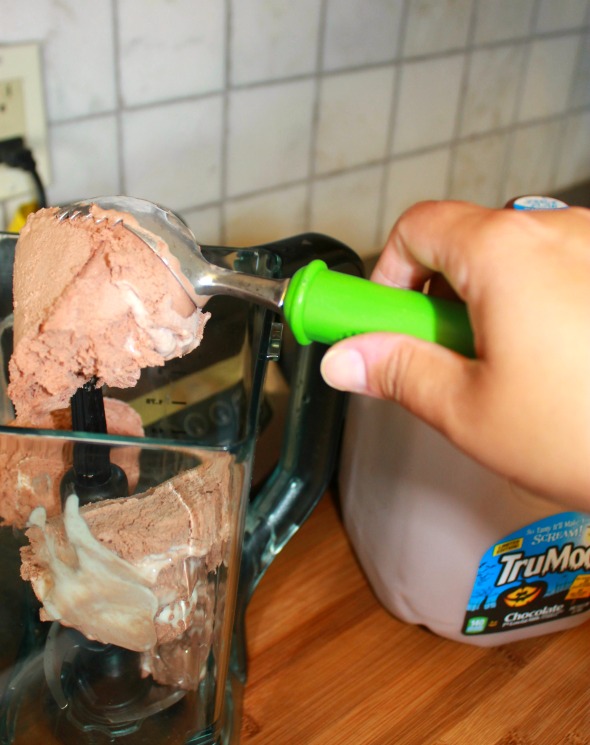
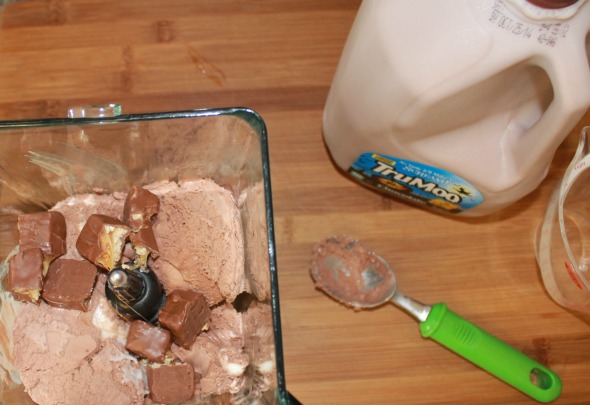
In a blender combine ice cream and candy, blend for 5 seconds to chop candy.
Add 1 cup of milk to blender (more or less depending how thick you prefer your milkshake). Blend for another 5-10 seconds.
Remove glasses from freezer and drizzle inside with caramel and chocolate sauce.
Pour milkshakes into each glass and top with whipped cream and mini chocolate chips or chopped candy pieces.
Add a straw and spoon and enjoy.

This is just one way to create an indulgent treat from wholesome chocolate milk from TruMoo. visit their website for more delicious TruMoo Halloween recipes or on Facebook or Pinterest to treat your family to something new and yummy.
Double Chocolate Candy Bar Milkshake #TruMooTreats

Double Chocolate Candy Bar Milkshake #TruMooTreats

Double Chocolate Candy Bar Milkshake #TruMooTreats

Double Chocolate Candy Bar Milkshake #TruMooTreats

Double Chocolate Candy Bar Milkshake

Double Chocolate Candy Bar Milkshake

Ingredients

  • 3-4 scoops Chocolate ice cream of choice (we used chocolate marshmallow)
  • 1-2 cups TruMoo Chocolate Milk
  • 4-6 fun size Snickers bars
  • chocolate syrup
  • caramel syrup
  • whipped cream
  • mini chocolate chips

Instructions

  1. Rinse mugs/glasses with water and place in freezer while building milkshake.
  2. In a blender combine ice cream and candy, blend for 5 seconds to chop candy.
  3. Add 1 cup of milk to blender (more or less depending how thick you prefer your milkshake). Blend for another 5-10 seconds.
  4. Remove glasses from freezer and drizzle inside with caramel and chocolate sauce.
  5. Pour milkshakes into each glass and top with whipped cream and mini chocolate chips or chopped candy pieces.
  6. Add a straw and spoon and enjoy.
https://lookwhatmomfound.com/2014/10/double-chocolate-candy-bar-milkshake-trumootreats.html

Visit Sponsor's Site


Pepperoni Pizza Puffs #recipe with Tyson Foods #WhatsYourTopping #CBias

I am a member of the Collective Bias®  Social Fabric® Community.  This shop has been compensated as part of a social shopper insights study for Collective Bias and their client.

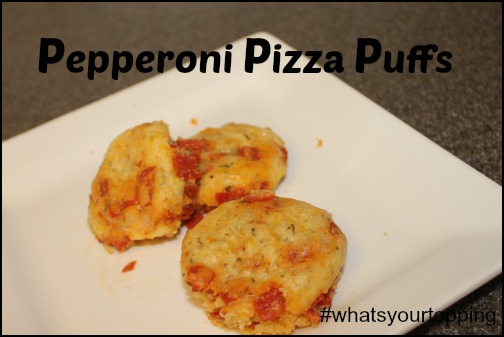
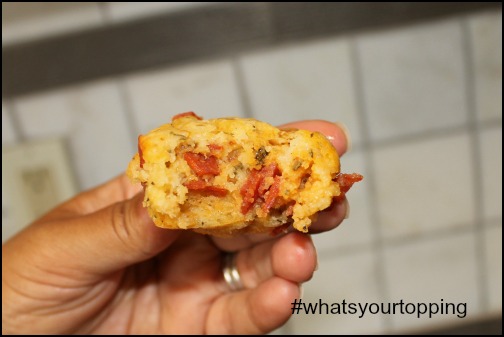
Cooking is my job. While Rob is usually on weekend breakfast duty the bulk of the dinners and planning is my responsibility. I like to plan out what is going on for the week so that all ingredients are on hand. This week since the kids are on summer vacation I planned a couple meal solutions besides sandwiches. One of them was Pepperoni Puffs. This muffin shaped fluffy bite is a treat for Shaun and Rob and they can often be found in lunch boxes year round.

Pepperoni Puffs #whatsyourtopping #cbias

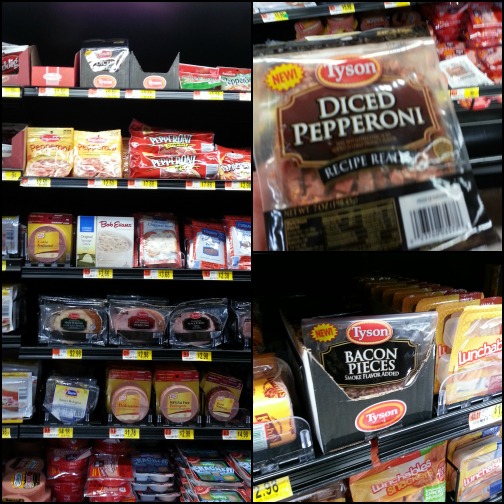
Using Tyson Foods Diced Pepperoni has never crossed my mind. In fact I had never heard of it before until I was sent to Walmart to shop for it.

Our Walmart is a one stop shopping center. We go there for everything; groceries, household items, sheets, toys and games and more. Shopping for Tyson Foods Diced Pepperoni I thought was going to be easy but finding it turned into an adventure. I stood in the Meats section looking around with no success. I had to ask an employee. We both located the diced bacon (which I also bought) but it took some digging to find the Pepperoni. Finally! On the top shelf, fallen over in a black box we found them. Not an ideal spot for such a great brand I thought. Luckily I bought 2 because when I went back 2 more times there was none to be found on the shelves.
Shopping Walmart #whatsyourtopping #cbias
Tyson Foods #whatsyourtopping #cbias

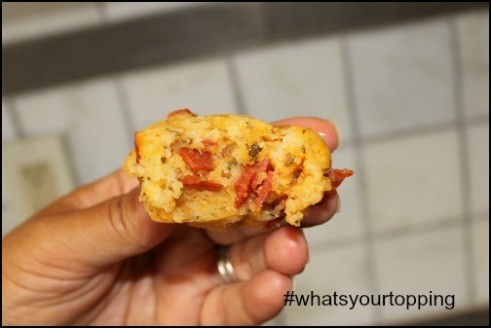
When making the Pepperoni Puffs I snuck a few bites of diced pepperoni and was surprised at the level of spice. This is how I like my pepperoni. The first bag we used was gone in a day or two. It was used for a pizza topping and for pizza quesadillas. We use a ton of sandwich pepperoni in our house so I see having this on hand regularly for adding spice and flavor to a ton of different recipes.
The puff recipe is something I found somewhere online and doctored to suit our tastes. It can easily be adapted to house sausage, bacon or even chicken.

Pepperoni Pizza Puffs

Ingredients

  • 3/4 cup flour
  • 3/4 tsp baking powder
  • salt and pepper to taste
  • 1 TBLS Italian seasonings
  • pinch of red pepper flakes
  • 3/4 cup milk
  • 1 egg, lightly beaten
  • 1tsp chopped garlic
  • 1 cup shredded pizza blend cheese
  • 2 TBLS parmesan cheese
  • 1 cup Tyson Foods Diced Pepperoni
  • 1 cup of pizza sauce, warmed

Instructions

  1. Preheat oven to 375 degrees. Grease 24-cup mini muffin or 12 regular size muffin pans with liners.
  2. In a large bowl whisk together flour, baking powder and seasonings.
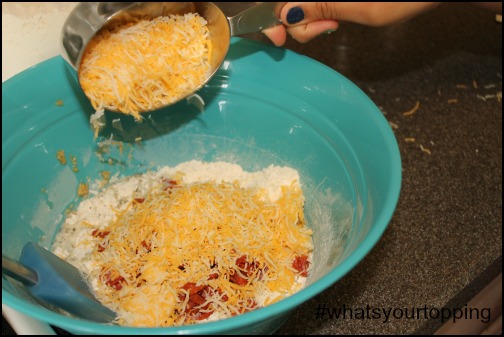
  3. Add milk, egg, garlic, cheese and pepperoni and gently blend till combined using wooden spoon or rubber spatula.
  4. Scoop into muffin tins.
  5. Bake for 21-24 minutes until puffed and golden brown.
  6. Serve warm or room temperature with pizza sauce for dipping.
https://lookwhatmomfound.com/2013/06/pepperoni-pizza-puffs-recipe-with-tyson-foods-whatsyourtopping-cbias.html

Pepperoni Pizza Puffs

Ingredients

  • 3/4 cup flour
  • 3/4 tsp baking powder
  • salt and pepper to taste
  • 1 TBLS Italian seasonings
  • pinch of red pepper flakes
  • 3/4 cup milk
  • 1 egg, lightly beaten
  • 1 tsp chopped garlic
  • 1 cup shredded pizza blend cheese
  • 2 TBLS parmesan cheese
  • 1 cup Tyson Foods Diced Pepperoni
  • 1 cup of pizza sauce, warmed

Pepperoni Puffs #whatsyourtopping #cbiasPepperoni Puffs #whatsyourtopping #cbias
Directions

Preheat oven to 375 degrees. Grease 24-cup mini muffin or 12 regular size muffin pans with liners.
In a large bowl whisk together flour, baking powder and seasonings.
Add milk, egg, garlic, cheese and pepperoni and gently blend till combined using wooden spoon or rubber spatula.
Scoop into muffin tins.
Bake for 21-24 minutes until puffed and golden brown.
Serve warm or room temperature with pizza sauce for dipping.

Pepperoni Puffs #whatsyourtopping #cbias

These are something the kids have eaten for school lunch that doesn’t have to be kept cold or warm, room temperature is just perfect. The mini muffin size makes for a great pop-able treat for after school and for parties. Doubling the recipe is simple so they can be frozen for eating later on. Sandwiches and salads can get boring so this is a tasty alternative


Pepperoni Soup Recipe

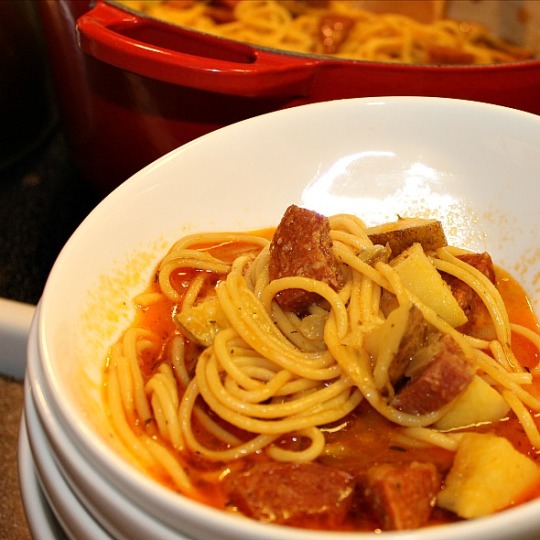
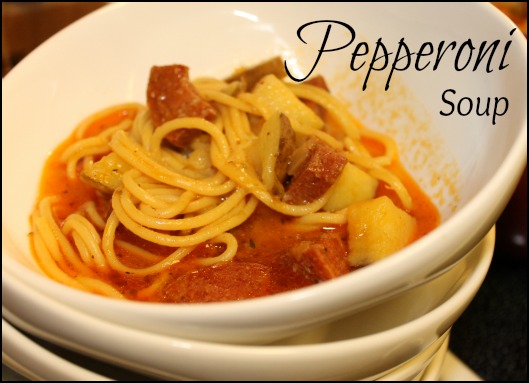
The recipe name sounds strange I know. Those outside my family look at me strange when I say we’re having pepperoni soup for dinner.  It was something that seemed like a special treat when I was growing up.  It’s something that my own family has grown to love and in fact Sabreena asked to have it for her birthday dinner last week.  Traditionally my grandmother used a Spanish sausage NOT pepperoni but I particularly like the pepper and spice that comes from it. My grandmother also called it pepperoni soup maybe because that was her translation.

Pepperoni Soup #Recipe, puerto rican comfort food

It’s very simple to make with very simple ingredients, most of which I have on hand. It can be made very quickly or left to gently simmer to develop more flavor. This is truly a one pot meal but prepared in steps.

Pepperoni Soup

Ingredients
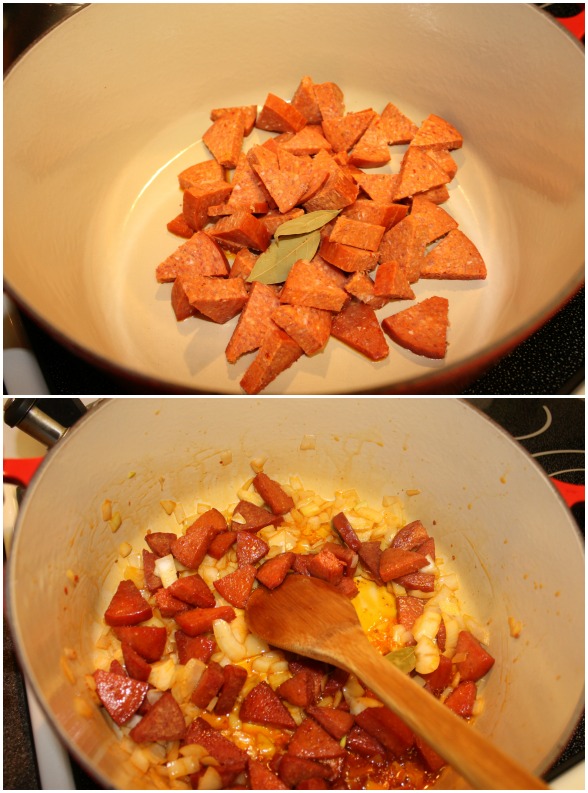
  • 1lb of pepperoni or salchichon (traditional Spanish sausage)cut into bite size cubes. I usually ask my deli to cut me a 4″ slab of pepperoni then cut it down myself to size.
  • 2 bayleaves
  • 1 medium onion, finely chopped
  • 1 cup chopped peppers
  • 3 garlic cloves, finely chopped
  • 1tsp pepper
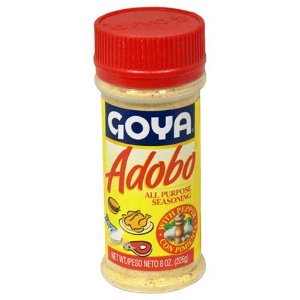
  • 1tsp Adobo Seasoning
  • 1tsp dried oregano
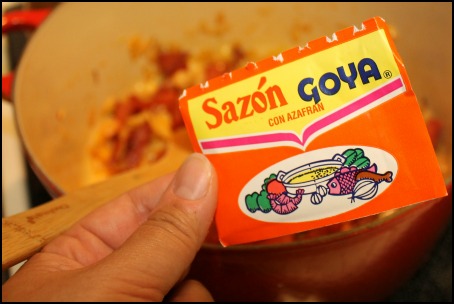
  • 1 packet of Sazon
  • 12 cups of water
  • 1lb russet potatoes, peeled, cut into 2″ chunks
  • 6oz spaghetti or rigatoni
Instructions

In a large pot over low heat brown and render off cut up pepperoni for 10-15 minutes.

Add chopped onion 7 pepper and cook till softened.

Mix in garlic and seasonings and cook for additional 5 minutes before adding water and potatoes.

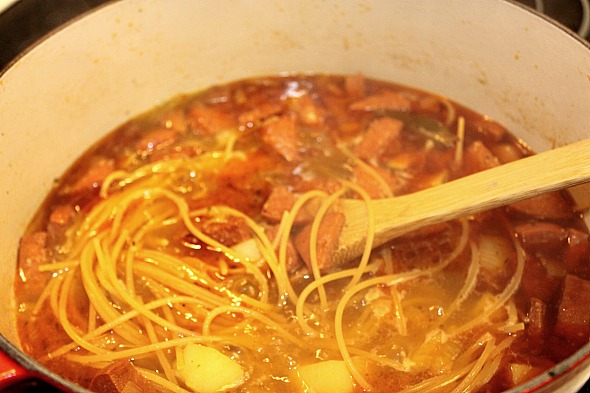
Bring soup to mixture to slight simmer and cook until potatoes almost cooked.

Increase heat to bring soup to boil and add pasta.

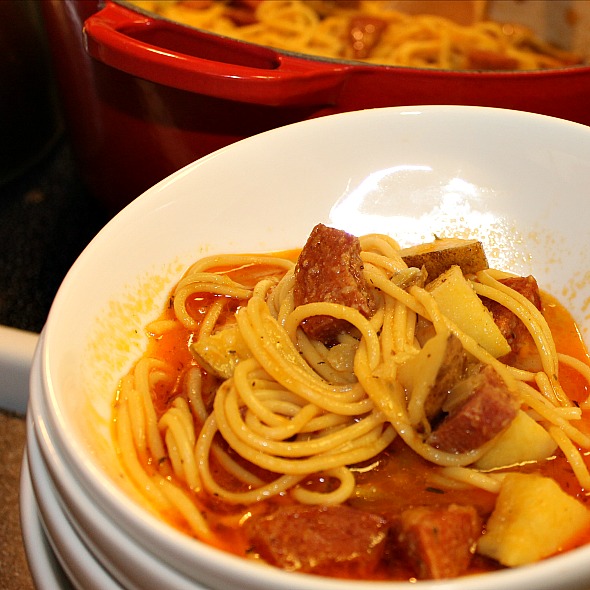
Soup is ready to eat when pasta is cooked. Salt and pepper if needed.

Don’t forget to remove bay leaves.

Pepperoni Soup #Recipe, puerto rican comfort food Pepperoni Soup #Recipe, puerto rican comfort food

Pepperoni Soup #Recipe, puerto rican comfort food

sazon, what is sazon

this is Sazon

We use this in lots of of our meals. It adds a little something special to soups, sauces, meatloaf, roasts and rice.  When I mention Adobo seasoning i’m not talking about the peppers in adobo sauce I’m talking about this Adobo. It’s another magic ingredient that adds a special touch to everyday meals.

Goya Adobo Seasoning for meals


Potatoes with Sausage and Ricotta #Recipe with Fabio

(Photo via Newscom)There’s a reason he won Fan Favorite on Season 5 of Top Chef. Chef Fabio Viviani has a warm and welcoming presence that shines through his adorable smile and exuberant personality. Of course his cooking talent is what got him through to the final four on Bravo TV’s competition series.

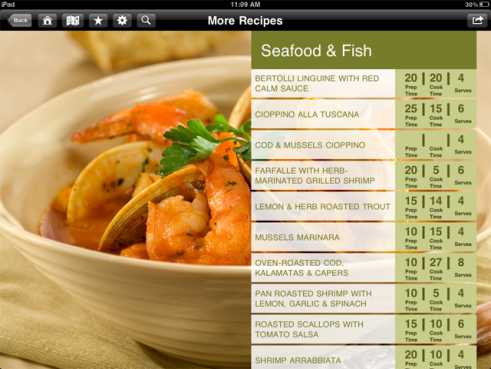
Years of cooking experience and testing and tasting products makes him a bit of an authority on ingredients and tools to use in the kitchen. Bertolli Olive Oil is one brand that he endorses. I’m happy to say I’m a Bertolli user too even though I’m far from the talented chef that he is. I was given the opportunity to review Fabio’s iPad app Let’s Cook. This app offers over 100 handpicked recipes from Fabio himself, step by step instructions in 16 cooking demos, video tips and tricks to make the everyday cook, like me, a bit more confident and successful in the kitchen and much more.

Let's Cook home page

recipes

I used the app, the provided Bertollii Extra Virgin Olive Oil and recipes cards to create a new but really delicious meal for my family last week. While I didn’t follow the recipe 100% I used it as a guide, incorporating ingredients we had on hand, methods I preferred and adjustments to measurements.

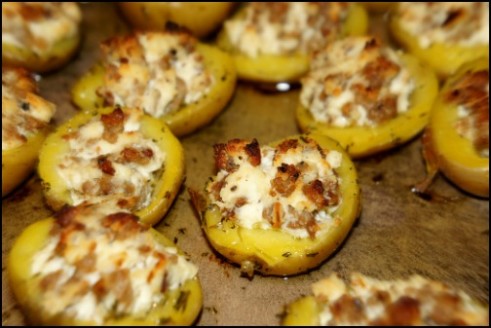
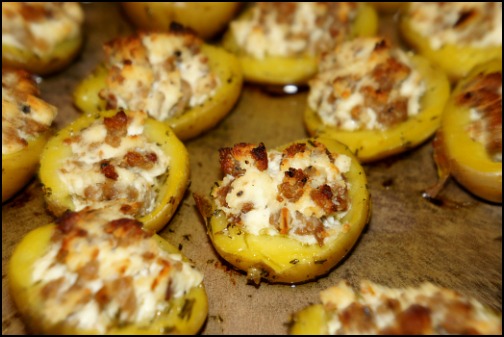
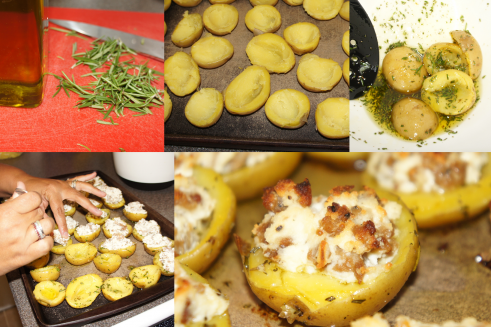
Sausage and Ricotta Stuffed PotatoesRoasted Baby Potatoes with Sausage and Ricotta
  • 16 baby Yukon potatoes (recipe called for reds)
  • ½ cup of Bertolli Classico Olive Oil (recipe called for 1 cup)
  • 2 TBLS fresh chopped rosemary (recipe called for 1 cup)
  • 2TBLS fresh chopped thyme (recipe called for 1 cup sage)
  • 8 oz ground cooked sausage
  • 8 oz ricotta cheese
  • 4 oz Parmesan cheese

Preheat oven 450 degrees
Boil potatoes till just tender, remove from water let slightly cool. Halve then scoop out some potato insides to create cup. In a bowl combine sausage, ricotta cheese, parmesan cheese and salt and pepper if needed. In another bowl add oil and herbs and gently coat potato cups then place on baking sheet.

Fill each potato with sausage and cheese mixture and bake for 8-12 minutes till bubbly and brown.
We enjoyed with fresh steamed broccoli and spinach salad. The meal was really really tasty, everyone ate without a peep and all but Shae had seconds. Next time I will make more so there are leftovers for lunch the next day.

baby potatoes with sausage and ricotta

According to the recipe card this meal makes 8 servings, Prep Time is 15 minutes and Cook Time is 15 minutes. Not in my world. This got made in over 1 ½ hours. Potatoes were boiled then set aside. Sausage was cooked then aside. Herbs were picked and chopped then set aside. This is the way I usually have to cook especially with kids and dog running around and others things going on. This WILL be made again and adjusted to try something new. Maybe bigger potatoes, maybe some cooked spinach, maybe cannellini beans. I see lots of possibilities and I think that’s the way people are supposed to cook. There was a big difference in the Bertolli provided recipe cards and the recipe listed on the app.

Let’s Cook is a really entertaining and informative app especially if you learn better by watching than by reading. Fabio Viviani is fun to watch and yeah not to bad to look at either. Oh and it’s only $.99, can’t beat that! I wish he had a video for pizza dough. Better yet I’d love a visit from him to teach me how to properly make homemade dough, sauté scallops and cook fish.

Bertolli wants a LookWhatMomFound… and Dad too! reader to improve their own cooking skills and win a bottle of Bertolli Extra Vergin Olive Oil. Let me know what meal or technique you’d like to learn from Fabio.

EXTRA ENTRIES:
To receive these extra opportunities for entries, you must fulfill the first REQUIRED entry above. Please note the changes to the entries and frequency, entries that don’t follow rules will be disregarded/ignored/deleted.

  • Subscribe to LookWhatMomFound…and Dad too! via email or RSS feed, bottom of page
  • Follow this blog on Google Friend Connect, bottom of page
  • Follow Us on Networked Blog, bottom of page
  • Follow Mom and Dad and Bertolli on Twitter and Tweet this giveaway 1 time per day, please leave your twitter link each time, tweet a form of this message:  Be a better cook with @Bertolli Olive Oil @giveaway from @lkwhtmomfound & @anddadtoo http://bit.ly/rc7wbW
  • SHARE this giveaway on your Facebook wall (easy to use widget at top of post) OR WRITE on our Facebook Wall that you entered to win this giveaway
  • LIKE Bertolli
  • Enter another Giveaway – let us know which one in the comment (one extra entry per giveaway you enter, just leave separate comments)
  • Leave a relevant comment on any other Review/Family/Article post, let us know where to find it

Your entries must follow the rules or they won’t be eligible for prizes. This contest ends 11:59 pm, Monday, October 10, 2011. The winners will be emailed and will have 24 hours to claim their prize. This contest is open to Continental US residents only. For complete rules please read our contest rules page.


I Disclose


Turkey and Rice Stuffed Cubanelles

My favorite type of food is Mexican. If I could eat burritos, beans and tacos every night I’d be a happier woman. This summer our garden was literally overflowing with peppers and tomatoes so I had to modify lots of our existing everyday recipes to accomodate the abundance of produce that was growing. I usually make stuffed bell peppers with an Italian influence but the cubanelles felt more ethic to me. The flavor of them cooked was much better than raw so I knew I had to get them in the oven. Hope you like!!!

Ingredients
1 lb of ground turkey (or beef, chicken or pork)
1 tsp cumin
Salt and pepper
½ cup salsa + ½ cup salsa
½ tsp Adobo seasoning (can substitute with garlic & onion powder)
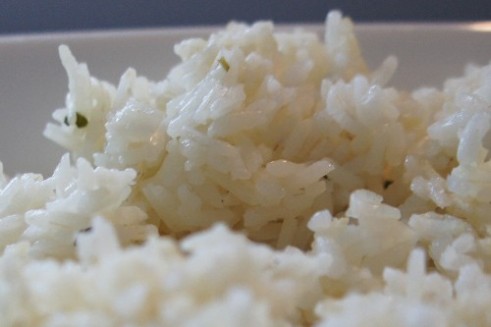
3 cups cooked rice
Tbls chopped fresh oregano
½ cup shredded cheese of choice
4-6 cubanelle peppers

fresh from the garden

Directions
Preheat oven to 375 degrees

cooked and fluffed

In large skillet cook turkey with cumin, adobo, oregano and pepper until just done. Add ½ cup of salsa to cooked meat, mix thoroughly.

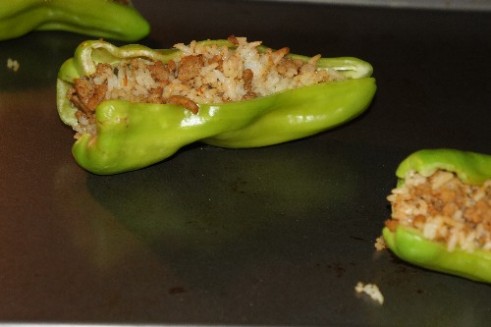
Mix cooked rice and meat mixture together and season with salt and pepper to taste. Split peppers down one side and remove seeds and ribs. Stuff peppers full with rice mixture, close with toothpick if necessary. Bake at 375 for 12-16 minutes, till warmed through. Top with tbls of salsa and sprinkle of preferred cheese.

ready to bake

Serve with seasoned black beans and a salad for a complete tasty meal.


I Disclose


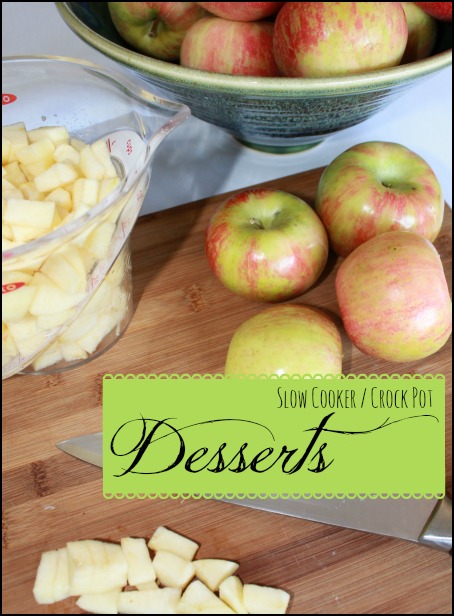
Crock Pot and Slow Cooker Desserts

Winter is going to be here very soon. In my house that’s the time to break out the crock pot for some savory stews and roasts. What I’ve never done is use my crockpot for desserts. Here are a couple recipes that look amazing and super easy for anyone to try.

Crock Pot Deserts

Crockpot Applesauce
Ingredients

10 apples, peeled and roughly chopped
1/4 cup water
1/8 cup sugar
½ tsp cinnamon
Pinch of nutmeg
Pinch of salt

Directions
Add all ingredients to crockpot, cover & cook on HIGH for 5 hours. Turn off crockpot, uncover & mash with potato masher until desired texture. If you prefer smoother applesauce transfer to food processor or blender. Ready to eat warm with ice cream or whipped cream or chilled for a sweet snack.

Crockpot Blueberry Cobbler
Ingredients
1/2 cup all-purpose flour
3/4 cup sugar, divided
1/2 tsp baking powder
1 pinch salt
1/4 tsp cinnamon
1/8 tsp nutmeg
1 egg, lightly beaten
½ tsp vanilla extract
1 TBLS milk
1 TBLS vegetable or canola oil
2 cups fresh blueberries
1/4 cup water
Cooking spray for coating crock pot

Directions
In a large bowl, combine flour, 6 tbls sugar, baking powder, salt, cinnamon, & nutmeg. In a separate bowl, mix egg, vanilla, milk and oil. Blend the egg mixture into the dry ingredients until just moistened. Coat the crockpot with cooking spray and evenly spread the batter on the bottom.

In medium saucepan, combine blueberrries, water & remaining sugar, bring to a boil and remove from heat, let set for 5 minutes. Pour blueberry mixture on top of batter & cook on HIGH for 2 hours. At the end of 2 hours, turn off crockpot, uncover and let cobbler set for 30 minutes before serving. Serve with fresh whipped cream or ice cream.

Crockpot Decadent Chocolate Pudding Cake
Ingredients
1 box chocolate devil’s food cake mix
1 box instant chocolate fudge pudding mix
2 cups sour cream (do not use fat free)
4 eggs
1 cup water, room temperature
1 cup canola oil
16oz semi-sweet chocolate chips

Directions
In mixing bowl, combine dry cake mix, dry pudding mix, sour cream, eggs, water and oil; beat until mixture is smooth and thick. Stir in chocolate chips.

Coat crock pot with cooking spray; pour batter into bottom of bowl. Cover and cook on LOW 5 to 6 hours, center should be just set. A toothpick inserted near center should come out with moist crumbs when done. Serve warm with whipped cream or ice cream of choice.


Best Rocky Road Brownies #Recipe

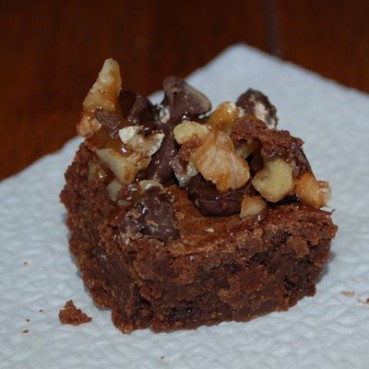
I’m not a big dessert eater; it takes something special to get to sidle up to the table for the sweet dish. This Rocky Road Brownie is one of those dishes. It’s a delicious blend of sweet, salty, gooey and crunchy.
The best part of this recipe is there is no need for a mixer. Everything is mixed together in on bowl over a double boiler. A quick prep of all of your ingredients and this can be mixed up in just a few minutes and on the table in time for an after dinner treat.

Rocky Road Browniesrocky road brownies recipe
Ingredients

  • 1/2 cup butter, cut into cubes
  • 1 cup chocolate chips, semisweet
  • 1/2 cup sugar
  • 1/2 cup packed brown sugar
  • 1/2 teaspoon salt
  • 2 eggs
  • 3/4 cup all purpose flour, spooned and leveled
  • 1 cup mini-marshmallows*
  • ½ cup caramel sauce*
  • 1/2 cup chopped lightly salted walnuts, pecan or almonds*
  • 1/2 cup chocolate chips, your choice of flavor*
  • 1/2 cup fudge topping*
  • 1/2 cup peanut butter chips*
  • ½ cup chopped candy bar or toffee bits*
  • 1 cup broken Oreos or other cookie of choice*

Directions
Preheat oven to 350 degrees. Butter an 8-inch square pan and line with parchment with a couple inches overhang on 2 sides, then butter the parchment paper. It sounds like a lot of work but you DON’T want these brownies sticking to the pan.
In a double boiler or heatproof bowl set over a pan with 1” simmering water add butter and 1 cup of chocolate chips. Mix until completely melted, remove from heat. Add sugars and salt, mix until combined. Mix in eggs then flour until just combined. Spread batter into prepared pan.

Bake 28-32 minutes until inserted toothpicks come out with moist sticky crumbs attached.

*Remove from oven and start adding your toppings. Start with something sticky or melty like chocolate chips and marshmallows, and then add dry toppings like nuts or cookies then finish with sticky melty topping like caramel. Bake an additional 3-5 minutes to set toppings onto brownies.

Remove from oven and let brownies cool completely in pan. Using parchment handles, remove brownies from pan and cut into squares. Using a large plastic knife or wet sharp blade works best. These will keep in a sealed plastic container for about 3 days but they don’t last that long in this house.


I Disclose


What’s for Dinner This Summer

I’m in another mealtime rut. Summer has been great, we’ve been doing tons of stuff and having a great time with friends and family. Even my garden is producing edible goodies I can get to the plate.  My issue is I’m bored and I don’t want to cook. It’s too hot inside with the oven and it’s too hot next to the grill and my kids typically don’t like salad or sandwiches or soup. I’ve been on the hunt for new recipes and ideas that will at least give me some motivation to cook for my family.

I’ve found a couple of new recipes that I’m really interested in trying. I’m sharing them with you and maybe if they sound appetizing you can test them out for yourself and tell me your experience.

Penne with Spinach, Shrimp, Tomatoes and Basil
Ingredients
12 ounces penne pasta
2 tablespoons olive oil
1 pound uncooked medium shrimp, peeled, deveined
3 garlic cloves, minced
5 large plum tomatoes, cut into thin wedges
6 tablespoons chopped fresh basil
3 tablespoons fresh lemon juice
2 teaspoons grated lemon peel
6 cups (packed) baby spinach leaves (about 6 ounces)

Preparation
Cook pasta in large pot of boiling salted water until just tender but still firm to bite. Ladle 1 cup pasta cooking liquid into small bowl and reserve. Drain pasta. Return pasta to pot; cover to keep hot.
Meanwhile, heat oil in large nonstick skillet over medium-high heat. Sprinkle shrimp with salt and pepper. Add shrimp and garlic to skillet and sauté 2 minutes. Add tomatoes, 4 tablespoons basil, lemon juice and lemon peel and sauté until shrimp are cooked through, about 3 minutes.
Add spinach leaves to hot pasta; toss until spinach wilts. Add shrimp mixture and toss to blend. Add enough of reserved pasta cooking liquid to moisten. Season to taste with salt and pepper. Transfer pasta to bowl.
Sprinkle with remaining 2 tablespoons basil and serve.

Annie’s Fruit Salsa and Cinnamon Chips
Ingredients
2 kiwis, peeled and diced
2 Golden Delicious apples – peeled, cored and diced
8 ounces raspberries
1 pound strawberries
2 tablespoons white sugar
1 tablespoon brown sugar
3 tablespoons fruit preserves, any flavor
10 (10 inch) flour tortillas
butter flavored cooking spray
2 cups cinnamon sugarFruit Salsa for Dinner, Summer Recipes

Preparation
In a large bowl, thoroughly mix kiwis, Golden Delicious apples, raspberries, strawberries, white sugar, brown sugar and fruit preserves. Cover and chill in the refrigerator at least 15 minutes.
Preheat oven to 350 degrees F (175 degrees C).
Coat one side of each flour tortilla with butter flavored cooking spray. Cut into wedges and arrange in a single layer on a large baking sheet. Sprinkle wedges with desired amount of cinnamon sugar. Spray again with cooking spray.
Bake in the preheated oven 8 to 10 minutes. Repeat with any remaining tortilla wedges. Allow to cool approximately 15 minutes. Serve with chilled fruit mixture.

Italian Chicken Salad
Ingredients
MARINADE
1 (8-ounce) bottle Italian dressing
2 tablespoons Worcestershire sauce
1 tablespoon lemon juice
1 teaspoon Creole seasoning (optional)
CHICKEN SALAD
8 thin-sliced boneless, skinless chicken breasts
Mixed salad greens
Cherry tomatoes

Preparation
Combine the marinade ingredients in a medium-size bowl and whisk them to blend. Set aside 1/2 cup of the mixture for basting the chicken on the grill.
Place the chicken breasts in a gallon-size zip-lock bag and pour in the remaining marinade. Press the air out of the bag and seal it. Turn the bag to thoroughly coat the chicken, then place it in a bowl and refrigerate it for at least 1 hour, turning it occasionally. Remove the meat from the refrigerator 20 minutes before grilling.
Prepare a charcoal fire or set a gas grill to medium-high, close the lid, and heat until hot — about 10 to 15 minutes.
Remove the chicken from the bag and discard the marinade. Grill it uncovered, basting with the reserved marinade. Cook the chicken until it is no longer pink inside, about 2 minutes per side on a gas grill. Transfer the breasts to a cutting board and let them rest about 5 minutes before thinly slicing them crosswise. Serve the chicken over salad greens and cherry tomatoes. Serves 6 to 8.


fruit image courtesy of Deeluscious via Flickr