RSS Email

Creating a Memo Board with Cork Tiles #craft

I was compensated for this post but all opinions and experiences are my own.

For the last 3 years I’ve made good strides in making changes in our home to add my touch. We’ve purchased new furniture, hung extraordinary artwork, created statement pieces and painted walls. Each project is important to me and serves a purpose even if the purpose is strictly to beautify.
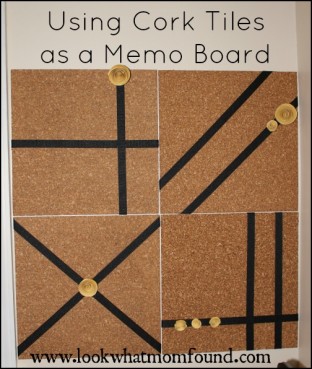
WorkSpace Memo Board using Cork Tiles
Joann’s Fabric and Craft Stores asked me to create my interpretation of a craft found in their Spring Cape Discovery catalog. Armed with the catalog and a head full of ideas I made my way to my local store to shop.My first trip produced things that ended up getting returned because my measurements were wrong and because my vision changed.

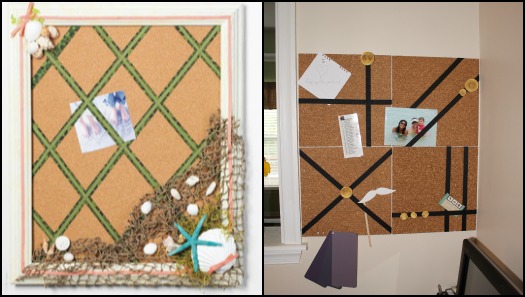
I used this ribbon memo board as my inspiration. The one found in the catalog had a beach theme with shells, starfish and a fishing net. At purchased my own accessories but ended up going with a more modern look in the end.Cork Board Inspiration Supplies
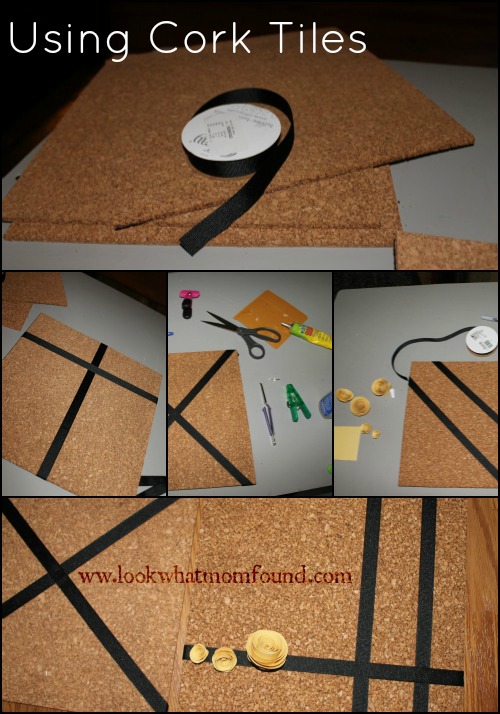
  • Black Grosgrain Ribbon
  • 12 X 12 Cork Tiles
  • Textured Scrapbook Paper
  • Adhesives

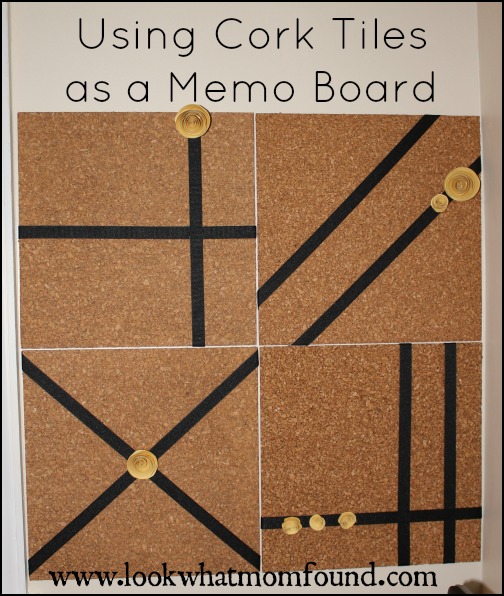
The project was simple but the planning took the most work. i wanted to make sure my ribbons were not only useful but pretty. Each tile is draped with ribbon in different but complementary directions and decorated with quilled paper roses. Each flower was cut and twisted by hand. All I needed was 1 sheet of paper.
Creating Memo Board using Cork Tiles

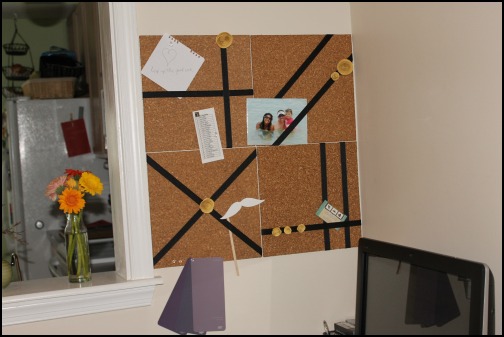
The tiles are now taking up residence next to my small desk in the living room. It’s pretty enough that it doesn’t take away from the rest of the decor but it’s also very useful. My next step is to decorate some thumbtacks with black buttons, a nicer tough than plain silver.

Work Space Memo Board using Cork Tiles

Thanks to Joanns for giving me the inspiration to add this touch to my work space. Don’t forget to check out their extensive project ideas when in need of your own inspiration and sign up as a preferred customer to receive notice of great sales and money-saving coupons.


A Crafty Night with #ACMooreGNO

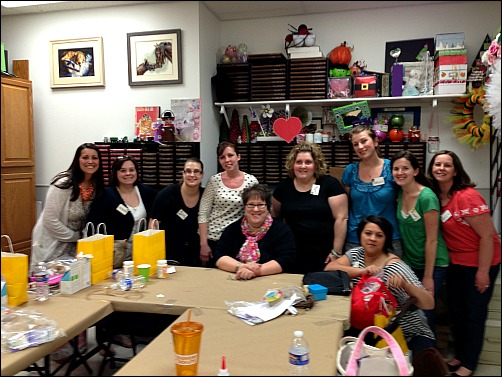
Last week I was joined by 8 other bloggers for a crafty night of fun. This was the inaugural A.C. Moore Girls Night Out.

ACMooreGNO Bloggers

A couple of months back I pitched AC Moore in a selfish attempt to let me and my friends use one of their rooms to get together for a night of laughs and crafts. Get this, they fell for it.  In fact they came through with such an awesome event that I’m hoping to help them organize more for other bloggers.

We were joined by A.C. Moore’s Director or Education, Marketing Manager and Activity Coordinator, A.C. Moore’s PR Rep and a brand representative from Beacon Adhesives. Stepping into that room I knew they meant business. We were set up with complete stations with everything we needed to create 2 fun projects that fit our skill levels. Within the group we had some crafty mavens and some crafty hesitant but the steps of each craft were laid out clearly and there were plenty examples given from our leader Robin.

The  night was filled laughs and information about products and inspiration and crafting stories from the pros and the bloggers.

Here is what we worked on.

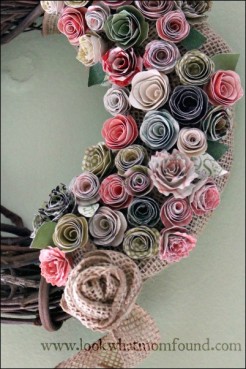
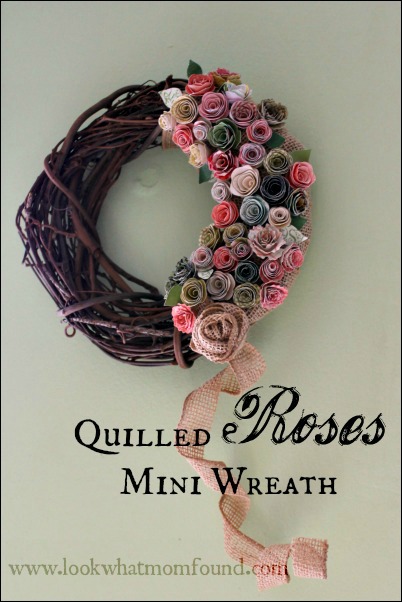
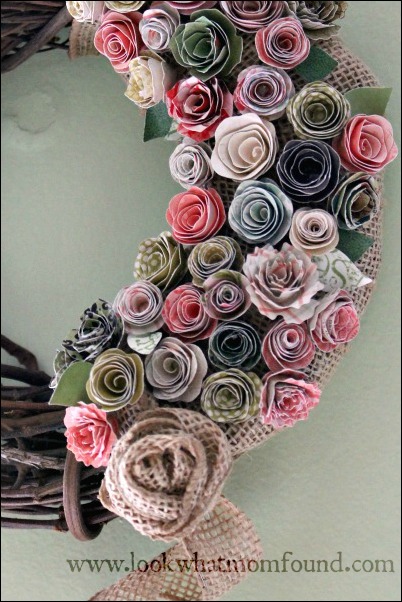
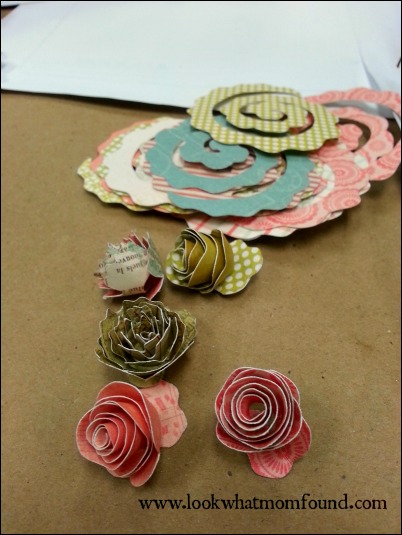
The Quilled Roses Mini Wreath was my favorite. It did take the longest since I had to finish my roses and assembly at home.
Quilled Roses on Min Wreath, ACMooreGNO,

quilled rosettes on wreath craft, #ACMooreGNO

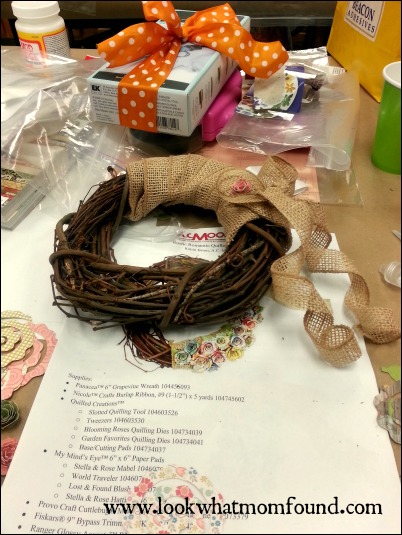
quilled roses supplies

quilled roses supplies
The first craft we did was this Patchwork Paper Composition Book.

Patchwork Paper Notebook, ACMooreGNO
All the pretty squares were provided along with adhesives and the notebook. I’m using mine for the next conference I attend. I plan on making a couple more of these with different themed paper for different personalities.

Check out your local A.C. Moore location from Maine down to Florida or online for project ideas and top crafting brands.


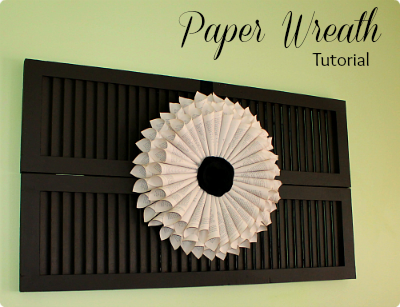
Book Page Wreath Tutorial

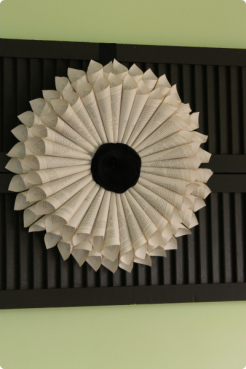
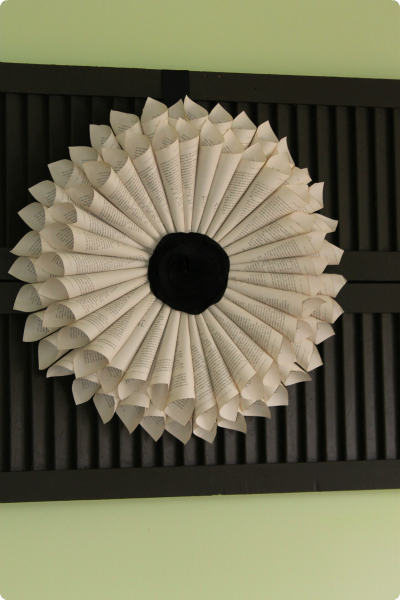
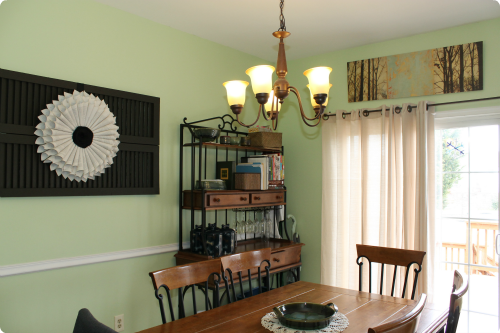
Back in the Fall I stumbled onto a blog post that featured this beautiful book page wreath over shutters. I’m not one to copy a design but I was completely in love with it. I bookmarked it, showed it to Rob and made it my mission to get that look in my house.

paper wreath, tutorial, book page wreath, painted shutters
I knew where I wanted it, I knew what I wanted to go along with it and that was it, my mind was made up. I found someone selling 20 year old louvered doors for $15. I got those and Rob and I worked on stripping layer upon layer of paint off of them. It wasn’t working so well so it was decided to clean them up as best as we could and just paint over the half done shutters. Honestly I loved the look. They look old. That was the point. This process took the longest. Months to be honest thanks to an early winter.

Rob did an amazing job finishing them and hanging them, surprising me one day while I was out. Next step was to get that wreath done. I knew it would be tedious but didn’t expect it to take the 4-5 hours it did. Was it worth it? Yes. I love it that much.

For the whole look you need 2 shutters, painted in the color you choose. We chose a Stealth Jet, not quite black but close; think wet chalkboard. Rob hung them with simple D rings and picture anchors. He also attached them together with 2 T shaped brackets. Hanging on the wall by itself, it looked GOOD.

The paper wreath takes more creativity. You have to decide what you want to use for paper. I thought sheet music would look good but didn’t know where to get any really cheap. I went for a novel that was stuffed in a swag bag from an event. It wasn’t a book I was ever going to read so I didn’t feel that bad. I did get an old atlas from the thrift store and thought that might work but the more I looked at paper crafts using maps the more I realized that wasn’t the look I wanted.

paper wreath hanging

book page wreath, paper wreath in kitchen

Supplies
6-8 inch round cardboard circle
Book, atlas or music sheets (thrift store find would be great here)
box cutter
Hot glue gun & lots of glue sticks
Wide Ribbon of choice to hang wreath, 18-24″
decorative flower, brooch or other ornament to place in center of wreath

Directions
I started with taking a damp tea bag and lightly rubbing the sides of the book. I wanted a very light color variation, not vintage but just a touch of contrast. A marker would work too.

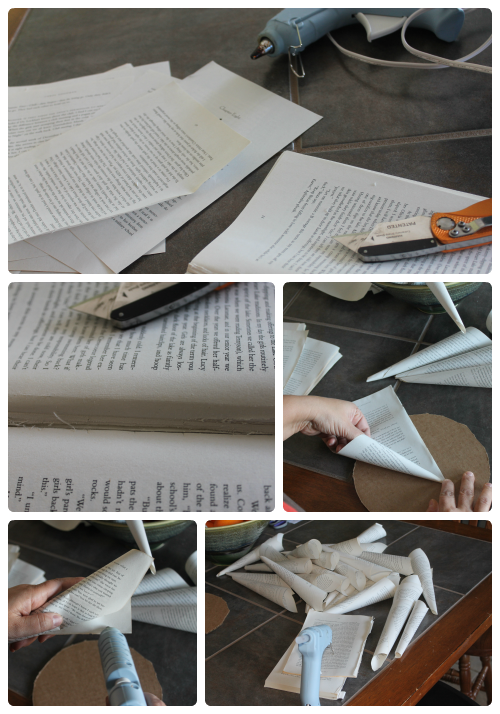
Break the binding of the book as much as you can. Taking a sharp box cutter or exacto knife cut out the sheets as cleanly as possible. I used about 80-90 sheets for the wreath but had many mess ups so I cut out about 125.

Determine the direction you will be rolling and the direction of your paper. This was my biggest mistake in the beginning and led to lots of paper in the recycling bin. I used the bottom right corner as my point and the top right corner ended on top of the cone. Doing this every time gave me a more uniform look even though they weren’t all perfect.

book page wreath tutorial

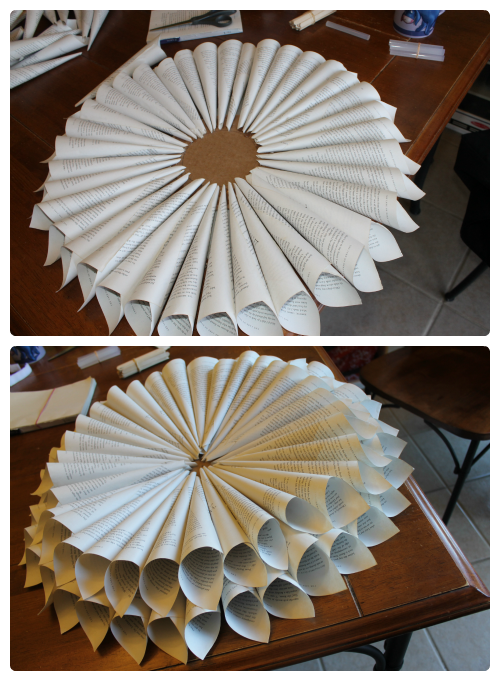
I rolled and rolled and rolled for 2-3 hours, hot gluing each sheet closed. Tape would work but would show. School glue would work but takes too long to set. The hot glue dries fast and holds tight.

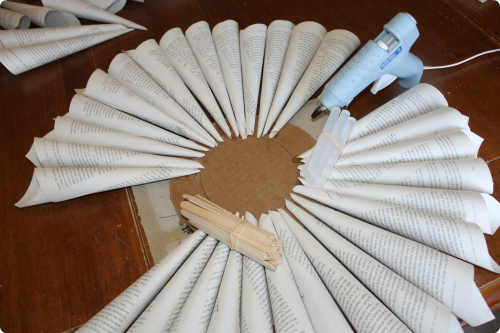
Before you start gluing your cones take your cardboard circle make an inner circle about halfway from the center. This line gives you a guide as to where to start your 1st layer of paper cones. Then attach your ribbon with staples or hot glue. I didn’t do this before glue and had a mini disaster on my hands.

When it’s time to start gluing your 1st layer start in small sections so you get good spacing. If you try to focus on getting all the points together you’ll end up with a lopsided wreath. The focus should be getting good even coverage on the part that is showing. The second layer is the same as the first just this time you at gluing the points closer to the center of the circle.
glueing paper wreathpaper wreath layers

When it’s completed pick it up and shake to find loose cones.

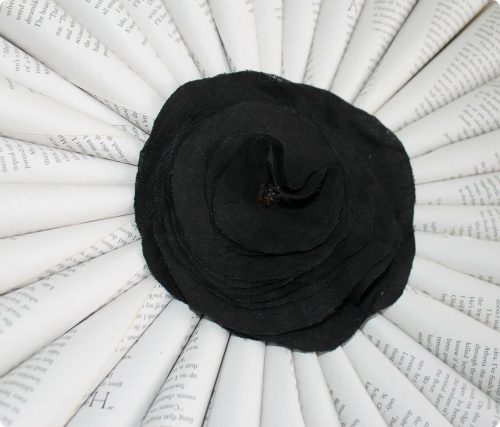
At this point attach your centerpiece. I made a flower from black linen; 8-10 circles in varying sizes, sewn together in a haphazard way with some tucks and a tiny middle embellishment.

fabric flower

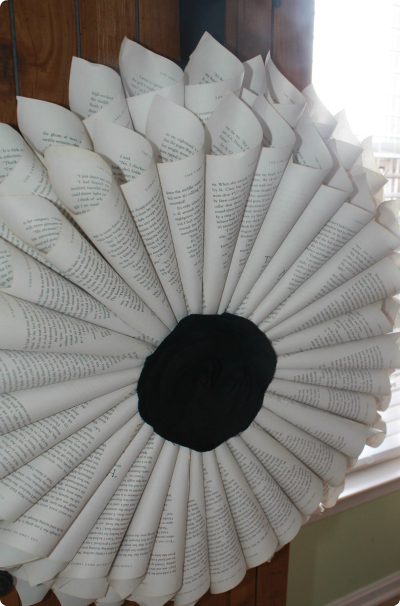
finished paper wreath
I then stapled the ribbon to the back of the shutter and it was done. Attach your ribbon before glueing the paper cones on your cardboard Again, I truly love this and thank Denise of The Painted Home for the inspiration.


Toilet Paper Roll Gift Box #craft

There is never a shortage of toilet paper rolls in this house. 5 people, 3 bathrooms there is always a holder that needs to be filled. I’m usually the one replacing them so imagine how a crafty mom’s mind does flips when she’s holding this simple cardboard tube that’s begging for some flair. If you’re looking for ideas to put into your gift box, check out Gift Glide.

This Toilet Paper Roll Gift Boxes are perfect for candies, play jewelry or other small gifts. Valentine’s Day is right around the corner and I thought I would put some of my stash to good use.

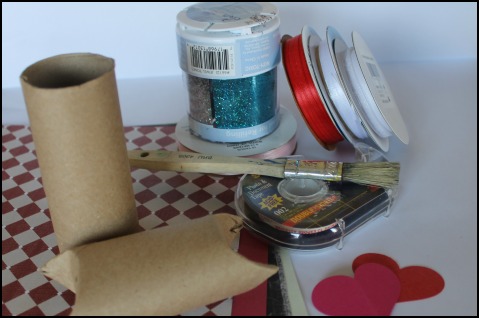
Supplies
toilet paper rolls, cleaned of all tissue pieces
paper, paint, ribbon, glue, glitter, buttons, paper or foam shapes, raffia, the list goes on and on

craft supplies, toilet paper rolls

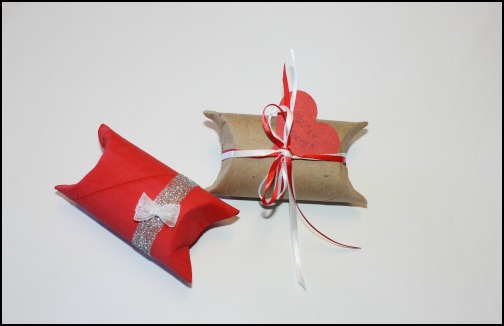
Red Gift Box
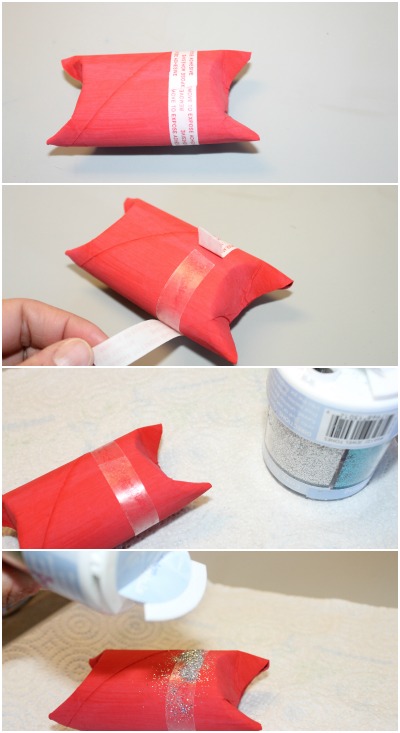
Using poster paint I applied an even coat and set it aside to dry for 2 hours. I circled double-sided tape around the tube once. Then, over a paper towel (or sheet of paper) I sprinkled silver glitter on the tape, tapping it on every once in a while. This is much easier and less messy than glue. Using this awesome bow tying fork technique I made a tiny bow from a thin organza ribbon, adhered it with glue and the box was done.

glitter with double stick tape, toilet paper roll craft

Ribbon Gift Box
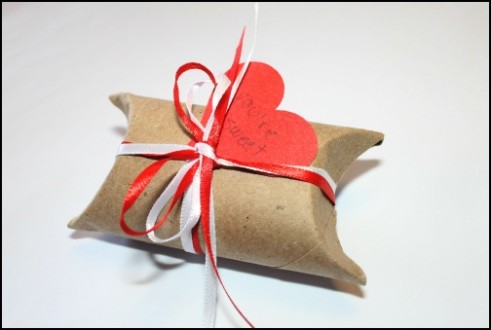
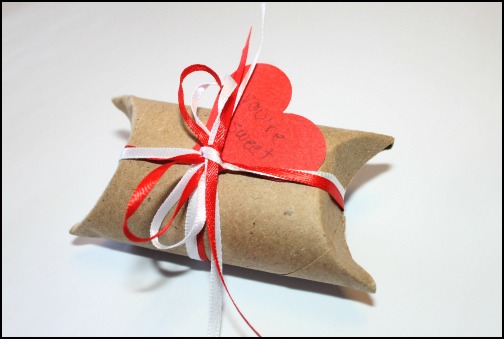
Even simpler. I left the tube naked, and neatly wrapped ribbon around it and tied it in a nice bow. I tucked a note under the ribbon and it’s ready to give as a gift.

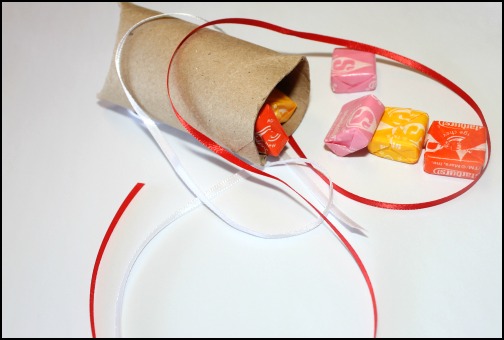
toilet paper roll gift box, candy holder


toilet paper roll craft gift box

Each tube held about 6-8 starburst candies but hershey kisses or sweetheart candies would be very appropriate too.

candy gift in toilet paper roll

Covering in a pretty lightweight scrapbook paper is a great way to personalize and customize for any holiday or occasion. I wouldn’t recommend heavyweight cardstock though.

Letting a child decorate their own gift box is an adventure. Break out the stickers, paints, markers and everything else you can find to let them be as creative as possible. Don’t have any stickers? Why not make a sticker using this site?
I Disclose


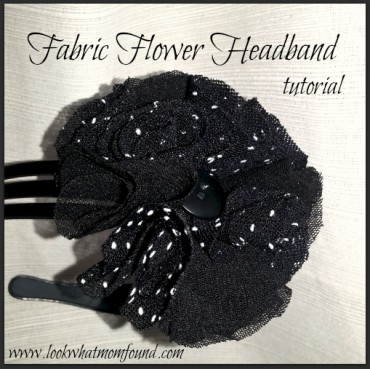
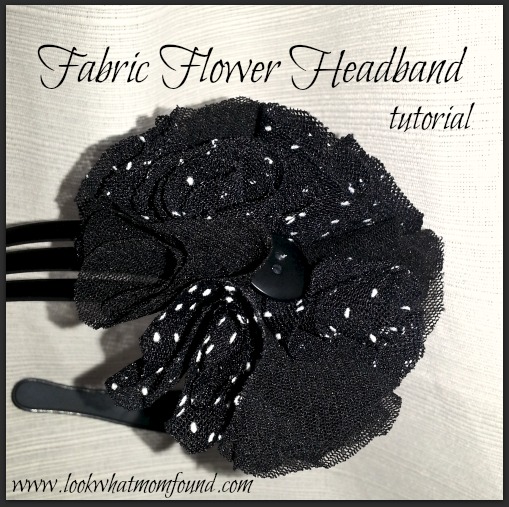
Fabric Flower Headband Tutorial

Ever since school started Shae has been sporting headbands. Since her hair is still short it doesn’t hold a ponytail and she hates barrettes. I did the simple route and glued some fabric flowers to existing headbands but wanted to do something special, more elaborate to dress up her everyday outfits. I took to Pinterest and found a few ideas and tutorials.

fabric flower headband, tutorial, diy craft, handmade
Polka Dot Fabric Flower Headband

Supplies
7- 3 1/2 inch circles (sheer polka dot fabric)
4- 2 1/2 inch circles (sheer black fabric)
1- 1 1/2 inch circle (white felt)
hot glue
coordinating button, rhinestone, bauble of choice (if desired)
black headband
fabric flower headband, tutorial, diy craft, handmade
Directions
I’ve been holding onto a shirt that used to be Sabreena’s. It’s about 5 years old but it was so pretty I knew I could use it for something. Shae used it for dress up for a while but this was it’s perfect new life.

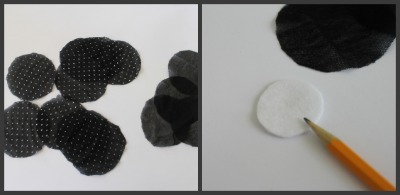
All measurements are approximate. I cut all the circles using a random cup. Since the fabric was very stretchy I was careful not to pull. Don’t worry about the uneven edges, they won’t be seen.

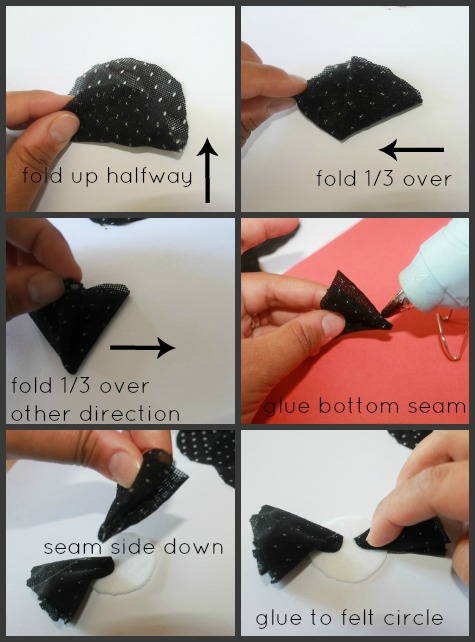
Start by placing your white felt circle in front of you. Following the step by step instructions below, fold your circles in half then in thirds.

fabric flower headband, tutorial, diy craft, handmade

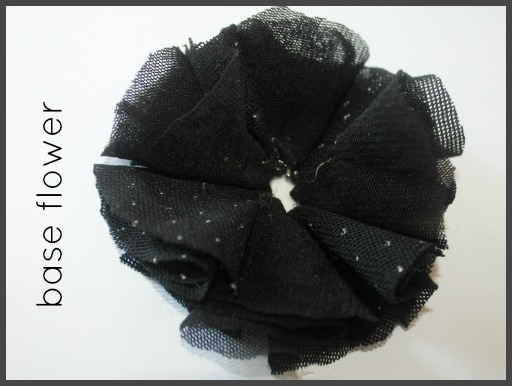
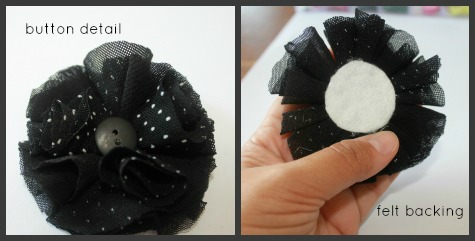
Glue the seam side down onto your white felt, halfway across. Go all the way around, alternating fabrics/designs. The end result should be 8 glued circles, each color/design making an X pattern.

fabric flower headband, tutorial, diy craft, handmade

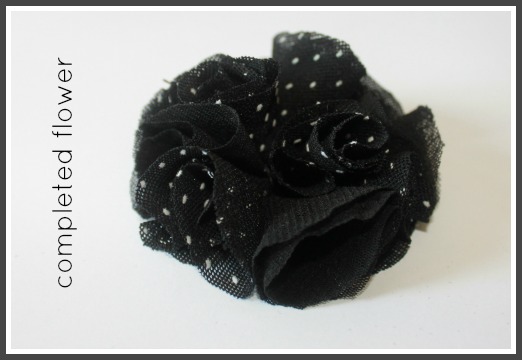
Let this dry thoroughly then glue the remaining 3 circles in top of the already constructed base. This gives a bit of height and fluffiness.

fabric flower headband

Add your center button or bauble is desired. Glue the felt bottomed fabric flower directly to the headband, off center. Done.

fabric flower headband
I’m doing these flowers with all types of fabric scraps I have tucked away. Quarter Flats are a great way to get multiple headbands made for a very very cheap price. These can go on sale for as low as $1.

*If your fabric has a right and wrong side you might have to fold them a specific way. The bottom base should be folded with the right side inside the flower. The top layer should be folded with the right side showing outside.


Headband Holder DIY Tutorial

Shae is half girly girl half a miniature Shaun. She spends so much time with her big brother that the line of dainty and sweet is often crossed into to that of a tomboy. But when she wants to hold onto her girliness she slathers on the pink and flowers and sashays through daily life. Her headband collection has been exploding lately. Mainly because I keep making them but I only make them because she wears them. Since headbands don’t fit perfectly on Shae’s DIY hairbow holder I figured it was best to make a headband holder equally as cute.

headband holder tutorial diy

Supplies Needed
empty Oatmeal canister (small or large)
inner fabric ( i used fleece)
outer prettier fabric
1/2″ wide grosgrain ribbon (contrasting color works best)
Large artificial flowers and leaves, disassembled
hot glue

headband holder supplies craft
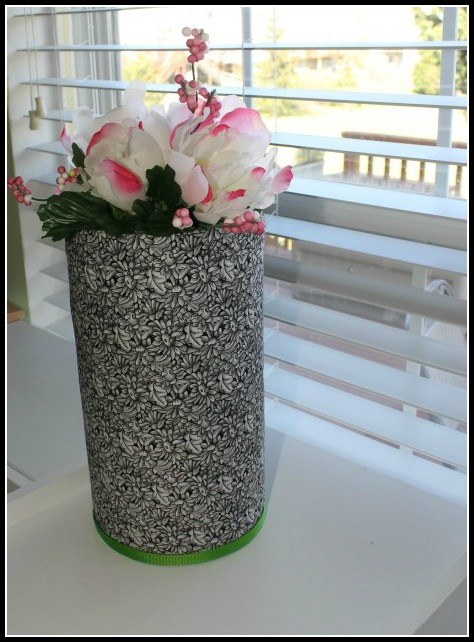
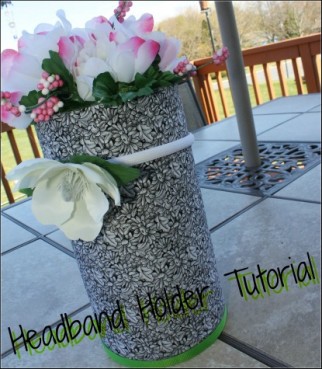
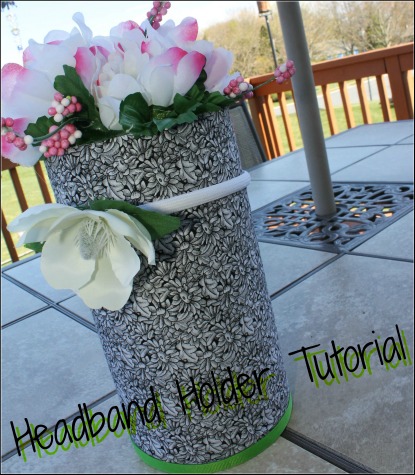
Start your project by measuring out a base fabric to plump up your oatmeal canister to give the headbands something to grip. I had black fleece on hand, I used that. I measured and cut so the fleece to fit just perfectly around and top to bottom. Glue the fabric to the container pulling firm but not over stretching it. Let the glue dry for a few minutes.

Next measure and cut your outer fabric so that it covers exactly the top and bottom and once all the way around the canister. Apply hot glue in small sections on your starting seam and ending seam. Pull fabric so it’s smooth and free of wrinkles and creases.

headband holder collage instructions

Use your grosgrain cover the outer edge of the canister lid. Turn the canister upside down so the ribboned lid is on the bottom.

Using glue proceed to cover the now top of your holder with leaves and flowers.

headband holder craft tutorial
Allow the entire project to cool and set for a few minutes then go ahead and add headbands.

I Disclose


TShirt Tote Bag #ExpressYourself #CBias

I was recently asked to come up with a craft for the #ExpressYourself campaign using Elmers Painters Paint Markers and fabric. The fabric part got me stumped. I thought I’d make Shae a cute shirt, draw a flower or fun saying on it but what’s so original and creative about that. Then it hit me, go DIY with it. I stood in the middle of my living room at a pile of laundry and I got the idea of making a t-shirt tote bag.

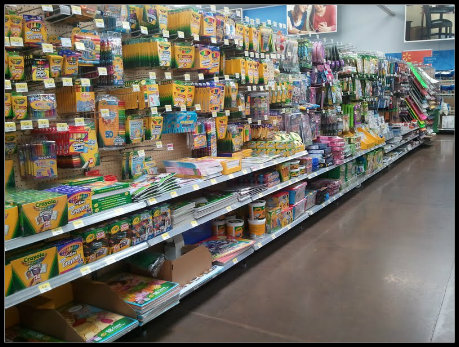
I’ve seen tutorials before and figured this would be easy. I got the kids in the car and headed to Walmart to find the Elmers Painters Paint Markers. It actually took me a little while to find them and I got worried that they didn’t carry them but finally found them with the acrylic paints and stencils.
walmart craft aisle #expressyourself elmers #collectivebias
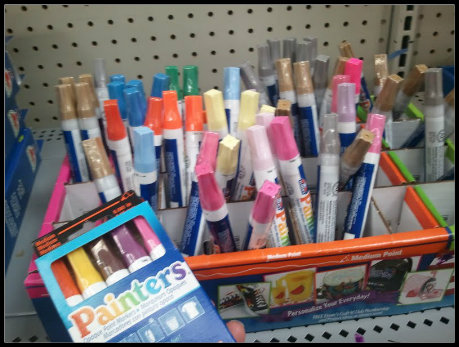
I chose the Sherbet collection in Medium Point. I wasn’t exactly sure what I was going to do to the bag but figured medium point was a safe option.  Instead of purchasing a box of set colors all with the same point you can always buy individuals.  Priced @ $1.97 each at your local Walmart it’s a cheap craft supply when you only need one to two for a specific project.  My Walmart didn’t have a ton of bright color choices.  I almost bought the silver and gold Painters Paint Markers but figured I would wait to see how my project came out.  I’ll be getting more colors next visit to Walmart.
walmart painters paint markers #expressyourself elmers #collectivebias
Setting up my project took longer than the actual crafting but wait till you see what I came up with.
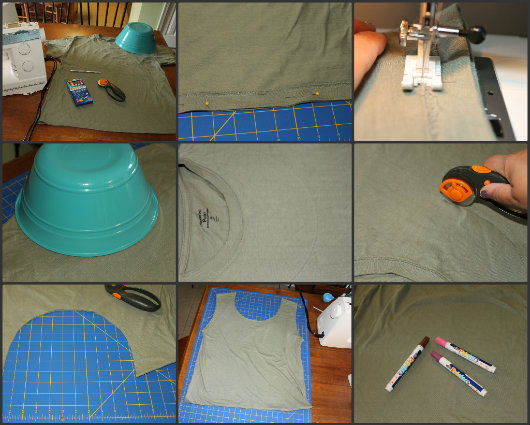
I scoured Rob’s t-shirt drawer and found an earthy green tee that he never wore. I grabbed my sewing machine and other tools and set out to get it done early in the morning.  The bag itself literally took minutes. Simply sewing shut the bottom of an inside out tee, cutting off the sleeves and making a larger opening was all it took to get a great bag. The trick here was to give it a unique and fun design with the Elmers Painters Paint Markers.

tshirt tote bag tutorial diy step by step craft project

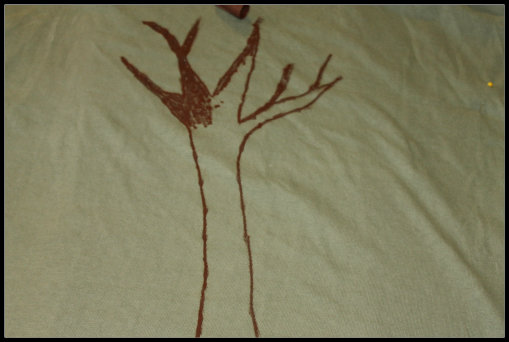
I figured since the bag already had a “green” feel to it being a neutral color and a recycled/reused item I’d stick with the crunchy theme and go for a tree. I drew out a couple trees on paper to get the right look and size and them totally free-handed it on the bag.

elmers painters paint markers drawing shirt craft

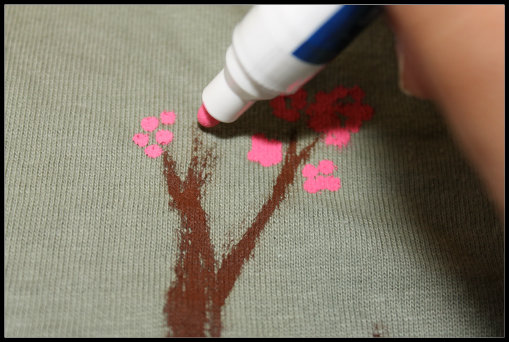
elmers painters paint markers flower craft

A large brown tree with pink and purple flowers on a handmade upcycled tote bag is my final project.

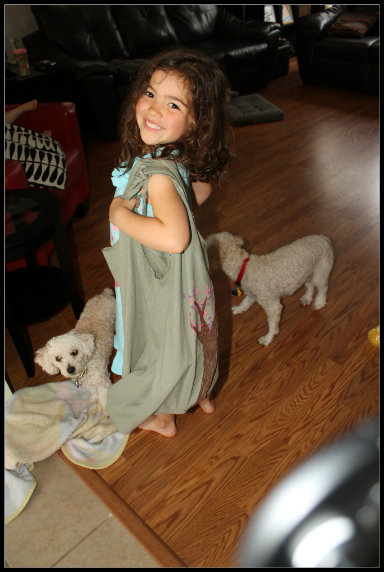
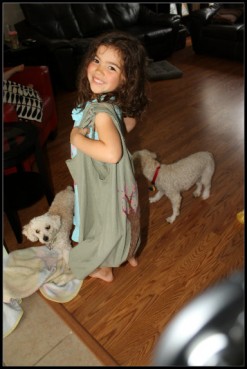
handmade tote from t shirt upcycled recycled craftThese markers were so easy to use I let my 4 year old make her own upcycled tote bag but an old tank top sewn shut on the bottom. She copied mommy’s design and drew a tree with flowers.

painted tote kids craft

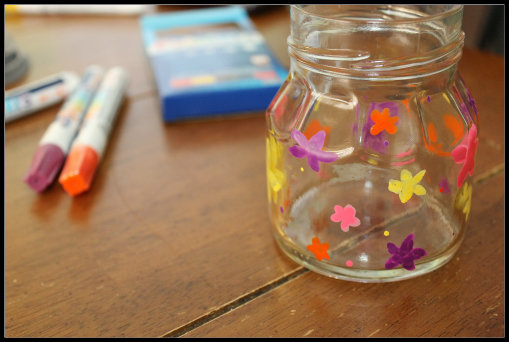
As she did her craft I did a quick second craft for myself; a decorated vase. This is the perfect size for thumbtacks, paperclips or even buttons.  It only took minutes and was simple.

painted jar craft project

Elmers Painters Paint Markers can be found at your local Walmart and other retail locations.  At about $10 for a pack of 5 it’s a small investment for tools that can be used for almost any project you may have.  As you can see from above these Painters Paint Markers easily go on fabric and glass but can also be used on wood, plastics, ceramics and more.  They are now a staple in my craft supplies closet since they are a cleaner and easier option than paintbrushes and tubs of paint.  Stay connected with Elmers and all of their other crafty supplies and projects on Facebook and Twitter.
“I am a member of the Collective Bias™ Social Fabric® Community. This shop has been compensated as part of a social shopper insights study for Collective Bias™. #CBias #SocialFabric”


Decorating Easter Eggs #Fail

Easter is days away and while we don’t do the whole Easter Bunny shtick I thought it would be fun to do something with dyeing eggs. I got my April issue of Family Fun in the mail and in it they had this adorable and simple looking activity for making Easter Egg Hats. I thought, Perfect! Super Cute and not oozing chocolate bunnies and marshmallow chicks.
Decorating Easter Eggs #Fail
The first step was simple, dye the eggs. I had everything, even had neon dye. I love the colors.
Decorating Easter Eggs #Fail
The next day I pulled out all of my craft supplies and a few random things that I thought we would need and set out to get these little hats made.
Decorating Easter Eggs #Fail
At first I was excited as I thought about the supplies I needed and how to get the right shapes. The first egg made was a princess. I couldn’t figure out how to make the cone. I started with a triangle but it just wasn’t coming out right. So I made a cone then trimmed to a flat bottom. Shae decorated the cone with sticky jewels and ribbon, viola, a princess. I placed it on the egg, it fell off. I put it back on, it fell off again. This went on and on; so I glued it.
Decorating Easter Eggs #Fail
The next one was chef, he was my favorite! A simple strip of paper and a tissue was all it took. Again trimmed to fit. Again glued in place. I let Shae draw his face with a Sharpie, cute.
Decorating Easter Eggs #Fail
The Rockstar was a royal pain. I had to Krazy Glue his Mohawk on and hold it in place to get the right look. Cutting a tiny star from sticker foam was just a stupid idea.
Decorating Easter Eggs #Fail
King and Easter Bunny were simpler to do and I liked the outcome even with King’s obvious skin condition. At this point Shae was thoroughly annoyed that she couldn’t do more. I figured she’d be able to help more but there was a lot of waiting, while glue dried.
Decorating Easter Eggs #Fail
bunny easter egg, Decorating Easter Eggs #Fail
The Spring Bonnet was almost the death of me. I literally wanted to throw it across the room but knew I was the one that would have to clean up the soft yolky mess. Her hat was a disaster; it wouldn’t stay on no matter how much glue I used. I set them all up like a wacky little family, took a picture and had lunch.
Decorating Easter Eggs #Fail

That issue of Family Fun already made it into the recycling bin.


HairBow Holder Tutorial

I’ve always love crafting but it’s been on hold for a while, especially since moving to this house  This weekend I got some inspiration after looking at crafting tutorials over at MomDot.  Shae’s barrettes and other hair stuff have been shoved in a little box for too long. I used that inspiration and came up with a hairbow holder design that I think is perfect for not just Shae and her room but for all the stuff she has.

Supplies & Tools

  • Glue gun & Staple gun
  • Wrapped canvas-whatever size you choose
  • Material of your choice
  • Optional material to add padding/weight ( I used an old white curtain)
  • Ribbons of your choice, various lengths
  • Coordinating fabric for pocket (optional)
  • Buttons or other trim for cute details
  • Velcro

diy-hairbow-tutorial-handmadeMeasure your under fabric 1 inch wider & longer on each side than your canvas.  Starting at the top middle, secure this fabric just over back edges with staples or glue gun.  Next secure bottom middle, pulling tight, then proceed to sides and finish adhering all the way around. I used the blue gun for this step since it wouldn’t be seen.

Now with your finishing material do the same process, only this time fold under edges and staple about 4 inches apart.  This gives a really nice look on the back. Be sure to pull the material tight and make sure the patter (if there is any) is straight.

The pocket is great place to store brushes, combs and mirror. Measure a coordinating piece of fabric and secure with staples or hot glue.  I wanted a deep pocket for Shae’s leave in conditioner so I finagled the material to have a bottom. This was done by leaving myself with extra material on that side of the project.  No secrets just a little tucking, folding and pulling. I did take it a step further and ironed out my fabric and added an interfacing this made my flimsy cotton material more stiff, able to withstand the constant in and out of supplies.

Next, layout your ribbons where you want them and secure them tightly to the back with your glue gun or staple gun.  I did 4 ribbons straight across.  This gave me plenty of space for clips, pins and headbands.

For the loop use an 8′ piece of coordinating ribbon, looped underneath and secure with a piece of Velcro that has been glued onto the ribbon. Secure the ribbon to the top of the wrapped canvas. this holds elaborate pony holders and elastic headbands.

I finished the look with a little ribbon detail and a button.  This is hanging on the wall now, high enough that she can’t reach it now but not too high that when she can do her hair, everything is going to be handy.

You can see from the pics that Shae has a ton of clips and there is still plenty of room for more stuff. I hope you try it out, don’t be afraid to alter the instructions, swap materials and use your imagination. If you do try make one I’d love to see it.