RSS Email

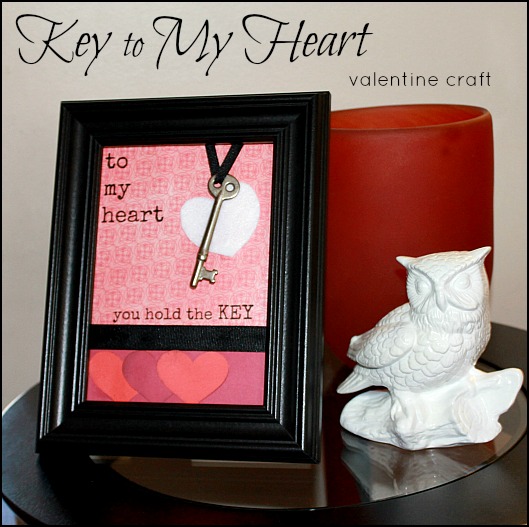
Framed Key to My Heart Valentine’s Craft

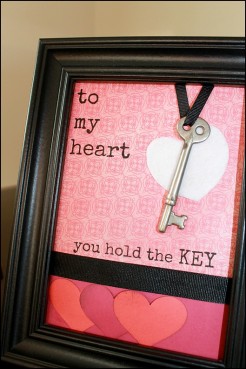
Our home decor stays pretty static  most of the year. Halloween and Christmas are the holidays where we decorate but I’m realizing that celebrating even the small ones we’d probably enjoy them more.  I consider Valentine’s Day a “Hallmark” holiday. A holiday hyped up to sell cheesy greeting cards, expensive candy and boring roses. This year I’m starting early with this Framed Key to My Heart art.

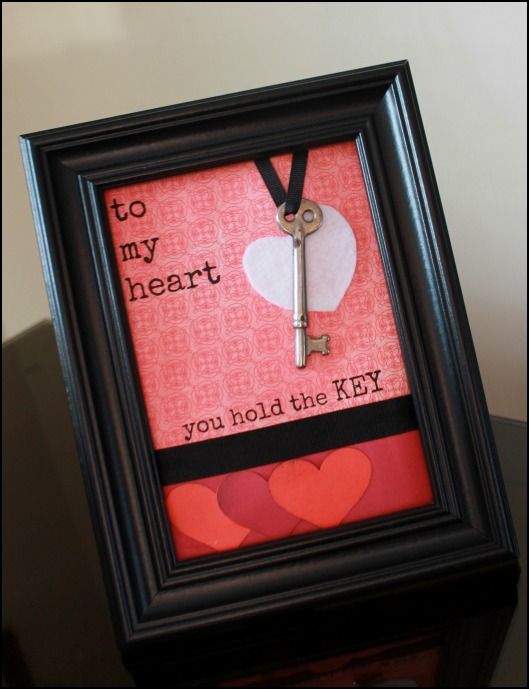
Key to My Heart Valentine Craft

I like frames. They cover my walls and shelves filled with photographs of my family and friends but I’m seeing that they make great vessels for crafty art. I can interchange frames to suit the season or holiday.

I had the perfect spot on a table that I knew needed a little something

Materials Needed

Frame, size and color your choice, paint if you need to

Cardstock or scrapbook paper, color and pattern of your choice

Coordinating ribbon, skinny and wide

Embellishments, I used paper & felt heart cut outs

Stamps, markers or printed message

Key, I used a decorative skeleton key

Glue & tape

Directions
Key to My Heart Valentine Craft

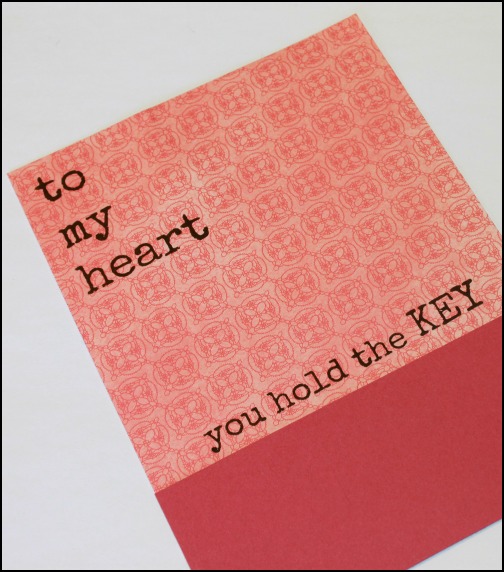
Remove the glass from your frame and cut your cardstock to fit the opening. I layered a pattern and a coordinating solid with a valentine’s theme but not overdoing it.

I played with the wording and tried my best to hand write it but my writing is terrible so I taped my cardstock onto a sheet of paper and ran it through the printer after figuring out the right placement.  Go ahead and write or stamp if you prefer.

Key to My Heart Valentine Craft

Play around with the embellishments you choose to use like rhinestones, lace, raffia or buttons.

Key to My Heart Valentine Craft

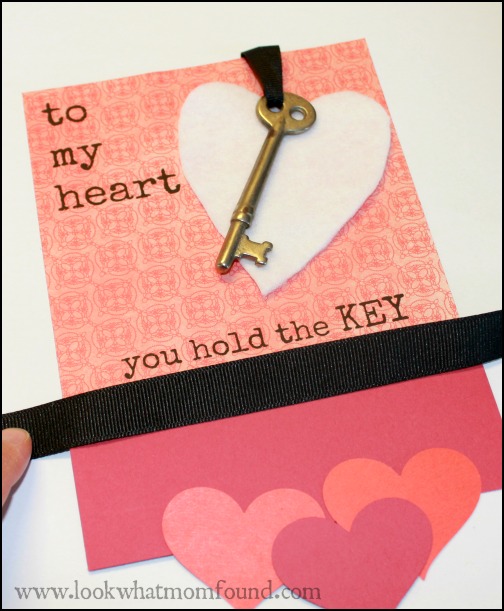
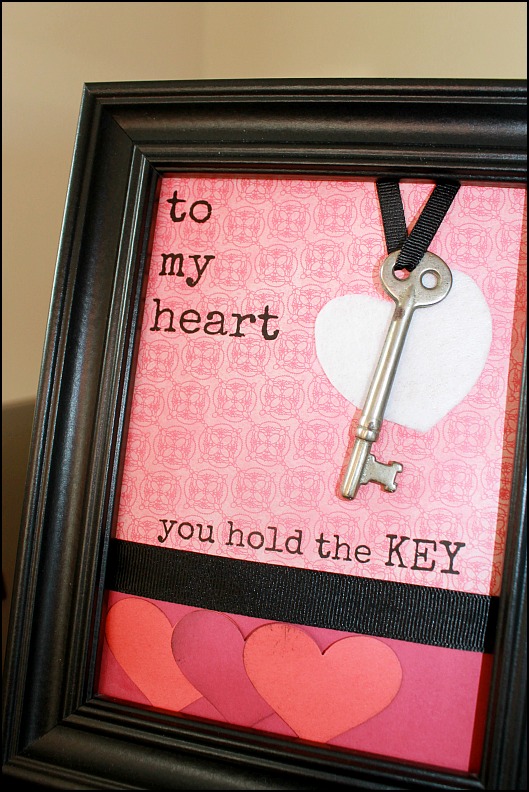
I used a piece of thin black grosgrain ribbon to hang my key and wider ribbon to seperate the different papers.

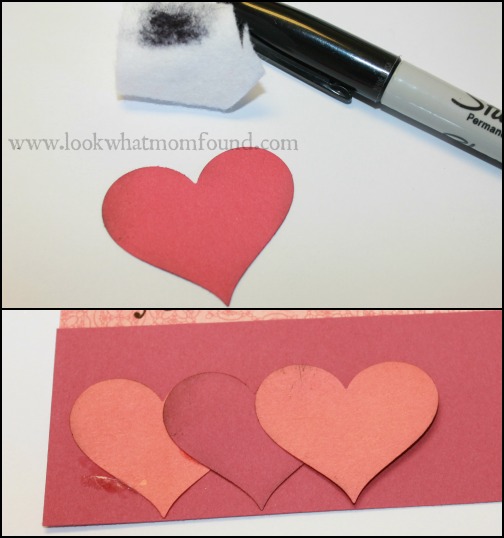
I added dimension to my paper hearts with a little ink.  Using a black sharpie and scrap felt I rubbed the edges of the hearts to ink them.

Key to My Heart Valentine Craft

I layered the key over a felt heart for a pop of texture and color and added the entire craft to the frame.

Key to My Heart Valentine Craft

Key to My Heart Valentine Craft


It’s sitting on a small end table where it can be seen for the season.


Valentine Felt Envelope Craft

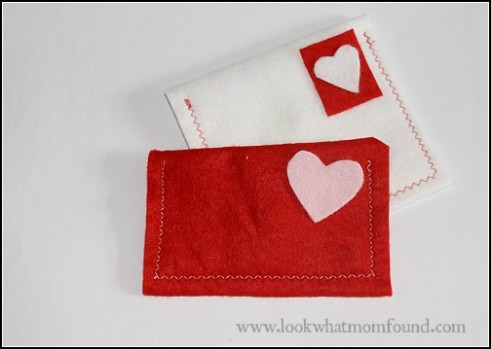
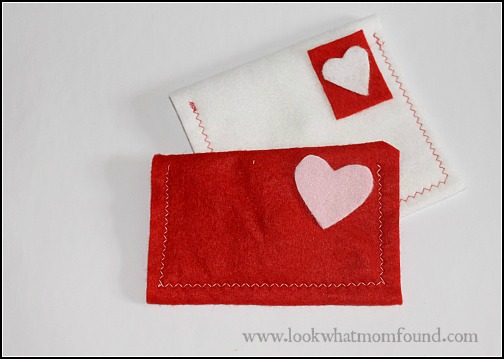
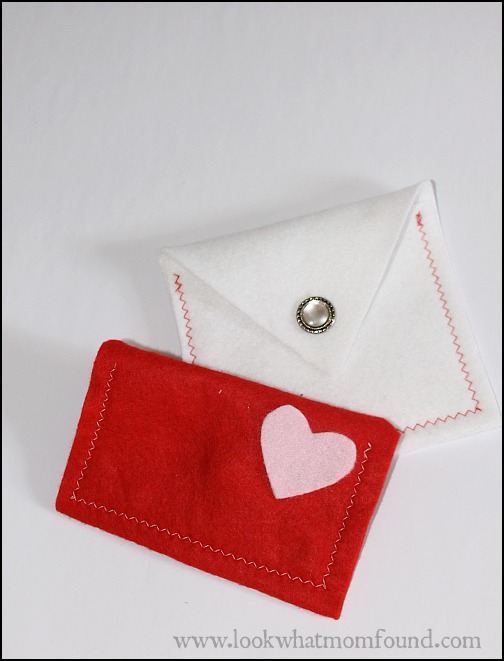
For Valentine’s Day I like to tuck little notes in the kid’s lunchbox or next to Rob’s night stand.  Doing this gives them a little surprise just letting them know how much I love them. This year I’m taking it a step further by using these Handmade Felt Envelopes to hold my love notes.

Felt Envelope for Valentines Craft

I made these using a sewing machine but a good ole needle and thread would work just fine too. These don’t have to be for just Valentine’s Day either.  I’m thinking pretty blues, greens and pinks for spring time or to even celebrate birthdays and anniversaries.

Felt Envelope for Valentines Craft

Materials Needed

  • Felt
  • button
  • needle & thread or sewing machine
  • glue

Directions

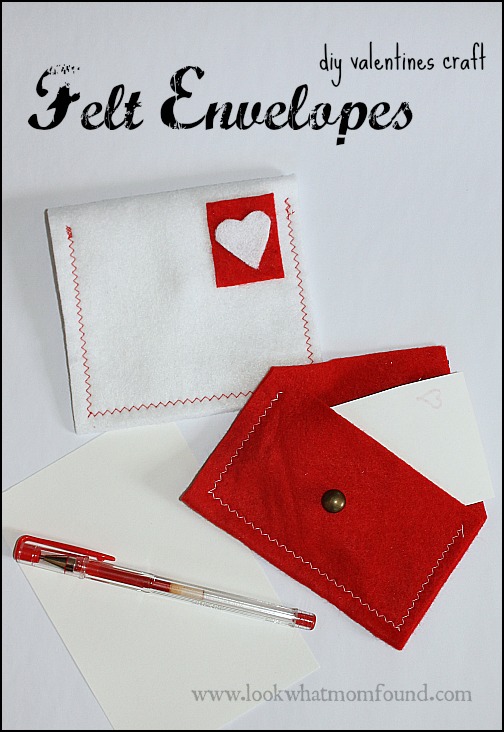
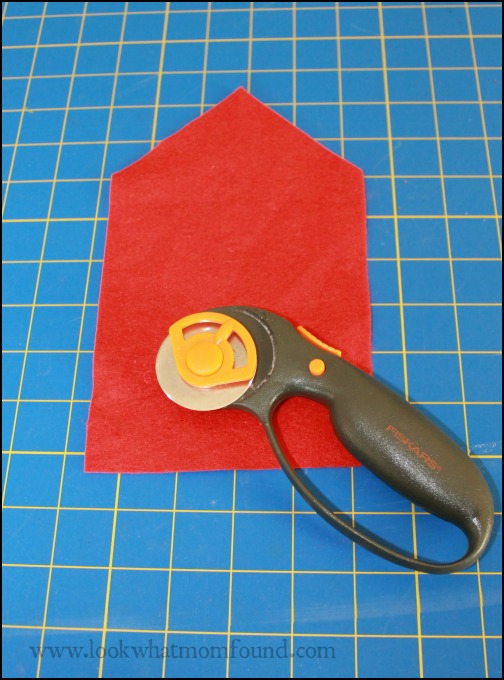
Cut your felt into a long rectangle with a triangle at the top. You can easily go wide to fit sheets of paper but make sure it’s tall enough to fold then also have enough for the fold over flap. I didn’t make mine any particular measurement.

Felt Envelope for Valentines Craft

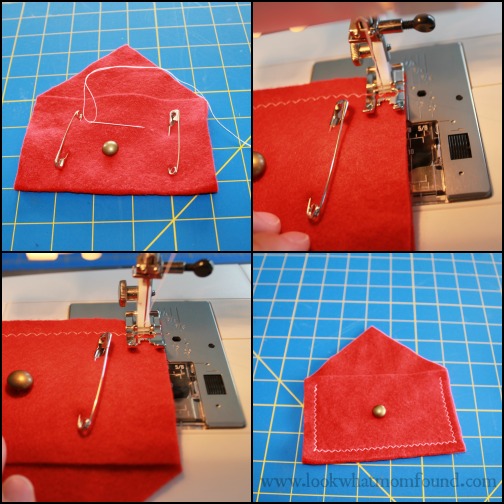
Use a decorative button so you’ll be able to close your envelope.  Velcro or snaps would work too but buttons work for me.   Use straight pins or safety pins or even binder clips to get your folds in the right spot. Do this before sewing your envelope together.

Choose a contrasting thread and sew the sides and bottom of your envelope shape.  I used a zig zag pattern with my sewing machine but a wide running would look great too if you had to sew by hand. Cute a small hole in your flap for the button hole.

Felt Envelope for Valentines Craft

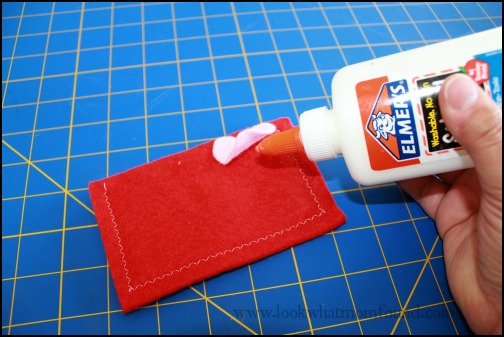
School glue is the simplest way to adhere your “stamps”.  Sewing these down would look great too. Pink shears would’ve given these stamps an endearing quality but I don’t have a pair.

Felt Envelope for Valentines Craft

Once the glue has dried they are ready to use for notes, candy hearts or favorite valentine chocolates.

Felt Envelope for Valentines Craft

If you want to make these with children just skip the sewing step and go with fabric glue to hold the sides together.  Decorate with glitter glue, buttons or rhinestones to make it a true gift from your child.


Paper Heart Chandelier #craft #heart

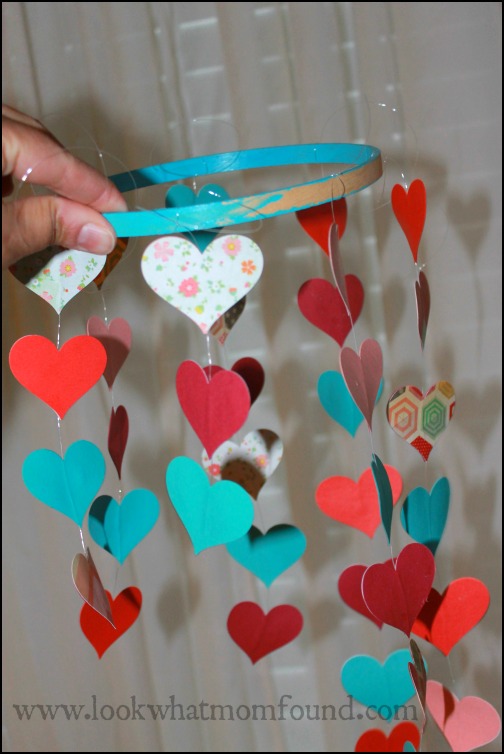
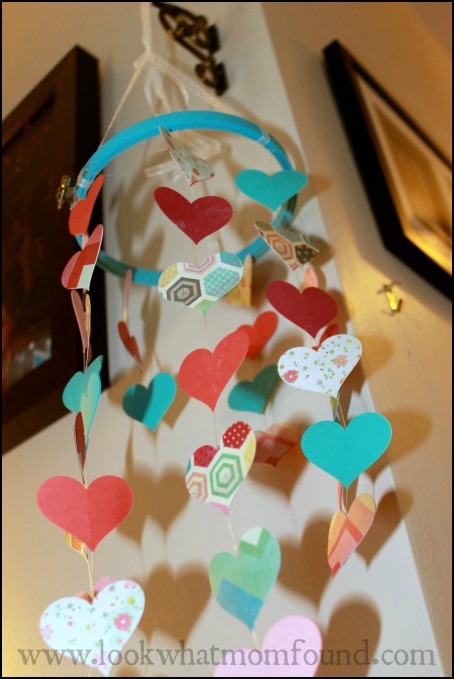
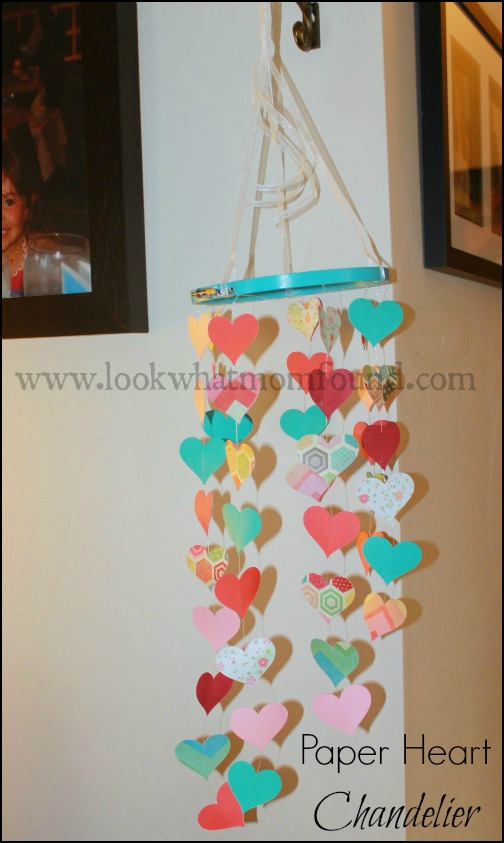
With Valentine’s Day just a few short weeks away I’m going to bombard share with you some great Valentine themed crafts & activities for the next 5 days.  These will all be simple enough that anyone can make them. Even with simple adjustments they can be done with the kids. I’m starting off with making this colorful Paper Heart Chandelier.  I’ve been wanting to make one for a long time and finally got around to doing it.

Making this is a charming way to dress up a dinner for two or for the whole family.  Valentine’s Day is the best excuse to shower your loved ones with extra kisses, hugs and symbols of how much they mean.

Paper Heart Chandelier #craft

This heart chandelier is going to end up in Shae’s room. She’s a collector of mementos and notes and trinkets from her family and friends.  Since this isn’t overly pink and red it’ll fit into her room just fine for a long time.

Making a chandelier of your own is very simple, using simple materials.  The most time is spent attaching your hearts to your thread.
Paper Heart Chandelier #craft

Paper Heart Chandelier #craft

Paper Heart Chandelier #craft

Paper Heart Chandelier #craft


Paper Heart Chandelier #craft

Paper Heart Chandelier #craft

Materials Needed

  • embroidery hoop
  • jewelry thread
  • scrapbook paper
  • heart punch
  • school glue
  • paint
  • glue gun
  • finishing ribbon

Directions

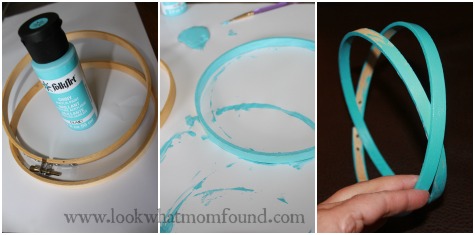
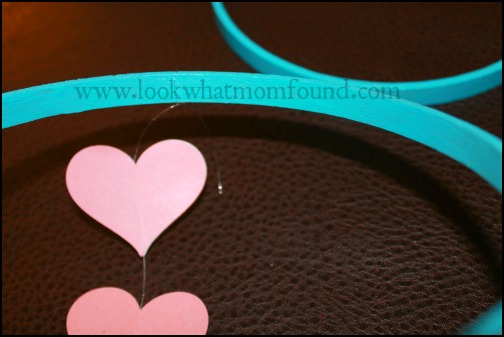
Paint your embroidery hoop your preferred color and set aside to dry.

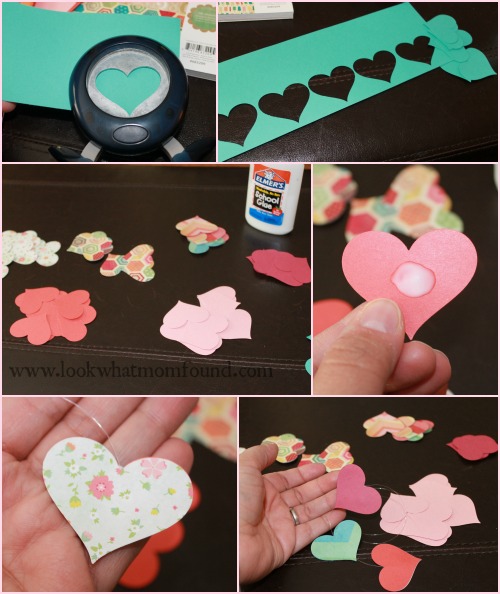
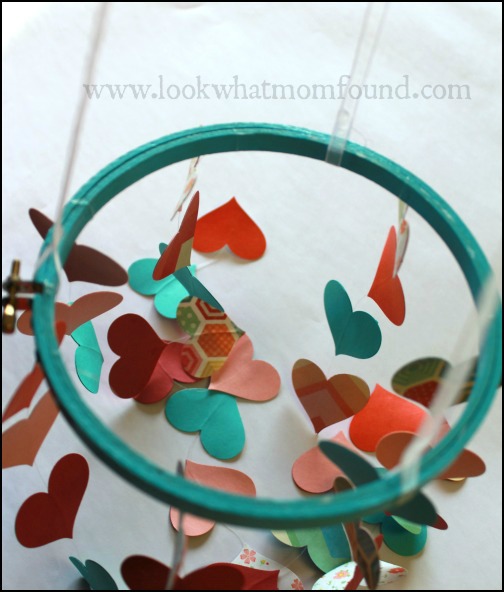
Start punching hearts from your scrapbook paper.  I needed 98 hearts because I was making 7 strands of double sided hearts, one strand with 9 hearts, one with 8 hearts, one with 7 hearts, etc till the shortest strand with 3 hearts.

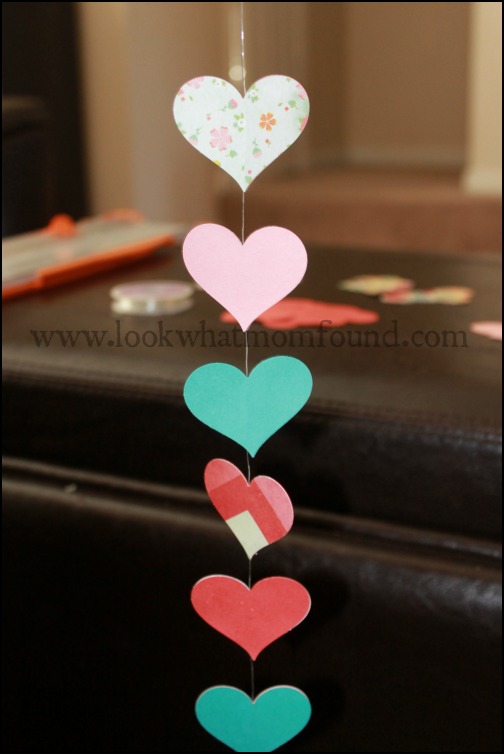
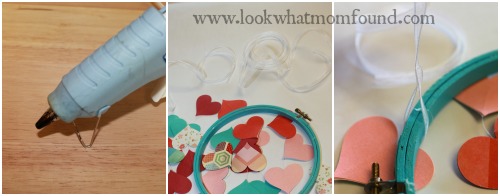
Starting at the bottom of a long piece of string add a heart with glue and attach the 2nd heart and hold till it bonds.  Move 1-2 inches up and add another heart with glue onto the string and another heart shape.   Repeat until you have all of your strands complete.

Make sure you leave excess string at the top of your strands so they can be attached to your hoop.

Tie your strands in the order you prefer and knot them so they don’t come undone as you finish all of the heart strands.  Arrange them neatly and put the outer ring of the embroidery hoop on tightly. This keeps the strands in place.

Using a pretty ribbon cut 3 or 4 long pieces to act as the hanger.  Figure out where you want your ribbons  and make a small loop around the embroidery hoop and hot glue it closed.  Pull the ribbons together at the top, arrange them so the chandelier is straight, make a loop and hang.

Paper Heart Chandelier #craft

Paper Heart Chandelier #craft

Substitute supplies for things you have on hand. Hearts can be made from wrapping paper, felt, comic strips or book pages.   If invisible jewelry wire isn’t available use yarn or twine. Make the craft work for and your personal preferences.


A Family of Christmas Stockings #PCHoliday

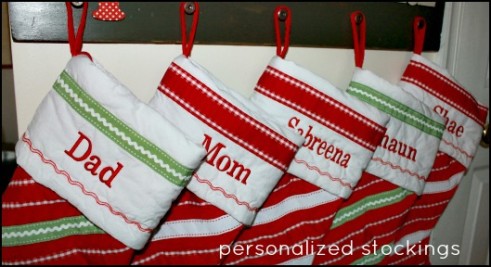
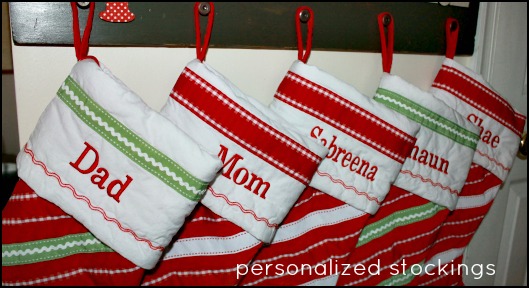
trackable pixelBlog Post Disclosure BannerWay back in the day when  we were just a family of 4 I spent a Christmas finding the “perfect” stockings and stocking hangers to display on our mantel.  I trudged out in the cold, snipped fresh holly branches and weave tiny twinkling lights through them and flaunted the beautiful design I had come up with.  Fast forward to the next 6 years and you’ll see only 3 stockings each Christmas attached to anything that had a flat surface. This year when the note came through that I could pick out new stockings for the whole family from Personal Creations I almost leapt out of my seat.  I knew we’d finally have what I’ve been wanting for a long time, these Ribbon Stockings personalized with our names.

Personalized Christmas Stockings

Personal Creations carries a HUGE selection for just about everyone.  The best part of their choices are most of them can be personalized to reflect a name, initial, special date or even more.  With hundreds of gifts to choose from for any occasion Personal Creations can be your shopping destination throughout the year.

I knew our stocking were on their way so I knew I had to come up with a new idea to hang all five of them. this house does not have the fireplace mantel that we used to have so I knew I had to get creative.  I scoured our makeshift workshop and found something that would work perfectly with some tweaking.

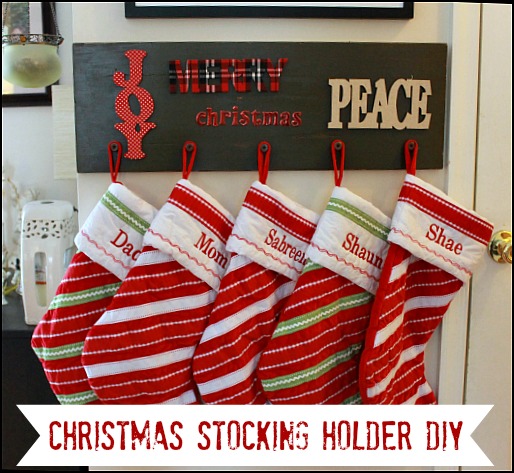
Christmas Stocking Holder DIY

Christmas Stocking Holder DIY

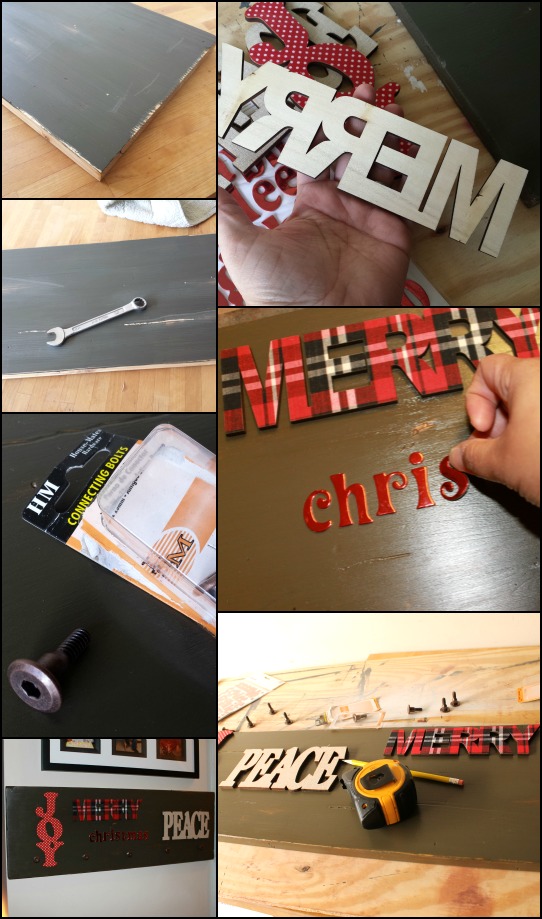
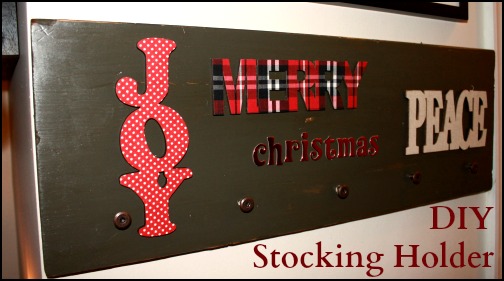
Using a simple unused wood shelf, existing paint & stain and some bought decorations and hardware I came up this Christmas Stocking Holder. The project was very easy. I painted and stained a plain wood shelf till I achieved a color I like and took an old wrench and a hammer to it to add some distressed details.  The words and stickers were less than $10 from the craft store and Rob found these antique brass bolts. I thought there were a unique and better alternative to plain hooks.
Christmas Stocking Holder DIY

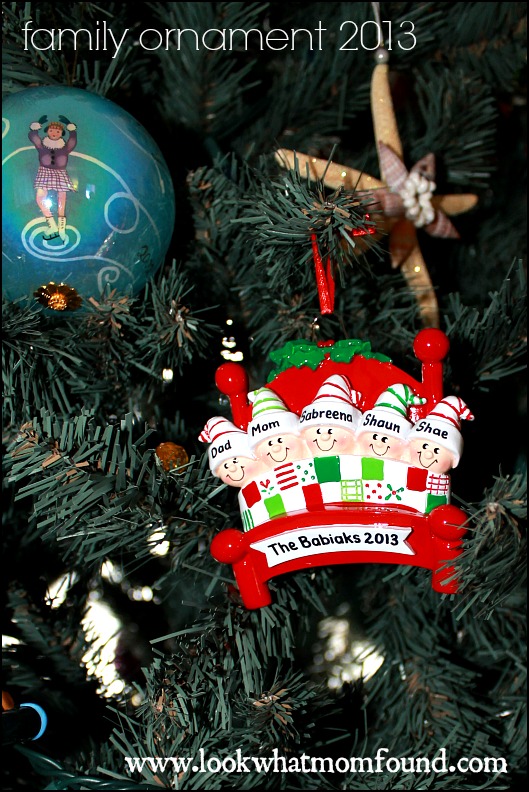
The stockings look great hanging up.  Even without a mantel they stand out with this special new home. I’m not forgetting about our new ornament.  Each year I get new ornaments for the kids or family that mark a significant point in the year or commemorate another wonderful year together.  The Family in Bed ornament was adorable and I knew it was a good fit for our family.

Family Ornament

This ornament will stay on the family tree but individual ornaments that the kids received are put right on their own trees. When they are grown up and have families of their own they’ll have a great start for the holidays and great stories and memories to share.

Shop today for your own personalized ornaments and stockings to ensure availability and delivery in time for the holidays. Personal Creations is offering you 20% off all of your purchases through the end of December. Click here to start shopping and the 20% will be applied in your shopping cart.

Follow Personal Creations Blogger Board: Christmas Ideas on Pinterest


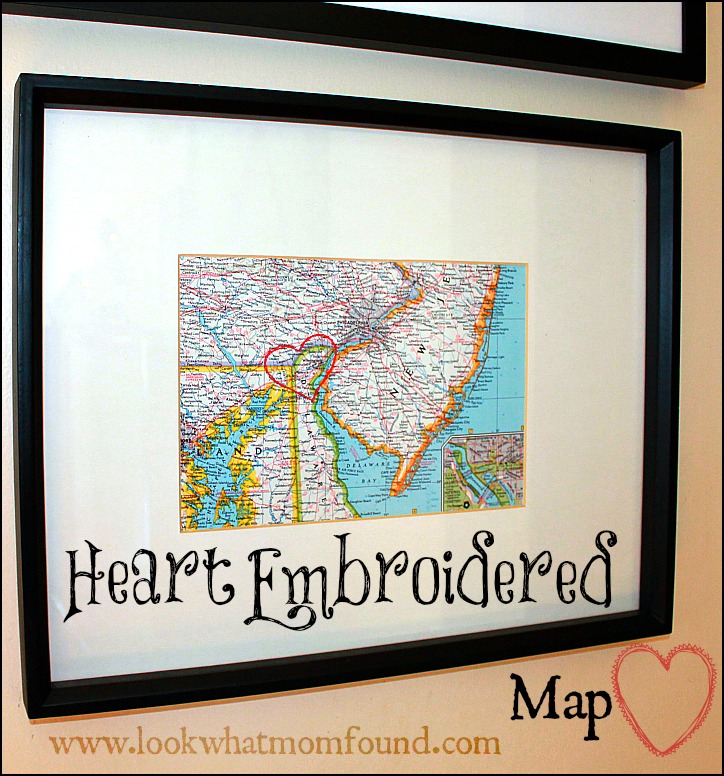
Heart Embroidered Map

Creating art and decor pieces for the house has become a little bit of a hobby for me.  Currently I have about 3-4 projects in the works but I want to show you this very personalized heart embroidered map that’s been hanging in our house.

Heart Embroidered Map #decor #craft

This project was very simple.  The only thing I needed to find special was a shadow box but feel free to use a regular frame with or without the glass.

Determine what you want to outline on the map. Is it your honeymoon spot?  The city where you met?  How about multiple hearts for everywhere you’ve traveled together? I chose the area where we live and spend most of our days, the place where we call home.

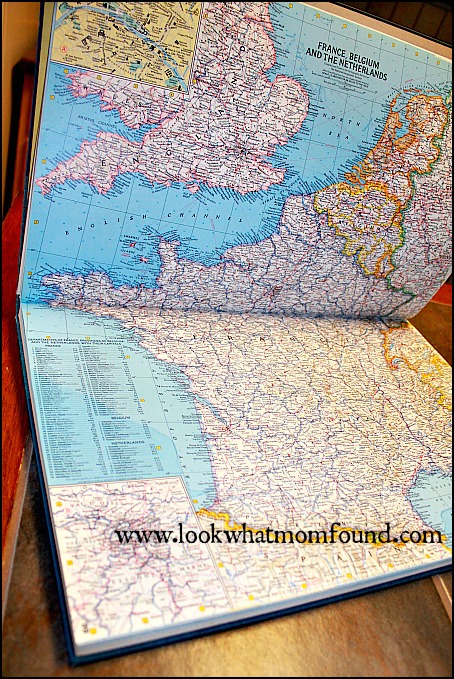
I found this vintage atlas at the thrift store and knew it was going to be a source of lots of crafts!  I love the coloring, the country flags and the variety of maps included.

Heart Embroidered Map

Materials

  • Straight Pin
  • Hand Sewing Needle
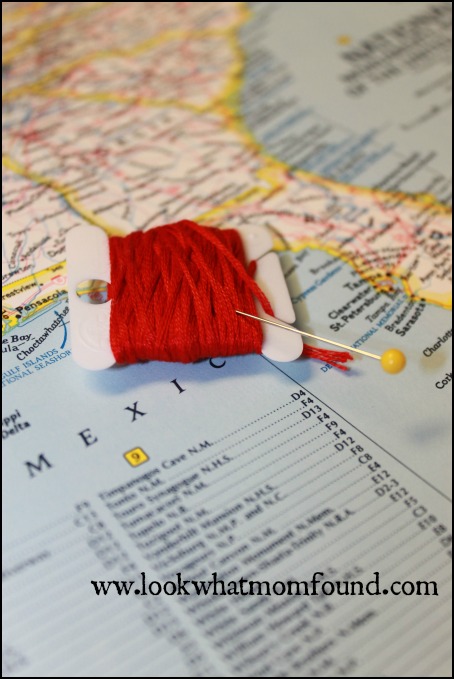
  • Embroidery Thread-color of choice
  • Map-original or photocopy
  • Tape
  • Frame of choiceHeart Embroidered Map

Directions

Make sure your map size fits into your frame or mat.

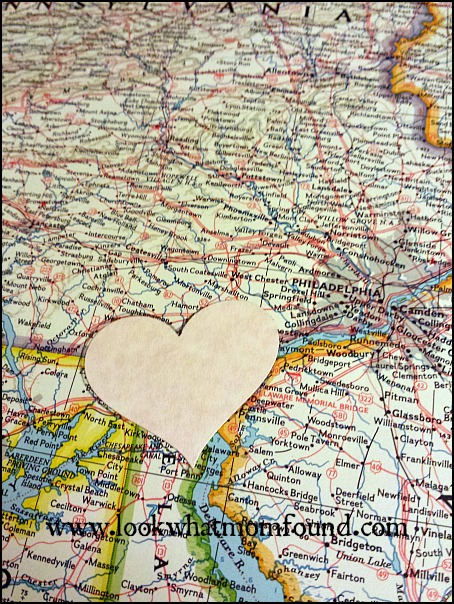
Decide what shape you want to outline and lightly draw that on the map. I used a heart shape cut out and traced that onto my map.

Heart Embroidered Map

Using a straight pin poke holes along your trace line about 1/4 inches apart. As you come close to corners or curves make your hole a touch closer so your thread can make that shape. If your paper is thin I would suggest adhering it to another sheet of paper or running strips of tape along the back to give it strength.  You don’t want the paper to rip as your are pulling your thread through.

Thread your sewing needle with more thread than you think you’ll need. Pull in through from behind the map and tape the end to the back of your paper/map.

Using a back stitch start filling in your shape with your thread.  This video will show you how to do the back stitch on paper, starting around the 3:30 mark. It’s not hard at all and this kind of stitch will fill your lines rather than leaving spaces leaving people wondering what your shape is. If you prefer a running stitch that is fine too. It’s all about personal preference.

Finish with another piece of tape holding your thread down in the back. Frame and hang.

Heart Embroidered Map


A sentimental variation on this would be tracing a long road trip or relocation with a heart at the final destination.


Fabric Pumpkin Home Decor Tutorial #craft

Festive table-scapes are fun ways to incorporate decoration into the home.  Our dining table is the usual catch-all of school papers, sunglasses, the day’s craft leftovers and water glasses so creating something decorative pushes us to clean up our messes. An for some reason I’m obsessed with pumpkins this year!

Fabric Pumpkins Tutorial

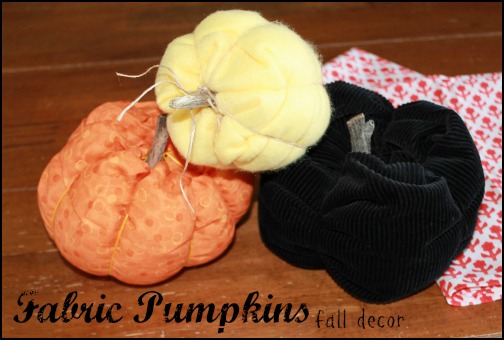
These decorative pumpkins can be found in favorite shops for hefty price tags. I’ve seen a gorgeous velvet ruby red variety for upwards of $30. I’m not one to spend that kind of money for decorations. I’m the kind of person to make my own. Using scrap fabrics I created some pumpkins of my own to decorate for years to come.

Materials

  • Fabrics of your choice
  • sewing machine or needle and thread
  • embroidery thread, raffia, ribbon
  • batting
  • stem, real or made from fabric
  • glue gun

Instructions

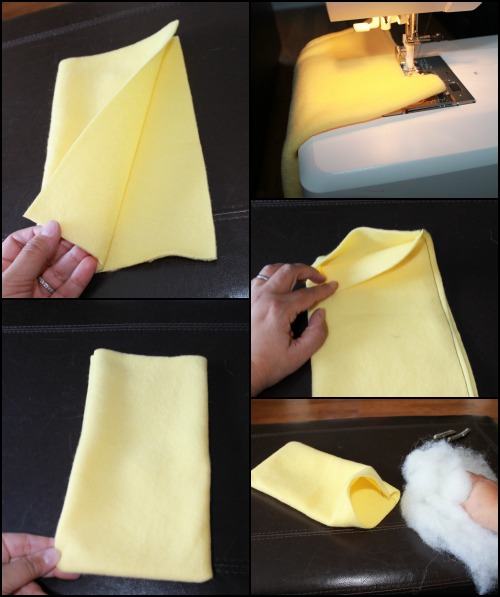
Create a pouch from your fabric. The length and width of your tube will change the shape of your pumpkin so experiment to see what you prefer.

Fabric Pumpkins Tutorial

Fully stuff the tube leaving a couple inches at the top. Loosely fold in the top to cover stuffing.

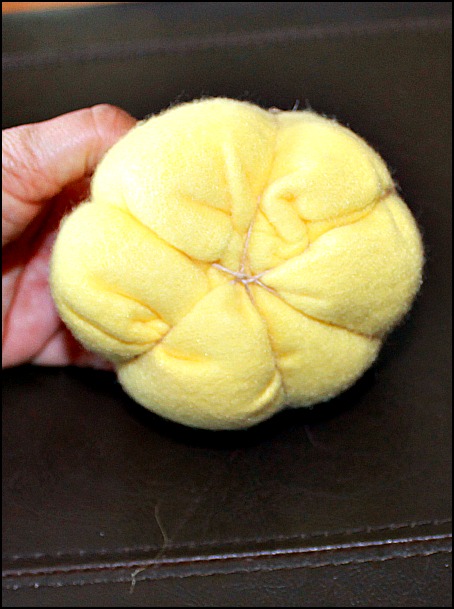
At the top of your pumpkin start wrapping your twine, raffia, thread or ribbon to create the indentations of your pumpkin. Finish by tying your thread tightly at the top.  Arrange your threads to achieve the pumpkin look you want, fluff with your fingers and hands.

Fabric Pumpkins Tutorial


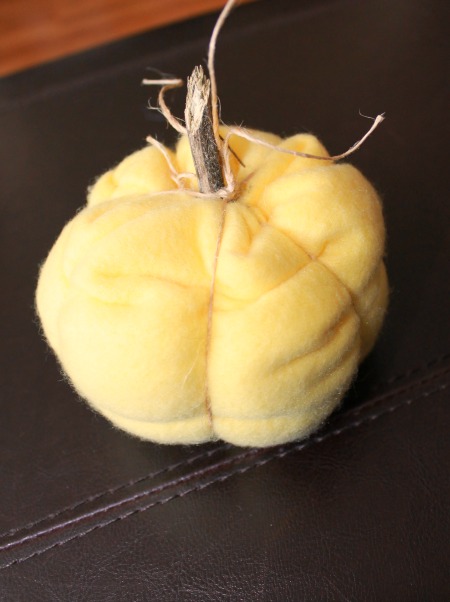
Add a touch of glue to your stem and shove through the top of your pumpkin into the batting and adjust till it sits how you like it. Arrange on table or shelf to decorate for the holidays.

Fabric Pumpkins Tutorial


DIY Framed Yarn Spider Web #halloween #craft

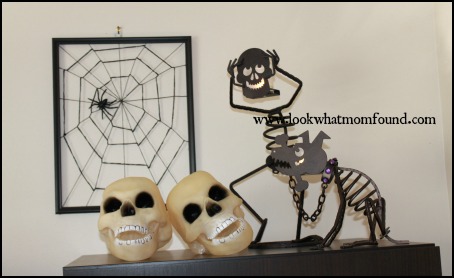
I love decorating for the holidays, all of the holidays. Fall and Halloween themed decor is something I’m still building because I feel like I don’t have enough. Creating my own decor is always fun.

This spider web was created quickly and easily and CHEAPLY. From start to finish this took 1 hour including glue drying time.


Materials Needed

  • large picture frame ($1, dollar store)
  • black embroidery floss or yarn
  • plastic spider
  • clear, white or silver glitter glue
  • tape
  • glue

Instructions
Start with removing the glass and backing from your frame. If you prefer to paint it a different now is the time.

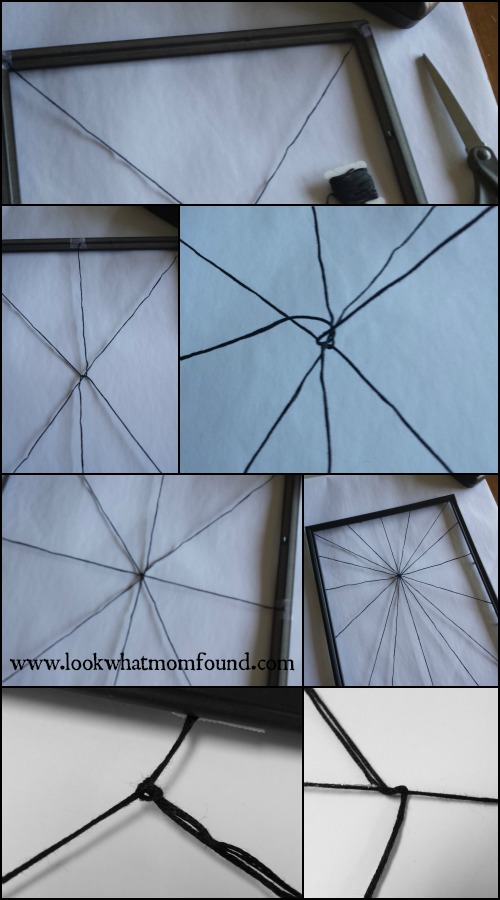
Create your base web by simply crisscrossing from corner to corner and side to side pulling the strings firm but not super tight. Tape them firmly to the back of the frame. I looped my threads around the intersection to give it some strength and bulk.

DIY Yarn Spider Web #craft

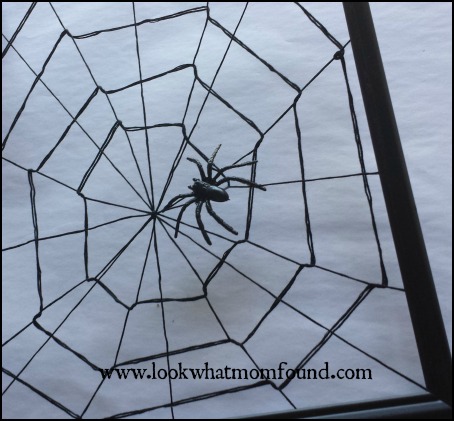
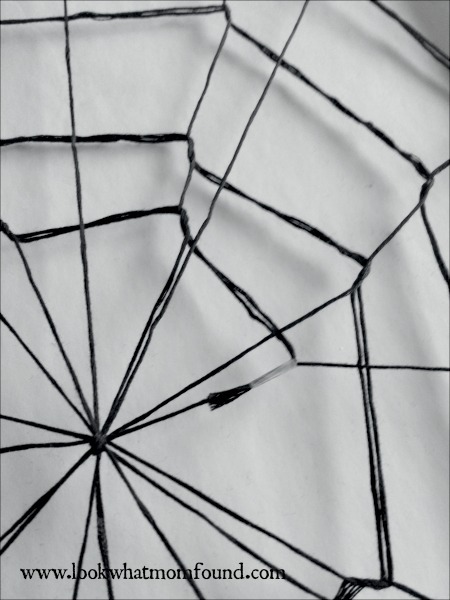
Once you are happy with your straight webbing the circular webbing can start.Gather a LARGE length of thread/yarn (5-6 ft), double it and start from the outside with a single loop knot. Start going around your web. I looped around every other thread. Continue going around until you run out of thread or you are happy with your web.

DIY Yarn Spider Web #craft

To finish the web I used a small piece of tape to secure it in place and glued the spider in place to cover that spot. Using my fingers I pulled the web open to make sure the loops were tight and the web was taut. I pulled the straight webs tighter if they needed to be, retaping and cutting as I needed.
DIY Yarn Spider Web #craft

To give it a little more visual interest I haphazardly added glitter glue in various spots on the web.

The kids loved it as soon as they walked in.

DIY Yarn Spider Web #craft


Decoupage Makeover Wall Art #upcycle #bird

This project came about because we were forced to change the entire look of a room.

Decoupage Art on Wood  #diy #upcycle

What started out as a mini project of new end tables turned into a whole bedroom makeover. I had these grand plans of doing an Ikea Hack of mini dressers but like usual with Ikea, the plans didn’t go our way. But then these adorable cabinets appeared in another display and immediately became our new end tables.

Ikea Enamel End Table
What we didn’t think through was the rest of the room. Our furniture didn’t match our new cute end tables or our bed. The drapes were horrendous and the bedding was too dark and heavy overall. The next couple of days we spent shopping for new dressers, rearranging art and photos and thinking up new design elements for the room.

I found this odd art piece at the Goodwill outlet.  It had a good shape and even though I knew the eye chart design wasn’t my style I liked it. It cost just a couple dollars so the investment was a easy YES.

Wooded Eye Chart #upcycle

It lingered in the garage for a couple of weeks while I thought about how to upcycle it and that’s when I knew it should be used for the bedroom makeover for it. I settled on a simple bird silhouette found on Google images.

To start Rob sanded the eye chart off and left me with a smooth finish. It was just a simple box someone had made and nailed together but it was very sturdy and straight.  Next he painted the top with a couple light coats of white and the outside edges a chalky black. The same color as my paper wreath covered shutters.

Sanding and Painting #decoupage #art #upcycle

Then it was time to decoupage the image onto the wood. Arranging the image was the hardest part. I purposely overlapped some of the pages and left space between others. I was not going for a perfectly smooth finish.

Layered Leather Look Decoupaged Bird

Layered Leather Look Decoupaged Bird

I applied 3 thin layers of decoupage medium (letting them each dry inbetween) then went for a unique step by adding color. As you can see it just took a couple drops in a small amount of decoupage and a couple stirs for an uneven blend. Using a dry brush method I gently applied the tint randomly over the art. I again let each color dry completely.

tinting decoupage #upcycle #art

One final layer of decoupage then a polyurethane finish and it went on the wall. I love the texture and layered colors. It reminds me of leather.

Decoupaged Bird on a Branch #art #upcycle

Decoupage Bedroom #Art #upcycle

There’s still work to be done in the bedroom but this really is a lovely handmade touch. Best of all this cost me less than $10 for the entire project.


How to Dry Herbs from the Garden

Herbs are some of the easiest things to grow in a garden, in a flower box or even on your window sill. For the most part they need little maintenance to thrive. This year was my hardiest crop of herbs ever. I did a tiny bit of research to find out what I had to do to keep my basil going for an entire season and it worked. The trick was to prune back as it flowered up top. Check YouTube, it’s a wealth of information for us common folk.

As the season was coming to an end I hated the thought of losing all the great herbs I’ve been growing. I did a little more research and figured I’d give drying my own herbs a try.

Drying Herbs from the Garden

SIMPLE

All you need is parchment paper, an oven and some containers to hold your dried herbs.

Trimming off your herbs is the first step. First morning is usually not the best time as they might still be damp. Give it a few hours then go ahead and snip. Cut more than you think you’ll  need especially thing like thyme, rosemary, oregano and parsley. Basil is a little trickier. Once a stem has started to flower or the leaves have started to lose their flavor. Try to stay away from these.

Flowering Basil

I give all of my stems a firm shake and run through my fingers. Since my herbs are in flower pots I don’t have to worry about too much dirt or problem from the dogs. Shaking them vigorously gets rid of not only dirt but bugs and dead leaves. No need to be really gently.

Drying your own herbs

For the Basil pluck each leaf leaving as much stem as possible. Everything else can stay on its stems. Place your herbs (one type at a time) on a parchment lined cookie sheet.  Pile it on.

Drying Herbs from the Garden

Preheat your oven as low as it will go. Let it come to temperature then place your herb filled cookie sheet in the oven and turn off the heat. Set a timer for 30-40 minutes.

Check your herbs. If they are still pliable give them another round in the oven.

Let them cool then remove the leaves. Run your fingertips along the stems and gently scrape them off. Sometimes you are left with tiny “twigs”, please remove as much of them as possible.

Homemade Dried Herbs

Dried Herbs from the oven

Sorting Herbs

Once your leaves are sorted tranfer them to a tight lidded container for use. Hold onto the sheet of parchment for the next batch and keep reusing.  Try stacking multiple cookie sheets in the oven to dry more at one time.

  • My oven goes down to 170°F so it never got too hot to scorch the herbs. If you find your oven doesn’t get below 200°F let it cool an extra couple minutes after turning it off and then placing your cookie sheet inside.
  • Don’t crush your dried herbs when your picking them or transferring them. Crush them as you use them.

I’ve done several batches of Thyme, Basil and Oregano. These are the herbs I use the most.  Don’t let this stop you from drying whatever it is you are growing.


Painted Wooden Tray #upcycled #craft

I’m the kind of person that sees something that goes in the trash and wonders “Can that be reused or re purposed?”. This happens with toilet paper rolls, milk jugs and CoffeeMate creamer bottles. The problem with wanting to “re purpose” everything is having a place for the final project. Things headed for the trash usually end up there unless I have an idea for it.

For Christmas Shae received a few Melissa and Doug bead kits. I love Melissa and Doug toys because they are wood and non-toxic and last forever. I especially love the bead kits because they come in this simple wood trays that DON’T have lids. Not having a lid usually isn’t something I would applaud but that just meant I could dump the beads together in a box and set the tray aside for something prettier.

Wooden bead tray from Melissa and Doug

This is my something prettier. My make-up collection is getting out of hand. The vanity drawer that is dedicated to brushes has to make way for real cosmetics. I figured I could make a pretty-fied tray to sit on my vanity to house the brushes and fragrances and it would still look organized.

Painted Wooden Tray #upcycling #recycle

The tray ended up looking nicer than anticipated and is now sitting in the coffee table with my grandmother’s handmade doily and treasured milk glass. I’m not sure if this is its final resting place but for now it works to showcase these things that mean a lot to me.

The tray is a simple, lightweight, pine tray. There was nothing special about it except it was a blank canvas for so many ideas.

Supplies

  • Wooden tray
  • Acrylic Metallic Blue Paint
  • Waterbased Walnut Wood Stain
  • Polyurethane Spray
  • Painters Tape
  • Foam brushes
  • Paper plates or palettes to hold paint
  • Decorative details, optional

painting supplies

Instructions

I prepped my tray by vigorously wiping with a dry microfiber towel, being sure to remove any adhesives. My tray had a mark in the shape of a strip of tape but I wiped until it wasn’t sticky. I then taped off top edges to keep the paint off. I applied 3 coats of Metallic paint in order to get the shiny finish.

Metallic Paint, wooden tray

Metallic Paint, wooden tray

After a couple hours I removed the tape and applied new painters tape on top of the blue so the stain didn’t drip onto the tray. As you can see the Melissa and Doug logo is still there, I thought about sanding it off but ended up leaving it.

logo showing on wooden tray
I applied 3 coats of stain, letting each one dry in between. I wanted a deep brown color but still wanted to see the wood grain.

Painted Wooden Tray #upcycle #recycle
The next day and day after I sprayed thin but thorough coats of Polyurethane to protect against scratches and nicks. I made sure to get all sides, inside and out.
The tray ended up with a slight gloss but still looks like wood where it should. The tray was no additional cost, the paint and stain cost me less than $3 and the clear coat is something I always have on hand for projects. This thrifty little project makes me smile.
An old frame would work well for a tray too. A couple coats of paint can transform almost anything.