RSS Email

Pepperoni Pizza Puffs #recipe with Tyson Foods #WhatsYourTopping #CBias

I am a member of the Collective Bias®  Social Fabric® Community.  This shop has been compensated as part of a social shopper insights study for Collective Bias and their client.

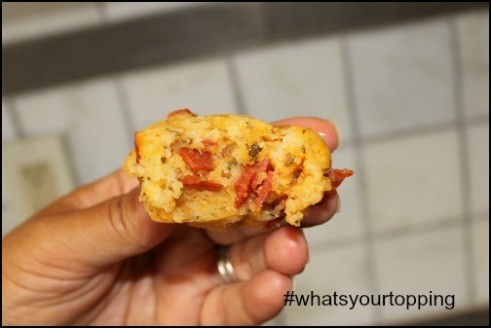
Cooking is my job. While Rob is usually on weekend breakfast duty the bulk of the dinners and planning is my responsibility. I like to plan out what is going on for the week so that all ingredients are on hand. This week since the kids are on summer vacation I planned a couple meal solutions besides sandwiches. One of them was Pepperoni Puffs. This muffin shaped fluffy bite is a treat for Shaun and Rob and they can often be found in lunch boxes year round.
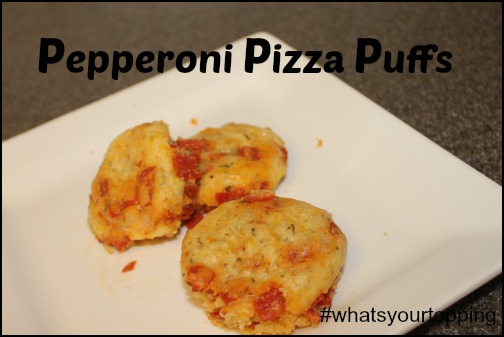
Pepperoni Puffs #whatsyourtopping #cbias

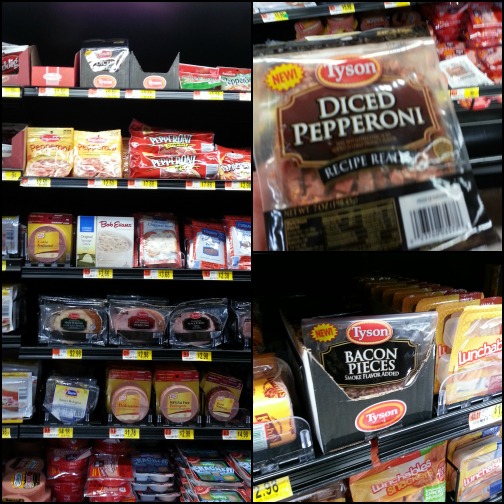
Using Tyson Foods Diced Pepperoni has never crossed my mind. In fact I had never heard of it before until I was sent to Walmart to shop for it.

Our Walmart is a one stop shopping center. We go there for everything; groceries, household items, sheets, toys and games and more. Shopping for Tyson Foods Diced Pepperoni I thought was going to be easy but finding it turned into an adventure. I stood in the Meats section looking around with no success. I had to ask an employee. We both located the diced bacon (which I also bought) but it took some digging to find the Pepperoni. Finally! On the top shelf, fallen over in a black box we found them. Not an ideal spot for such a great brand I thought. Luckily I bought 2 because when I went back 2 more times there was none to be found on the shelves.
Shopping Walmart #whatsyourtopping #cbias
Tyson Foods #whatsyourtopping #cbias

When making the Pepperoni Puffs I snuck a few bites of diced pepperoni and was surprised at the level of spice. This is how I like my pepperoni. The first bag we used was gone in a day or two. It was used for a pizza topping and for pizza quesadillas. We use a ton of sandwich pepperoni in our house so I see having this on hand regularly for adding spice and flavor to a ton of different recipes.
The puff recipe is something I found somewhere online and doctored to suit our tastes. It can easily be adapted to house sausage, bacon or even chicken.

Pepperoni Pizza Puffs

Ingredients

  • 3/4 cup flour
  • 3/4 tsp baking powder
  • salt and pepper to taste
  • 1 TBLS Italian seasonings
  • pinch of red pepper flakes
  • 3/4 cup milk
  • 1 egg, lightly beaten
  • 1tsp chopped garlic
  • 1 cup shredded pizza blend cheese
  • 2 TBLS parmesan cheese
  • 1 cup Tyson Foods Diced Pepperoni
  • 1 cup of pizza sauce, warmed

Instructions

  1. Preheat oven to 375 degrees. Grease 24-cup mini muffin or 12 regular size muffin pans with liners.
  2. In a large bowl whisk together flour, baking powder and seasonings.
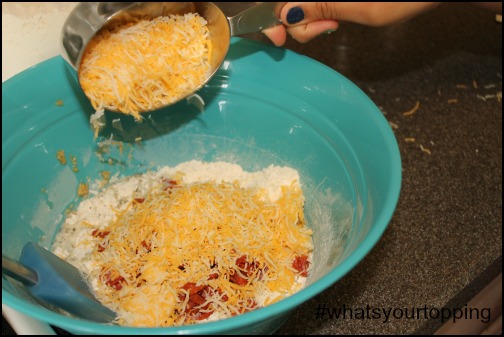
  3. Add milk, egg, garlic, cheese and pepperoni and gently blend till combined using wooden spoon or rubber spatula.
  4. Scoop into muffin tins.
  5. Bake for 21-24 minutes until puffed and golden brown.
  6. Serve warm or room temperature with pizza sauce for dipping.
https://lookwhatmomfound.com/2013/06/pepperoni-pizza-puffs-recipe-with-tyson-foods-whatsyourtopping-cbias.html

Pepperoni Pizza Puffs

Ingredients

  • 3/4 cup flour
  • 3/4 tsp baking powder
  • salt and pepper to taste
  • 1 TBLS Italian seasonings
  • pinch of red pepper flakes
  • 3/4 cup milk
  • 1 egg, lightly beaten
  • 1 tsp chopped garlic
  • 1 cup shredded pizza blend cheese
  • 2 TBLS parmesan cheese
  • 1 cup Tyson Foods Diced Pepperoni
  • 1 cup of pizza sauce, warmed

Pepperoni Puffs #whatsyourtopping #cbiasPepperoni Puffs #whatsyourtopping #cbias
Directions

Preheat oven to 375 degrees. Grease 24-cup mini muffin or 12 regular size muffin pans with liners.
In a large bowl whisk together flour, baking powder and seasonings.
Add milk, egg, garlic, cheese and pepperoni and gently blend till combined using wooden spoon or rubber spatula.
Scoop into muffin tins.
Bake for 21-24 minutes until puffed and golden brown.
Serve warm or room temperature with pizza sauce for dipping.
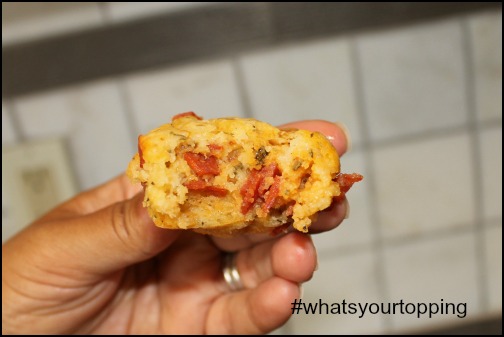
Pepperoni Puffs #whatsyourtopping #cbias

These are something the kids have eaten for school lunch that doesn’t have to be kept cold or warm, room temperature is just perfect. The mini muffin size makes for a great pop-able treat for after school and for parties. Doubling the recipe is simple so they can be frozen for eating later on. Sandwiches and salads can get boring so this is a tasty alternative


Meal Plan for the Week 4-15

I’m a pretty good meal planner but I’m not good at blogging that plan. I often forget till about Tuesday and then by that time it’s too late. I’m on time this week and want to share with you what we are having this week.

Monday-Pasta, Sausage and Veggie Toss. Easy mix of shaped pasta tossed with sliced cooked sausage and lots of fresh tomatoes, broccoli, red peppers, baby spinach mushrooms and herbs.

Tuesday-Turkey Tacos with black beans and brown rice. Bulked up lean turkey with beans, salsa and corn served with rice and beans.

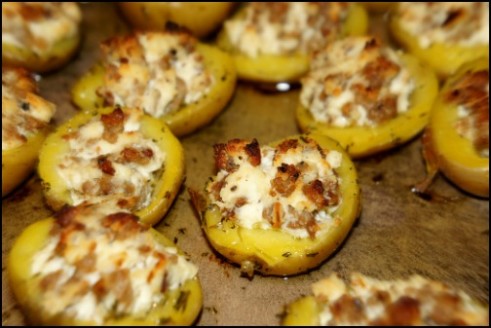
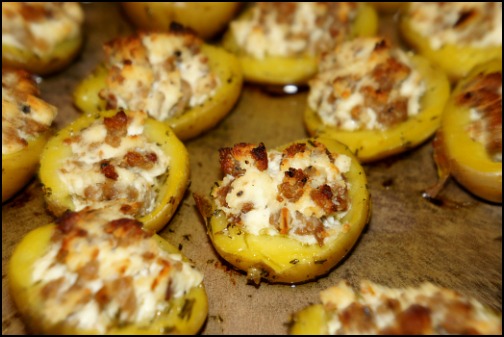
WednesdaySausage and Ricotta stuffed Potatoes. Spicy sausage and creamy ricotta mixed with herbs are stuffed into fluffy buttery baby potatoes for delicious finger food dinner
Sausage and Ricotta Stuffed Potatoes

Thursday-Breakfast for Dinner. Pancakes for kids, eggs for adults with sausage and fruit on the side.

FridayHomemade Pizza. It’s been the same meal every Friday for the last 5 years.

I don’t usually plan meals for the weekend because our daily plans are always in the air. We keep our freezer stocked with plenty of easy meals like frozen filled pastas, chicken fingers, fish fillets and of course plenty of leftover pizza if just need quick meals for busy days when the meal plan falls through.


Homemade Brushetta #recipe

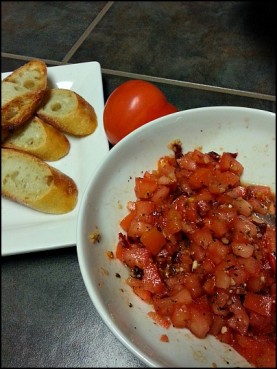
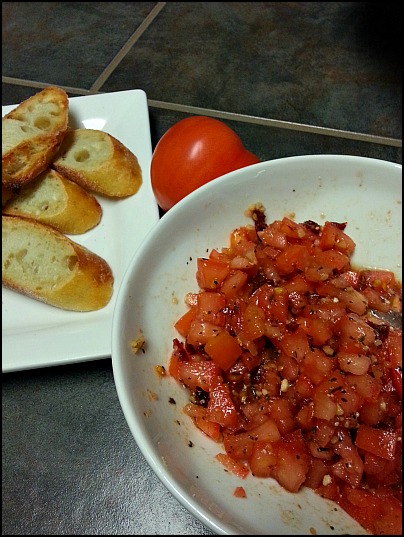
Somedays I crave a little snacking food. Lately it’s been all about tomatoes; fresh salsa from the deli, roasted beefsteaks with parmesan cheese and today it was brushetta that was calling my name. I made this a while back for my family and it got really good reviews. It’s such a simple dish I’m not sure why I don’t make it more often. This amount serves 4-5 but can easily be doubled or quadrupled for larger gatherings.

Fresh Brushetta at Home #Recipe

Ingredients

  • 4 Roma Tomatoes
  • 4-5 Sundried Tomatoes
  • 2 tsp finely minced garlic
  • 1 tsp dried basil or 6-10 leaves fresh basil finely chopped
  • 1/4 tsp salt
  • 1/4 tsp fresh cracked pepper
  • 1-2 tbls grated Parmesan cheese (fresh is best)
  • 1 tsp Balsamic Vinegar
  • 1 tbls Extra Virgin Olive Oil

Instructions

  1. Rough chop Roma tomatoes, finely mince dry packed sun dried tomatoes or finely chop marinated sun dried tomatoes.
  2. Add all ingredients into a bowl, mix well and set aside for 1-2 hours.
  3. Serve with thin sliced baguette or as a pasta topping.
https://lookwhatmomfound.com/2013/02/homemade-brushetta-recipe.html

homemade brushetta recipe
The sundried tomatoes boost the flavor and the Balsamic Vinegar gives it a great earthy sweetness. Fresh tomatoes are best but if canned are all that is available then I suggest a high quality, no salt added organic diced tomato.


Overnight Dutch Oven Bread Recipe

It’s all rage, this “No Knead Bread” recipe floating around the internet. I wouldn’t say that it’s completely No Knead because there is a time when there is about 5 minutes of pulling the bread together a couple hours before baking. I will admit that it is very very simple to make even though the directions look long and tedious. The wait time is the biggest struggle to deal with. This is an overnight process so plan ahead with a cheesy, soupy, saucy meal to go along with it…or not.

bread dough recipe

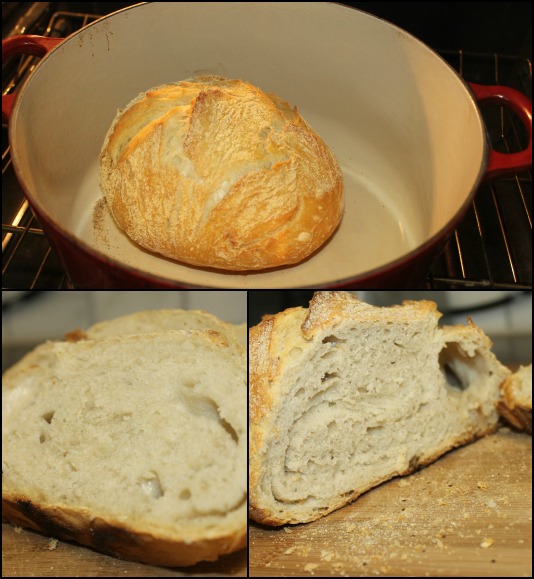
Eaten sliced, still warm with butter is the best way.


Easy Overnight Bread

Ingredients

  • 3 Cups of Flour
  • 1/2 tsp active or rapid rise yeast
  • 1 tbls Kosher Salt or Sea Salt
  • 1 1/2 cups plus 2tbls warm water

Instructions

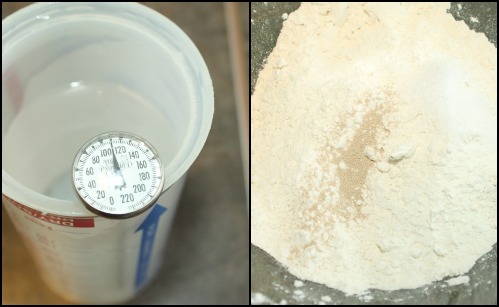
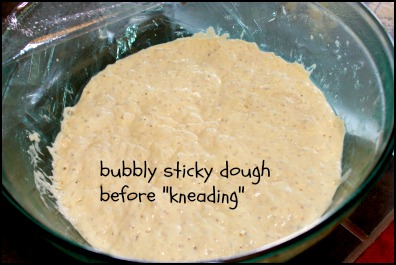
  1. Dump all ingredients (not cornmeal) in a large glass bowl, stir, stir, stir until combined. This will look messy and wet and not like bread dough at all. That is exactly what want. Cover with plastic wrap and set aside for 10-18 hours.
  2. 2 hours before you want to bake your bread dump the batter on a floured surface. With wet hands lightly turn edges into the middle of your bread dough. "Knead" for a couple minutes still smooth and place onto a floured clean, lint-free kitchen towel in a bowl. Cover again with plastic wrap and let rest for 2 hours.
  3. About an hour into the dough's rest time, crank up the heat in your oven to 450°. Place your large, heavy covered pot in the oven to get hot. Leave it there for at least 30 minutes while your dough finishes rising.
  4. Carefully pull your HOT pot out of the oven and using the towel drop the dough into the pot. There is no right side or wrong side of the dough. Replace the cover on your your pot, push back into the oven and let cook for 30 minutes. Then remove the lid and continue to cook for an additional 12-15 minutes.
  5. Remove the pot from the oven and immediately remove the bread from the pot. Remember everything is HOT so be careful.
  6. Let cool for several minutes then it's ready to enjoy.
https://lookwhatmomfound.com/2013/02/overnight-dutch-oven-bread-recipe.html

bread ingredients

bread dough after mixing bread dough before kneading

bread doug baked


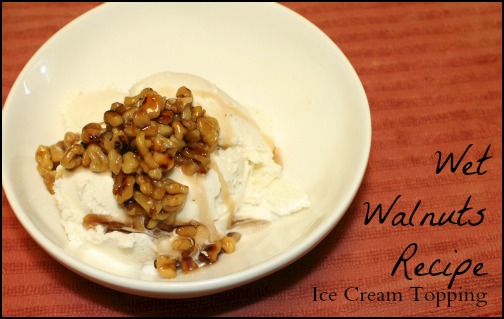
Wet Walnuts Ice Cream Topping #Recipe

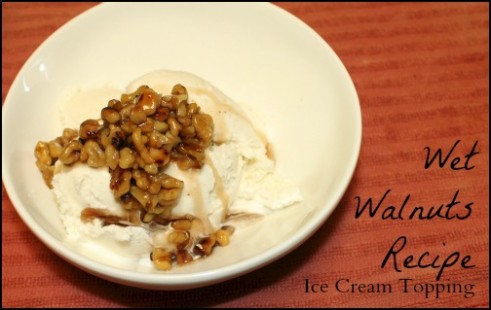
For as long as I can remember I’ve loved Smuckers Walnuts in Syrup on ice cream.  Those teeny jars were like heaven to me and often I would pass on ice cream for dessert if we didn’t have any.

Recently I’ve been splurging and buying it but I could literally eat the whole jar in one sitting.  The cost close to $4 per jar so it hurt my wallet with every delicious spoonful.  This weekend I decided I was going to figure out how to make it myself. I researched a ton of recipes but most were so fancy adding ginger, cinnamon and other spices. What I wanted was simple and straightforward so I came up with this recipe.

wet walnuts, recipe, ice cream toppings

Wet Walnuts Ice Cream Topping #Recipe

Prep Time: 10 minutes

Cook Time: 10 minutes

Total Time: 20 minutes

Yield: 8 servings

A sticky, sweet concoction for ice cream, pancakes, cinnamon rolls and more.

Ingredients

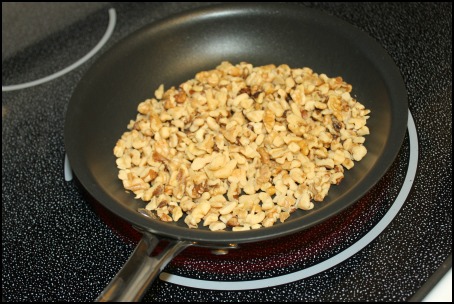
  • 1 cup chopped walnuts, toasted and cooled
  • 1/2 cup water
  • 1/2 cup light corn syrup
  • 1/2 cup packed brown sugar
  • 1/2 tsp vanilla

Instructions

  1. Add the water, sugar and corn syrup to a small saucepan over medium low heat.
  2. Dissolve the sugar.
  3. Turn up heat to medium and bring mixture to boil for 2 minutes.
  4. Remove from heat and add vanilla.
  5. Set aside to cool for several minutes before adding nuts.
  6. Let cool to room temperature before adding to ice cream.
https://lookwhatmomfound.com/2013/01/wet-walnuts-ice-cream-topping-recipe.html

toasted walnuts

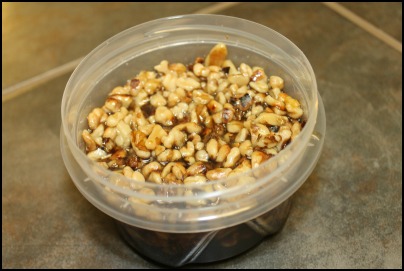
wet walnuts in syrup

This would be soooo good on pancakes, cinnamon roll casserole, sliced bananas or apple pie. Double the recipe to have on hand for get togethers or a dessert bar.

I Disclose


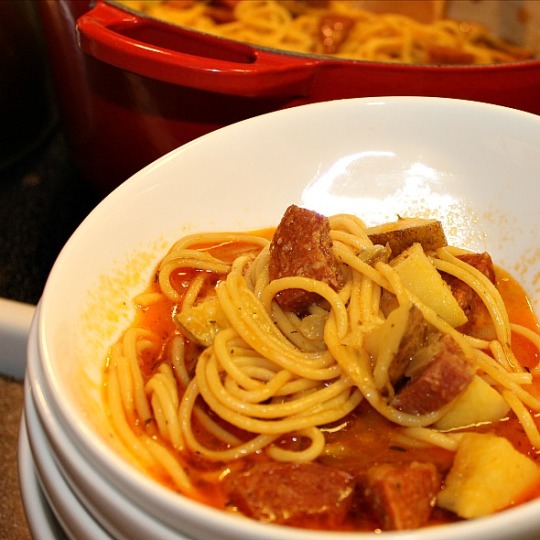
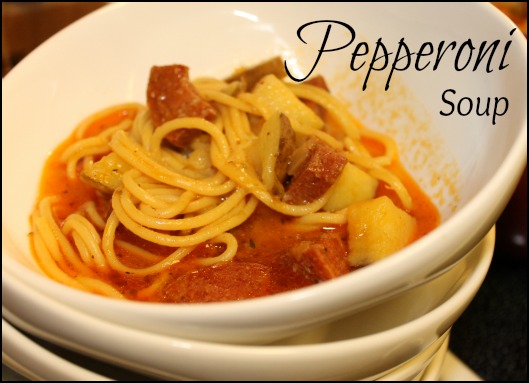
Pepperoni Soup Recipe

The recipe name sounds strange I know. Those outside my family look at me strange when I say we’re having pepperoni soup for dinner.  It was something that seemed like a special treat when I was growing up.  It’s something that my own family has grown to love and in fact Sabreena asked to have it for her birthday dinner last week.  Traditionally my grandmother used a Spanish sausage NOT pepperoni but I particularly like the pepper and spice that comes from it. My grandmother also called it pepperoni soup maybe because that was her translation.

Pepperoni Soup #Recipe, puerto rican comfort food

It’s very simple to make with very simple ingredients, most of which I have on hand. It can be made very quickly or left to gently simmer to develop more flavor. This is truly a one pot meal but prepared in steps.

Pepperoni Soup

Ingredients
  • 1lb of pepperoni or salchichon (traditional Spanish sausage)cut into bite size cubes. I usually ask my deli to cut me a 4″ slab of pepperoni then cut it down myself to size.
  • 2 bayleaves
  • 1 medium onion, finely chopped
  • 1 cup chopped peppers
  • 3 garlic cloves, finely chopped
  • 1tsp pepper
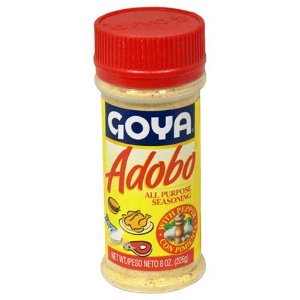
  • 1tsp Adobo Seasoning
  • 1tsp dried oregano
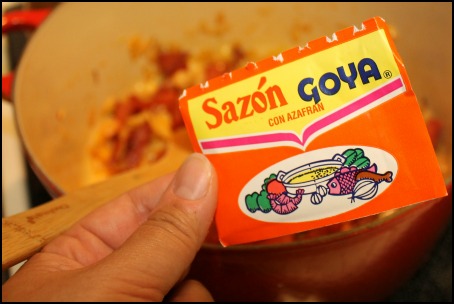
  • 1 packet of Sazon
  • 12 cups of water
  • 1lb russet potatoes, peeled, cut into 2″ chunks
  • 6oz spaghetti or rigatoni
Instructions

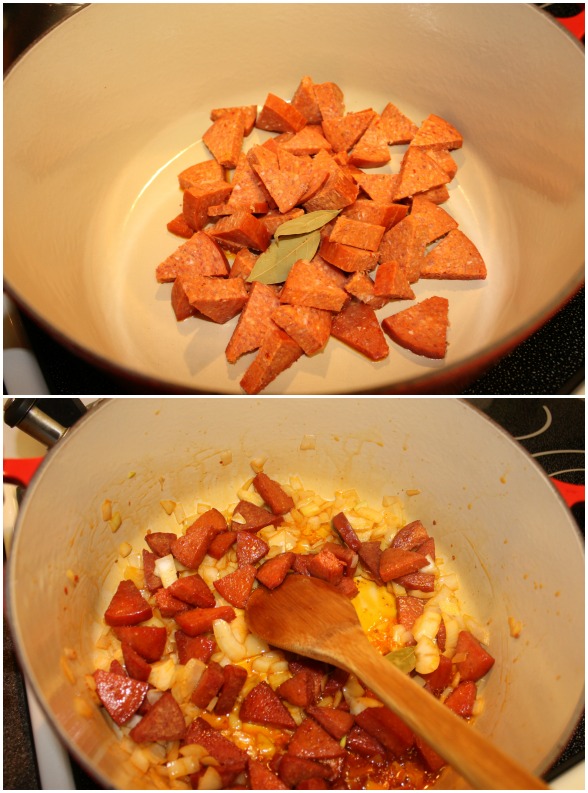
In a large pot over low heat brown and render off cut up pepperoni for 10-15 minutes.

Add chopped onion 7 pepper and cook till softened.

Mix in garlic and seasonings and cook for additional 5 minutes before adding water and potatoes.

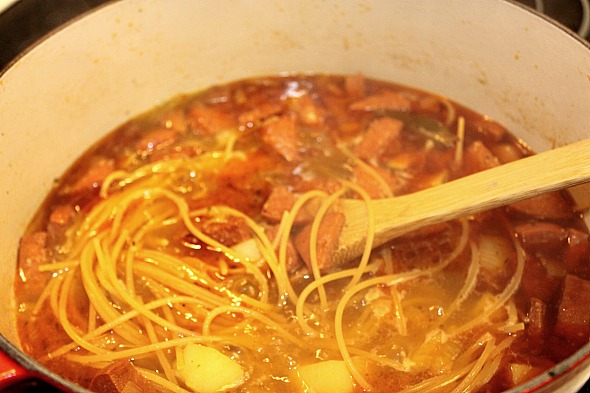
Bring soup to mixture to slight simmer and cook until potatoes almost cooked.

Increase heat to bring soup to boil and add pasta.

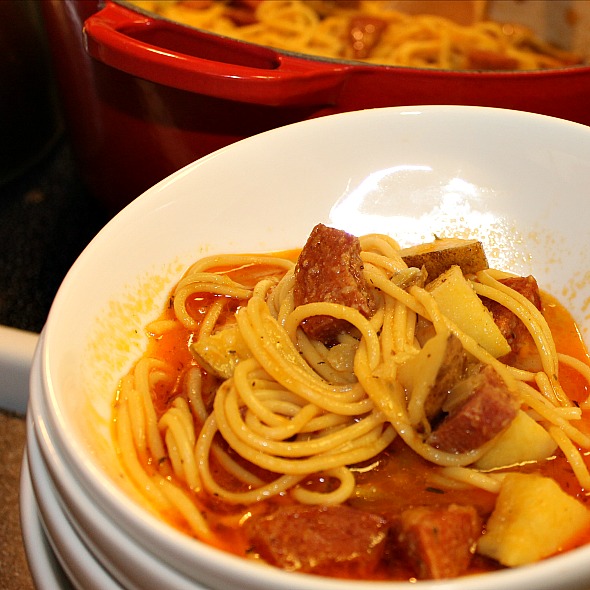
Soup is ready to eat when pasta is cooked. Salt and pepper if needed.

Don’t forget to remove bay leaves.

Pepperoni Soup #Recipe, puerto rican comfort food Pepperoni Soup #Recipe, puerto rican comfort food

Pepperoni Soup #Recipe, puerto rican comfort food

sazon, what is sazon

this is Sazon

We use this in lots of of our meals. It adds a little something special to soups, sauces, meatloaf, roasts and rice.  When I mention Adobo seasoning i’m not talking about the peppers in adobo sauce I’m talking about this Adobo. It’s another magic ingredient that adds a special touch to everyday meals.

Goya Adobo Seasoning for meals


Homemade Squirrel Nut Zipper Candy Recipe

This is a both a Pinterest recipe FAIL and success. I found a 6 minute microwave caramel recipe that got great reviews so I attempted it as my first foray into candy making. It was simple, easy and hopeful. About 1 hour after it was “setting” I knew it wasn’t going to be exactly what I wanted so i tried again. Thank goodness I did because I’m addicted to what I did create.

Remember those old school penny candies, Squirrel Nut Zippers. Sticky, chewy, nutty, pull your molars out kinda yum. I made them, and made them better.

Homemade Squirrel Nut Zippers

Recipe Type: Candy
Author: Melinda@LookWhatMomFound
Just like the Old School penny candy
Ingredients
  • Ingredients
  • 1/4 cup softened butter
  • 1/2 cup white sugar
  • 1/2 cup brown sugar
  • 1/2 cup light Karo syrup
  • 1/2 cup sweetened condensed milk
  • 1 tsp vanilla extract
  • 1/3 cup finely chopped nuts of choice (I used walnuts)
  • 1/4 tsp fine sea salt(optional but recommended)
Instructions
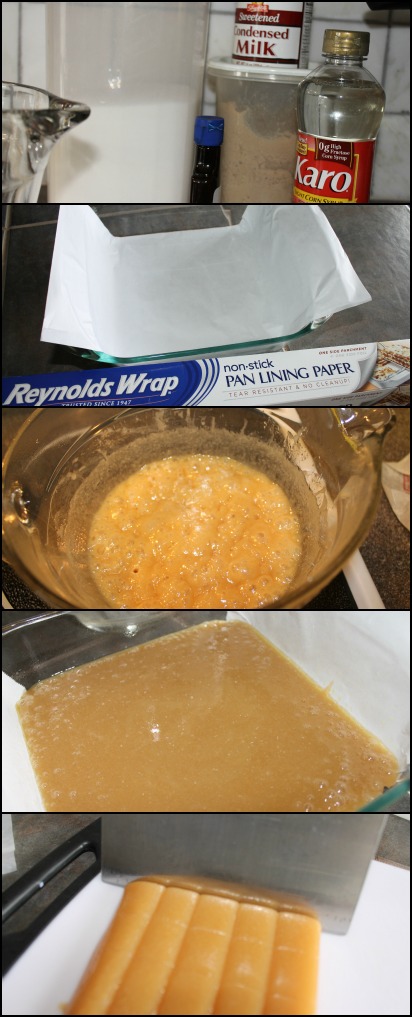
  1. Prep a 8″X8″ casserole dish with cooking spray and parchment paper. DO NOT skip the parchment paper.
  2. Sprinkle nuts on bottom of dish and set aside.
  3. In a large microwave safe glass bowl mix together butter, sugars, Karo syrup and condensed milk.
  4. Cook on High for 7 minutes, stirring at the 2, 4 and 6 minute marks.
  5. Remove the cooked mixture, add the vanilla and stir. The caramel will bubble up so be sure your bowl is large enough.
  6. Pour the hot caramel into your prepared casserole dish.
  7. Sprinkle sea salt evenly over the caramel and set aside to cool on counter for 20 minutes, then in fridge for 2 hours.
  8. Remove caramels from pan by lifting the parchment paper.
  9. Using a bench scraper or large knife and ruler mark on 1″ squares or rectangles.
  10. Wrap in wax paper and enjoy.
3.1.09

making caramel in the microwave

If you won’t be wrapping them store them between sheets of waxed paper as temperature changes will affect the texture and stickiness.

The salt isn’t traditional for a Squirrel Nut Zippers but it adds a great contrast of flavor that goes well with the nuts and sweetness of caramel.
The recipe #FAIL was the first batch then didn’t hold their shape and ended up getting put into a jar and used as a ice cream and brownie topping. Cutting back on your cook time by just 1 minute will greatly affect the end result.

I Disclose


Steps to Healthy Eating for the New Year

With the New Year comes many promises of change. Changes to eating habits, changes to exercise, changes to habits. Some changes come easier than others. Starting on the road to a healthier diet can be quite simple. Taking steps to incorporate new ingredients or techniques can be done in baby steps. Jumping feet first into an elaborate diet plan isn’t the answer for everyone. I believe that living an overall healthy lifestyle is the best answer, Using the old adage “All things in Moderation” fits perfectly here.

I’ve included below some steps you can take to incorporate into your everyday menus and meal plans. Take into consideration your own restrictions and allergies. Apply what makes sense and enjoy the food you eat.

  • Desserts, treats and snacks should never be excluded. Indulge a little.
  • Use smaller dinner plates; you’ll be surprised how your eyes can fool your belly.
  • Swap whole wheat pastas and breads for energy draining simple carbs like white bread and rice.
  • Serve plated meals rather than family style it will discourage unnecessary 2nd and 3rd helpings.
  • Use flavorful options like Parmesan cheese, spices and fresh herbs in place of excess salt and fats.
  • Utilize hidden kitchen gadgets to encourage healthy meals like the salad spinner, grill pan or non-stick griddle.
  • Cut back on the fat by going meatless once a week. Boost protein with tofu, edamame or flaxseed.
  • Try new cuisines to update flavor and presentation to everyday ingredients.
  • Shop light. Swap regular grocery items for healthier ones; low fat sour cream, milk, salad dressing and yogurt.
  • Use spices, herbs, mustard, vinegars and honey as marinades and dressings, skimp on the oil.
  • When you are done baking those delicious gooey brownies, package and freeze individual portions for less temptation.
  • Stock up on nourishing snacks; fruits, ready to eat veggies, nuts and cheese.
  • Eat slower, savor each bite, enjoy your food.


Russian Tea Cakes #Recipe #ChristmasCookies

Also known as Mexican Wedding Cookies, butterballs, snow cookies, jumbles and many other monikers, these little sugary buttery cookies are delicious no matter what you call them.

russian tea cakes, mexican wedding cookies, christmas cookies

I’ve seen many variations of this recipe and I love this one the best. These are Rob’s favorite cookies, one of the few good childhood memories he has. Last year he was given a tin of these and the moment I saw him eat them I knew I had to make them . I mentioned to his grandmother that I needed the recipe and she did one better, she gave me the cookbook that the recipe originally came from. She gave it to me so nonchalantly but I was touched. First I was amazed that she had kept this shredded, discolored cookbook for so long but I felt honored that it was now mine.
cookie cookbook, vintage cookbook

Now on to the recipe. I most recently doubled this recipe. Rob eats them very quickly because they are just bite size and it’s too easy not to simple pop them one after another. Secondly, the process of making them a bit tedious so I wanted to get some of the work over with so I doubled the batch. This is a single batch recipe.

Russian Tea Cakes

Recipe Type: Dessert
Author: Melinda@LookWhatMomFound
Prep time:
Cook time:
Total time:
Serves: 4 dozen
just a handful of simple ingredients and you’ll have the tastiest little morsels ever.
Ingredients
  • 1 cup slightly softened butter
  • 1/2 cup confectioners’ sugar
  • 1tsp pure vanilla extract
  • 2 1/4 cups all purpose flour
  • 1/4 tsp salt
  • 3/4 cup finely chopped walnuts or other nut
  • more confectioner’s sugar for coating, approx 1 cup
Instructions
  1. Blend softened butter, 1/2 cup of sugar and vanilla till sugar disappears.
  2. Mix in flour and nuts till well blended and dough is sticking together.
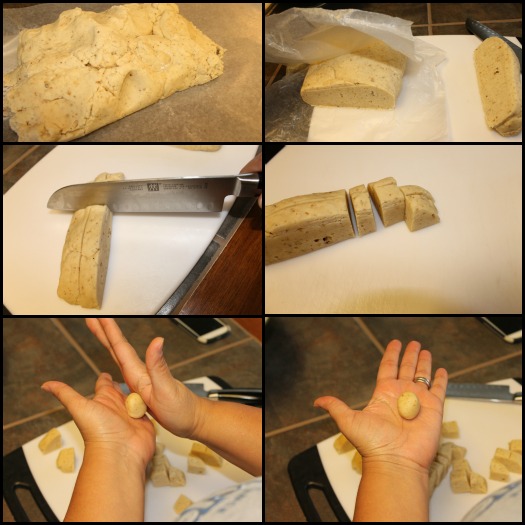
  3. Form dough into a brick shape and chill for 1-2 hours to firm up butter.
  4. Once dough is chilled, use a knife or bench scraper cut dough into more manageable pieces and then cut into 1″ chunks.
  5. Roll each piece into a ball and place on ungreased cookie sheet.
  6. These cookies DO NOT spread so feel free pack them onto your cookie sheet.
  7. Bake at 400 ® for 10 minutes till they should look slightly toasted and dry.
  8. Remove them from the cookie sheet right away; they will be a bit fragile.
  9. Let them cool for 15 minutes then toss in remaining powdered sugar.
  10. Then toss them again.
  11. EAT!

Russian Tea Cakes, recipe, christmas cookies

russian tea cakes


powered sugar, russian tea cakesTo double the amount of dough I doubled the amounts of  all of the ingredients except the flour.  Instead of 4 1/2 cups of flour I used 4 1/4. I figured I could add a little extra if needed but my dough didn’t need it.  It all depends on the humidity and temperature of your kitchen and of course the butter. Also keep in mind that simple variations can be done like adding anise or peppermint flavors or coating in chocolate or chopped nuts. Different shapes or using cookie cutters are also great ways to personalize for your family.
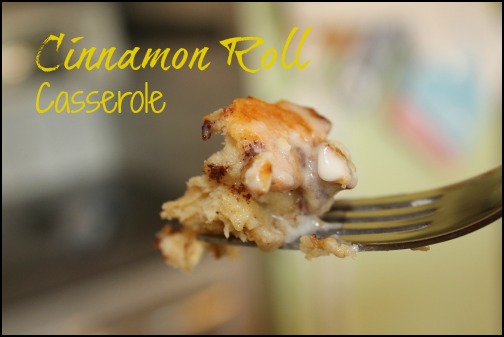
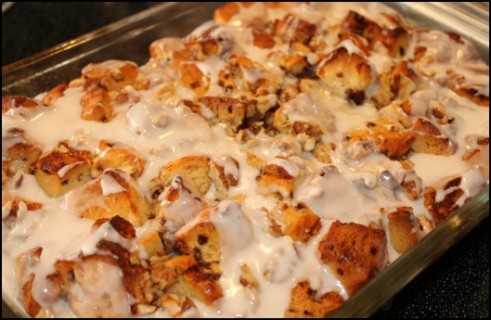
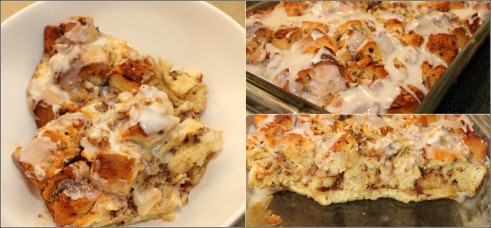

Breakfast Cinnamon Roll Casserole Bake #Recipe

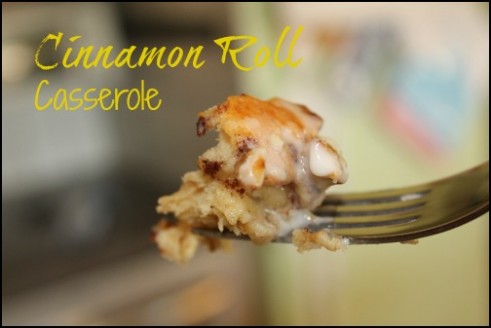
Every Christmas Morning I bake up Pillsbury Cinnamon Rolls while the kids are opening gifts and usually serve them along with juice, milk and sausage. I like to keel breakfast light since we have a big family dinner in the early afternoon. Thanksgiving we don’t usually have any traditions since we tend to head out to visit family for the turkey feast.

cinnamon roll casserole bake


This year I wanted to make something special for the kids for breakfast on Thanksgiving morning. I had just visited BJs wholesale the night before and picked up a 4-pack of cinnamon rolls so it just seemed perfect that I made something different with them. I’ve seen recipes for cinnamon roll waffles but we have a Belgian waffle iron so that wasn’t going to work. I love french toast casserole so this felt like the next best thing. It turned out the be THE best thing. This is something I’ll be making again.

cinnamon roll casserole

Cinnamon Roll Casserole Bake

Recipe Type: Breakfast
Author: Melinda@LookWhatMomFound
Prep time:
Cook time:
Total time:
Serves: 8
a blend of sweet and cinnamony rolls baked into a warm, sticky and delicious casserole.
Ingredients
  • Cooking Spray
  • 2 packages of Pillsbury Cinnamon Rolls
  • 4 eggs
  • 1/2 cup whole milk or heavy cream or half and half
  • 1 tsp cinnamon
  • 2 tsp vanilla
  • 1/2 cup chopped walnuts or pecans (optional)
  • 1/2 cup maple syrup
Instructions
  1. Preheat oven to 375® and spray a 9 X 13 casserole dish with cooking spray.
  2. Open the cinnamon rolls, set aside icing and cut each roll into 8 pieces.
  3. Place all cut rolls evenly into your pan.
  4. In a bowl, beat together eggs, milk, cinnamon, vanilla and maple syrup.
  5. Pour evenly over cinnamon roll pieces.
  6. Sprinkle with chopped nuts and bake for 15-18 minutes until golden brown.
  7. While rolls are still hot drizzle with included icing.
  8. Serve Warm.

Make it even simpler on Christmas mornings by prepping the rolls the night before and storing in the fridge in your  casserole dish.  In the morning just whip up your eggs and milk mixture, pour and bake.

cinnamon roll casserole