RSS Email

#KidsintheKitchen Using Colored Rice as Art

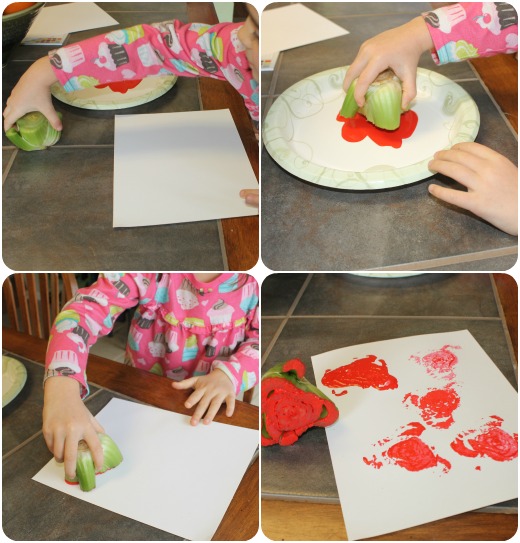
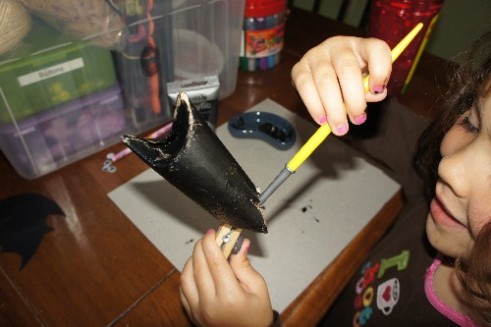
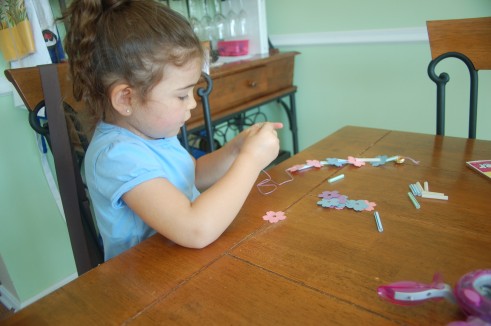
Last Sunday was a cooking day for me. I was in the mood for all kinds of new food but recipes that I wasn’t familiar with so I didn’t really want the kids helping out. Instead I gave Shae an entirely new project to try out, Using Colored Rice as Art. Colored Rice and Pasta is typically used as a sensory play mediums but for us it was a new way to play with color and texture and shapes.  As you can see I added some wagon wheel and bowtie pasta shapes into the mix.

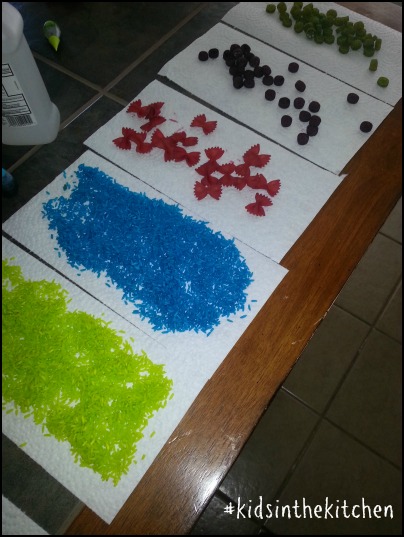
I added rice to a wonton soup container, added a few drops of food color and alcohol and let Shae shake. Within a hour of creating all the colors we needed the rice (and pasta) was dry.
#kidsinthekitchen Using Colored Rice as Art
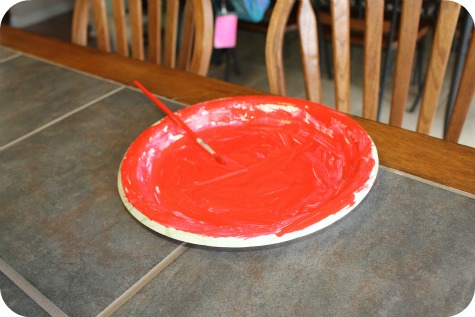
I set Shae up with her individual bowls of rice and pasta, school glue, heavy finger paint paper and let her create whatever she wanted. The trick was to really add lots of glue so the rice and pasta didn’t move once it had dried.

#kidsinthekitchen Using Colored Rice as Art

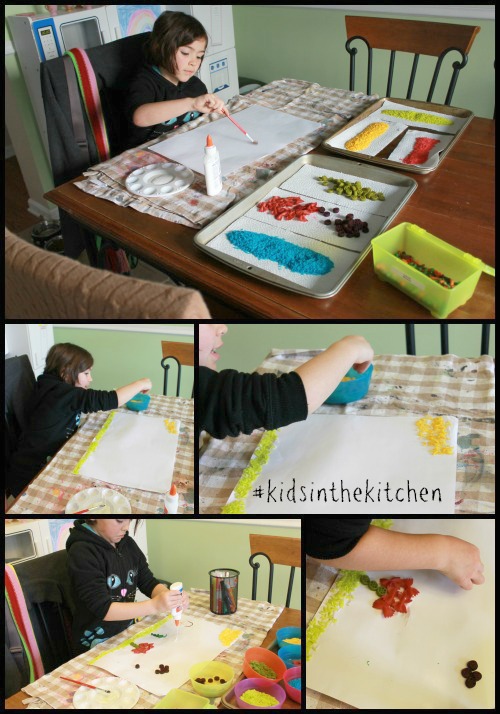
I recommend putting your picture on a sturdy piece of cardboard so it can be transferred while drying. Trying to move a flimsy piece of paper covered in rice wasn’t fun.

Did your kids help with meal planning this week? Did your kids discover a new food and love it? Share your experiences, photos, stories or recipes that include your #kidsinthekitchen. I would love for you to join me and my co-hosts, Paula at Frosted Fingers and Sara at Sensibly Sara, each week linking up a post, new or old, that feature the theme Kids in the Kitchen. It doesn’t matter what you are doing as long as you are doing it together and enjoying it and learning something.

  • preparing healthy snacks
  • having a tea party
  • counting skills with m&ms
  • pouring from measuring cups
  • discovering a local restaurant that your kids love
  • creating new family friendly recipes

Don’t have a blog, then share a photo you uploaded to Facebook, Instagram or Twitter. Share whatever you have, we want to see it.

Linky Rules

1. Link up only your kid friendly recipes, stories, pictures or cooking lessons here.(No Etsy stores or giveaways please).
2. Link directly to a specific post, update or tweet not your homepage.
3. Please add a Kids in the Kitchen button or link on your site or blog post or share through social media so readers know you are participating.

kids in the kitchen, meme

kids in the kitchen, cooking with kids, weekly series
4. Click through and comment, pin, like, tweet or share with other participants. We love to share inspiration and ideas with each other, don’t link and run.
5. Follow the hosts of this feature,Paula at Frosted Fingers, Sara at Sensibly Sara and me, Melinda at LookWhatMomFound…and Dad too!

I can’t wait to see all of the fun food themed ideas, excursions and photos you have to share.


Dr Seuss Kids Crafts and Activities

Theo LeSieg, Rosetta Stone, Theophrastus Seuss. These names may sound familiar; they should. They are all different pen names used by Dr Seuss. Theodor Seuss Geisel career is a colorful one. One that spans newspapers,magazines and of course books. The Cat in the Hat is probably the most widely recognized Dr Seuss work but his other additions to the children’s literary device world are equally as awesome. I’ve put together a collection of great kids crafts and activities that would make for a great way to celebrate Dr Seuss’ Birthday on March 2nd.

Having Fun at Chelles House
Big Fun with Lorax

Making Boys Men
Cat in the Hat Wooden Peg Dolls

Because I Said So
Yertle the Turtle Paper Plate Craft

See Vanessa Craft
Apples Up On Top Felt Board

Toddler Approved
Thing 1 and Thing 2 Puppets

Crafts and Things for Childrens
Horton Hears a Who Craft

Inner Child Fun
Lorax Truffula Tree Craft

Sugar Bee Crafts
Dr Seuss Activity Blocks

Jersey Family Fun
One Fish Two Fish Aquarium Treats

A Little Delightful
Lorax Paperplate Craft

How are you wishing Dr Seuss a Happy Birthday this year?


3D Hearts Valentine’s Day Kids Craft

Valentines is right around the corner.  It’s time to break out the colored paper, glitter glue, doilies and other crafty items to create cards and decorations to celebrate the ones you love

This is a simple project that can be done to make garland, hanging decorations on doorknobs or even hanging from a gift bag. Ours are hanging from a lamp and a curtain rod in front of a window.

Gather your basic supplies and some embellishments to create these simple but cute 3Dimensional Hanging Hearts.

Supplies

Colored or Patterned Paper of your choice

Glue or Glue Stick

Ribbon or String

Glitter, Stickers, Stamps, Markers and other kids craft supplies

Directions

Fold your Paper in half, trace 4 half heart shapes on the fold and allow your child to cut them out or assist them in cutting them out.

toddler cutting paper

Write messages of love and sweetness and decorate as your child wishes.

Attach a string or ribbon to the back of a heart shape and glue each half of heart to each other so that it forms a 3D heart like pictured.

valentine craft for kids

I used paper clips to hold the hearts in place while the glue dries.

Hang where someone you love will see it!


Kids Craft #PinterestFail

I use Pinterest almost daily to get inspiration for new meal ideas, kids activities and crafts and DIY projects around the house.

This particular craft I’ve seen floating around for about 2 years.  Celery Heart Flowers.  It’s supposed to be a simple but cute gift giving craft that just requires a couple supplies and a celery root/core.


I was breaking down the produce while Shae was in the kitchen and remembered to save the celery piece.  Shae was excited. She knew who she was going to give her card to and what it was going to say and how many flowers she was going to fit on her paper.

celery heart craft, pinterest fail

The prep took seconds but it was an instant fail.  The blob of paint on the paper looked nothing like a flower.  Neither did any of the other attempts.  Pinterest failed us.  It hasn’t been the first time and it definitely won’t be the last.

pinterest fail, #pinterestfail, craft fail

Shae wasn’t going to let that stop her. She ended up painting the paper plate with the left over paint.

kids painting

I Disclose


Framed Button Art #kids #craft for Holiday Giving

The holidays are right around the corner and what better way to show a loved one on your list how much you care than with a handmade gift that will last longer than the season. My family loves seeing the ideas and creations the kids come up with year and year and this one can become part of the everyday room decor or a reminder each year of a time when hands were little.
button art kids craft
While this particular piece we made was personalized just for Shae it can be made to fit any theme or holiday. HO HO HO in red and white buttons is next on our list with a small tree in the corner. As always I like to mention a little educational spin that can be placed on our crafts. This one is a great way to get preschoolers and toddlers working on their color and letter recognition and patterns an improving fine motor skills. Spell out words for older children.

Supplies:

  • Picture Frame of any size
  • Buttons
  • Clear drying school glue
  • Pattered or colored cardstock or scrapbook paper

Time Needed:
15 minutes plus drying time

Prep Time:
Clean and dry the glass from your picture frame. Decide on image or word that is appropriate for your child

framed button art

Instructions:
Cover the backing of the frame with a patterned or colored paper, adhere with glue or tape. On the piece of scrap paper draw your letter, word or image and place under your clean glass to use as a trace for your buttons. Apply plenty of glue over the line drawing. Allow child to arrange buttons to fill the image or just cover the outline. Let the glue dry over night. Place glass back into frame, replace backing and gift to someone your love.

This craft can be altered many ways to include glitter glue, beads or gems for ANY theme or holiday. As you can see from the different photos above we worked on 2 different themes; a heart and the letter S for our Shae’s bedroom. Your frame choice is endless too. Little ones will benefit from an adult’s help with spreading the glue and choosing a simpler design. Intricate corners and details can be done with older children who may have better dexterity and fine motor skills. The options are endless with what you can create with your child.


Owl Mask for Dress Up Play #Kids #Craft

Dress up and crafts are my favorite ways to keep the kids imaginations going. Owls are  so popular right now I figured I would try to make a owl mask for Shae to use for dress up or storytelling or just because.

owl mask template #kids #craft

I drew out a design and used it to help Shae create this cute Owl Masquerade Mask.

Supplies

  • Card stock to print your Owl Mask
  • Scissors
  • Crayons, markers or paint to color your mask(or print on colored card stock)
  • Embellishments such as feathers, glitter glue, sequins, tissue paper, etc
  • School glue and/or tape
  • Popsicle stick to use as handle

Directions
Print your owl mask template.

You may want to adjust size to suit your child’s face. Mark with a crayon/marker here your child’s eyes will be. Cut out mask and quarter size eye holes. Cut out an additional small triangle for the nose. Lightly crease it down the middle and attach it to the back of the mask, pointing down. This allows some room for your child’s nose.

Let your child decorate as they wish, make sure they don’t cover eye holes. Attach popsicle stick to back of mask using glue or tape.
Now let your child transform into a spooky or whimsical owl.

owl mask for kids dress up #kids #craft

Modifications
By simply restricting the embellishments this craft is suitable for little ones as young as 18 months. Extending the owls points will give a more dramatic look. Instead of a popsicle stick attach ribbon or string for a mask that needs to be tied on.

Next step is to design and construct an owl costume.


Simple Button Bracelet Craft for Kids

Simple kids crafts are my favorite to do with Shae. Since we are usually squeezing in crafts between errands, activities, meals and other responsibilities. If I can gather supplies and get her started in just a few minutes than I know that craft is a keeper. This Simple Button Bracelet is something Shae wears on her girly days. In fact she’s made for her friends because they are so easy to make.
 button bracelet craft for kids
Supplies
stretchy/elastic
buttons, different shapes, sizes and colors
scissors
craft supplies button bracelet
Instructions
Measure your child’s wrist then add 2 inches, cut this measure of elastic string. Tie a double or triple knot, big enough so button doesn’t slip off. Let your child string buttons in whatever order or pattern they choose. Be sure elastic go in a hole from bottom then back in another hole from the top. This allows the buttons to lay flat against the wrist.
button crafts for kids

When your child is done tie a knot around the starting knot. This helps prevent loosing as the bracelet is stretched over the wrist.

button bracelet for crafts
Show off your own kid’s cute button crafts.

I Disclose


Halloween Hanging Bat Craft

It’s Halloween and I knew I needed to step up the crafting.  I looked at what we had on hand and figured I could do something with the random toilet paper rolls I had been saving.  I only save a couple at a time but I know they come in handy.

halloween-kids-craft-bat

hanging halloween bat

Halloween Bats
toilet paper rolls (or paper towel rolls cut in half)
black construction paper or foam or cardstock for wings
black paint, we used acrylic but poster paint would work well
googly eyes
glitter glue pens
string, twine or fishing line to hang finished bats

craft-supplies-halloween-bat

get your supplies ready and wings cut

Start off with covering your work area. I know paint is washable but I still like to put something down to protect my dining table. I use scrap cardboard most of the time because it dries fast and can be reused then tossed when it’s too gross.

As you can see from the picture below the tube ends need to be folded a certain way to establish the looks of bat ears and the bottom.

folding-toilet-paper-roll-bat-halloween

folding your toilet paper roll

Paint your toilet paper roll. I had Shae unfold the ends to paint it thoroughly but quickly folded them back down before it dried. This helped with the overall look; no brown peeking out.

painting-toilet-paper-roll-halloween-bat

shae uses a clothespin to hold wet painted bat


Once your bat is dry ( 15 minutes with acrylic paint) add dabs of glue to secure wings( cut from black paper) and googly eyes. Shae then used a silver glitter pen to add fangs. A red glitter pen would be good too if you want a more spooky bat with blood dripping fangs.
bat-wings-halloween-kids-craft

tape adds a little more security to glued wings


glitter-glue-fangs-halloween-bat-kids-craft

fangs all by herself

Once everything is completely dry and secure punch a little hole near the wings and hang from your desired spot. We use our dining chandelier a lot. I used twine this time because I liked the rustic look. Fishing line would disappear and make your bats look like they are floating.

Share your Halloween kids crafts!


I Disclose


Hawaiian Lei Craft

Summer crafting is in full swing but it’s hard to get them up on a regular basis. While we went on vacation this year it’s wasn’t tropical or remote like last years trip. To take our minds back to sandy beaches and palm trees we decided to make some flower leis. This particular craft can be adjusted for different ages depending on what you prep, what you allow your child to do on their own and what kind of supplies you use.

supplies are prepped

making-Hawaiian-lei-kids-craft

threading the string

Supplies
2-3 straws cut to 1″-2″
embroidery floss or yarn or twine
fabric or paper flowers in various colors and sizes

Directions
We had striped bendy straws. Shae cut them into into about 2″ lengths and we tossed the bendy part. The flowers we used were cut using Fiskars Punches in 2 flower shapes from various colors of construction paper. Patterned paper would work really well here too. Start threading a straw piece with 1,2 or 3 flowers then another straw piece. Shae put flowers together that were different sizes and colors. When she was done filling up a 20″ length of embroidery floss I gave it a double knot and it was ready to wear.

flower-kids-craft-necklace

pull all the way through

almost there

This is a great craft to work on with multiple children. All of the supplies can be prepped before hand and there is no waiting for paint or glue to dry or worry about huge messes to clean up. if you don’t have punches available fabric flower bunches from the $1 bin can be taken apart and used. They already have a hole in the middle of the petals too so assembly is simple.

hawaiian-lei-craft

all done and so pretty


Have fun with this one and hope to see your end results. Don’t forget to visit GummyLump #300CraftsforKids Blog to see the fun crafts going on over there. This particular project came right from Fiskars Idea Gallery using their paper punches.


I Disclose


Salt Dough Craft

Salt is one of the 1st ingredients I reach for when cooking. It’s one of the most important ingredients in many recipes. A small amount of salt in baked goods enances the sweetness? A pinch of salt while brewing your morning coffee cuts down the acidity. Besides flavoring salt has tons of uses not just in the kitchen but for cleaning and kids crafts too.
Salt Dough

Ingredients:salt-dough-kids-craft

  • about 1 cup of salt
  • about 1 cup of flour
  • about 1 cup of water

Instructions:
In a very large bowl, mix together the salt and the flour.  Make a well in the salt/flour mixture and add the water, add more by the tablespoon as needed to get the consistency desired. Knead until smooth.
When not in use, wrap in plastic or store in an airtight container

HINT: To get a softer dough add more flour NOT more salt. Add food coloring a couple drops at a time for a variety of colors then knead well to get an even color. Clay can be molded into ornaments or sculptures and painted after they have fully dried. Insert a straw before drying to get your ribbon hole


I Disclose