RSS Email

Easy and Cheap Family Activities this Spring

The winter seemed short but the warmth that has started peaking through the cold winds and snow flurries are a welcomed change in scenery. This could only mean Spring is here. And that means it’s time to get outside to spend some fun quality time as a family.Cheap and Easy Spring Activities for FamiliesCheap and Easy Spring Activities for Families

To take advantage of these bursts of sunshine we’ve thought about a few easy activities that can be done outside with little effort, little to no expense but with a big payback of fun and family memories.

Grab a hula hoop and see who can last the longest. Yes, hula hooping can be done indoors but there is never enough room for EVERYONE to do it at the same time. If you have the extra large hula hoops try jumping them like a rope.

Feed the ducks with berries and thawed frozen peas at the local pond.  Be careful with those Canadian geese though, they can get greedy and sometimes a bit aggressive.Feed the Ducks

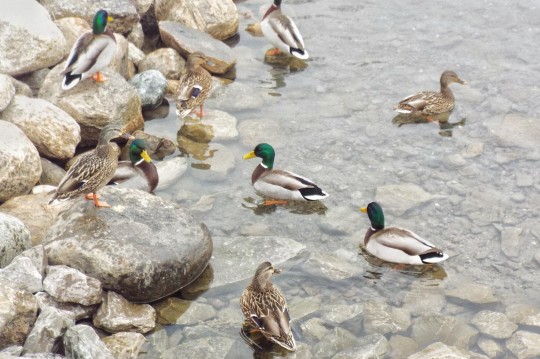
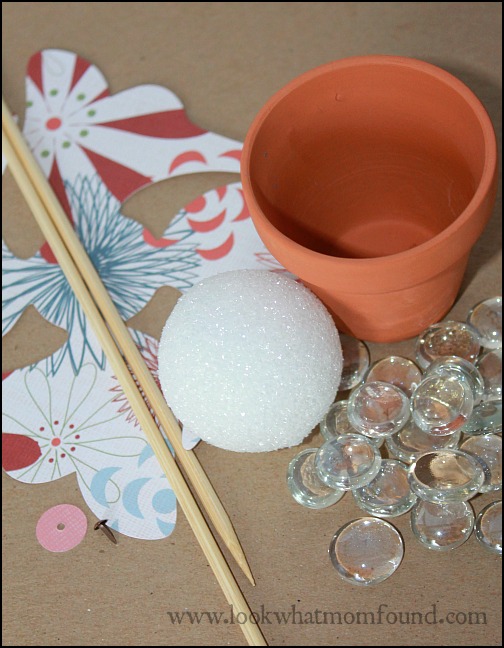
Start a garden with just a few seeds from your local home improvement store or garden center. Now is the perfect time to work with a planter or flower pot to get a jump on flowers or herbs.  Placing your seedlings in the sunshine during the day and bringing it inside at night ensures it will survive the remaining weeks of winter.

Paint the scenery with watercolors, pencils or even crayons. Bring your art supplies to the park or backyard. Find that perfect subject and bring it to life on a canvas.  Create a new piece of artwork for each season.Painting the Scenery

Visit a farm and watch the animals enjoy the weather.  It’s not just people that take pleasure in the changing seasons. Pull over and observe horses gallop through green meadows and cows munch on sprouting grasses and ducks splash in the pond. Animals of all kinds thrive in the warm sunshine.

Fly a kite on a windy day.  Make sure kids are getting some help from adults so their kite isn’t lost in a tree, power lines or into the sky. Kite flying can be tricky so practice each chance you get.

These activities don’t require extra special resources. Most of these things we have on hand but take advantage of swaps to have any kind of fun you can muster up just to enjoy your family in the great outdoors. The point is to spend time together creating memories, smiles and good times.


Jelly Bean Tree Kids Craft #KidsintheKitchen

With spring comes Easter and with Easter comes the influx of sweet, brightly colored candies. Jellybeans are a staple for this season and what better way to use them (besides eating them) is making crafts like this Jelly Bean Tree.Jelly Bean Tree Craft for Kids #KidsintheKitchen

I made a different kind of Jelly Bean Tree(coming next week) but Shae wanted to make her own. Using the same jelly beans leftover from my project I thought this was a good project for her. While it wasn’t HARD it took a little more maneuvering than I initially figured. The trick is to use a thick tacky glue, NOT HOT GLUE. You don’t want to be stuck holding the jelly beans in place for a long time.

The Quick Grip adhesive from Beacon works really good for projects that use beads, candies, buttons, etc. I wish it came in a different container, a squeeze bottle would be beneficial. (not sponsored)

Materials
styrofoam balls
vase, mini flowerpot
strong adhesive
jelly beans
lollipop stick or skewer
cotton balls
decorative filler/cover, like grass or moss

Directions
Using a dab of glue, stick a styrofoam ball into the bottom of your flower pot and let set.
With another dab of glue slide a larger styrofoam ball onto the stick then into the base.Jelly Bean Tree Craft for Kids #KidsintheKitchen 
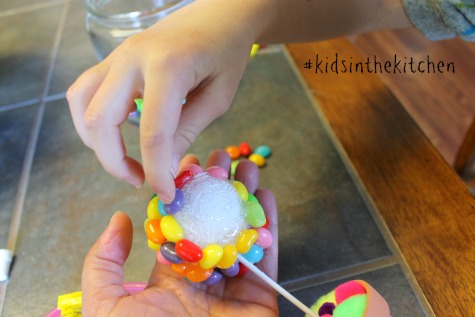
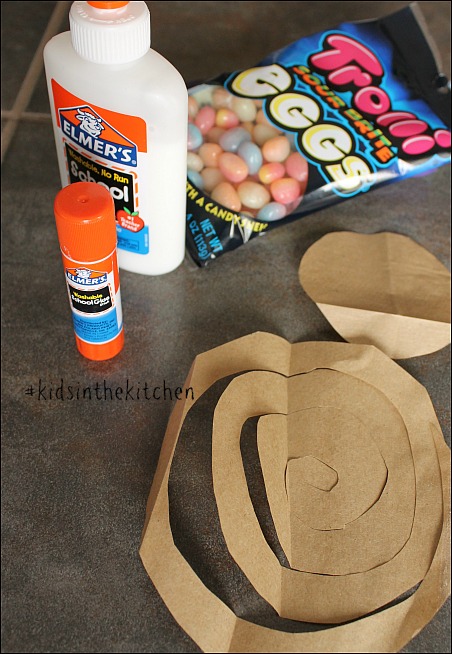
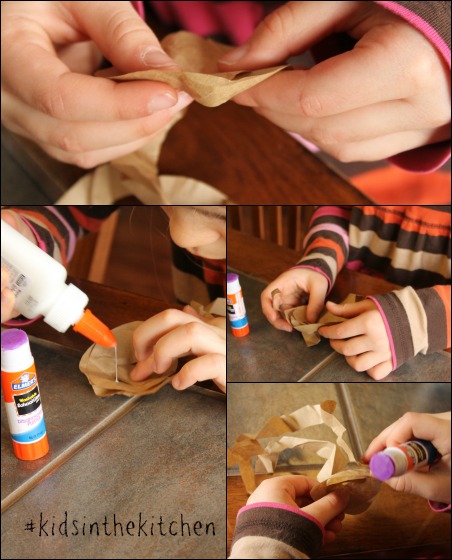
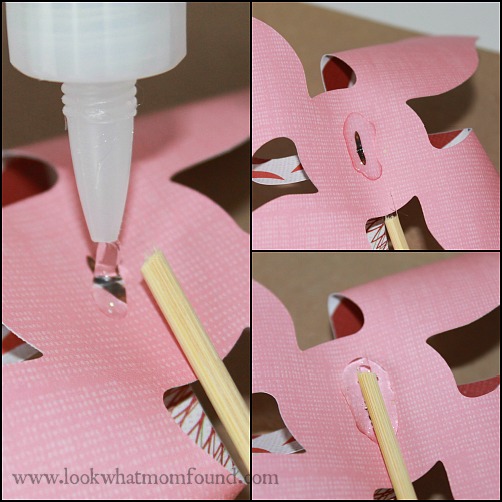
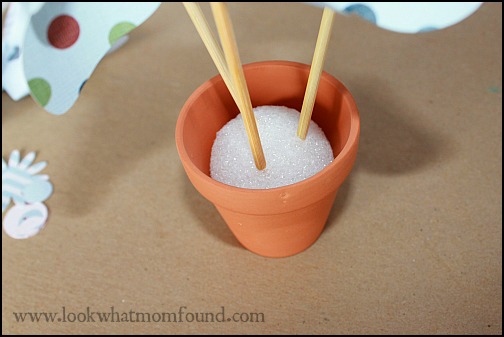
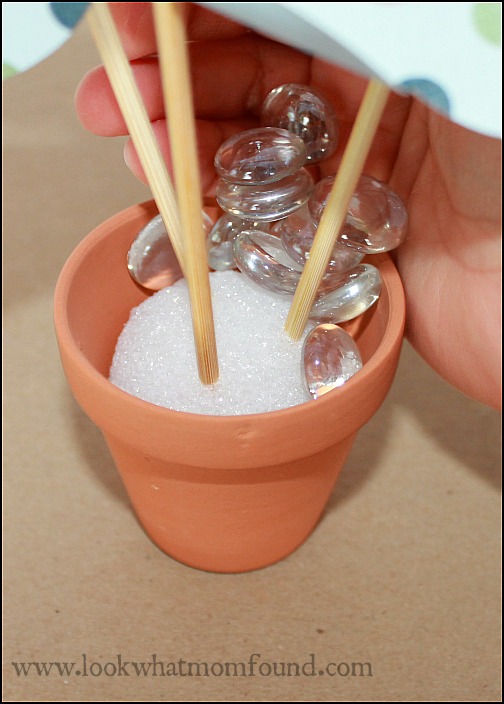
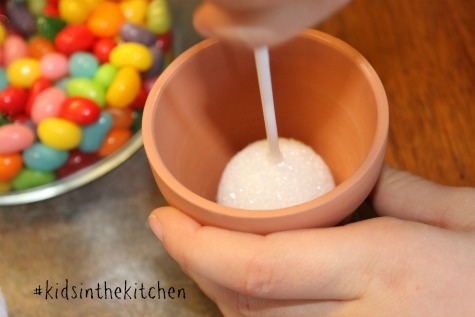
Distribute the glue onto the styrofoam ball in sections. We did lines at first then just filled in spaces. Be sure to hold the jellybeans in place for a few moments so they get a good grip.

Jelly Bean Tree Craft for Kids #KidsintheKitchen

(This is where a good glue is important. School Glue might work but I don’t think it dries fast enough to make this a project suitable for kids)

As one side of the ball was getting heavy we supported the stick with pompoms (or cotton balls). these can be removed at the end but Shae ended up keeping them and making them part of her arrangement.

At one point the one of our ball was filled with jellybeans making it a bit top heavy so I placed it in my hand so Shae could add the last of the jelly beans.Jelly Bean Tree Craft for Kids #KidsintheKitchen 
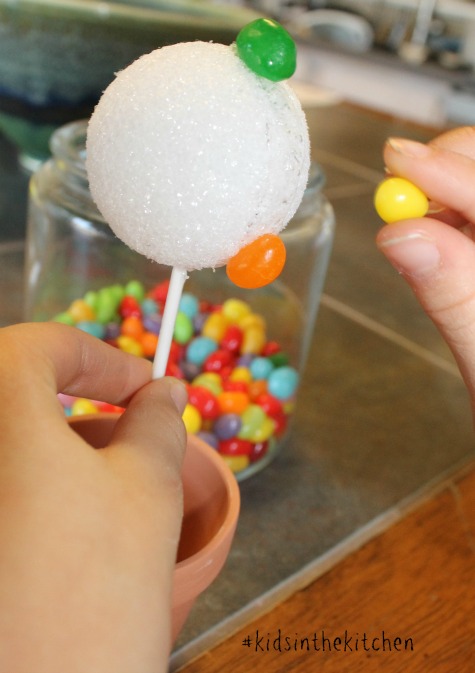
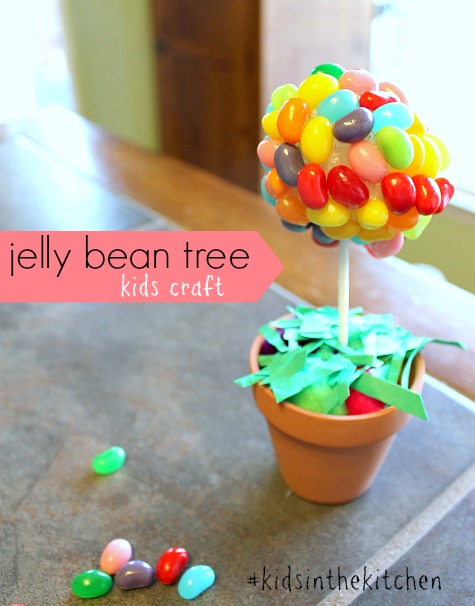
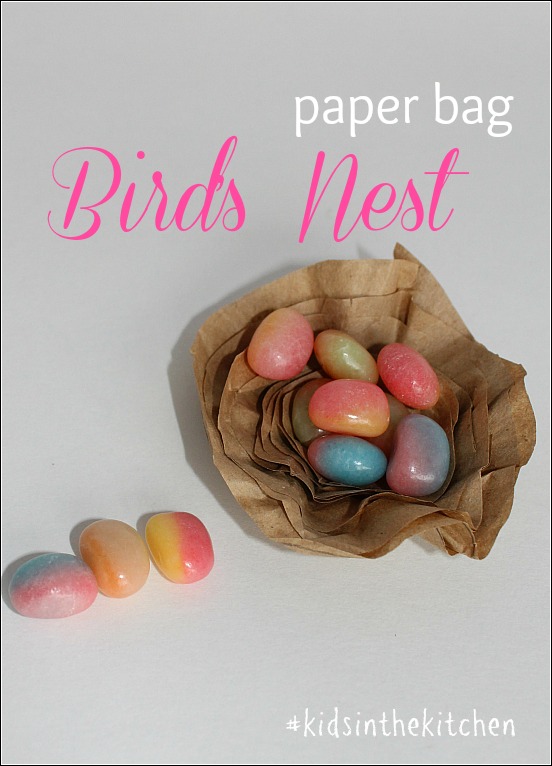
Once your ball is covered in jelly beans and set sprinkle the top of your flowerpot with “grass”. We used crumpled up, cut up scrap paper. Now it’s sitting on my shelf in the kitchen.

Jelly Bean Tree Craft for Kids #KidsintheKitchen
Come join me and my co-hosts, Sarah of Play to Learn with Sarah, Paula at Frosted Fingers and Sara at Sensibly Sara, each week linking up a post, new or old, that feature the theme Kids in the Kitchen. It doesn’t matter what you are doing as long as you are doing it together, enjoying it and learning something along the way.

You’ll find so many more ideas on the #KidsintheKitchen Pinterest Board.

Follow Melinda Babiak’s board #KidsintheKitchen on Pinterest.

Linky Rules, #kidsinthekitchen

#KidsintheKitchen Weekly Linky


Paper Bag Birds Nest #kidsinthekitchen

The weather has finally changed for the better. No snow for almost 2 weeks now, that might be longest run we’ve had for the last 4-5 months. We’re noticing the birds making nests in the trees so why make our own Paper Bag Birds Nest to celebrate the great weather we’re experiencing and the new feathered friends taking over the neighborhood.
DIY Paper Bag Birds Nest #craftsforkids #kidsinthekitchen #easter
A simple lunch bag and some jelly beans makes an adorable little nest.

Supplies
paper bag
school glue or glue stick (shae used both)
jelly beans

Directions
Cut open your paper bag so it lays flat. From it cut 4 circles, 2 of them about 4 or 5″ across and 2 of them 3″ across.

Cut the larger circles into a spiral.

DIY Paper Bag Birds Nest #craftsforkids #kidsinthekitchen #easter

Starting from the middle of the spiral create a flat-ish base and wrap the spiral of paper around the OUTSIDE of itself. Add drops of glue as you go to keep it in place.
DIY Paper Bag Birds Nest #craftsforkids #kidsinthekitchen #easter
Crumple your spiral before wrapping for a more rustic look.

Glue your smaller circle on the bottom of your nest. This gives it more support and closes up any holes so the “eggs” don’t fall through.

Set aside your nest to dry for 20-30 minutes then add eggs. DIY Paper Bag Birds Nest #craftsforkids #kidsinthekitchen #easter
These would be cute placecards for the Easter dinner.

To make this more permanent go ahead and glue your jelly beans into the nest or make eggs from clay.

DIY Paper Bag Birds Nest #craftsforkids #kidsinthekitchen #easter
Come join me and my co-hosts, Sarah of Play to Learn with Sarah, Paula at Frosted Fingers and Sara at Sensibly Sara, each week linking up a post, new or old, that feature the theme Kids in the Kitchen. It doesn’t matter what you are doing as long as you are doing it together, enjoying it and learning something along the way.

You’ll find so many more ideas on the #KidsintheKitchen Pinterest Board.

Follow Melinda Babiak’s board #KidsintheKitchen on Pinterest.

Linky Rules, #kidsinthekitchen

#KidsintheKitchen Weekly Linky


Paper Pinwheels in Mini Flowerpots #craft

Happy Spring! Today marks the day of a new season full of promise and excitement. The green grass and daffodils poking through the snowflakes shows that there are BIG things happening. In our house we looking forward getting outside and enjoying the weather changes and shining sun. In the meantime we’re crafting fun and colorful things like these Paper Pinwheels in Mini Flowerpots.Paper Pinwheels in Flowerpots
This craft is also part of a mini clay pot challenge brought forward by Barb of A Life in Balance.

This is what I came up with.

Supplies

  • mini clay flowerpot
  • beads or marbles
  • Styrofoam ball
  • paper
  • brads
  • skewers
  • glue

Paper Pinwheels Supplies #craft

Directions

I’m a Silhouette Cameo user so my pinwheel shapes are cut out for me but cutting these out yourself is very simple. Using this tutorial is one of the easiest I’ve ever seen and can be modified for any size pinwheel.

Taking your pinwheel shape and pull the ends down and secure with a brad. OR you can follow the directions on the tutorial and use the pin and pencil method to make it spin. My version doesn’t spin in the wind.

Paper Pinwheels in Mini Flowerpots

Paper Pinwheels

My version has you adding a blob of glue to the back of the pinwheel and securing the skewer in place with a scrap of paper on top for a cleaner look.Paper Pinwheels #craft

Paper Pinwheels #craft

Place your styrofoam ball to the clay pot, use glue if wanted. Arrange your pinwheels in your styrofoam ball.styrofoam for pinwheels

Add your beads or marbles to cover the styrofoam. Again using glue if wanted.Adding marbles Pinwheels #craft

Your pinwheel bouquet is ready to display.Paper pinwheels


Project 52 – Week 11

Welcome to my 11th edition of Project 52, an attempt to capture our lives in a couple pictures once a week.

project 52, weekly photos
This week was a quiet one, the weather was rainy a couple day and we didn’t have any big plans. We stayed close to home except for dinner last night.  Well here’s a glimpse into our what we had going on this week.

i call it a pumpkin grape

waiting for spring

bookworm

Are you participating?  Add your link in a comment and I’ll come check out your week.


UMI Shoes for Spring and Summer plus Giveaway


There’s a hint of spring in the air. That means the snow boots can be packed away and the fun spring sandals and shoes can make their appearance. UMI Shoes for kids are the epitome of style, comfort and quality and come in the best colors, patterns and designs for the season.

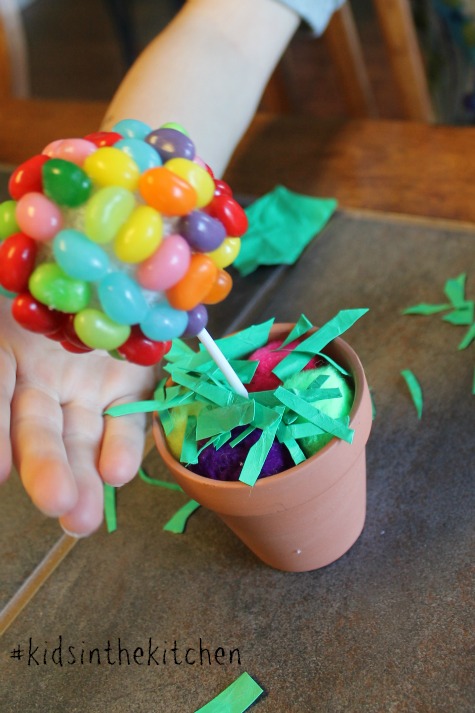
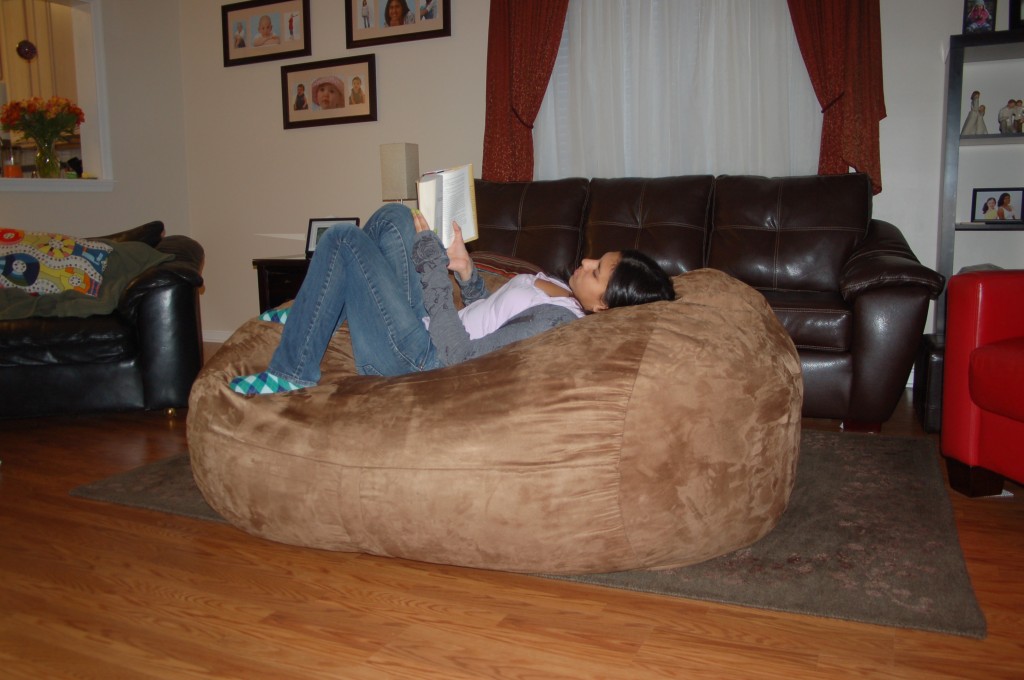
Shae is rocking her Riff these days. Being a casual shoe girl these sneaker style are a definite change for Shae but they have a fun and bright look. The shoes have a rubber sole but NO laces so she can slip them on easily for playing outside.

UMI Shoes are made to protect little feet while maintaining proper structure to let those little feet grow. Focusing on sustainable construction is just one way UMI sets themselves apart from others. -Each show is created using high quality materials, tried and true practices and a belief that every little foot that steps into an UMI shoe is special. Always enjoy free shipping and returns on each order too.


This year’s Spring/Summer collection is full of great designs for kids of all ages. Win a pair of your choice here at LookWhatMomFound…and Dad too! Visit UMI Shoes and come back and tell me with shoe or shoes you like best.

EXTRA ENTRIES:

To receive these extra opportunities for entries, you must fulfill the first REQUIRED entry above. Please note the changes to the entries and frequency, entries that don’t follow rules will be disregarded/ignored/deleted.

  • Subscribe to LookWhatMomFound…and Dad too! via email or RSS feed
  • Publicly follow this blog of Google Friend Connect, bottom of page
  • Like Us in our Networked Blog section, right sidebar.
  • Follow Mom and Dad and UMIShoes on Twitter and Tweet this giveaway 1 time per day, please leave your twitter link each time, tweet a form of this message: I entered to #win a pair of kids @UMIShoes from @lkwhtmomfound @anddadtoo http://bit.ly/ijIfwa
  • Like LookWhatMomFound…and Dad too! and UMIShoes on Facebook AND like this giveaway.
  • Enter another Giveaway – let us know which one in the comment (one extra entry per giveaway you enter, just leave separate comments)

Your entries must follow the rules or they won’t be eligible for prizes. This contest ends 11:59 pm, Thursday, March 24, 2011. The winners will be emailed and will have 24 hours to claim their prize. This contest is open to US residents only. For complete rules please read our contest rules page.


I Disclose