RSS Email

Search Results for: Project 52

A Family of Christmas Stockings #PCHoliday

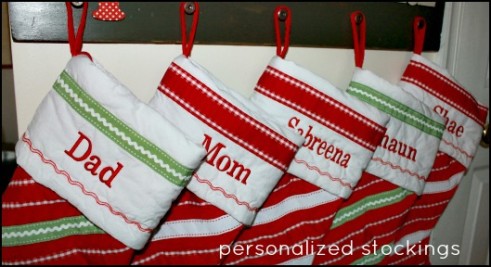
trackable pixelBlog Post Disclosure BannerWay back in the day when  we were just a family of 4 I spent a Christmas finding the “perfect” stockings and stocking hangers to display on our mantel.  I trudged out in the cold, snipped fresh holly branches and weave tiny twinkling lights through them and flaunted the beautiful design I had come up with.  Fast forward to the next 6 years and you’ll see only 3 stockings each Christmas attached to anything that had a flat surface. This year when the note came through that I could pick out new stockings for the whole family from Personal Creations I almost leapt out of my seat.  I knew we’d finally have what I’ve been wanting for a long time, these Ribbon Stockings personalized with our names.
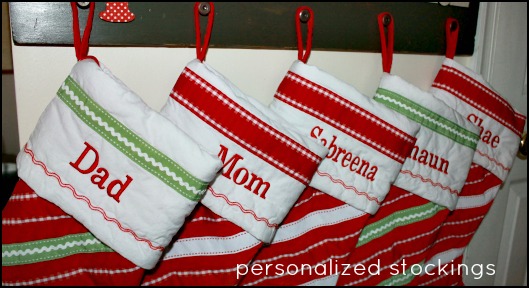
Personalized Christmas Stockings

Personal Creations carries a HUGE selection for just about everyone.  The best part of their choices are most of them can be personalized to reflect a name, initial, special date or even more.  With hundreds of gifts to choose from for any occasion Personal Creations can be your shopping destination throughout the year.

I knew our stocking were on their way so I knew I had to come up with a new idea to hang all five of them. this house does not have the fireplace mantel that we used to have so I knew I had to get creative.  I scoured our makeshift workshop and found something that would work perfectly with some tweaking.
Christmas Stocking Holder DIY

Christmas Stocking Holder DIY

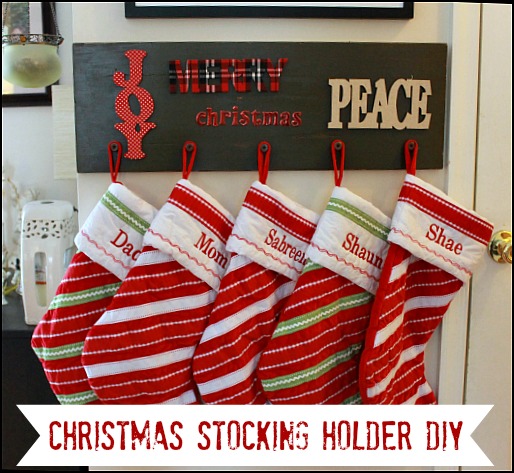
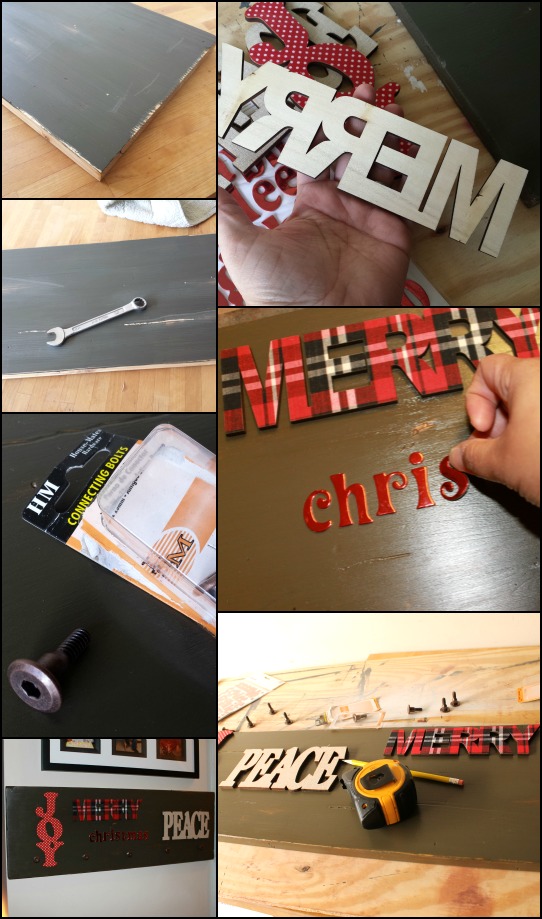
Using a simple unused wood shelf, existing paint & stain and some bought decorations and hardware I came up this Christmas Stocking Holder. The project was very easy. I painted and stained a plain wood shelf till I achieved a color I like and took an old wrench and a hammer to it to add some distressed details.  The words and stickers were less than $10 from the craft store and Rob found these antique brass bolts. I thought there were a unique and better alternative to plain hooks.

Christmas Stocking Holder DIY

The stockings look great hanging up.  Even without a mantel they stand out with this special new home. I’m not forgetting about our new ornament.  Each year I get new ornaments for the kids or family that mark a significant point in the year or commemorate another wonderful year together.  The Family in Bed ornament was adorable and I knew it was a good fit for our family.

Family Ornament

This ornament will stay on the family tree but individual ornaments that the kids received are put right on their own trees. When they are grown up and have families of their own they’ll have a great start for the holidays and great stories and memories to share.

Shop today for your own personalized ornaments and stockings to ensure availability and delivery in time for the holidays. Personal Creations is offering you 20% off all of your purchases through the end of December. Click here to start shopping and the 20% will be applied in your shopping cart.

Follow Personal Creations Blogger Board: Christmas Ideas on Pinterest


Peanut Butter Nutella Graham Treats #kidsinthekitchen

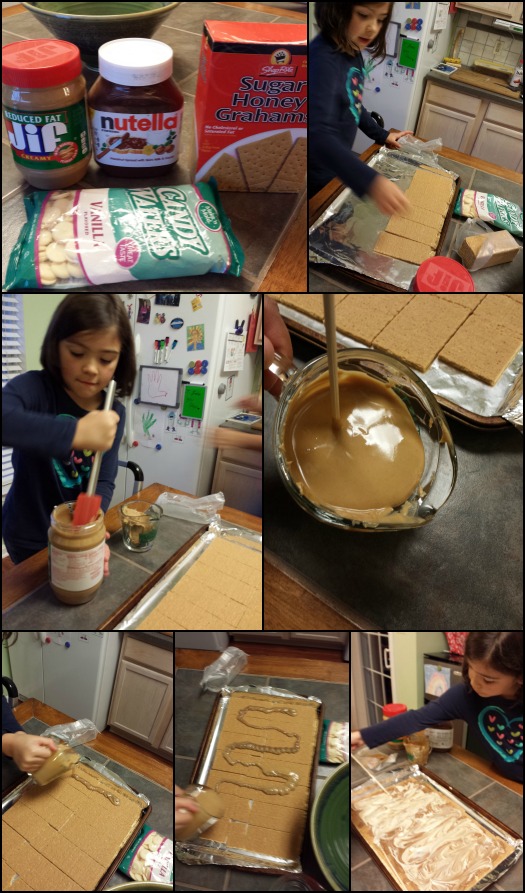
I was in the mood for a new sweet treat this week so Shae and I worked on a spin of something that we made over a year ago. Using graham crackers as a base we decided to combine some of our FAVORITE flavors into a “bark” kinda dessert.

Peanut Butter Nutella Graham Treats #kidsinthekitchen

Shae was definitely main chef for this project. She laid out all the graham crackers, scooped peanut butter and nutella and spread the mixtures all over.

A quick set in the fridge and they are ready to eat.

Peanut Butter Nutella Graham Treats #kidsinthekitchenIngredients

  • graham crackers
  • peanut butter
  • Nutella
  • vanilla candy wafers

Directions

Cover a large baking dish in foil (reduces mess).

Spread graham crackers in an even layer.

Microwave a cup of peanut butter to a spreadable consistency, about 20 seconds.

Add a large spoonful of Nutella to the peanut butter and gently mix but don’t blend completely. You should still have a marbled look.

Pour this mixture over the graham crackers and spread evenly. Place in fridge to set.

Microwave 1 cup of vanilla candy wafers till melted. Pour this over your set peanut butter mixture and spread evenly.

Set aside in fridge again for 15 minutes. Break apart and enjoy.

Did you have fun in the “kitchen” this week? Did you try a new food or a new kid friendly restaurant? Did your littlest ones use their snacks to count to 10? We invite you to share your experiences, photos, stories or recipes that include your #kidsinthekitchen.

Come join me and my co-hosts, Sarah of Play to Learn with Sarah Paula at Frosted Fingers and Sara at Sensibly Sara, each week linking up a post, new or old, that feature the theme Kids in the Kitchen. It doesn’t matter what you are doing as long as you are doing it together, enjoying it and learning something along the way.

Don’t have a blog? Share an instagram photo or Facebook update.

Linky Rules, #kidsinthekitchen

#KidsintheKitchen Weekly Linky


HP 15.6″ Laptop Recap

We were provided a laptop for review but all opinions are our own!!!

Back to school in our house means more than new sneakers and pencils. With one entering her senior year of high school we’re also thinking about technology.  Sabreena is looking at a career in Architectural Engineering so she’s going into her 3rd year of Computer Aided Design, software that helps with creation and modification in manufacturing or industrial design.

This year she’s going to be bringing the software home to work on projects outside the classroom and needs the right PC/laptop to be successful.  Staples has stepped in with this HP laptop.

Here are some stats on the HP 2000-2c32nr 15.6 Laptop:

  • AMD E1-1500 1.48GHz 1MB L2 Cache Accelerated Processor
  • 4GB DDR3 SDRAM (1 DIMM), expandable to 8GB
  • 320GB 5400RPM Hard Drive
  • 15.6″ diagonal HD BrightView LED-backlit display (1366 x 768)
  • Windows 8

For a full list of spec click HERE.

Upon receiving we expanded the RAM to 8 GB. That’s an easy task especially when you already have memory sticks on hand because of a technology obsession in the family.  Other then the memory upgrade all I needed to do was turn on the laptop and run through a bunch of normal setup items.  I’m even using the free trial of Norton Antivirus that was provided on the laptop and so far I have had zero problems.  As a blogger I am always writing a post, surfing the web or browsing social media so I need a laptop that is able to multitask along with me.  It’s been a challenge learning Windows 8 because of all of the new features but I feel like I am holding my own so far.  I know there are so many features of the laptop that I am not using but I know in time I will learn them and use them just like I do with the current features that I do know.

20130821_210942

Overall I am very impressed with the HP 2000-2c32nr and for it only costing $320.00 this laptop is a steal.


Painted Wooden Tray #upcycled #craft

I’m the kind of person that sees something that goes in the trash and wonders “Can that be reused or re purposed?”. This happens with toilet paper rolls, milk jugs and CoffeeMate creamer bottles. The problem with wanting to “re purpose” everything is having a place for the final project. Things headed for the trash usually end up there unless I have an idea for it.

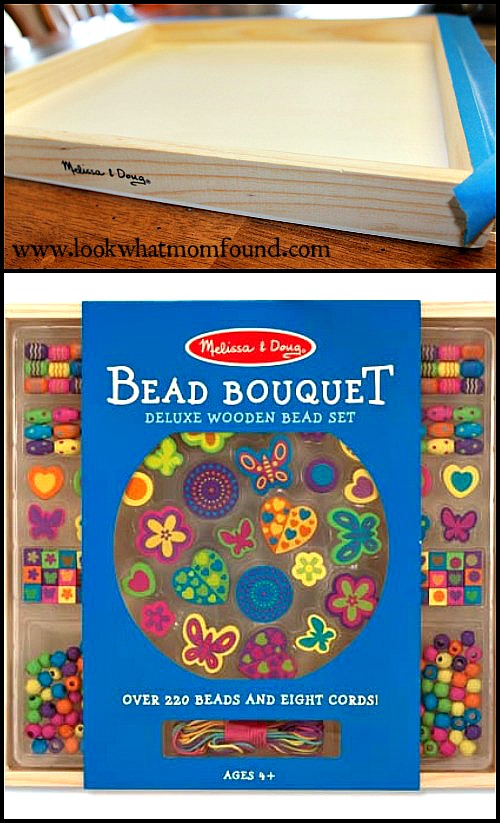
For Christmas Shae received a few Melissa and Doug bead kits. I love Melissa and Doug toys because they are wood and non-toxic and last forever. I especially love the bead kits because they come in this simple wood trays that DON’T have lids. Not having a lid usually isn’t something I would applaud but that just meant I could dump the beads together in a box and set the tray aside for something prettier.

Wooden bead tray from Melissa and Doug

This is my something prettier. My make-up collection is getting out of hand. The vanity drawer that is dedicated to brushes has to make way for real cosmetics. I figured I could make a pretty-fied tray to sit on my vanity to house the brushes and fragrances and it would still look organized.

Painted Wooden Tray #upcycling #recycle

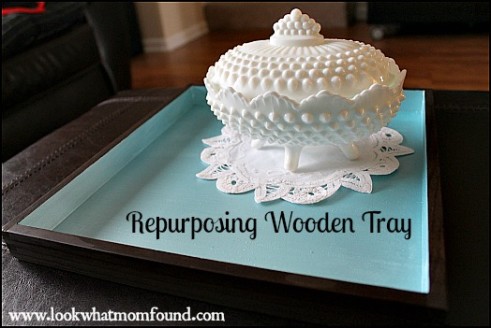
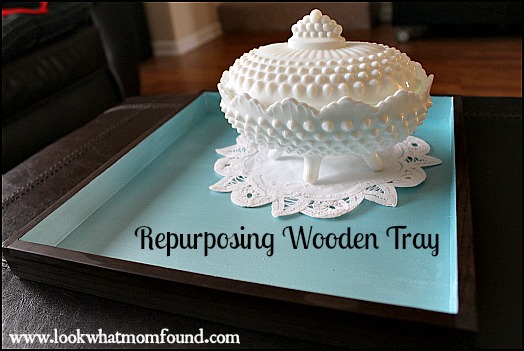
The tray ended up looking nicer than anticipated and is now sitting in the coffee table with my grandmother’s handmade doily and treasured milk glass. I’m not sure if this is its final resting place but for now it works to showcase these things that mean a lot to me.

The tray is a simple, lightweight, pine tray. There was nothing special about it except it was a blank canvas for so many ideas.

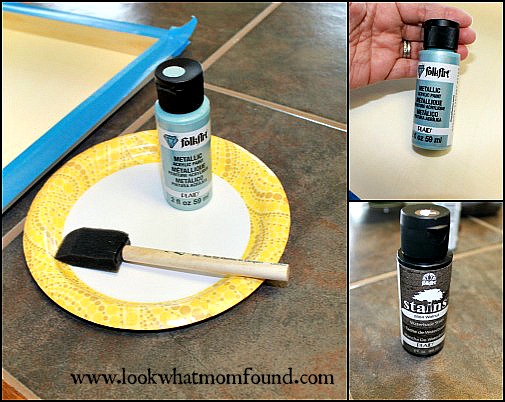
Supplies

  • Wooden tray
  • Acrylic Metallic Blue Paint
  • Waterbased Walnut Wood Stain
  • Polyurethane Spray
  • Painters Tape
  • Foam brushes
  • Paper plates or palettes to hold paint
  • Decorative details, optional

painting supplies

Instructions

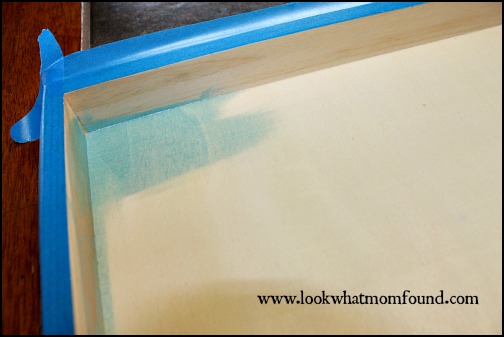
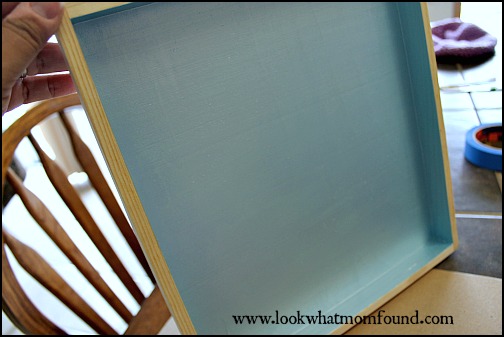
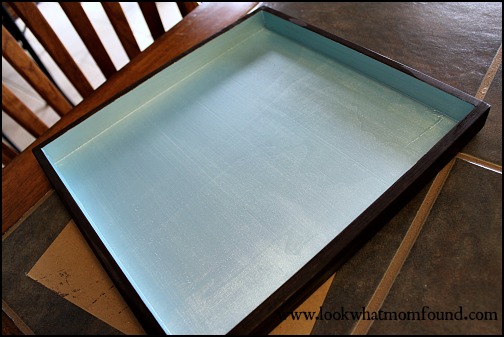
I prepped my tray by vigorously wiping with a dry microfiber towel, being sure to remove any adhesives. My tray had a mark in the shape of a strip of tape but I wiped until it wasn’t sticky. I then taped off top edges to keep the paint off. I applied 3 coats of Metallic paint in order to get the shiny finish.

Metallic Paint, wooden tray

Metallic Paint, wooden tray

After a couple hours I removed the tape and applied new painters tape on top of the blue so the stain didn’t drip onto the tray. As you can see the Melissa and Doug logo is still there, I thought about sanding it off but ended up leaving it.

logo showing on wooden tray
I applied 3 coats of stain, letting each one dry in between. I wanted a deep brown color but still wanted to see the wood grain.

Painted Wooden Tray #upcycle #recycle
The next day and day after I sprayed thin but thorough coats of Polyurethane to protect against scratches and nicks. I made sure to get all sides, inside and out.
The tray ended up with a slight gloss but still looks like wood where it should. The tray was no additional cost, the paint and stain cost me less than $3 and the clear coat is something I always have on hand for projects. This thrifty little project makes me smile.
An old frame would work well for a tray too. A couple coats of paint can transform almost anything.


Creating a Memo Board with Cork Tiles #craft

I was compensated for this post but all opinions and experiences are my own.

For the last 3 years I’ve made good strides in making changes in our home to add my touch. We’ve purchased new furniture, hung extraordinary artwork, created statement pieces and painted walls. Each project is important to me and serves a purpose even if the purpose is strictly to beautify.
WorkSpace Memo Board using Cork Tiles
Joann’s Fabric and Craft Stores asked me to create my interpretation of a craft found in their Spring Cape Discovery catalog. Armed with the catalog and a head full of ideas I made my way to my local store to shop.My first trip produced things that ended up getting returned because my measurements were wrong and because my vision changed.

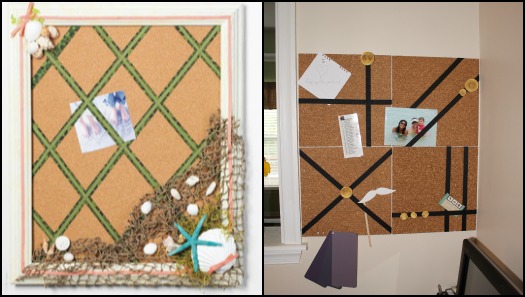
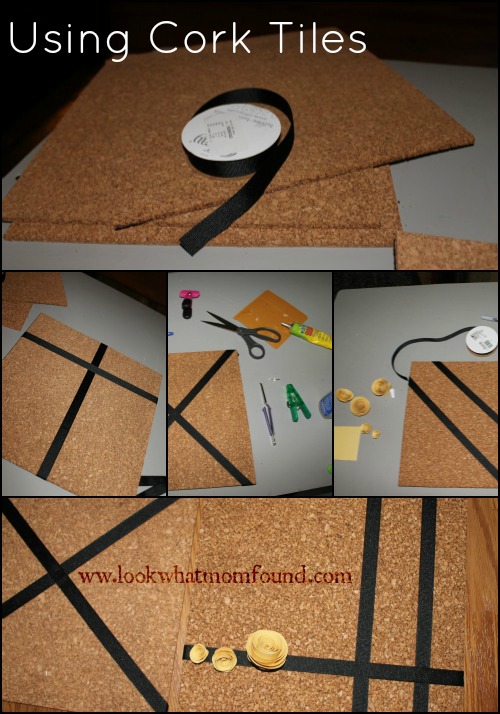
I used this ribbon memo board as my inspiration. The one found in the catalog had a beach theme with shells, starfish and a fishing net. At purchased my own accessories but ended up going with a more modern look in the end.Cork Board Inspiration Supplies

  • Black Grosgrain Ribbon
  • 12 X 12 Cork Tiles
  • Textured Scrapbook Paper
  • Adhesives

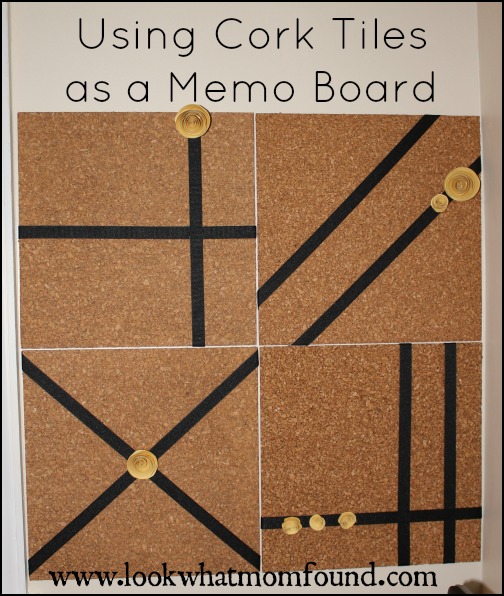
The project was simple but the planning took the most work. i wanted to make sure my ribbons were not only useful but pretty. Each tile is draped with ribbon in different but complementary directions and decorated with quilled paper roses. Each flower was cut and twisted by hand. All I needed was 1 sheet of paper.
Creating Memo Board using Cork Tiles

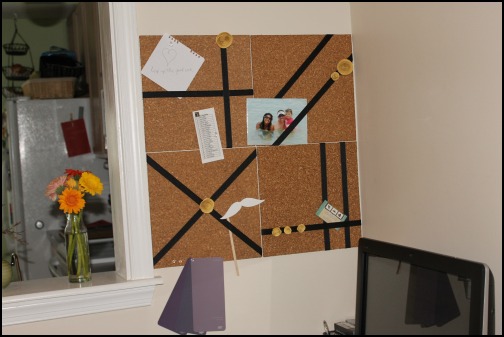
The tiles are now taking up residence next to my small desk in the living room. It’s pretty enough that it doesn’t take away from the rest of the decor but it’s also very useful. My next step is to decorate some thumbtacks with black buttons, a nicer tough than plain silver.

Work Space Memo Board using Cork Tiles

Thanks to Joanns for giving me the inspiration to add this touch to my work space. Don’t forget to check out their extensive project ideas when in need of your own inspiration and sign up as a preferred customer to receive notice of great sales and money-saving coupons.


The Many Steps for a Green Lawn with @HomeDepot #digin

This is a sponsored post but all opinions are my own.
Getting our backyard lawn to a state that we are proud of wasn’t hard but needed the right steps. We listened to the advice of the experts from Home Depot and following maintenance schedules so that we guaranteed ourselves good results.

One month after the first mow, application of fertilizer/feed and using a Flexogen garden hose by Gilmour to water we have the greenest lawn we ever had in this home. It took a few steps with a few products but it was worth it to give us something we want enjoy all summer long.

We started with a cleaned up yard. The kids helped pull weeds and toss rocks out of the grass. The shrubs were trimmed back and the garden beds were cleaned of weeds.

The grass was treated with Scotts Turf Builder 15.97 lb. Fertilizer with Plus 2 Weed Control We had heard some horror stories about this product from people saying it burned their lawn. The research we did found out that they were not applying correctly. We’ve had success in the past so felt confident in applying again.

In fact within days we saw a decrease in weeds and increase in plusher grass. We back up to a large community space that is filled with weeds so keeping them away from our yard takes a couple extra steps. We do some spot treatments using a weed and crabgrass killer. This works great for those mutant dandelions and spaces under the deck stairs or along the fence line. With just 2 applications the changes are incredible.

Another obstacle we have to contend with are the dogs. They are little dogs so their damage isn’t threatening to the entire look and health of the yard. We are filling in the bare spots with an repair seed.

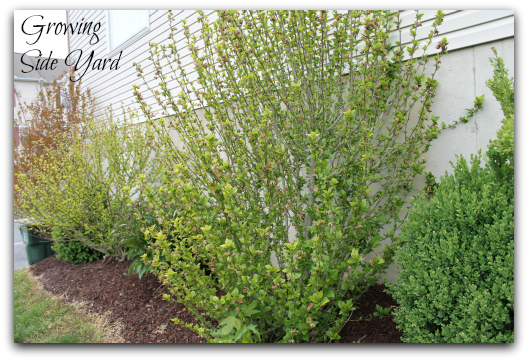
The side yard was its own beast. The shrubs were so overgrown. Right now we have a mix of boxwoods, butterfly bush and peonies and everything has flourished just with a little extra care and nutrient. I’ll be honest and say I don’t spend too much time tending to that part of the house. It’s green when it needs to be, covers the dull concrete wall as people pull up and that’s all I cared about. This year I want flowers and shrubs that impress.
#Digin Butterfly Bush Growing

#digin Pruning the Side Yard

#Digin Peonies Ready to Bloom
It’s home improvement time, and The Home Depot has everything you need to #DigIn for Spring. No matter what projects you want to tackle, they have great values on all you need. They’re ready to help you with renovation ideas and expert advice, too.

Get over $300 in email exclusive savings each year, sneak peeks on new products, monthly lawn & garden ideas for your region and access to The Home Depot’s gardening experts. Click here to join the world’s largest garden community today! Or go to homedepot.com/gardenclub to see some of the many benefits of membership.


Revell SnapTite Model Kit Giveaway

Today’s society is so technology focused that a lot of kids would be happy just watching TV or playing video games all day.  I know my kids would do that if we let them but we try to engage them in other activities like crafts, sports and games whenever possible.

IMG_8349

Recently I was asked by model-building company Revell to spend some screen-free time with my son building a model.  I thought this would be a great activity for Shaun and me to do together so we selected a Revell SnapTite 1970 Chevelle SS.  I can remember when I was a kid going to the store and picking up a model, glue and paint and how much fun I would have just sitting in my room all weekend long and building my model until it was done.  My father wasn’t around so I had to build my models alone but not Shaun because we built it together and had an awesome time.  I can say this is the first time in a while where Shaun and I sat down together and both worked on the same project and I am glad we did.  Parents need to spend more time with their children and model building is a great activity to do together.  Shaun and I plan to do again very soon.

IMG_8351

IMG_8352

IMG_8357

I really like the Revell SnapTite Model Kits because I can remember when I was a kid and having to use model glue to hold everything together, which was a total mess.  The SnapTite Kits go together really easy (they don’t require any paint or glue) which allowed Shaun to build 95% of the model himself with just a little direction from me.  The instructions were well laid out and the pieces were easy to find and it all snapped together perfectly.  The sticker decals were pretty easy to apply and Shaun did it by himself after I showed him once.  All in all the whole process from start to finish took about 1 hr to 1.5 hrs and like I mentioned was really easy and fun to do.

IMG_8361

Helping Shaun build this model took me back to a place in my childhood that I really enjoyed and I was glad that I got the opportunity to share this experience with my son.

Revell model kits are available at local hoppy shops, Hobby Lobby and Michaels stores, as well as Walmart. Revell offers all sorts of kits, like classic cars, trucks, and planes.

Looking to spend some quality time with your kids?

Two lucky Look What Mom Found…and Dad too readers will have the chance to win a Revell SnapTite Model Kit of their choice and a $50 Hobby Lobby Gift Card.  All I need you to do is head over to Revell and tell me which SnapTite Model Kit is your favorite.

EXTRA ENTRIES:
To receive these extra opportunities for entries, you must fulfill the first REQUIRED entry above. Please note the changes to the entries and frequency, entries that don’t follow rules may be disregarded/ignored/deleted.

  • SUBSCRIBE to LookWhatMomFound…and Dad too! via NEW Email Subscription or BlogLovin
  • SHARE this giveaway on your social networks such as Facebook , Google +, Pinterest, Stumble Upon or Other (let me know where you shared)
  • FOLLOW Mom on Pinterest.
  • FOLLOW Dad on Pinterest.
  • FOLLOW Mom , Dad and Revell on Twitter and TWEET this giveaway (1 time per day), please leave your twitter link each time: I’m entering to win a $50 Hobby Lobby GC and @RevellUSA model kit from @lkwhtmomfound @anddadtoo http://bit.ly/14uk5DM
  • LIKE Revell on Facebook
  • ENTER another Giveaway – let us know which one in the comment
  • COMMENT on any other Review/Our Life/Our Travels/Our Thoughts post, let us know where to find it

Your entries must follow the rules or they won’t be eligible for prizes. This contest ends 11:59 pm, Wednesday, May 8, 2013. The winners will be emailed and will have 48 hours to claim their prize. This contest is open to Contiguous US residents, age 18 or over. For complete rules please read our blog contest rules page.

I Disclose


Kids Craft #PinterestFail

I use Pinterest almost daily to get inspiration for new meal ideas, kids activities and crafts and DIY projects around the house.

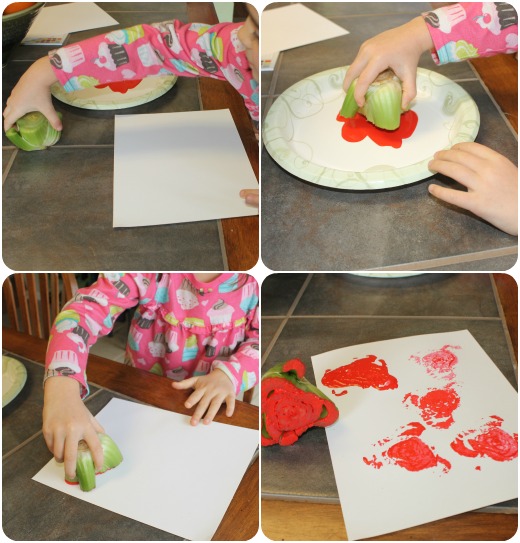
This particular craft I’ve seen floating around for about 2 years.  Celery Heart Flowers.  It’s supposed to be a simple but cute gift giving craft that just requires a couple supplies and a celery root/core.


I was breaking down the produce while Shae was in the kitchen and remembered to save the celery piece.  Shae was excited. She knew who she was going to give her card to and what it was going to say and how many flowers she was going to fit on her paper.

celery heart craft, pinterest fail

The prep took seconds but it was an instant fail.  The blob of paint on the paper looked nothing like a flower.  Neither did any of the other attempts.  Pinterest failed us.  It hasn’t been the first time and it definitely won’t be the last.

pinterest fail, #pinterestfail, craft fail

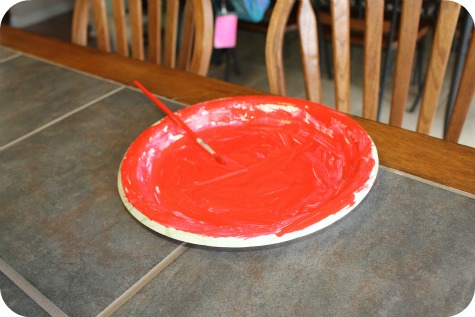
Shae wasn’t going to let that stop her. She ended up painting the paper plate with the left over paint.

kids painting

I Disclose


Shop At Home for the Holidays with Rendi

I consider myself a little crafty and love to conceptualize a fun DIY project. My problem with pulling these jobs off is my lack of artistic capability. I like to leave some things to the experts especially when it comes to words and printing.

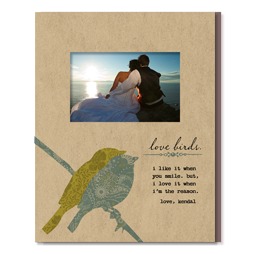
rendi style frameI was recently introduced to Rendi, an online and at home shopping experience that specializes in home decor and styling. Rendi isn’t new to the home decor business but is finally making its way into the booming business of home parties. These parties allow friends and family to get together and shop from the comforts of their own home while learning about products, how they are produced, the customization available and more.

Rendi started out at a smalltown home decor business that supported their community by employing local women. These women were able to work a schedule that fit their family life, contribute financially to the household and be proud of the work that they were doing. The business is still run this same way. All products are Made in the USA, made from reclaimed wood and made with safe materials.
No matter your personal home decor style or complete lack of style Rendi is going to have something that will appeal to you.

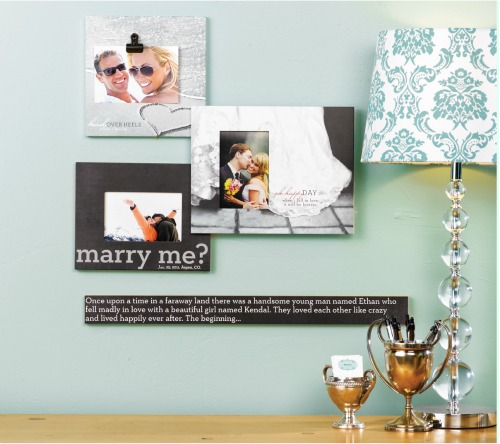
The Gallery Collection is modern with simple lines and neutral colors, allowing easy incorporation into any theme. Using multiple pieces from the same collection lets you design a coordinated vignette without second guessing yourself.

wedding frames, rendi home decor

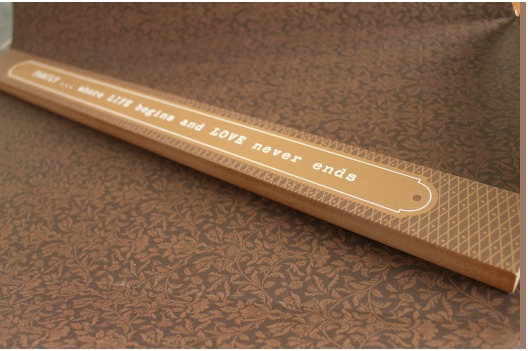
I chose a the Modern Palette Beam for my best friend. She’s been trying to change the decor in her home. She wants to step out of the box and use more color and texture and I thought a this would be a great accent to her arched doorways and existing cultural pieces. I was able to have printed a phrase that goes perfectly well with her family.  I received the wooden beam within 3 days of ordering and loved the way it looked.  I was able to put together a completely personalized piece of decor that I feel is a perfect fit for Stacy and her home.

wooden beam, home decor, rendi

FAMILY…where LIFE begins and LOVE never ends

Shop from the comfort of your own home with Rendi and know your are getting not only outstanding quality but supporting a brand that supports you.

Supporting American jobs. Protecting the environment. Crafting products of unique design. Telling your story. Creating opportunities for women to make a better living and a better life. For Rendi, it’s the heart of the matter.

I Disclose


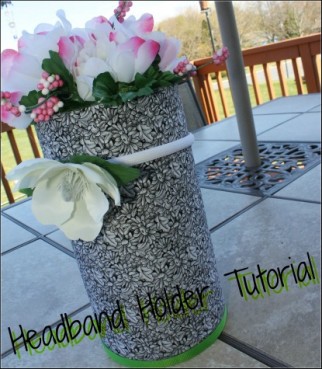
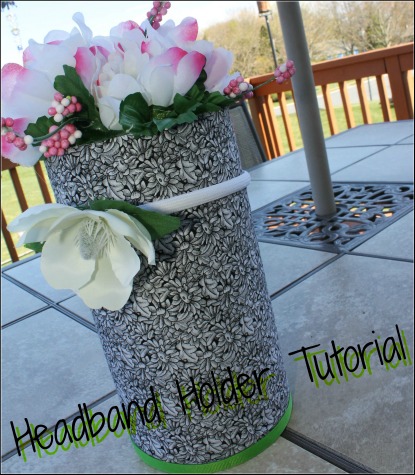
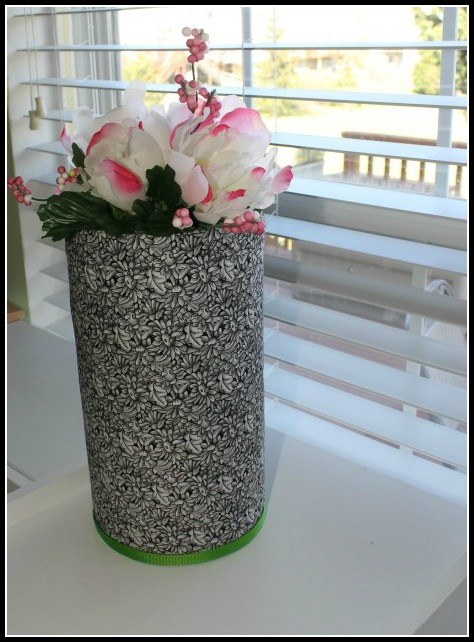
Headband Holder DIY Tutorial

Shae is half girly girl half a miniature Shaun. She spends so much time with her big brother that the line of dainty and sweet is often crossed into to that of a tomboy. But when she wants to hold onto her girliness she slathers on the pink and flowers and sashays through daily life. Her headband collection has been exploding lately. Mainly because I keep making them but I only make them because she wears them. Since headbands don’t fit perfectly on Shae’s DIY hairbow holder I figured it was best to make a headband holder equally as cute.

headband holder tutorial diy

Supplies Needed
empty Oatmeal canister (small or large)
inner fabric ( i used fleece)
outer prettier fabric
1/2″ wide grosgrain ribbon (contrasting color works best)
Large artificial flowers and leaves, disassembled
hot glue

headband holder supplies craft

Start your project by measuring out a base fabric to plump up your oatmeal canister to give the headbands something to grip. I had black fleece on hand, I used that. I measured and cut so the fleece to fit just perfectly around and top to bottom. Glue the fabric to the container pulling firm but not over stretching it. Let the glue dry for a few minutes.

Next measure and cut your outer fabric so that it covers exactly the top and bottom and once all the way around the canister. Apply hot glue in small sections on your starting seam and ending seam. Pull fabric so it’s smooth and free of wrinkles and creases.

headband holder collage instructions

Use your grosgrain cover the outer edge of the canister lid. Turn the canister upside down so the ribboned lid is on the bottom.

Using glue proceed to cover the now top of your holder with leaves and flowers.

headband holder craft tutorial
Allow the entire project to cool and set for a few minutes then go ahead and add headbands.

I Disclose