RSS Email

Search Results for: Project 52

Bathroom Redo DONE Olympic Paints #BringontheColor Campaign

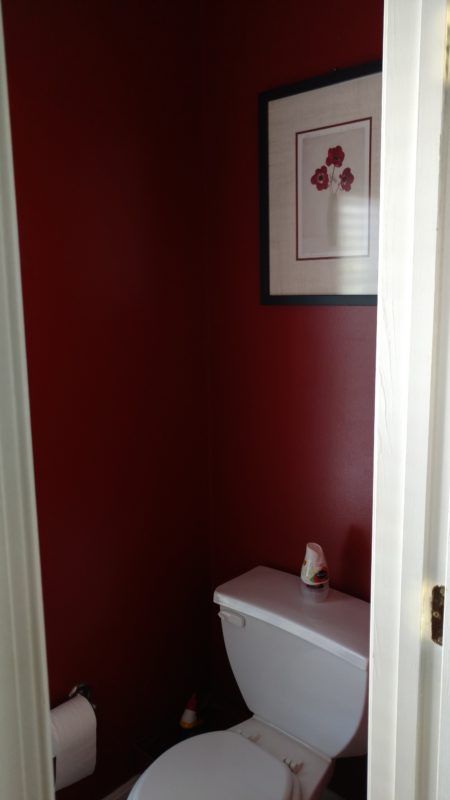
Some of you may have read HERE how I was selected for the #BringontheColor campaign from Olympic Paints.  It means we got the opportunity to redo a room in our house .  Melinda and I selected our master bathroom because not only was it the most hideous room in the house with the ugliest dark red walls it is the worlds smallest master bathroom. In fact we have 2 of the smallest bathrooms in the world, including the powder room, with the same ugly blood walls.

Before

I may have mentioned once or twice or three times how much I dislike painting but I will say that the final product turned out awesome.  Melinda and I went to Lowe’s and spent at least an hour maybe two looked through all of the colors that Olympic Paints had to offer.  After grabbing a TON of color sample swatches we agreed on “keepsakes” which is part of the blues collection.  We made sure we picked something that would brighten the room to help get away from the dark closet feeling.
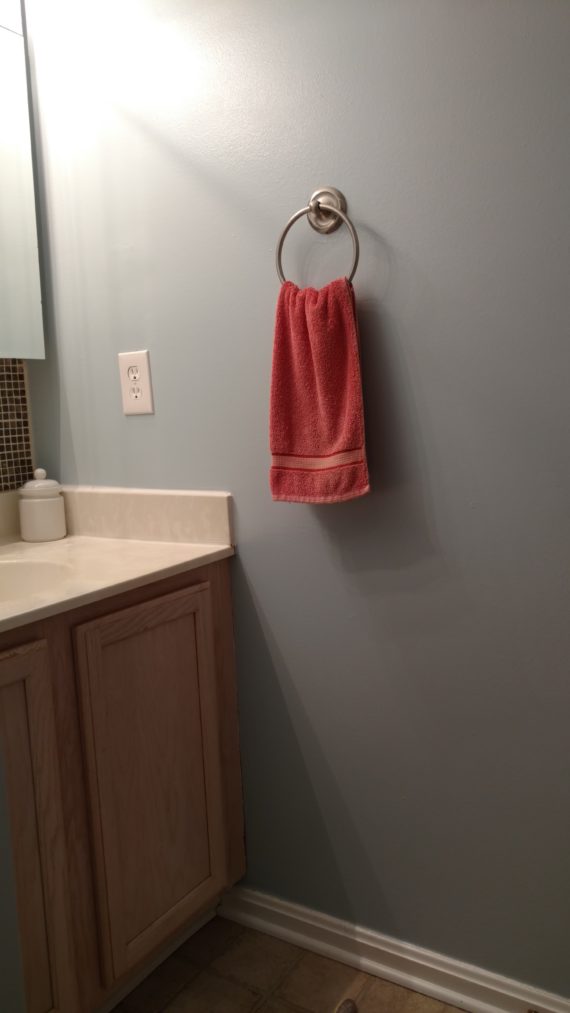
image_29161

After

It also made me feel good knowing that if I didn’t like the color or quality of the paint Lowe’s had my back with the Paint Pledge Program.

  • Lowe’s has your back with their paint pledge, and they’ll do whatever it takes to help you find the perfect paint.
  • Lowe’s will refund customers who are dissatisfied with their paint for any reason, as long as the customer returns the paint in its original container within 30 days. Reason for return may include being unhappy with the quality or color, among others.
  • Valid on interior and exterior liquid paint purchases 4/3/16-8/9/16

Honestly anything would have brightened up our dungeon bathroom but this color really impressed once on the wall.  The color ended up bluer and brighter on our walls compared to the swatch but it immediately, with the first roll of the brush, made the room brighter and more modern. The finished product left a tine bathroom that no longer felt claustrophobic. It’s amazing what a fresh coat of paint can do for a boring or outdated room.

Inspiration Board for Bathroom Remodel with Olympic Paint at Lowe's Home Improvement

To be honest at first I was leary on the color because I was worried it was going to take four or five coats of paint to cover up our red walls but it only took two coats. The entire room, top to bottom was painted in one day thanks to the tag team effort of Melinda and I. The bathroom, weeks later, is still refreshing to walk into every morning. We have some decorating to do. I’m waiting for Melinda to pick new art, shelving and accessories so I can install but the hard work is done. Thanks to Olympic Paint this was a pretty painless home improvement project.

Also be sure to follow Olympic via their social media channels which I have listed below:

Olympic Facebook, Olympic TwitterOlympic InstagramOlympic Pinterest

Disclosure: This post is a sponsored by The Motherhood and Olympic Paints but all thoughts are 100% my own. 


Dyson Hot+Cool Fan Heater QVC Today’s Special Value

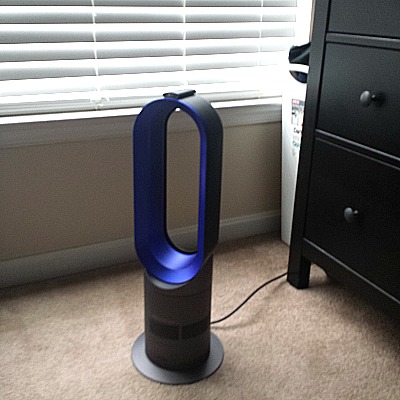
2014 disclosureI’ve been making some not so subtle comments about the The Dyson AM05 Hot + Cool fan heater the past couple days. That’s because not only is it an amazing product that can efficiently and quickly heat or cool a room for the changing weather it also is Today’s Special Value on QVC for $299.99. #HotontheQDyson Hot+Cool Fan Heater QVC Today's Special Value

That’s right!  On November 2nd  beginning at midnight (EST) QVC will be showcasing the latest technology from the Dyson family for an exceptionally low price.  Don’t be stuck in front of a tv screen trying to catch this deal. Visit  QVC.com, the QVC apps or by calling 800.345.1515 to get your pick of Iron/Red, Iron/Copper, and Iron/Silver, Black/Silver, Iron/Blue, and White/Silver. It’s One machine for four seasons.

How it works:

Using Air Multiplier™ technology and a motor engineered for greater airflow, AM05 draws in six gallons of air per second via a mixed flow impeller. Air friction is reduced using nine asymmetrically aligned fins, with rows of tiny holes. This helps maintains constant smooth airflow. Dyson Hot+Cool Fan Heater QVC Today's Special Value

In heater mode, two Positive Temperature Coefficient (PTC) ceramic plates heat the air as it’s projected into the room. The air is then accelerated through a tiny aperture set within the loop amplifier. This creates a jet of air which passes over an airfoil-shaped ramp angled at 5˚. Creating an area of low pressure behind the fan, air is drawn in through a process known as inducement. Surrounding air is drawn into the airflow in a process called entrainment.

Safety: Low surface temperatures throughout and no visible heating elements. And if tipped over, the machine has been engineered to automatically shut off.

Environmental chamber – The Dyson Hot + Cool™ fan heater was tested in Dyson’s own environmental chamber simulating temperatures from 41°F to 176°F, and 10% relative humidity to 80%.

The swift drop in temperature here in the Delaware Valley we had to close our windows and use the Dyson Hot + Cool fan heater to take the chill off in our room last night. I prefer a cool sleeping environment but just needed to make it more comfortable to climb under the covers and fall asleep. Dyson Hot+Cool Fan Heater QVC Today's Special Value

The lightweight machine makes it simple to move room to room so that we can have a cozy cuddling session in the living room or the kids can play video games in the basement and I can warm up the kitchen can warm up if I need a little help with bread dough.

Get your Dyson AM05 Hot + Cool fan heater NOW because this deal won’t last forever.


Fabric Bead Necklace Kids Craft

Crafting is becoming a big passion for Shae. I’m not talking about cutting out construction paper and gluing it to each other to make odd shapes. I’m talking about thought out creations that have a purpose. These fabric beads happened after seeing my trunk full of fabric and other random stuff. She wanted to make something permanent, something that was useful not something that would’ve ended up in the recycle bin in a month.Making Fabric Beads by Kids #craft

Making Fabric Beads by Kids #craft

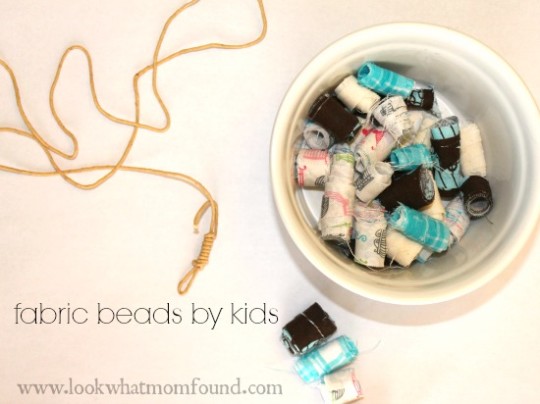
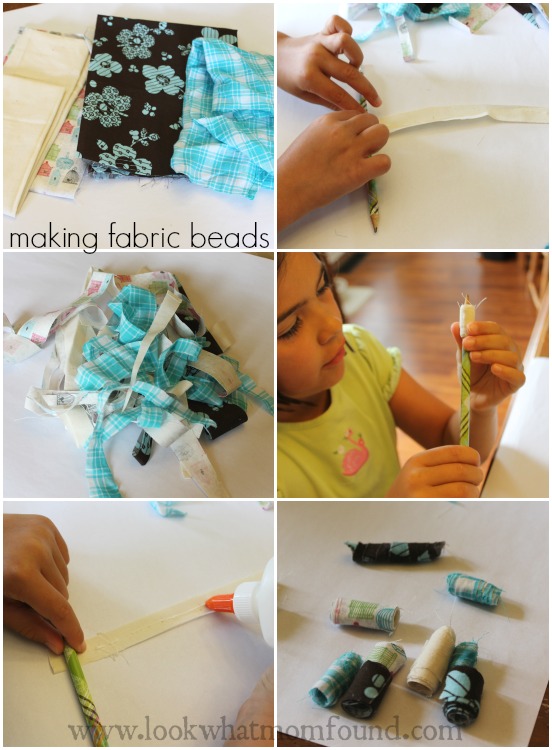
We started off with a stack of thin fabrics in a variety of colors and patterns. We cut them into strips of all lengths and widths.  Don’t exceed 1 inch wide as your bead with be very big.  Lengths can vary from  5″ to 12 depending how thick your child wants the beads.

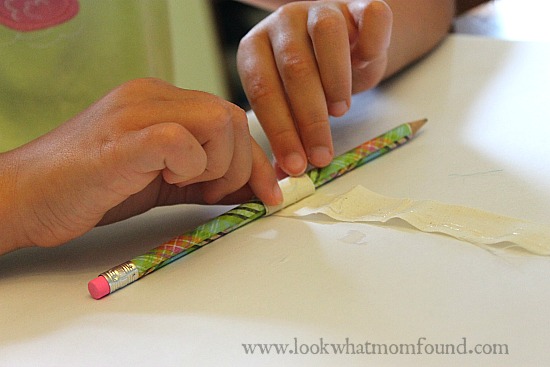
Hold your strip flat and apply a thin strip of glue the entire length. Using a pencil start rolling the strip up. Making Fabric Beads by Kids #craft Don’t roll too tight as it will be difficult to remove. Slide your rolled up fabric gently off your pencil and set aside to dry. Use an extra touch of glue if the end isn’t secure. If you find your pencil is getting too much glue, use another pencil.
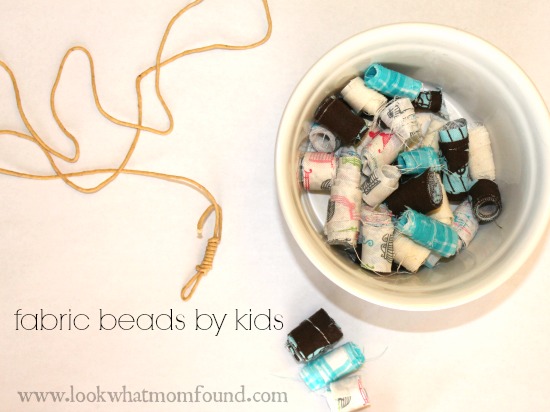
              *roll your bead close to the pointy end, it’ll be easier to remove.

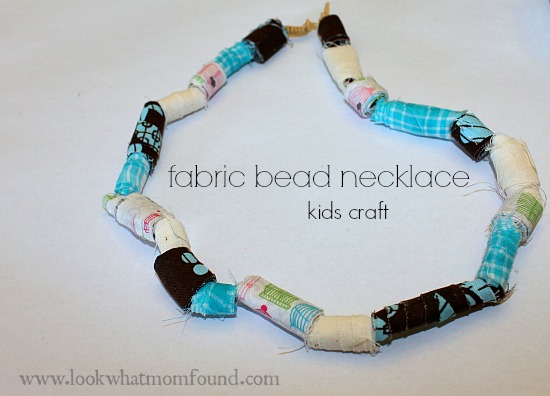
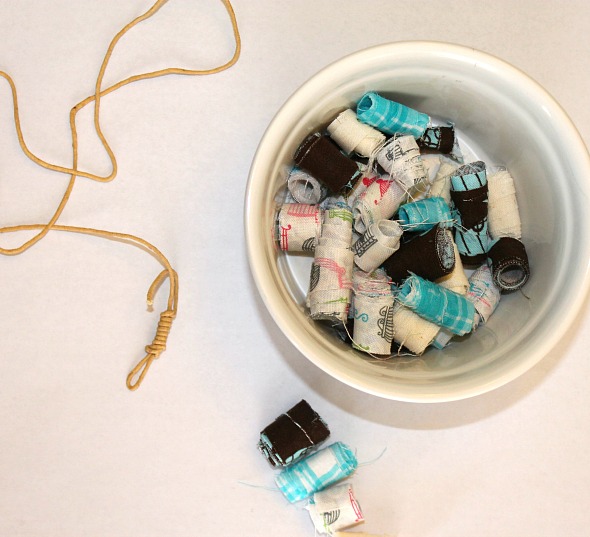
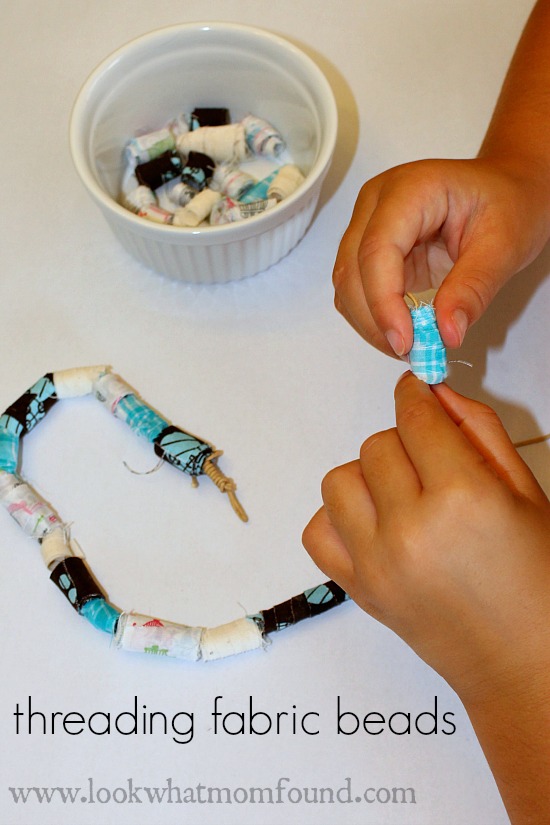
After all of your beads have set and seem to have hardened (we let them sit overnight) you’re ready to create your jewelry. Shae made a necklace using a thin suede cord.Making Fabric Beads by Kids #craft

I created a cool knot/loop on one end and when she done I created a larger knot to close the necklace. Elastic cord would work well too and then you won’t have issues with closures.
Making Fabric Beads by Kids #craft

Making Fabric Beads by Kids #craft

Make tons of beads for rainy day projects or make gifts for others.

Supplies needed

thin fabric in a variety of colors/patterns
scissors
school glue
pencil
thread/cord for necklace

Making Fabric Beads by Kids #craft

Making Fabric Beads by Kids #craft

Making Fabric Beads by Kids #craftFabric Beads, making a necklace with scrap materials, kids craft


DIY Animal Ring Holder Craft

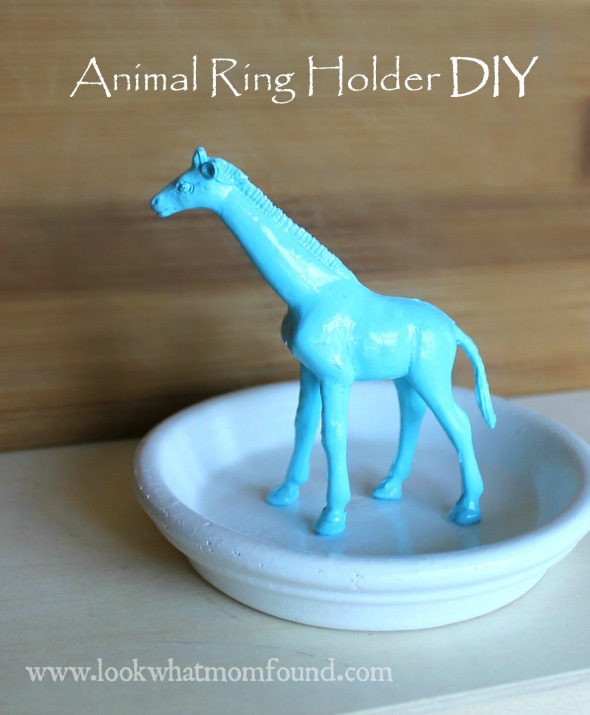
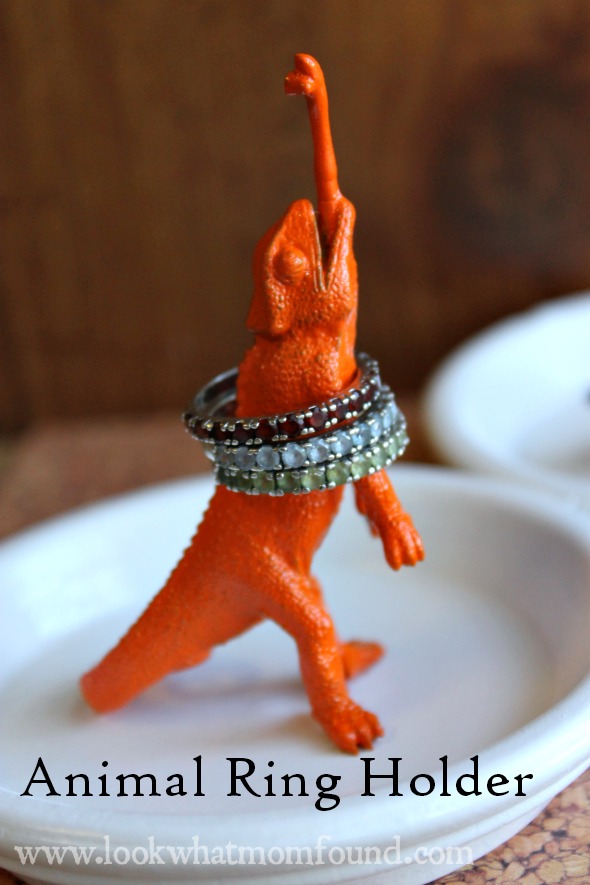
Deep down I’m really a #craftymom. I scour Pinterest, crafting sites and magazines all the time for new ideas for ways to make projects my own. My struggle is with time. I have ideas and supplies but have a hard time putting aside the hour or so needed to devote to something fun. I found this latest project and knew I could have it completely done in a day. The Animal Ring Dish was very simple but like usual real life got in the way.

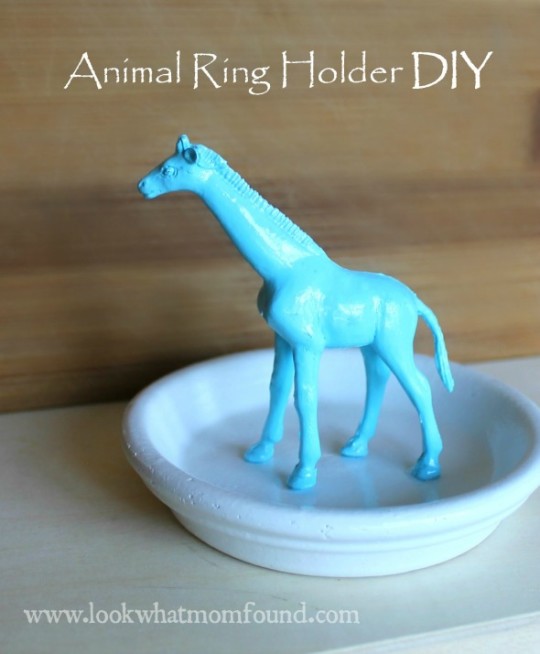
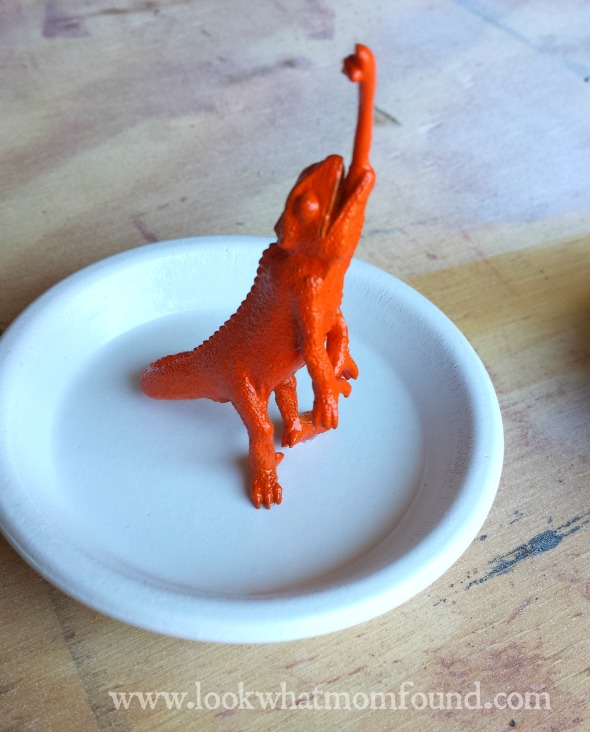
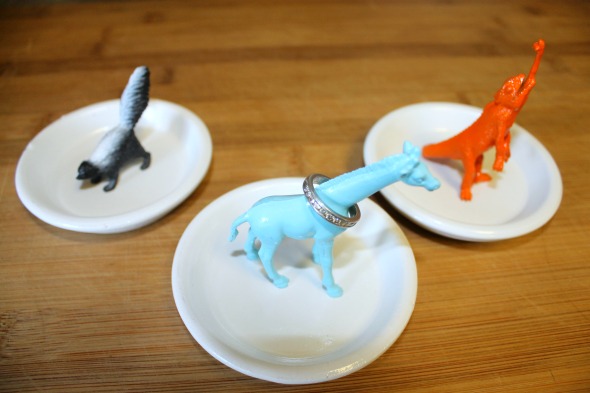
Animal Ring Holder #DIYI found this on a new mail order craft site. The site is done well, the projects are gorgeous but they are way out of my price range for craft projects and supplies. I knew I could do it cheaper and just as well. For these animal ring dishes I only needed to purchase 1 thing, the dishes. I walked the craft store for 30 minutes and I found flower pot dishes that were a perfect size. I spent approximately $1.50 for 3 of them. For years we’ve been collecting these Safari Ltd Animal Toobs so I had no shortage of those. I also have a collection of spray paint and paint pens and a bin full of glues.Animal Ring Holder #DIY #craftymom

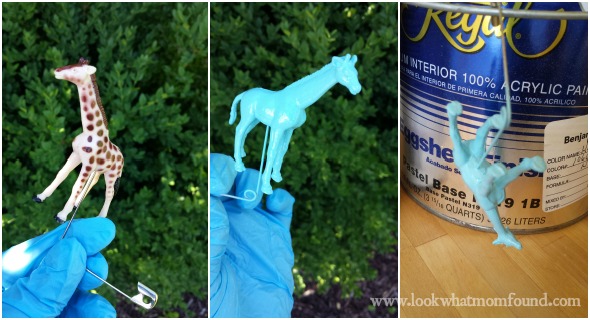
First I spray-painted the animals. I stuck a large saftey pin in them and gave them a quick coat from all angles. Animal Ring Holder #DIY #craftymom Then came the dishes. I started with the bottoms, 2 coats then gave the tops 3-4 even coats. This is what took the most time. I started late in a day and it carried over into the next day to get all the coats of spray paint on.Animal Ring Holder #DIY #craftymom

Then the weather was bad and we started a new project that lasted 2 weeks so the dishes sat on a shelf waiting for the next step.

It ended up working out. Painted items work best when they’ve had time to cure; set up. 2 weeks isn’t necessary but that’s what happened here.

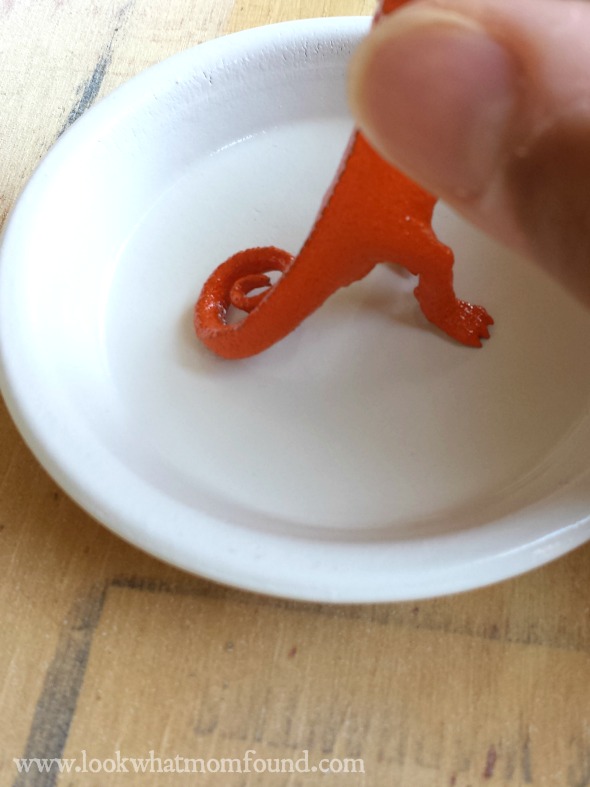
Then with a toothpick and some E-6000 glue I attached the animals to the dishes.Animal Ring Holder #DIY #craftymom Animal Ring Holder #DIY #craftymom Animal Ring Holder #DIY #craftymom

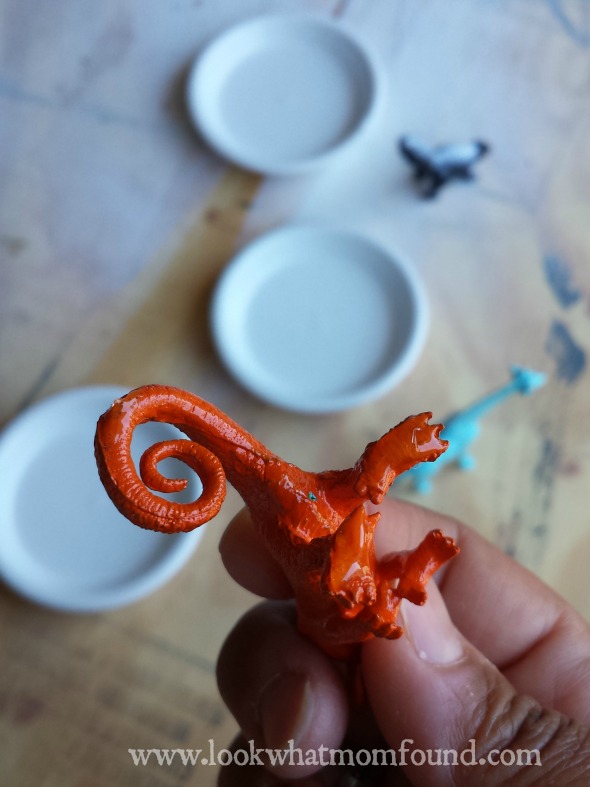
I choose animals that stood tall or had a long neck or tail. This batch included a lizard with its tongue sticking out, a giraffe and a skunk who I didn’t paint because I was afraid he’s just end up looking like a cat.
I set them out to dry for 2 hours and it’s done.

This would be an amazing craft night project if you were using paint pens. I would suggest painting all of the dishes ahead of time.

I think i’m going to make some more but add some pattern to the dish or dress it up with beads or rhinestones. Animal Ring Holder #DIY #upcycle #craftymom

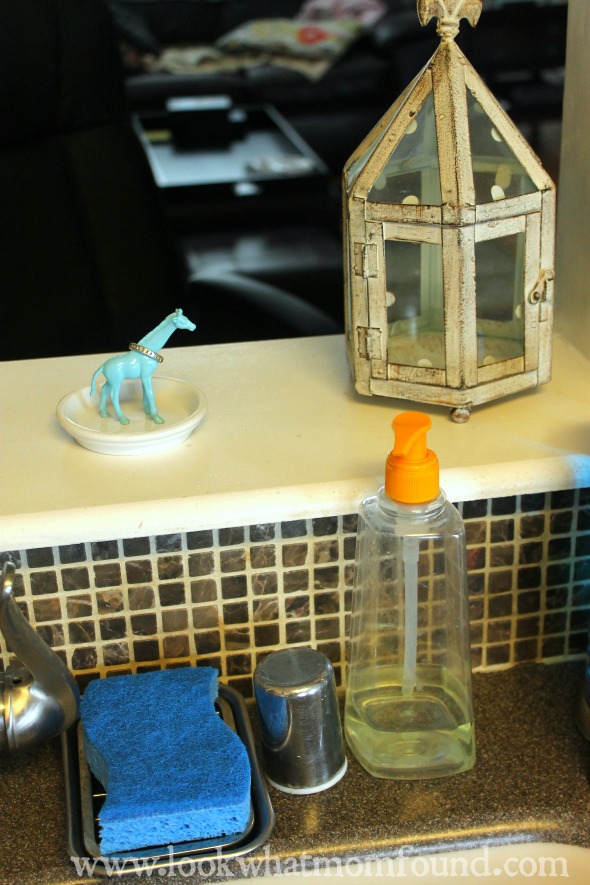
The lizard is for my friend Kelly. I thought of her the first time I saw this project. The giraffe is sitting near my kitchen sick to hold rings while I wash dishes or clean.Animal Ring Holder #DIY #upcycle #craftymom

Animal Ring Holder DIY Craft Animal Ring Holder #DIY #upcycle #craftymom


Lace Covered Candle Holder #upcycle #craft

In honor of Earth Day 2014 (today) I’m sharing an upcycle project I did a couple week back. In a spring cleaning frenzy I cleaned out the kids drawers of outgrown clothing. This gorgeous blue satiny and lace shirt was in the pile. Sabreena picked it up in a thrift store but it never really fit right. It killed me to get rid of it, the lace was so pretty so I figured I could create something pretty with it. This Lace Covered Candle Holder was the perfect fit.Lace Covered Candle Holder #upcycle #craft

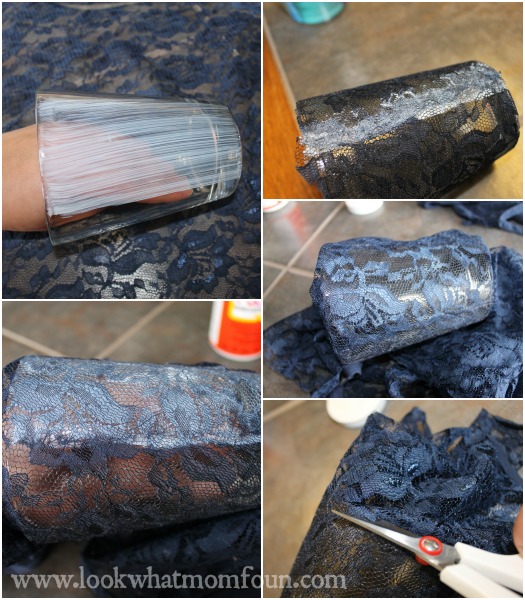
I had an empty Yankee Candle jar, a sleeker shape than the traditional jar, cleaned it really well and ran it through the dishwasher. I left the lace intact as I covered it. i didn’t want any cuts or gaps.

Lace Covered Candle Holder #upcycle #craft

Lace Covered Candle Holder #upcycle #craftLace Covered Candle Holder #upcycle #craft

With some glossy mod podge I started to attached the lace.

I worked in small sections so the lace stayed taut and in place. I left each section for 15 minutes so it set up then worked on another section and pulled the lace over the mod podge again.

I covered the entire piece of lace with mod podge again once the jar was covered. This gave it it’s final sheen. Using super sharp scissors I trimmed the lace off the top and bottom of the jar leaving a clean finish. I might go back and trim with wide grosgrain ribbon.

A lit tealight is enough light to shine through to still see the intricate lace pattern.

I have another jar, still have wax in it, but that will be transformed into a Lace Candle Holder too.


Jelly Bean Tree Centerpiece plus Giveaway

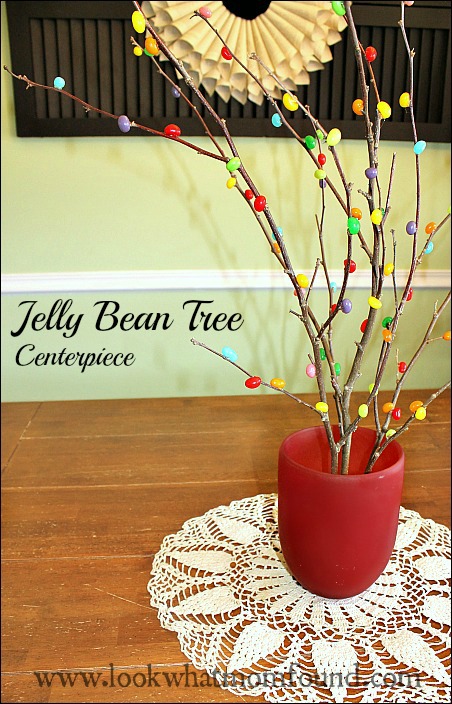
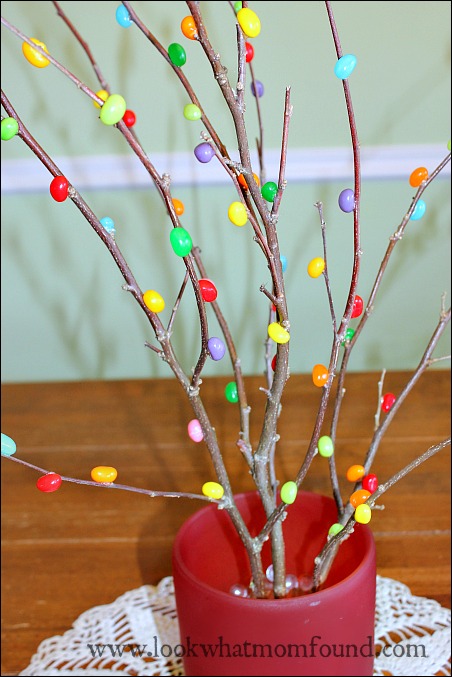
For the last few months I’ve been enjoying making some DIY home decor that fits the seasons and holidays. There was the Valentine’s framed Key to My Heart and the Christmas Card Display board. For Easter and spring it’s no different. I created this adorable Jelly Bean Tree Centerpiece for the dining table.jelly bean tree centerpiece

I’m hoping it lasts till June honestly. For the week it’s been up I’ve lost 1 tiny branch holding 1 jelly bean and that’s because I hit it by accident.

Materials
vase, jar, flowerpot, basket
stabilizer for wide mouth container (styrofoam, marbles, dirt)
branches
jellybeans of your choice
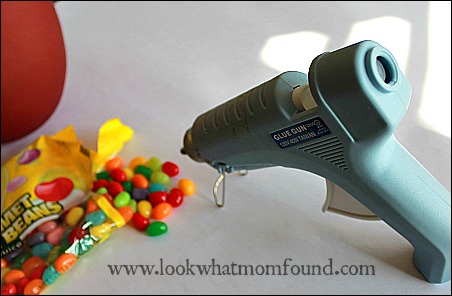
glue gun
polyurethane spray (optional)

jelly beans

Directions
Clean off your branches of dead leaves, buds and dirt.

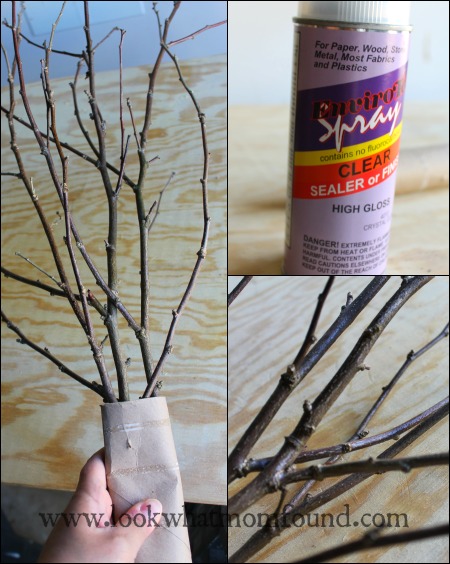
Spray with a clear coat. I did this to get rid of the dusty look but there is nothing wrong with leaving it the way it is.  You might be able to see that I use a paper towel roll to hold the branches but keep  my hands free of over spray.

Jelly Bean Tree Centerpiece #craft #easycraft #EasterCraft
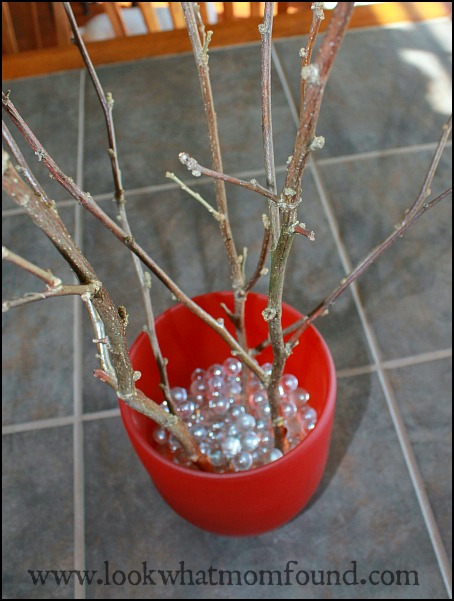
Arrange your branches in their container. I rubber-banded mine together very low so they spread out slightly.

Jelly Bean Tree Centerpiece #craft #easycraft #EasterCraft

I keep these marbles on hand for just these kind of projects. They are strong enough to keep the centerpiece in place but it’s not permanent. A block of floral styrofoam would work well. This can be topped with shredded green paper or Easter grass too.

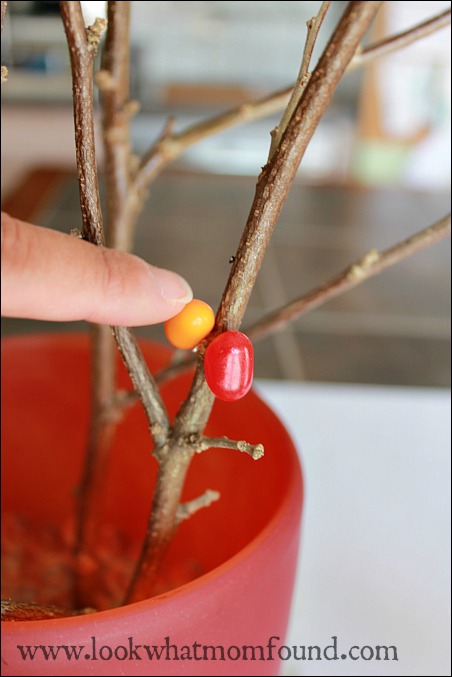
Using your hot glue gun add small dabs of glue to your branches.

Jelly Bean Tree Centerpiece #craft #easycraft #EasterCraft #jellybeancraft

Then add your jelly beans. Do this one at a time. Hot glue is the best option as it dries FAST and clear. I DO NOT suggest adding the glue to the jelly bean because of the small surface space and the risk of fingertip burns. I speak from experience.

Jelly Bean Tree Centerpiece #craft #easycraft #EasterCraft

I went with jelly beans that had a vibrant color, I actually don’t like the way these taste. Coordinate your home and tablescape with jelly beans of any hue or just one color.

Jelly Bean Tree Centerpiece #craft #easycraft #EasterCraft #jellybeancraft

This was created with a vase I already had on hand, marbles I’ve had for many years and branches off a bush that hasn’t bloomed yet in my side yard. My only expense was a bag of jelly beans and I didn’t even use the whole bag. I though about adding more to the branches but I thought it would start to look more like a child’s craft.

 Jelly Bean Tree Centerpiece #craft #easycraft #EasterCraft

With just 6 days left until Easter, many of us are planning what to serve or bring to the big dinner, as well as how to decorate and add the extra touches that make our holidays memorable.  Colleen of Souffle Bombay and Heather of Real: The Kitchen and Beyond decided to gather 26 bloggers to share some of their Easter Entertaining Ideas with you! From Jelly Bean Trees to a Giant Deviled Egg, we’ve got you covered!  To make this even more memorable we have some amazing giveaways as well from John Boos (crafter of incredible cutting boards, butcher blocks and more) , The Spice House (THE online source for incredible spices), Wilton Armetale (maker of both beautiful & finctional serving ware), Divine Chocolates (a fair trade, farmer-owned chocolate company) & The Tree Hut (natural body products that do what they say) for a few lucky readers!  Follow along via #AllThingsEaster on social media this week and visit our Pinterest Board “All Things Easter” for more ideas.  Now if only we had a magic formula to make all those dishes disappear, Happy Easter!

Ideas for Leftover Easter Eggs

Giant Deviled Egg | Souffle Bombay

Easter Breakfast Recipe Ideas

Easter Breakfast Casserole | How I Pinch A Penny

Baked French Toast | O’Boy! Organic

Dutch Baby | The Naughty Mommy

Easter Dinner Recipe Ideas

Scallion & Brown Butter Mashed Potatoes | Musings of a Housewife

Baked Cheesy Broccoli & Rice Casserole | We’re Parents!?

Cheesy Potato Casserole | Coupon Cutting Mom

Easter Dessert Recipe Ideas

Peanut Butter Eggs | Real: The Kitchen & Beyond

Toasted Angel Food Cake Parfait | What the Heck’s a Bonbon?

Allergy Friendly Cookies | Chockababy

Individual Lemon Meringues | Pandora’s Deals

Peeps in the Pond Trifle | Opera Singer in the Kitchen

Rice Krispie Pops/Chocolate Covered Pretzels | A Grande Life

Easter Cocktail Recipe Ideas

Raspberry Beer Float | Teaspoon of Spice

The Peter Cottontail Cocktail | Can’t Google Everything

Bunnytail-tini | Mommy Snapped 

Easter Decorating Ideas

Easter Printable | Diapered Daze and Knights

Easter Centerpiece | The Vintage Mom

Jellybean Tree Centerpiece | Look What Mom Found

Easter Gift Ideas

Allergy Friendly Non-Toxic Easter Basket | Mom-Blog    

Naturally Dyed Wooden Easter Eggs | Inspired Family

Sugar Free Easter Basket Ideas | philly fun 4 kids

Easter Fun

5 Easter Activities for Kids | Mama Teaches

Pretzel Fun for Family | Homeroom at Home

Taking Great Easter Photos | Life with Kaishon

Frugal Easter Basket Ideas & Menu

Frugal Easter Ideas | Centsible Life

Easter Egg Pass | A Life in Balance

John Boos for the beautiful maple cutting board, The Spice House for their spice and baking gift sets, Divine Chocolate for their luxuriously rich Fair Trade Chocolate gift basket, Wilton Armetale for the elegant egg plate, and Tree Hut for the body scrub and lotion.
#AllThingsEaster Prize Pack

#AllThingsEaster Prize Pack
a Rafflecopter giveaway


ENTERTAINING ALTERNATIVES TO TV: For Kids and Other Creative Humans

When our kids are young, we expose them to as many things as we can to stimulate their minds and assist them in the learning process. We buy them this educational toy, that mind challenging game, and everything in-between. However, somewhere along the way we let our kids watch educational TV, which often includes Sesame Street, Dora the Explorer, and too many other shows to name. We exposed them to TV for a good reason, but the more we sit them in front of the large screen, the more they come to rely upon it as a pastime. The battle between you, your child, and the TV will occur for years, but here are a few creative options to have in your back pocket to lure them away.


Good Food Gardening
Gardening isn’t just for Mommy anymore. Having your kids assist you in the backyard is a great way to teach them about the values of healthy foods, give a simple science lessons, and in its simplest form, it’s FUN.
You don’t need a plot of land to be a gardener, nor do you need to go buy every tool at home depot. A small balcony or even a sunny window can sometimes suffice and there are lots of easy to grow plants and vegetables that grow in containers. Lettuce, kale, and Swiss chard can grow in pots without needing a full day of sun. If you have a sunny porch or a small backyard, your options are many; from tomatoes and peppers to peas that can grow up the railing. A fun project, if you have the space, is to build a “Jack and the bean pole” tepee. Just lash 4-6 poles (wooden or bamboo works great) at the top, spread evenly with an opening in the front and plant pole bean seeds around the bottom, and watch them grow! If you don’t have space, you can make a potted plant topiary using wire or sticks and train a vine to climb according to the shape you and your child create. No matter what approach you take, make sure to reinforce the science behind what you’re doing.

Clever Cooking

Learning to cook is a valuable lesson that will be everlasting. The skills you build with your child will benefit them years from now when you’re not home and he or she has to feed his or herself. Bring your kid into the kitchen and let your child read the recipe to you, gather the items needed, and do the measuring. Point out how things can be converted and substituted (ex. two ½ cups equals one whole cup).


Don’t be nervous about the danger in tools for preparation; just be vigilant and teach age-appropriate best safety techniques. There are child friendly kitchen tools available if you’re scared about them hurting themselves.

Making Musical Harmony

Many struggling schools have given up offering the arts altogether, despite clear empirical evidence that artistic expression contributes to improved learning in other subjects. What a terrible loss for our children!

You and your child can sing along with the radio (yes, radio still exists) or stereo. Mix the tunes up between yours and theirs, and switch styles, discussing this with your kids. Classical music has been shown to produce very positive effects on the minds of the youth. This genre is largely believed to be the best study music around.

Another great idea is to keep various instruments around the house that your child can pick up and play along with whatever music you put on. For very little money you can find maracas, tambourines, bongos, xylophones and a recorder instrument. Vendors like West Music are a great resource for finding musical recorders, as well as other instruments for your kids. For the larger, more costly instruments, such as guitars, banjos, trumpets, violins, and so on, check out yard sales, EBay, Craig’s List, Freecycle and other reasonable options. If you don’t want to spend a buck, there is no end to what can be made out of recycled items around the house. The goal is to entertain new and fun ideas.

Learning to play an instrument requires creativity and self-discipline; two character traits that all loving parents want their children to develop, while simultaneously fostering each child’s individual creative spirit.
Television may be a convenient distraction when we need our kids “out of our hair” but it is a false and lousy substitute for real and valuable creative stimulation.

This is a Guest Post


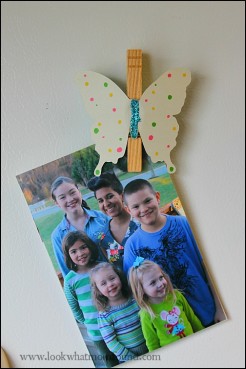
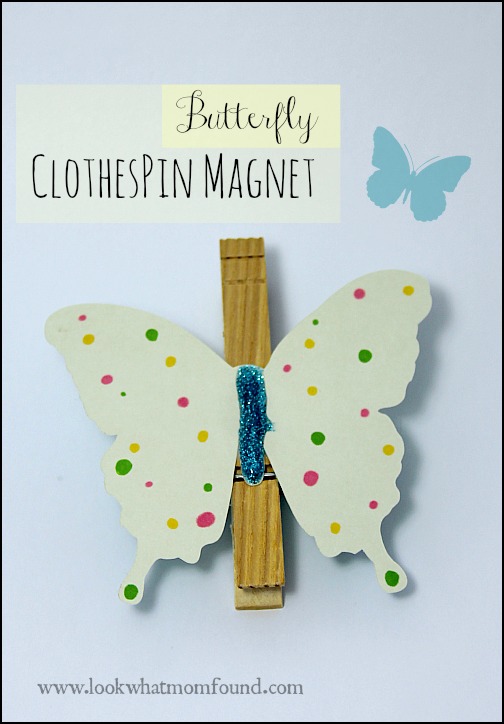
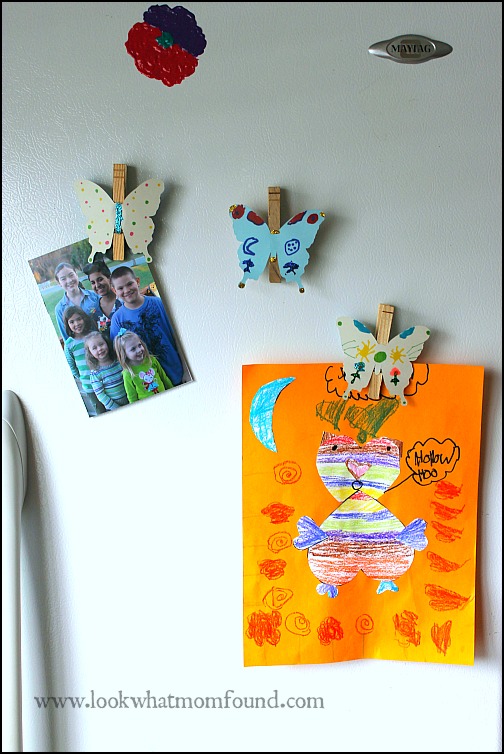
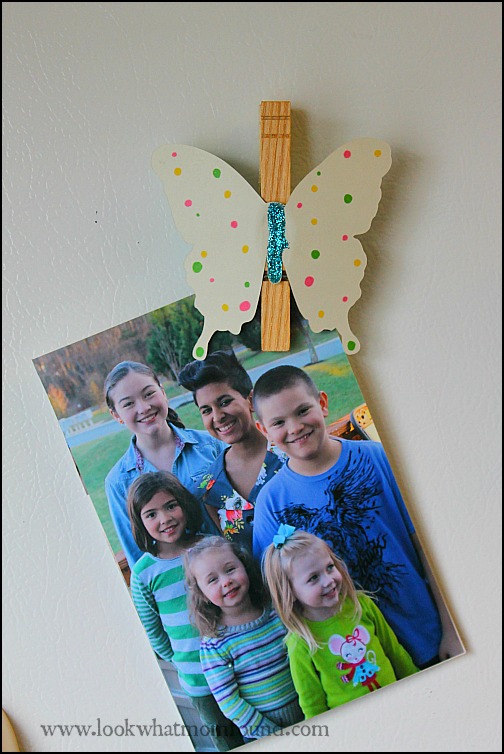
Butterfly Clothes Pin Fridge Magnet #kids #diy #craft

Everyday Shae comes home from school and empties her backpack of a stack of papers. Among these papers are art projects and drawings that she cherishes with every fiber of her being. She’s 6 so every single crayon stroke is important to her. I’ve often turned my kitchen walls into a mini art gallery but there is something about the refrigerator that beckons a masterpiece. That’s why these Butterfly Clothespin Magnets are so handy to have.

ClothesPin Fridge Magnet #kids #diy #craft Making these fridge magnets can be done by any child, any age. The materials used can vary from foam sheets to wooden shapes to molded clay.
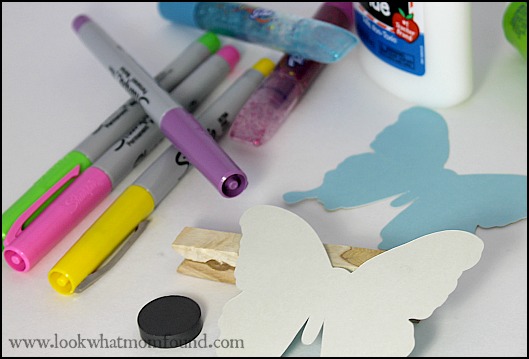
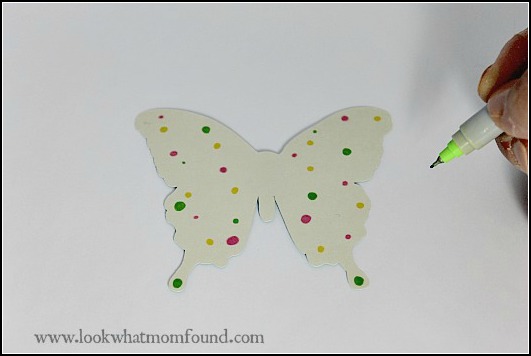
ClothesPin Fridge Magnet #kids #diy #craft

Materials
Cardstock butterfly
Fine point markers
Glitter glue, glitter, sequins, stickers, etc
Clothes pins
Glue (something strong enough to keep magnet attached to clothespin)
Button magnets

ClothesPin Fridge Magnet #kids #diy #craft

Directions
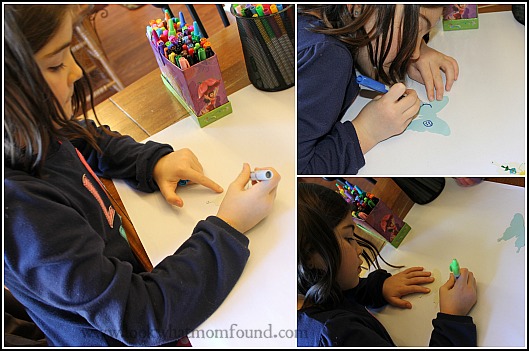
Give your children creative license when decorating their shape. These magnets are to hold not just notes and photos but their artwork. If using glitter glue allow time to dry fully before handling.ClothesPin Fridge Magnet #kids #diy #craft

ClothesPin Fridge Magnet #kids #diy #craftUsing a strong adhesive attach the magnet to the lower half of the clothes pin. Set aside to dry.
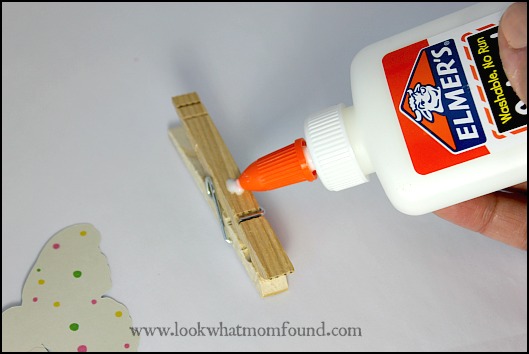
ClothesPin Fridge Magnet #kids #diy #craft
Glue the shape onto the clothespin so the opening is at the bottom. This works best when displaying sheets of paper.
ClothesPin Fridge Magnet #kids #diy #craft
Save the chip clips for the chips & pretzels and make multiple fridge magnets to exhibit the many pieces of artwork your children are creating at school and at home.


Budsies Custom Stuffed Animal

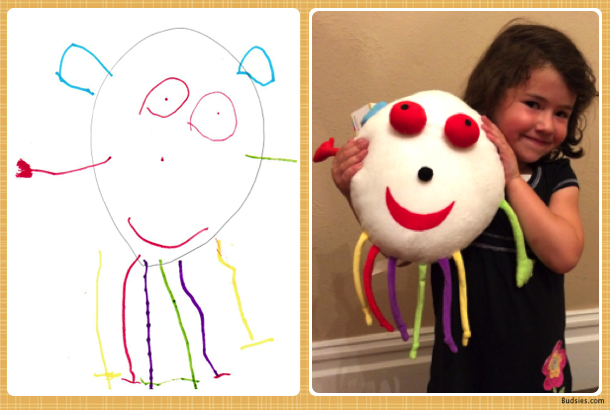
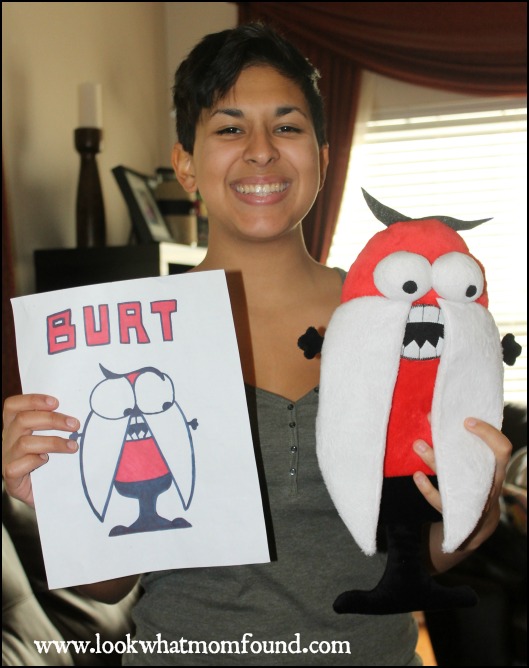
My girls are creative and artistic and imaginative.  Even though there are 12 years between them they can sit for hours with a stack of papers and markers and work on obscure projects that only they understand.  I’ve shared before their goofy and inspired drawings but was able to take them to a new level with Budsies Custom Plush.

art-plush-drawing-stuffed-animal-purchase-2

Budsies is a unique service that brings life to your child’s artwork. Send them a drawing and they will create it into a high quality plush that will be cherished forever.

On Christmas day I presented Sabreena and Shae with their own Budsies. Confusion, excitement and then smiles is how things went after the gifts were opened.  The details are amazing, as well as the construction.  I don’t have to worry about the dangling legs or pompoms falling off because the sewing is strong enough to withstand little fingers and becoming a regular bedtime buddy.

Budsies Custom Stuffed Animal Plush

Budsies Custom Stuffed Animal

The idea of Budsies was born out of an idea to bring a little sister’s drawing to life to last a lifetime. It’s easy to create a Busies of your own child. Submit a drawing online or even from your smartphone via text message and you’re child’s new friend will be on its way 6-8 weeks later.

Every November, Budsies manufactures a duplicate Budsie for each one ordered.  These are then donated to children in need over the winter holidays.

Right now Budsies are on holiday special pricing for $49. Steep but this is a gift that comes from the heart.


kid made Cupcake Ornament

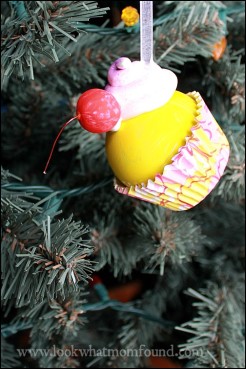
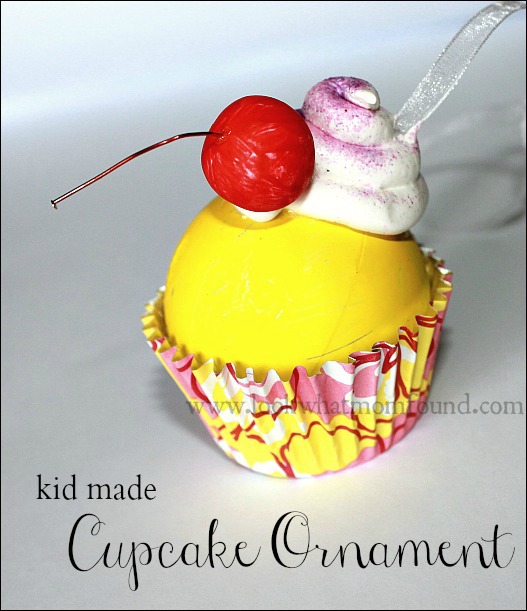
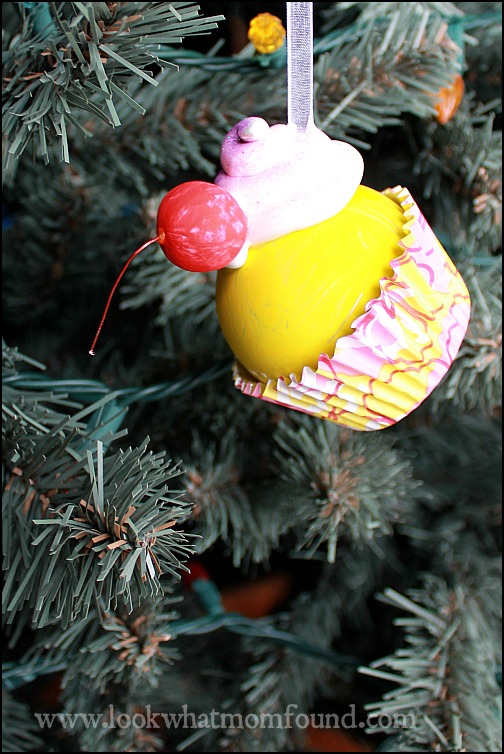
We’re dealing with snow days and I don’t know what you do during snow days but we craft, bake and play video games. Looking at Shae’s tree I noticed she’s needing more decorations.  We set out to create some that should last her years to come, creating memories to last those years. This kid made cupcake ornament came about a bit haphazardly. Cupcake Ornament #craft

What started as a simple idea exploded into something else that focused more on the details.

Materials needed

  • Christmas ball, you choice of color
  • paint, to change Christmas ball color and other items
  • cupcake liner
  • soft air dry clay
  • red pompom or red mini Christmas ball
  • straight pin, thin gauge wire or ornament hanger
  • glitter or beads
  • glue
  • ribbon

Directions

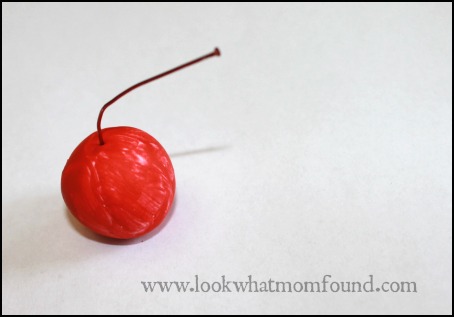
Start with the pieces that need painting first.  Our Christmas ball was gray, Shae painted it yellow.  Also since we didn’t have a red pompom Shae shaped a red sphere from the white clay and painted that red for the cherry. making Cupcake Ornament #craft

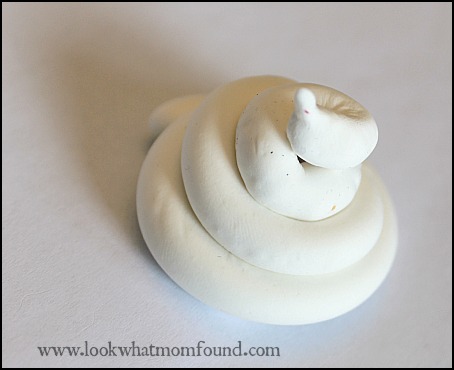
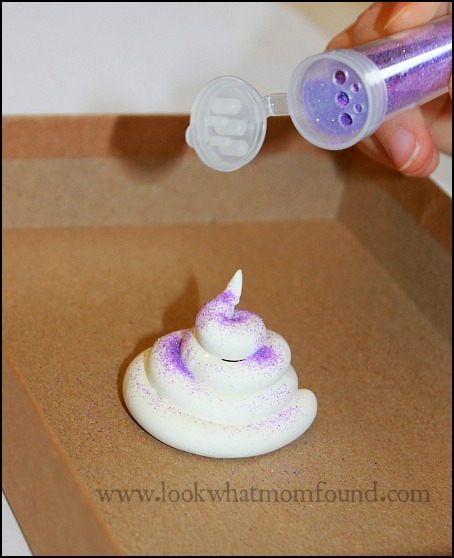
As the paint was drying we used some more clay to roll out a LONG snake and then coiled it to resemble frosting.  Using a toothpick make a hole in the frosting big enough to thread your ribbon.making Cupcake Ornament #craft

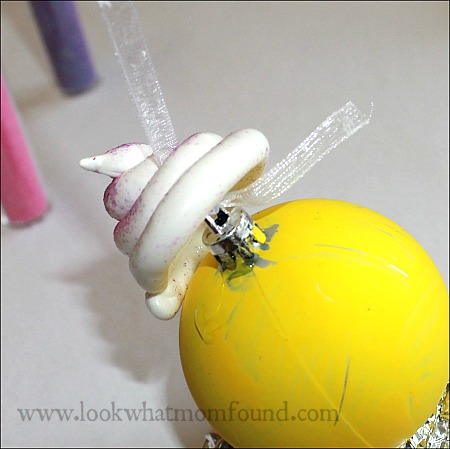
Tie the ribbon to the top of the ornament and thread the end through a hole in the frosting.  Coat the top nub of the ornament with glue and gently press the frosting on, making sure the ribbon is pulled through.  Make a loop at the top of the ribbon to use as a hanger.

making Cupcake Ornament #craft

Lightly spread some school glue on the frosting and dust it with glitter or beads to make your sprinkles.  Shape your straight pin or wire and insert into your cherry, add glue if you need to.  Glue it to you cupcake. Set aside to dry.

making Cupcake Ornament #craft

making Cupcake Ornament #craft

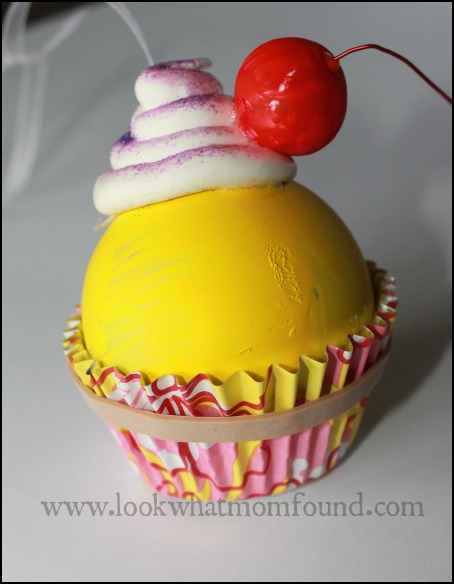
When everything is dry add a good amount of craft glue to the bottom of your cupcake liner and along the inner wall and place your ball inside. Use a rubber band to gently hold the liner in place against the ball.  You don’t want this to squeeze too hard to crush the paper.  Leave this for 10-15 minutes to make sure the glue bonds.

making Cupcake Ornament #craft

When everything has dried and set your ornament is ready to hang.

Cupcake Ornament #craft

Share your own crafts and DIY projects below and visit the other crafters sharing their posts.